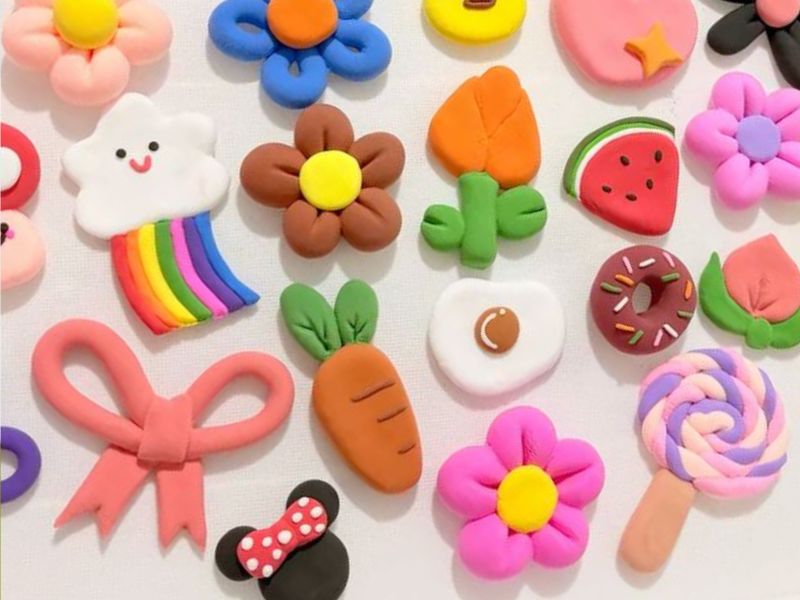
Clay crafts give children a wonderful opportunity to turn simple materials into something they can proudly call their own. With a little imagination, a small piece of clay can become a tiny animal, a colourful mushroom, a miniature cake, or a beautiful flower that looks lovely on a bedroom shelf.
One of the things that makes clay activities enjoyable is the freedom to experiment. Children can mix colours, shape different objects, add little details, and discover how their ideas change as they work. They do not need to create perfect shapes to enjoy the process. Sometimes, the most memorable projects are the ones that come with funny faces, unusual colours, and creative designs.
If you are searching for clay ideas for kids, this collection features 12 colourful miniature creations that children can make at home, during school craft sessions, or as part of a fun weekend activity. The projects include cute animals, tiny food, decorative objects, and imaginative designs that encourage children to explore their creativity.
These activities can also help children practise useful skills. Rolling, pinching, flattening, joining, and shaping clay encourage hand coordination and fine motor development. Choosing colours and arranging small details can introduce simple concepts such as shapes, patterns, sizes, and symmetry.
The projects below explain what you need, how to make each creation, and how to help children get the most out of the activity.
Go through My Air clay Ideas that Look too Pretty to be Handmade to gather more deep inspirations on Clay.
What You Need Before Making Miniature Clay Creations
Here are A few basic materials are enough for many of these projects, and you can add extra tools as your child becomes more confident.
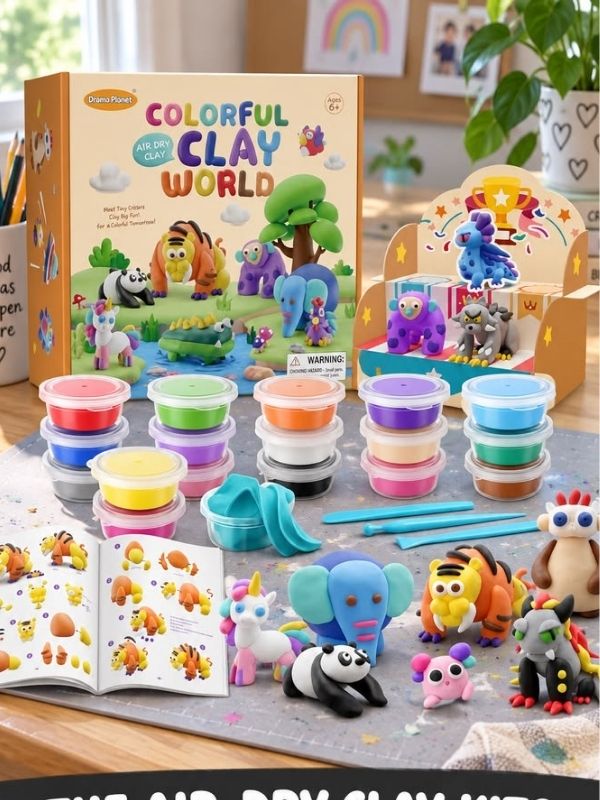
Basic Materials
- Air-dry clay or another age-appropriate modelling material
- Child-safe modelling tools
- A clean, smooth work surface
- A small rolling pin or smooth, clean cylindrical tool
- A plastic knife intended for children’s modelling activities
- A toothpick for supervised detailing, where age-appropriate
- Water, if recommended for the type of clay being used
- Acrylic paint or suitable clay paints, if compatible with the chosen clay
- Small paintbrushes
- A palette or disposable surface for mixing paint
- A damp cloth for cleaning hands and the work area
You may not need every item for every project. Most miniature creations can be shaped with fingers and a few simple tools.
If you enjoy making creative decorations by hand, you’ll also love these Embroidery Hoop Wall Art Ideas which can help you add a personal touch to your home decor.
Which Clay Is Best for Kids?
Choosing the right clay makes a difference to the crafting experience.
Air-dry clay: This clay hardens as it dries, so children can keep their finished creations. It is useful for miniature decorations, little ornaments, and small display pieces. Drying time depends on the product, thickness, and surrounding conditions.
Polymer clay: This material is shaped while soft and hardened by baking according to the manufacturer’s directions. It can produce detailed miniature objects, but children should use it with adult supervision. An adult should handle the oven and follow the product’s curing and safety instructions.
Modelling clay: Traditional modelling clay is often designed to remain soft. It works well for practising shapes and making creations that can be taken apart and remade. However, it may not be suitable if children want to keep their projects permanently.
For beginners, choose a clay that is easy to shape and appropriate for the child’s age. Always read the product label before use.
Safety note: Clay is not food, even when it resembles sweets, biscuits, or other edible items. Supervise young children, keep small pieces away from children who may put them in their mouths, and wash hands after crafting. Do not use food-preparation tools for clay if they will later be used with food.
If you enjoy shaping clay into creative designs, you can also explore this How to Make Coil Clay Pot Step by Step tutorial for another handmade project to try.
1. Cute Miniature Clay Cats
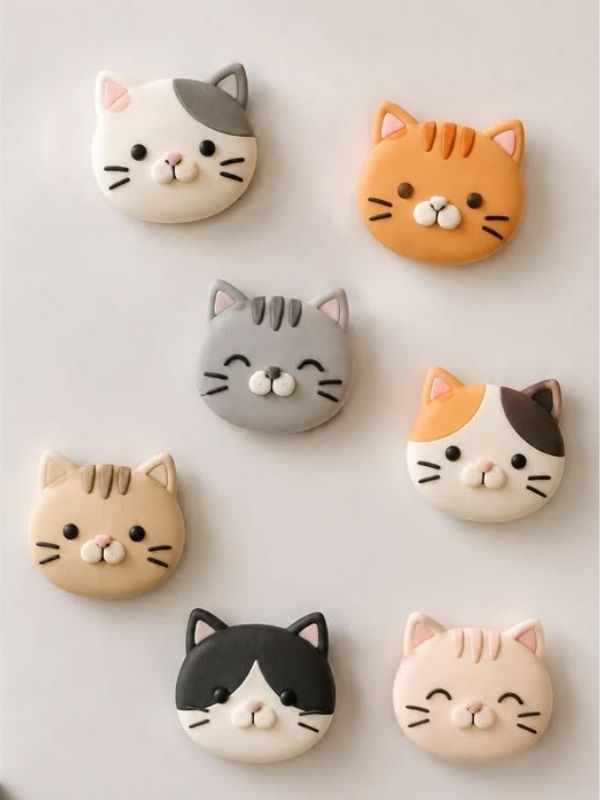
Miniature clay cats are a lovely starting project for children who enjoy animals. They can create a sitting cat, a sleeping kitten, or a tiny cat with a funny expression.
The basic shape is simple, but children can personalise their creations with different colours, facial expressions, and markings.
A white cat with pink ears will look different from a black cat with yellow eyes, so encourage children to choose their own designs rather than copying one exact example.
Materials Needed
- Modelling clay in the colours of your choice
- A small modelling tool
- A smooth work surface
- A toothpick for supervised detailing, if suitable for the child’s age
- Optional paint, if compatible with the clay
How to Make a Miniature Clay Cat
Step 1: Choose the clay colours.
Ask the child to select a main colour for the cat’s body. They might choose orange, white, grey, black, or a completely imaginative colour.
Set aside a little extra clay for the ears, paws, and facial details.
Step 2: Shape the body.
Roll a small piece of clay into an oval or rounded shape.
Gently flatten the bottom so the cat can sit upright. If the clay is too soft to support the shape, make the body shorter and wider.
Step 3: Make the head.
Roll another piece into a small ball.
Attach it to the upper part of the body by gently pressing the pieces together. Follow the clay manufacturer’s instructions for joining pieces if extra support is needed.
Step 4: Add the ears.
Shape two tiny triangles and attach them to the top of the head.
For rounded kitten ears, soften the points slightly with your fingers.
Step 5: Create the face.
Use suitable modelling tools to make two small indentations for the eyes.
Add a tiny nose and a simple mouth. You can use small pieces of clay for the features instead of drawing them.
Step 6: Add the paws.
Roll four tiny pieces of clay into short shapes.
Attach them to the lower body, arranging them so the cat appears to be sitting.
Step 7: Make the tail.
Roll a thin piece of clay into a short curved line.
Attach it to the back of the body. The tail can curl around the cat or point upward.
Step 8: Personalise the kitten.
Add spots, stripes, a collar, or little whisker marks.
If you are using air-dry clay, let the cat dry according to the manufacturer’s directions. Add paint only when the clay is ready for it.
What Children Learn
This activity helps children practise shaping, joining, and adding small details. They also learn how changing a few features can give a character a completely different appearance.
You can ask them to name their cat and describe its personality. This adds a storytelling element to the craft and encourages children to use their imagination.
Keeping your crafting materials organized makes it easier to enjoy your next project. Check out these How to store Unbaked Polymer Clay Ideas for inspiration on keeping your supplies neat and accessible.
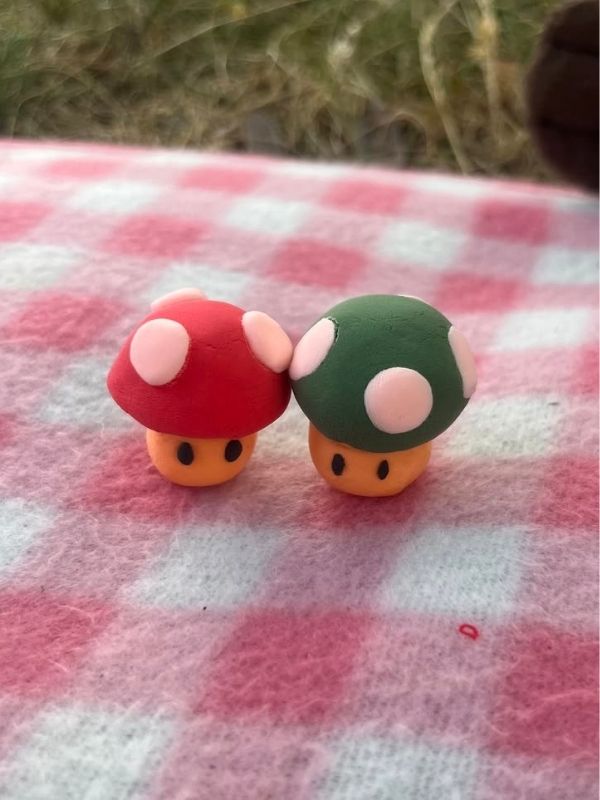
2. Colourful Miniature Clay Mushrooms
Clay mushrooms are perfect for creating a tiny woodland scene. Their rounded caps and short stems make them manageable for beginners, while the colourful tops allow children to experiment with patterns.
Children can make traditional red mushrooms with white spots or choose pastel pink, purple, yellow, and blue.
These little creations can be displayed on a craft shelf or used as part of a miniature nature scene, provided the finished pieces are suitable for their intended use.
Materials Needed
- Modelling clay in two or more colours
- A smooth work surface
- A modelling tool
- Optional paint suitable for the selected clay
How to Make Miniature Clay Mushrooms
Step 1: Select two colours.
Choose one colour for the mushroom cap and another for the stem.
Set aside a small amount of white or another contrasting colour for decoration.
Step 2: Shape the stem.
Roll a small piece of clay into a short cylinder.
Flatten the bottom slightly so the mushroom can stand upright.
Step 3: Make the cap.
Roll another piece of clay into a ball.
Gently flatten the bottom and round the top to create a dome shape.
Make sure the cap is not so large that it causes the mushroom to tip over.
Step 4: Attach the cap.
Place the cap on top of the stem and press the two pieces together gently.
If the selected clay requires a particular joining technique, follow the manufacturer’s instructions.
Step 5: Add decorative spots.
Roll several tiny pieces of contrasting clay into balls.
Flatten them gently and place them on the mushroom cap.
Children can arrange the spots randomly or create a neat pattern.
Step 6: Experiment with different sizes.
Make two or three additional mushrooms in different sizes.
A group of mushrooms can look especially attractive when the tallest one stands beside two smaller ones.
Step 7: Add extra details.
Children can create tiny grass shapes or small leaves to place around the mushroom bases.
Keep the additions proportional so the miniature design remains balanced.
Step 8: Finish the mushrooms.
Check that the stems are straight and the caps are attached securely.
Allow the clay to dry or cure according to its instructions before displaying the finished mushrooms.
What Children Learn
This project introduces basic shapes, colour contrast, patterns, and proportion.
Children also learn to think about balance. A cap that is too heavy can make a mushroom fall over, so they may need to adjust its size or strengthen the stem.
Once you’ve finished making your miniature clay creations, explore these DIY Keychains Ideas you can make at Home, for another fun way to turn craft materials into personalised accessories.
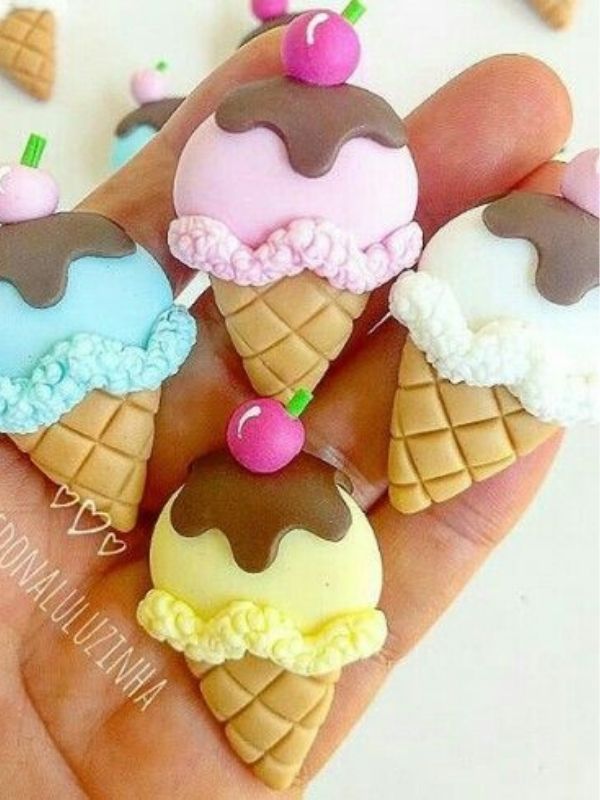
3. Miniature Clay Ice Cream Cones
If your children enjoy pretend play, miniature clay ice cream cones can become part of a tiny dessert collection.
They can make one scoop or several, experiment with colourful combinations, and create imaginary flavours. A collection might include strawberry pink, chocolate brown, lemon yellow, and mint green.
These creations are also useful for pretend shop games, provided children understand that the clay desserts are not edible.
Materials Needed
- Brown or beige clay
- Clay in several scoop colours
- A modelling tool
- A clean work surface
- Optional compatible paint
How to Make Miniature Clay Ice Cream Cones
Step 1: Create the cone.
Roll a small amount of brown or beige clay into a short cone shape.
Make the bottom narrow and the top wider.
Step 2: Add the cone pattern.
Use a modelling tool to create light diagonal lines across the cone.
Add lines in the opposite direction to form a simple criss-cross pattern.
Avoid pressing too deeply, especially if the cone is small.
Step 3: Make the first scoop.
Choose a colour for the ice cream.
Roll the clay into a small ball, then gently flatten the bottom so it sits on the cone.
Step 4: Attach the scoop.
Place the scoop on top of the cone and press gently to secure it.
Check that the cone can support the scoop without tipping over.
Step 5: Add another scoop.
For a double-scoop cone, make a second ball in a different colour.
Place it on top of the first scoop and press gently. A slightly smaller second scoop may help the cone remain balanced.
Step 6: Create a swirl.
Roll a thin strip of contrasting clay.
Curve it into a small spiral and place it on the top scoop to resemble whipped cream.
Step 7: Add sprinkles.
Roll very small pieces of coloured clay into short lines.
Arrange them across the ice cream scoops.
Keep the decorations attached securely and supervise young children around small pieces.
Step 8: Make a collection.
Create several cones with different colour combinations.
Children can name their imaginary flavours and arrange the cones in a pretend ice cream shop.
What Children Learn
Miniature ice cream cones encourage colour recognition, creative decision-making, and imaginative play.
Children can also practise counting by making one-scoop, two-scoop, and three-scoop designs.
For a simple maths activity, ask them to count how many cones they made or compare which cone has the most scoops.
If your children enjoy creating colourful flowers from clay, they may also enjoy making these DIY Paper Flower using simple materials and creative techniques.
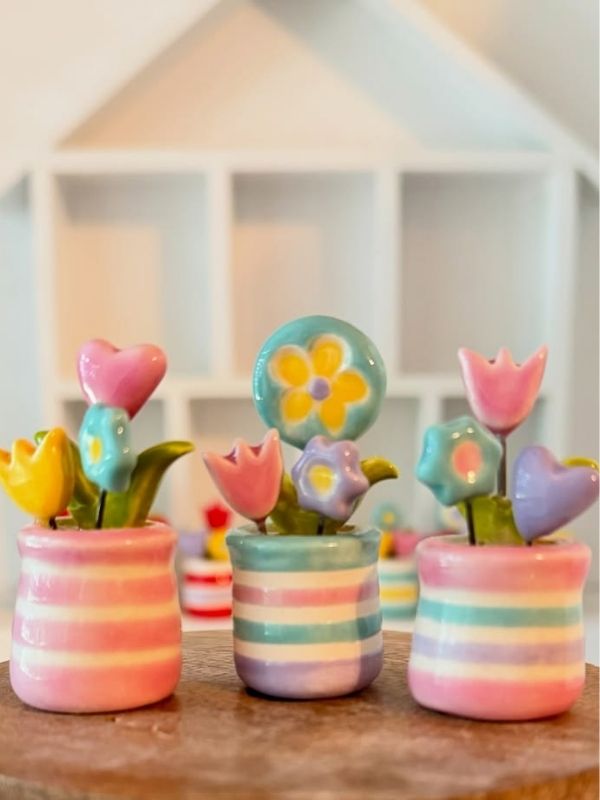
4. Tiny Clay Flower Pots
Miniature clay flower pots are a good choice for children who enjoy making decorations for their rooms or creating tiny garden scenes.
The project introduces simple hollow shapes and gives children room to experiment with patterns, colours, and miniature flowers.
If you are using air-dry clay, remember that a handmade miniature pot may not be waterproof. Treat it as a decorative object unless the clay and any finishing products are specifically suitable for contact with water.
Materials Needed
- Air-dry clay or another suitable modelling clay
- A modelling tool
- A smooth work surface
- Small pieces of green and colourful clay
- Optional paint suitable for the clay
How to Make Miniature Clay Flower Pots
Step 1: Roll the clay into a ball.
Take a small piece of clay and roll it between your hands to create a smooth ball.
This will form the main body of the pot.
Step 2: Press into the centre.
Use your thumb to create a shallow hollow in the middle.
Press slowly so you do not push through the bottom.
Step 3: Widen the opening.
Gently pinch the sides to widen the top.
Rotate the pot as you work so the sides remain reasonably even.
Step 4: Shape the base.
Flatten the bottom against the work surface.
Check that the pot can stand upright without rocking.
Step 5: Add a rim.
Roll a thin strip of clay and place it around the opening.
Smooth the join gently with your fingers or a suitable modelling tool.
Step 6: Decorate the outside.
Children can add dots, lines, tiny hearts, or simple geometric patterns.
They can also use compatible paint after the clay has dried or cured.
Step 7: Make miniature flowers.
Roll small pieces of colourful clay into petals.
Arrange several petals around a tiny centre to form a flower.
Add a short green stem and small leaves if the design allows.
Step 8: Arrange the flower.
Place the flower in the pot. If it needs support, use a small piece of green clay inside the pot to hold the stem upright.
Allow the finished pieces to dry or cure according to the product instructions.
What Children Learn
This activity helps children practise pinching, hollowing, smoothing, and attaching small shapes.
It also introduces the idea that objects can have both a decorative purpose and a practical shape.
For an additional learning opportunity, talk about what real plants need to grow, including sunlight, suitable soil, and water.
Handmade projects can make thoughtful presents for people we love. Explore these DIY Handmade Crafts for gifts that look special without costing a fortune for more inspiration for your next creative project.
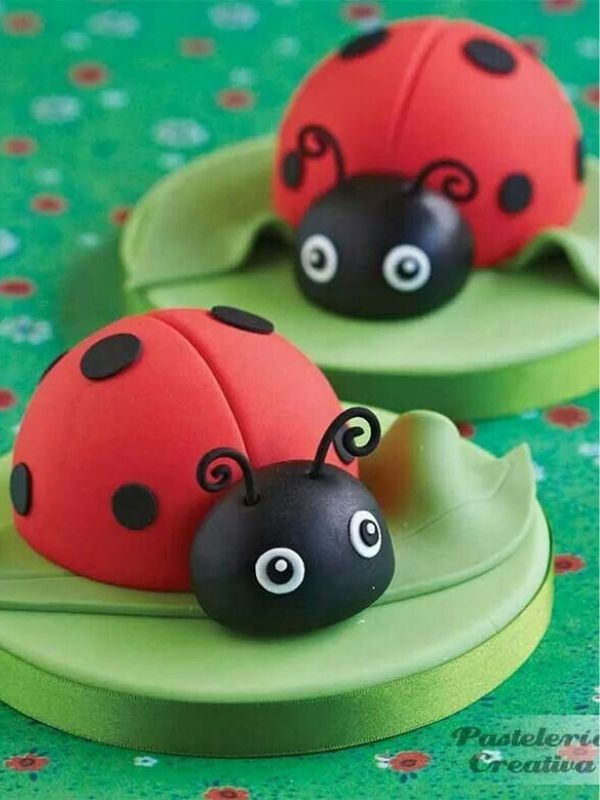
5. Miniature Clay Ladybugs
Ladybugs are easy to recognise and simple to create with rounded shapes. Their bright colours and spots make them a fun project for children who are just beginning to work with clay.
Although red and black are traditional choices, children can make purple, yellow, pink, or rainbow ladybugs.
Materials Needed
- Red or brightly coloured clay
- Black clay
- White clay, if desired
- A modelling tool
- A clean work surface
How to Make Miniature Clay Ladybugs
Step 1: Make the body.
Roll a small piece of red clay into a ball.
Flatten the bottom slightly to create a stable base.
Step 2: Shape the shell.
Smooth the upper surface into a rounded dome.
The ladybug should resemble a small oval rather than a completely flat disc.
Step 3: Add the head.
Roll a tiny piece of black clay into a ball.
Attach it to one end of the body to form the head.
Step 4: Make the spots.
Roll several tiny pieces of black clay into small balls.
Flatten them gently and place them across the red shell.
Try to distribute the spots evenly, or create a playful pattern.
Step 5: Add the dividing line.
Use a modelling tool to draw a light line down the centre of the shell.
This represents the division between the two wing covers.
Step 6: Create the eyes.
Add two tiny white dots to the head, followed by smaller black dots if desired.
If the pieces are too small for the child’s age, draw the eyes with a suitable marker after the clay is ready for decoration.
Step 7: Add the antennae.
Shape two short pieces of black clay into thin lines.
Attach them gently to the top of the head.
You can leave the antennae off if they are too delicate to stay in place.
Step 8: Make a ladybug family.
Create several ladybugs in different colours and sizes.
Arrange them together on a clean surface to make a miniature garden scene.
What Children Learn
Ladybug crafts encourage attention to detail, pattern recognition, and shape formation.
They also offer a simple way to introduce children to insects. You can explain that real ladybugs have six legs and that many species have spotted wing covers, although their colours and markings vary.
For an extra challenge, ask children to create a repeating pattern using the spots.
If you enjoy working with different colours, textures, and materials, these 10 Dried Flower Crafts and Decor Ideas That Make Your Home Look Beautiful offers more creative ideas to explore.
6. Colourful Miniature Clay Rainbows
A miniature clay rainbow is a cheerful project that introduces children to colour order and curved shapes.
The finished rainbow can be displayed on a desk or used as part of a larger miniature scene. It is also a good opportunity to talk about how different colours work together in a design.
Materials Needed
- Clay in several rainbow colours
- A smooth work surface
- A modelling tool
- Optional white clay for clouds
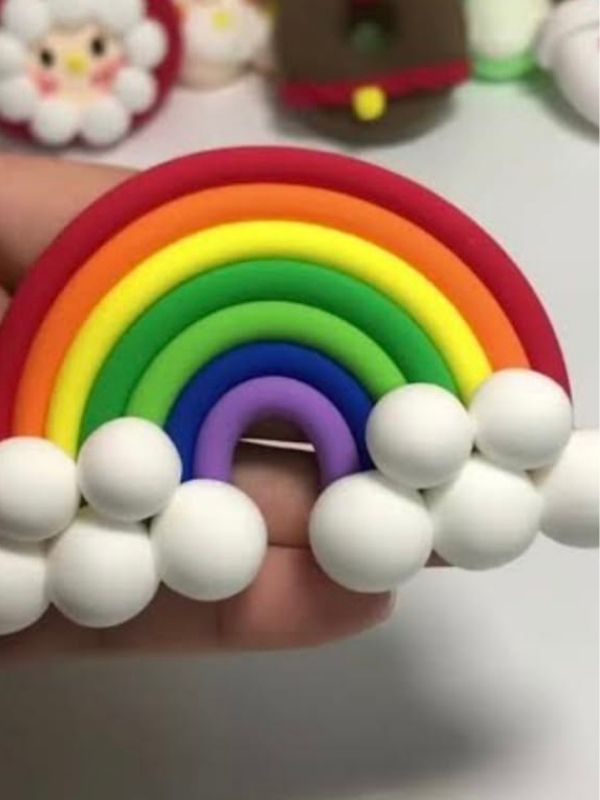
How to Make Miniature Clay Rainbows
Step 1: Choose the colours.
Select several colours for the rainbow.
You can use the traditional rainbow sequence or let children create their own colourful combinations.
Step 2: Roll the first strip.
Roll one colour into a long, thin cylinder.
Try to keep the thickness fairly even along the length.
Step 3: Shape the arch.
Bend the strip gently into an upside-down U shape.
Press the ends lightly onto the work surface so the arch can stand.
Step 4: Make the next strip.
Choose another colour and roll a slightly thinner or shorter cylinder.
Shape it into an arch that fits inside the first one.
Step 5: Add the remaining colours.
Continue making arches, working from the largest to the smallest.
Press the colours together gently so the rainbow holds its shape.
Step 6: Add clouds.
Roll two small pieces of white clay into balls.
Attach them at the bottom ends of the rainbow.
You can join several small white balls to create a fluffy cloud effect.
Step 7: Smooth the joins.
Check where the coloured arches meet.
Gently adjust any uneven sections, taking care not to flatten the rainbow.
Step 8: Finish the creation.
Allow the rainbow to dry or cure according to the clay instructions.
If it is intended as a display piece, place it on a flat surface where it can stand without being disturbed.
What Children Learn
This project supports colour recognition, sequencing, and careful shaping.
Children can also explore size by making each arch smaller than the one before it.
Ask them to identify their chosen colours and describe how they arranged the strips.
Looking for another hands-on project after your clay crafts? These 12 DIY Candle Making That Smell Better Than Store Bought offer inspiration for creating something different at home.
7. Miniature Clay Turtles
Clay turtles are a lovely option for children who enjoy making animals. Their rounded shells are easy to decorate, and the legs, head, and tail introduce simple three-dimensional shapes.
Children can create a green turtle, a pastel turtle, or an imaginative character with colourful shell patterns.
Materials Needed
- Green or other coloured clay
- A contrasting clay colour for the shell
- A modelling tool
- A smooth work surface
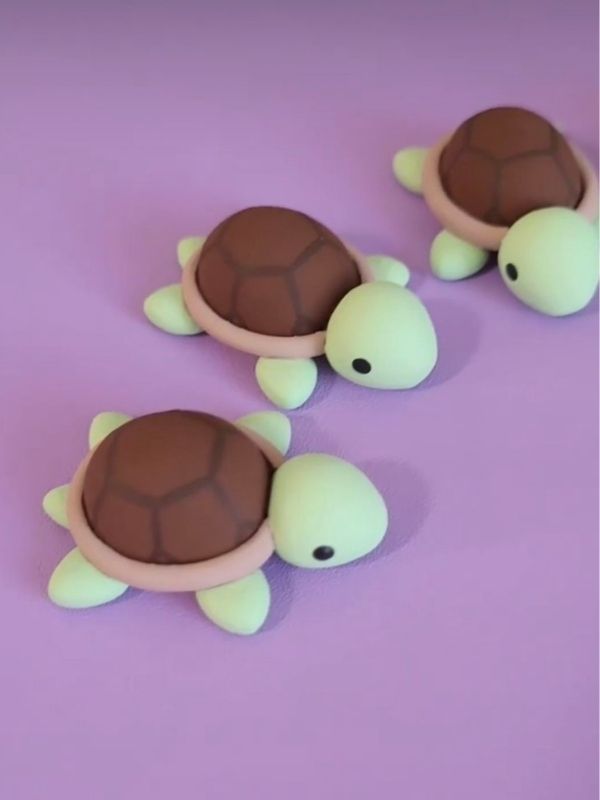
Photo credit
How to Make Miniature Clay Turtles
Step 1: Shape the body.
Roll a small piece of green clay into an oval.
Flatten it slightly to create the base of the turtle.
Step 2: Make the shell.
Choose another colour and roll a slightly larger piece into a ball.
Flatten the bottom and round the top to create a dome.
Step 3: Attach the shell.
Place the shell on the centre of the body.
Press gently so it stays attached while leaving the edges of the body visible.
Step 4: Make four legs.
Roll four small pieces of clay into short cylinders.
Attach two legs on each side of the body.
Position them so the turtle can rest evenly on the surface.
Step 5: Add the head.
Roll a small ball and attach it to the front of the turtle.
Make sure the head is not so large that it causes the turtle to tip forward.
Step 6: Create the tail.
Shape a tiny triangle or short cone.
Attach it to the back of the body.
Step 7: Decorate the shell.
Use a modelling tool to draw simple lines across the shell.
You can also add small shapes in contrasting colours to create a decorative pattern.
Step 8: Add the face.
Make two small eye indentations or add suitable clay details.
Allow the finished turtle to dry or cure according to the manufacturer’s instructions.
What Children Learn
Turtle crafts help children practise combining separate shapes to make one recognisable object.
They can also learn about the basic features of a turtle, including its shell, head, legs, and tail.
For a science connection, discuss how a real turtle’s shell is part of its body and provides protection.
If your children enjoy creative activities, making a journal can be another fun way to express their ideas. Check this DIY Journal Book Ideas you Can Make Home, for inspiration for a handmade notebook.
8. Tiny Clay Donuts
Miniature clay donuts are ideal for children who enjoy making pretend food. Their rounded shapes are easy to customise, and the icing and toppings provide plenty of opportunities for creativity.
Children can make strawberry donuts, chocolate donuts, or colourful fantasy designs.
Remember to explain that these are craft objects and must never be eaten.
Materials Needed
- Beige or brown clay
- Coloured clay for icing
- A blunt modelling tool
- A clean work surface
- Optional compatible paint
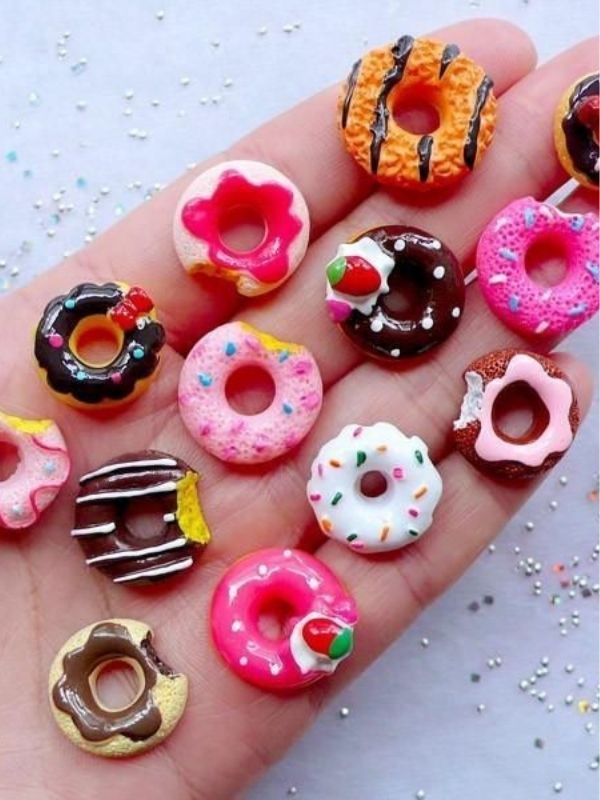
How to Make Miniature Clay Donuts
Step 1: Shape the donut.
Roll a small piece of beige or brown clay into a ball.
Flatten it slightly into a thick disc.
Step 2: Make the centre hole.
Use a suitable blunt modelling tool to create a small hole in the middle.
Gently widen the hole until the shape resembles a donut.
Step 3: Smooth the edges.
Round the outside edge and smooth the inner hole.
Try to keep the donut thick enough that it does not collapse.
Step 4: Create the icing.
Choose a bright colour for the icing.
Flatten a small piece of clay into a thin disc and shape it so it covers the upper surface of the donut.
Step 5: Attach the icing.
Place the icing over the donut and press gently.
Leave parts of the brown or beige base visible around the edges.
Step 6: Add sprinkles.
Roll tiny pieces of contrasting clay into short lines.
Place them across the icing in different directions.
Step 7: Make different flavours.
Create several donuts with different icing colours and decorations.
You can make a chocolate version, a pink version, and a colourful rainbow version.
Step 8: Arrange a miniature bakery.
Place the finished donuts on a small piece of cardboard or another suitable display surface.
Children can name their bakery and invent flavours for each creation.
What Children Learn
This project encourages creativity, pattern-making, and imaginative play.
Children also practise controlling the thickness of a shape and adding decorations without overwhelming the base.
You can introduce simple fractions by discussing how a donut can be divided into halves or quarters on paper, without cutting or eating the clay model.
For more inspiration from nature, check out these 10 Beautiful DIY Acorn Crafts For Adults To Make This Fall, featuring creative ways to turn natural materials into decorative projects.
9. Miniature Clay Butterflies
Butterflies are a colourful project for children who enjoy nature-inspired crafts.
Their wings can be decorated with spots, stripes, hearts, or other patterns. Children can also experiment with symmetry by making the two wings look similar.
Materials Needed
- Clay in several colours
- A modelling tool
- A smooth work surface
- Optional compatible paint
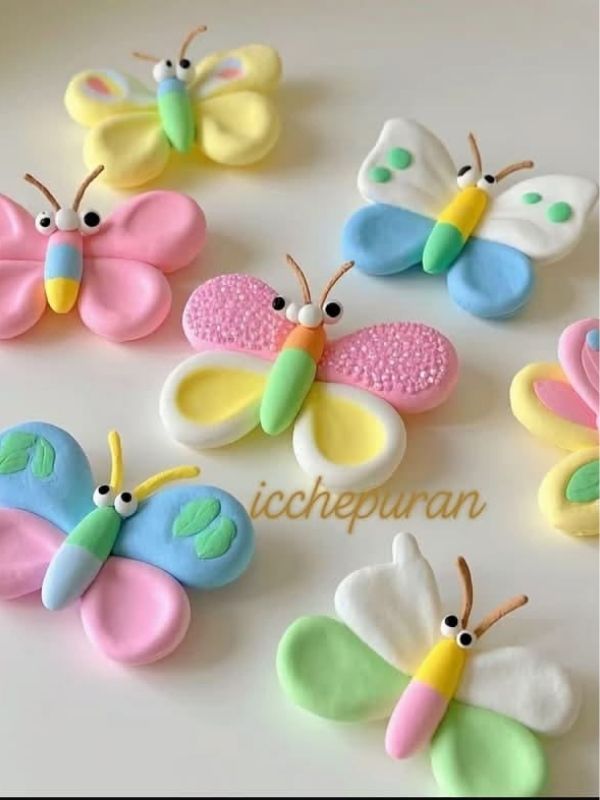
How to Make Miniature Clay Butterflies
Step 1: Create the body.
Roll a small piece of clay into a short cylinder.
Make one end slightly narrower to give the body a simple shape.
Step 2: Shape the upper wings.
Choose a bright colour and make two small rounded triangles or ovals.
Flatten them gently so they resemble butterfly wings.
Step 3: Shape the lower wings.
Make two smaller pieces in the same colour or a contrasting shade.
Place them beneath the larger wings.
Step 4: Attach the wings.
Arrange the wings on either side of the body.
Press them gently into place, supporting the body while you work.
Step 5: Add the wing patterns.
Use tiny clay dots, lines, or simple shapes to decorate the wings.
Try to create a similar pattern on both sides.
Step 6: Make the antennae.
Roll two very thin pieces of clay and attach them to the head.
Keep them short enough that they are less likely to break.
Step 7: Add the face.
Use small indentations or suitable clay details to create the eyes.
A simple smiling expression can give the butterfly a friendly appearance.
Step 8: Finish the design.
Check that the wings are balanced and attached securely.
Allow the butterfly to dry or cure according to the product instructions.
What Children Learn
Butterfly crafts encourage colour exploration, symmetry, and attention to detail.
You can also talk about the life cycle of a butterfly and explain that butterflies develop through the stages of egg, caterpillar, pupa, and adult.
10. Miniature Clay Fruit
Miniature fruit is one of the most versatile clay projects because children can make many different shapes using similar techniques.
They might create apples, strawberries, lemons, oranges, pears, or tiny bunches of grapes. The finished collection can be used in pretend play or arranged in a miniature fruit bowl.
Materials Needed
- Red, yellow, green, orange, purple, and other coloured clay
- Green or brown clay for stems and leaves
- A modelling tool
- A smooth work surface
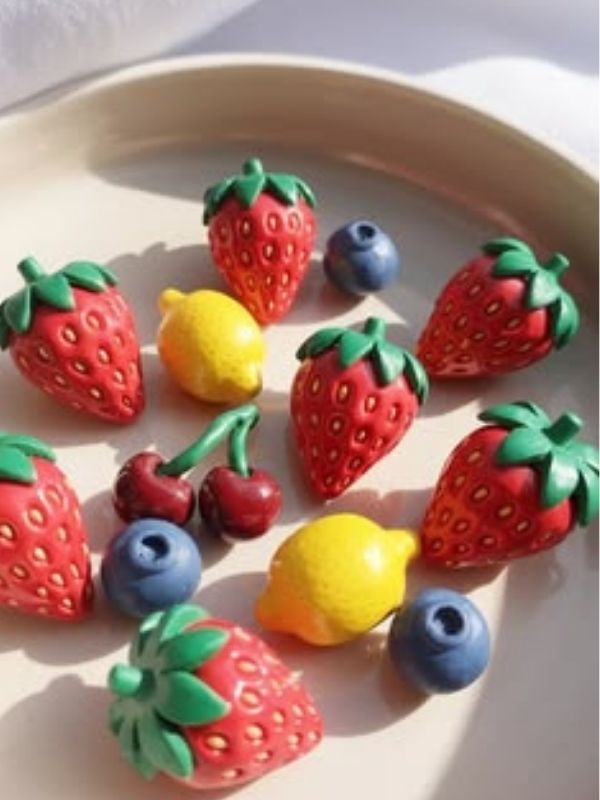
How to Make Miniature Clay Fruit
Step 1: Choose the fruit.
Ask the child to choose two or three fruits to make.
Start with simple shapes, such as round oranges or slightly tapered strawberries.
Step 2: Shape the main body.
Roll the clay into the shape needed for the selected fruit.
For an apple, make a rounded shape with a slight dip at the top. For a lemon, create an oval with pointed ends.
Step 3: Refine the shape.
Gently pinch or smooth the clay until the fruit is recognisable.
Avoid adding too many details before the main shape looks right.
Step 4: Make the stem.
Roll a tiny piece of brown or green clay into a short stem.
Attach it to the top of the fruit.
Step 5: Add leaves.
Flatten a small piece of green clay and shape it into a leaf.
Use a modelling tool to add a light line down the centre.
Step 6: Create surface details.
Add tiny dots to a strawberry or small indentations to an orange.
Use simple marks rather than trying to reproduce every detail of real fruit.
Step 7: Make a collection.
Repeat the process with different colours and shapes.
Arrange the fruit by colour or type.
Step 8: Create a miniature fruit bowl.
If time permits, make a shallow bowl from clay or use a small suitable container as a display piece.
Arrange the fruit inside and let the children name each item.
What Children Learn
This project introduces colour recognition, shape identification, sorting, and classification.
You can ask children to group the fruit by colour, identify which pieces are round or oval, or count how many different types they created.
It is also an opportunity to talk about real fruit and healthy eating, while making it clear that the clay versions are not edible.
If you’re looking for more activities to keep little hands busy, these Apple crafts for Preschoolers that are so fun, Kids can Make Almost Themselves, offer another fun way to combine creativity and learning.
11. Miniature Clay Snails
Clay snails are a fun project because the coiled shell gives children a chance to practise making spiral shapes.
The snail’s body can be one colour and its shell another, allowing children to experiment with contrast.
Materials Needed
- Clay in two or more colours
- A modelling tool
- A smooth work surface
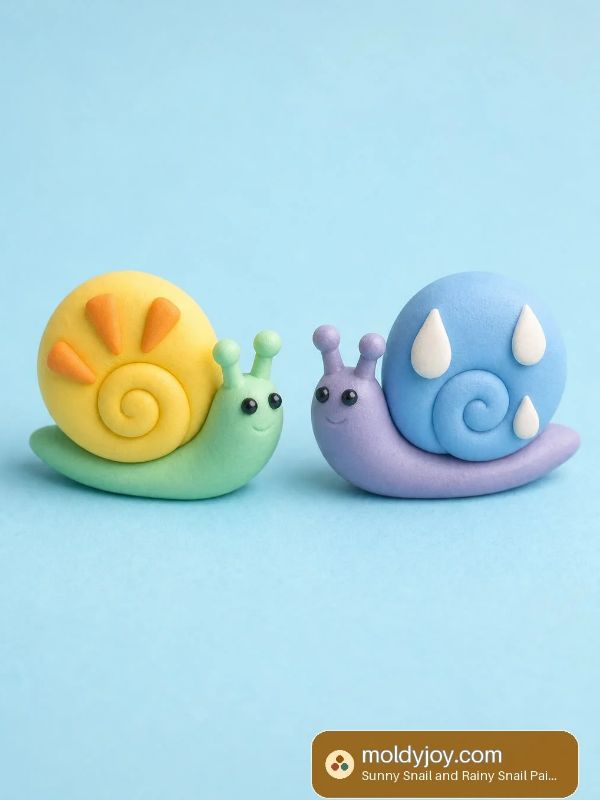
How to Make Miniature Clay Snails
Step 1: Shape the body.
Roll a piece of clay into a short, curved cylinder.
Make one end slightly wider to form the head.
Step 2: Flatten the base.
Press the bottom gently against the work surface so the snail can stand.
Step 3: Make the shell.
Choose a contrasting colour and roll it into a long, thin strip.
Try to keep the strip even in thickness.
Step 4: Create a coil.
Starting at one end, roll the strip into a spiral.
Keep the coil compact without pressing so hard that the shape disappears.
Step 5: Attach the shell.
Place the coil on the snail’s back.
Press it gently into the body so it stays attached.
Step 6: Add the eye stalks.
Roll two short, thin pieces of clay and attach them to the head.
Keep the stalks sturdy rather than making them extremely thin.
Step 7: Create the eyes.
Add small clay dots or use suitable tools to make the eyes.
You can also draw a simple mouth.
Step 8: Add shell details.
Use a modelling tool to create a line along the spiral or add small dots to the shell.
Allow the finished snail to dry or cure as directed.
What Children Learn
This project helps children practise rolling, coiling, and joining shapes.
It also provides an opportunity to discuss snails and their habitats. Explain that snails move using a muscular foot and that many land snails have shells that protect their soft bodies.
Need more creative activities for young children? Explore these Easy Halloween Crafts for Kids to Make At Home, for seasonal projects to enjoy together.
12. Tiny Clay Pencils and Books
For children who enjoy school-themed crafts, miniature pencils and books can make a charming little study scene.
These objects are relatively simple to shape, and they can be arranged on a desk display or used in pretend classroom play.
Because the objects are small, keep the activity suitable for the child’s age and supervise carefully.
Materials Needed
- Clay in several colours
- A modelling tool
- A smooth work surface
- Optional compatible paint
How to Make Miniature Clay Pencils and Books
Step 1: Make the pencil body.
Choose a bright colour and roll a small piece of clay into a thin cylinder.
Keep the sides fairly straight.
Step 2: Shape the pencil tip.
Gently taper one end of the cylinder.
If you want a wooden pencil appearance, add a small section of beige clay near the tip.
Step 3: Add the eraser.
Attach a small piece of pink clay to the opposite end.
Press gently to keep the pencil shape intact.
Step 4: Make the book cover.
Flatten a small piece of clay into a rectangle.
Keep it thick enough to hold its shape.
Step 5: Create the pages.
Use white or beige clay to make a slightly smaller rectangle.
Place it against the book cover.
Step 6: Add the back cover.
Make another coloured rectangle and attach it to the other side of the pages.
Press the edges together gently so the book looks like a tiny closed notebook.
Step 7: Decorate the cover.
Add a small heart, star, or simple line pattern.
You can also use a modelling tool to make the cover look like a notebook.
Step 8: Arrange the miniature school supplies.
Create a few more pencils and books in different colours.
Arrange them on a flat display surface to create a tiny study corner.
What Children Learn
Children practise shaping straight lines, rectangles, and small decorative details.
The activity also encourages imaginative play and gives them a chance to talk about school supplies, reading, writing, and learning.
Children who enjoy making miniature clay animals may also love these 10 Easy Zoo Animal Crafts for Preschoolers that Spark Creativity , featuring more animal-inspired crafting ideas.
Helpful Tips for Making Better Miniature Clay Creations
The first attempt does not always look the way a child imagined it. A mushroom may lean to one side, a tiny animal may have uneven legs, or a flower may lose its shape while being handled.
These little challenges are part of the learning process. Instead of correcting every detail for the child, show them how to make small adjustments and try again.
Here are a few practical tips to make clay crafting easier.
Start With Simple Shapes
Most miniature creations begin with a few basic forms.
A ball can become an animal’s head, a flattened oval can become a body, and a thin cylinder can become a stem or tail.
Help children recognise these shapes before introducing complicated details. Once they understand how the basic pieces work, they can combine them in different ways.
Use Small Pieces of Clay
It may seem easier to give children a large lump of clay, but smaller portions are often easier to control when making miniatures.
Give them enough material for the main body and set aside extra pieces for details.
This also helps reduce waste and allows children to experiment with different colours.
Keep the Pieces Proportional
Miniature objects look more balanced when their parts are suitable sizes for one another.
For example, a tiny mushroom needs a stem that can support its cap. A miniature turtle needs a shell that fits its body without making it tip over.
Encourage children to look at the object as they work and adjust the sizes when needed.
Smooth the Joins
When two pieces of clay are attached, the join may look uneven or separate easily.
Show children how to press the pieces together gently and smooth the meeting point when appropriate for the type of clay.
Some materials require specific joining techniques, so follow the product instructions rather than assuming every clay behaves the same way.
Avoid Overloading Small Creations With Details
Tiny objects can become difficult to shape when too many decorations are added.
Encourage children to choose a few details that make the creation recognisable. A ladybug may only need spots and a head, while a miniature donut may look complete with icing and a few sprinkles.
The goal is to enjoy the process, not to create a perfect replica of a real object.
Allow Enough Drying or Curing Time
Air-dry clay needs time to dry, and thick pieces may take longer than thin ones.
Place creations on a suitable surface and follow the manufacturer’s instructions. Avoid painting or handling them heavily before they are ready.
Polymer clay is different because it must be cured according to the product directions. An adult should manage the baking process and follow the recommended temperature and time.
Never put ordinary modelling clay into an oven unless the manufacturer specifically states that it is suitable for that purpose.
Store Unused Clay Properly
Different types of clay need different storage methods.
Air-dry clay should generally be kept sealed before use so it does not dry out prematurely. Polymer clay should be stored according to its packaging instructions. Traditional modelling clay can often be kept in its original container when not in use.
Keep all materials away from food and out of reach of children who may put them in their mouths.
If your family enjoys Bible-inspired activities, these Daniel and the Lion’s Den Crafts offer another creative way to help children engage with a Bible story.
How to Make Clay Activities Educational for Kids
Clay crafts can be more than an enjoyable way to spend an afternoon. With a few simple questions, you can use the activities to introduce learning concepts without making the experience feel like a formal lesson.
Practise Counting
Ask children to make three mushrooms, five ladybugs, or four miniature fruits.
They can count each creation as they place it on the table.
For older children, ask them to make a collection with a specific number of objects or compare the number of creations in two groups.
Explore Colours
Give children a selection of clay colours and ask them to name each one.
You can also discuss light and dark shades or invite them to create a pattern using two or three colours.
If the clay is suitable for mixing, children can experiment with combining small pieces to see how the resulting colour changes.
Learn About Shapes
Point out the shapes used in each project.
A miniature house may contain rectangles, squares, circles, and triangles. A snail shell introduces spirals, while a rainbow uses curved arches.
Ask children to identify the shapes in their finished creations.
Encourage Storytelling
Once the miniatures are ready, invite children to create a story around them.
A clay cat might live in a tiny house beside a garden of mushrooms. A miniature bee might visit a row of colourful flowers.
This type of imaginative play can encourage vocabulary, communication, and creative thinking.
Practise Patience and Problem-Solving
Some creations require several attempts before they hold their shape.
Instead of immediately fixing a leaning mushroom or a loose tail, ask the child what might help.
They may decide to make the base wider, use less clay for the top, or press the join more firmly.
This encourages children to experiment and understand that mistakes can provide useful information.
Frequently Asked Questions About Clay Ideas for Kids
What Are the Easiest Clay Ideas for Kids?
Some of the easiest projects include miniature mushrooms, ladybugs, fruit, ice cream cones, and simple rainbows.
These designs use basic shapes such as balls, ovals, cylinders, and flattened pieces.
For beginners, start with one or two colours and a simple design. Children can add more details as they become comfortable working with the clay.
Is Air-Dry Clay Good for Children’s Crafts?
Air-dry clay can be suitable for many children’s craft projects, provided the product is appropriate for their age and used according to its instructions.
It is useful for making decorative objects that harden without oven curing.
However, finished pieces can be fragile, particularly when they have thin legs, antennae, tails, or other delicate parts. Air-dry clay may also be unsuitable for objects that need to hold water unless the product is specifically designed and finished for that purpose.
Can Preschoolers Make Miniature Clay Creations?
Yes, with age-appropriate materials and close adult supervision.
Preschoolers can enjoy making simple balls, flattened shapes, and basic animals. Adults can prepare complicated parts in advance and help children attach them.
Avoid small loose pieces for children who may put objects in their mouths. Always follow the clay manufacturer’s age recommendations.
How Can Children Make Their Clay Creations Colourful?
Children can use naturally coloured clay or choose a clay that can be painted after it dries or cures.
They can also combine compatible clay colours to create patterns and contrasting details.
Before adding paint, check that it is suitable for the type of clay and that the clay has reached the appropriate stage for painting.
How Long Does Air-Dry Clay Take to Dry?
Drying time depends on the brand, the thickness of the object, and the surrounding conditions.
Small, thin creations may dry faster than thick objects. Follow the product instructions and allow additional time when necessary.
Do not assume a creation is completely dry simply because its outer surface feels firm.
Can Children Keep Their Clay Creations?
Yes, if they use a clay designed to harden and follow the correct drying or curing process.
Air-dry clay and polymer clay can produce lasting decorative pieces when handled and stored appropriately.
Traditional modelling clay, however, may remain soft and be intended for repeated use rather than permanent keepsakes.
How Can I Prevent Miniature Clay Objects From Breaking?
Avoid making delicate parts unnecessarily thin.
Give objects a stable base, use suitable joining techniques, and handle them gently while they dry or cure.
Once finished, store the creations in a safe place where they will not be crushed or knocked off a shelf.
Are Clay Crafts Suitable for School Activities?
Many clay crafts can work well in classrooms, art clubs, and supervised children’s activity sessions.
Choose projects that match the children’s ages, available time, and classroom resources.
For a large group, simple creations such as ladybugs, mushrooms, and fruit may be easier to organise than projects with many small components.
Prepare the materials in advance and explain the safety rules before beginning.
Conclusion on Clay Ideas for Kids
Making miniature clay creations is a fun way for children to explore their imagination while developing practical skills. With a few basic materials, they can turn small pieces of clay into animals, colourful desserts, flowers, miniature houses, and many other designs.
These 15 clay ideas for kids offer a variety of projects for different interests and ability levels. Some are simple enough for beginners, while others give older children more opportunities to experiment with shapes, patterns, and decorative details.
You do not need to complete all the projects in one day. Start with a design your child finds exciting, gather the necessary materials, and allow enough time to enjoy the process.
Remember that the finished creation does not need to look perfect. Every child has a different approach to making things, and the experience of trying new shapes, solving small problems, and creating something from scratch is valuable in itself.
Once the first project is complete, encourage your child to choose another design or invent something entirely new. A miniature garden could grow around the clay mushrooms, a tiny bakery could display the donuts and cupcakes, or the little animals could become characters in an imaginative story.
If you enjoy making miniature creations and handmade decorations, you’ll also want to check this 7 Crochet Chicken That will make you want to pick your hook for another charming project to add to your craft collection.