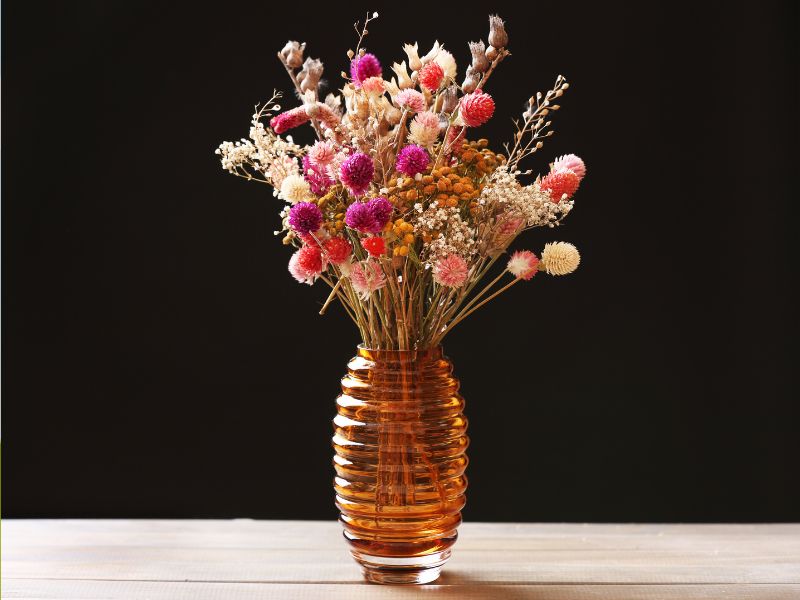
Dried flower crafts are a beautiful way to bring natural details into your home. They come in different shapes, colours, and textures, making them suitable for all kinds of crafts and decorating projects. You can use them to create wall art, decorate glass jars, make wreaths, design handmade gifts, or add a special touch to your dining table.
One thing I love about dried flower crafts is that you can make something beautiful without needing expensive materials. You can dry flowers from your garden, save a few blooms from a bouquet, or purchase dried flowers from a craft store. With a little creativity, those flowers can become decorations you will enjoy for months.
Dried flowers also work well with different decorating styles. If you prefer a simple home with neutral colours, you can use cream, white, and beige flowers. If you love colourful decorations, choose dried flowers in pink, purple, yellow, or orange. You can also mix flowers with natural materials such as wood, glass, twine, and paper to create a more personal look.
In this article, you will discover ten dried flower crafts and decor ideas you can make for your home, use as gifts, or create as part of your next DIY project. I will also share simple instructions, styling suggestions, and tips for keeping your dried flowers looking beautiful for longer.
Go Through My Guide on Cheap Fall Home Decor for your living room to see more Inspiration on How to decorate your home.
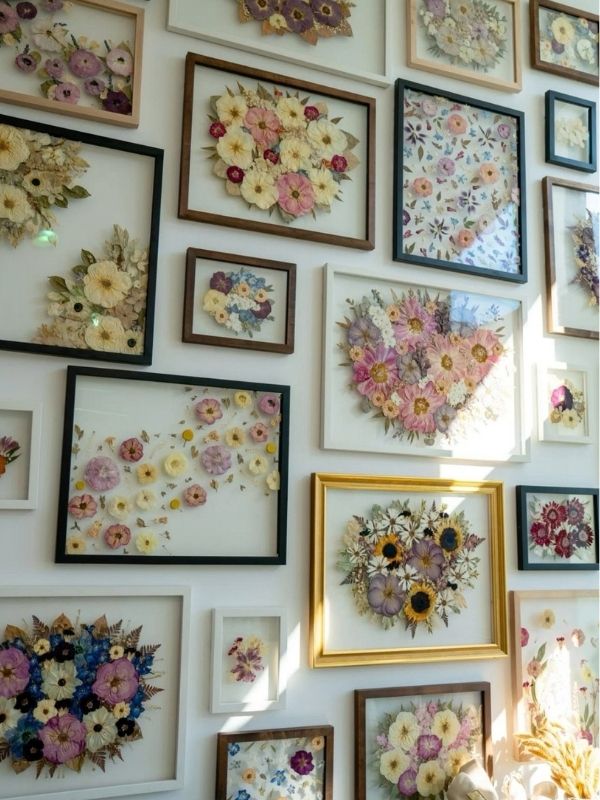
1. Create Beautiful Dried Flower Wall Art
Dried flower wall art is one of the loveliest ways to decorate an empty wall. Instead of using a regular printed picture, you can arrange real flowers into a design that adds natural texture and interest to your space.
This project works particularly well in bedrooms, living rooms, hallways, and home offices. You can make a large statement piece or create several small frames to display together.
The design is entirely up to you. Some people prefer a simple arrangement with one or two flowers, while others enjoy creating a fuller design with different stems and leaves.
Materials You Will Need
- Dried flowers and leaves
- A picture frame with glass
- A piece of white, cream, or coloured cardstock
- Tweezers
- Craft glue suitable for your materials
- Scissors
- Pencil
How to Make Dried Flower Wall Art
Step 1: Choose your flowers.
Select flowers that have dried completely. Flat flowers and delicate leaves are often easier to arrange inside a frame than thick flowers with bulky centres.
Choose colours that complement the room where you intend to hang the finished artwork. For example, cream flowers and muted green leaves can work beautifully in a neutral living room, while pink and purple flowers can add colour to a bedroom.
Step 2: Prepare the background.
Remove the backing from your picture frame and cut the cardstock to fit. White and cream backgrounds are excellent choices because they allow the natural colours of the flowers to stand out.
You can also use pale pink, light grey, or another colour that complements your flowers.
Step 3: Arrange your design.
Place the flowers on the cardstock before attaching anything. Try different arrangements until you find a design you like.
You might arrange the flowers in one corner, create a small bouquet in the centre, or place individual stems vertically across the page.
Leave enough space around the flowers so the design does not look overcrowded.
Step 4: Attach the flowers.
Once you are happy with the arrangement, carefully attach the flowers using a small amount of suitable adhesive. Use tweezers to handle delicate petals without damaging them.
Check that the flowers are secure before moving the artwork.
Step 5: Assemble the frame.
Place the finished design inside the frame and carefully close the backing. If the flowers are too thick for the frame, use a deeper frame designed for three-dimensional artwork.
Styling Tips
For a clean, modern look, use a simple black or wooden frame. If you prefer a softer appearance, choose a light wood or white frame.
You can also make a collection of three smaller frames and hang them together. Use similar flowers or colours to connect the designs.
Dried flower wall art can also become a thoughtful handmade gift for someone who enjoys flowers or home decorating.
Check out my article 10 home decor Ideas you can DIY to give your space a beautiful Look
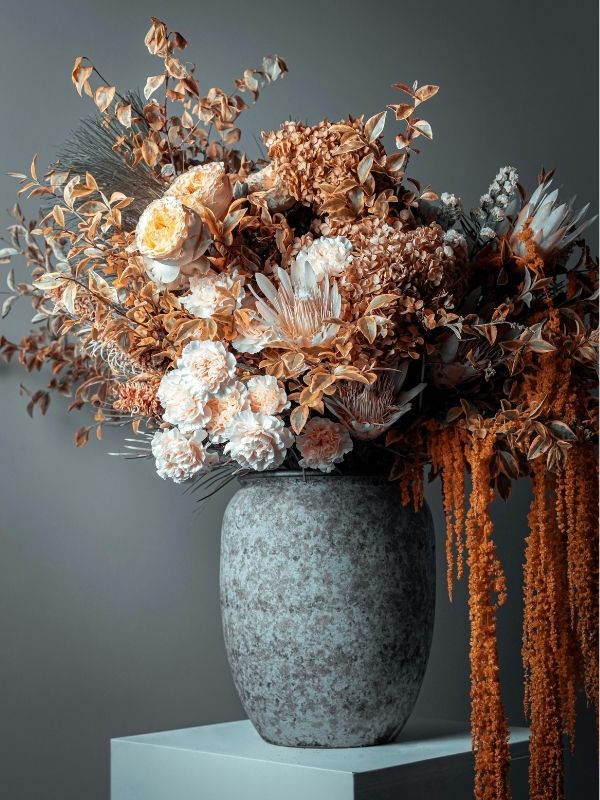
2. Make a Dried Flower Vase Arrangement
A vase filled with dried flowers is an easy way to decorate a coffee table, console table, bedside table, or dining room.
Unlike fresh flowers, dried arrangements do not need water. Once arranged properly, they can remain attractive for a long time, provided they are kept away from moisture and direct sunlight.
You can use flowers you have dried yourself or combine several varieties purchased from a craft store.
Materials You Will Need
- Dried flowers
- A vase
- Floral wire, if needed
- Scissors or pruning shears
- Ribbon or twine, optional
How to Make a Dried Flower Arrangement
Step 1: Choose the right vase.
Start with a vase that suits the flowers you have chosen. A tall vase works well for long stems, while a shorter, wider vase can support a fuller arrangement.
Clear glass vases are useful when you want the stems to remain visible. Ceramic vases are a good choice if you prefer a solid colour or a more understated design.
Step 2: Prepare the stems.
Remove any damaged petals and unwanted leaves. Trim the stems to different lengths so the flowers will sit at different heights.
Handle dried stems gently because they can break more easily than fresh ones.
Step 3: Add the larger flowers first.
Begin with a few larger stems to establish the general shape. Spread them out rather than placing them all in one direction.
Step 4: Fill in the gaps.
Add smaller flowers, grasses, and delicate branches to create texture. Turn the vase as you work so the arrangement looks attractive from different angles.
Avoid filling every empty space. A little breathing room can make the flowers look more elegant.
Step 5: Adjust the final arrangement.
Move any stems that appear crowded or hidden. If the flowers keep slipping out of position, secure a few stems together with floral wire.
Styling Tips
Dried flower arrangements look beautiful on coffee tables, dining tables, shelves, and bedroom dressers.
For a coordinated look, choose a vase that complements the room’s existing colours. You can also place the vase beside a stack of books or a small decorative tray.
If you are decorating a dining table, choose a shorter arrangement that allows people to see each other across the table.
For a fuller display, combine dried flowers with dried grasses and seed heads. These add height and texture without requiring many extra flowers.
A dried flower wreath is a lovely way to bring natural beauty to your home, especially during autumn. Check Out these Guide on 10 Beautiful DIY Fall Wreath Door Decor Ideas For Front Door to Welcome Autumn.
3. Make a Dried Flower Wreath
A dried flower wreath is a lovely decoration for a wall, interior door, or covered entrance. It can also be used for seasonal decorating, birthdays, or special occasions.
You can make your wreath colourful and full or keep it simple with a few flowers arranged along one side.
Although wreaths are often associated with Christmas, dried flower wreaths can be displayed throughout the year. The colours and flowers you choose will determine the overall appearance.
Materials You Will Need
- A wreath base made from grapevine, wire, or another suitable material
- Dried flowers
- Floral wire
- Scissors or wire cutters
- Ribbon, optional
- Craft glue, if needed
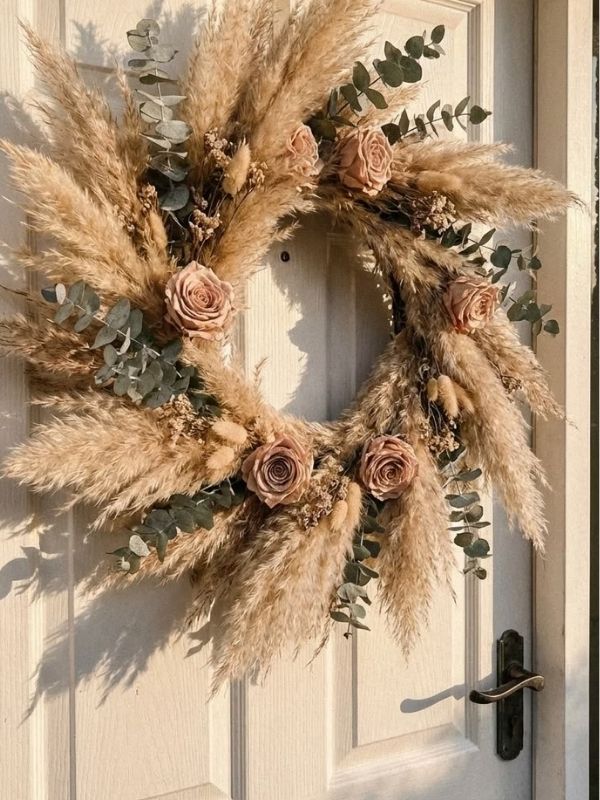
How to Make a Dried Flower Wreath
Step 1: Select your wreath base.
Choose a base that matches the size of the decoration you want to create. A smaller wreath works well in a bedroom or hallway, while a larger one can make a statement on a wall.
Grapevine bases are particularly useful because their natural texture complements dried flowers.
Step 2: Prepare your flowers.
Trim the stems to a manageable length. Separate the flowers into small groups so you can distribute the colours and textures evenly.
Step 3: Arrange the flowers before attaching them.
Place the flowers around the wreath base to decide where each group should go.
You can cover the entire wreath or decorate only the lower half. An asymmetrical design, with flowers concentrated on one side, can look especially attractive.
Step 4: Secure the flowers.
Use floral wire to attach the stems to the base. Wrap the wire carefully around the stems and wreath without crushing the flowers.
Continue adding small groups until you are satisfied with the design.
Step 5: Add the finishing touches.
Attach a ribbon if you want to soften the appearance or create a hanging loop. Check the wreath from the front and sides to make sure no loose wires are visible.
Styling Tips
For a natural look, combine dried flowers with grasses, small leaves, and seed heads.
For a colourful design, mix flowers in complementary shades. Pink and cream, yellow and white, or purple and muted green can work well together.
A dried flower wreath can also be used as a seasonal decoration. Choose warm shades such as rust, burgundy, and golden yellow for autumn-inspired decor, or use soft pastels for a spring-inspired display.
If you plan to hang your wreath outdoors, choose a sheltered location. Rain, humidity, and strong sunlight can damage dried flowers and cause their colours to fade.
I have a post on wreath DIY Christmas wreath Ideas that will make your Neighbours ask where you Bought Them
4. Decorate Glass Jars With Dried Flowers
Glass jars are useful for many DIY projects, and dried flowers can turn an ordinary jar into a decorative piece.
You can use decorated jars as shelf accessories, pen holders, containers for craft supplies, or decorative pieces for a bedroom or living room.
This is also a good way to reuse clean glass jars instead of throwing them away.
Materials You Will Need
- Clean, dry glass jars
- Dried flowers or pressed flowers
- Twine, ribbon, or lace
- Suitable clear-drying craft glue
- Scissors
- A small brush, if needed
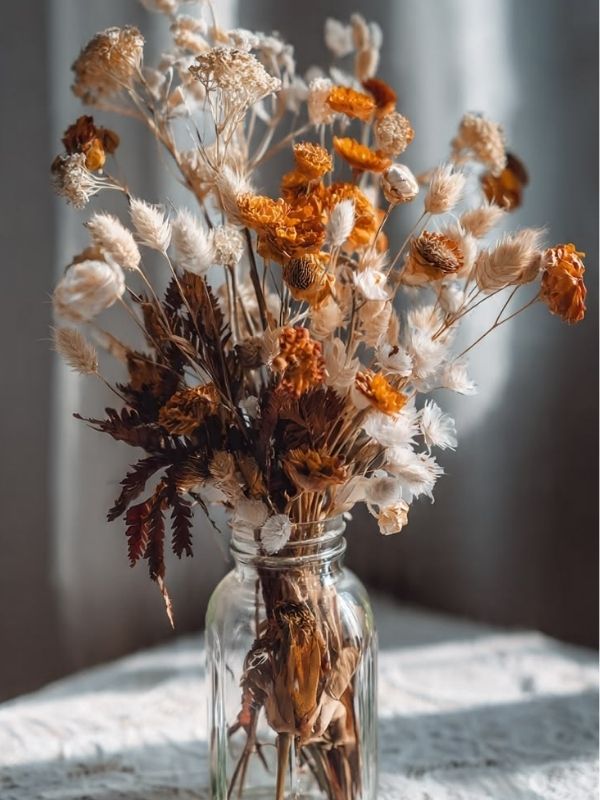
How to Decorate Glass Jars
Step 1: Clean the jars.
Remove any labels and wash the jars thoroughly. Allow them to dry completely before decorating.
A clean surface helps the adhesive work properly and gives the finished project a neater appearance.
Step 2: Plan your design.
Decide whether you want to decorate the entire jar or use only a few flowers.
For a simple design, arrange two or three small flowers on one side. For a more decorative appearance, combine several flowers with delicate leaves.
Step 3: Attach the flowers.
Apply a small amount of suitable craft adhesive to the back of each flower. Press it gently against the glass and hold it in place until it stays attached.
Work slowly to avoid damaging delicate petals.
Step 4: Add ribbon or twine.
Wrap twine around the neck of the jar or tie a ribbon into a small bow. You can also leave the jar plain if you prefer a minimalist design.
Step 5: Allow everything to dry.
Follow the adhesive manufacturer’s instructions and allow the decoration to dry fully before handling the jar.
Ways to Use Your Decorated Jars
Place one on a bookshelf, use it as a holder for pens, or display several jars together on a console table.
You can also use a decorated jar as gift packaging. Fill it with small craft supplies, wrapped treats, or another suitable gift.
If you intend to use the jar for storage, keep the opening clear and avoid putting food or drink inside a jar decorated with craft materials.
Glass jars filled with dried flowers are a beautiful way to decorate shelves, bedside tables, and other small spaces in your home. Go through this article to see How to make DIY glass jar Lanterns for your Garden easy step by step guide.
5. Create Pressed Flower Picture Frames
Pressed flower frames are a beautiful way to preserve the appearance of delicate flowers. They are particularly suitable for small blooms and thin petals that can be flattened without losing their shape.
You can make a frame for your bedroom, home office, living room, or hallway. Pressed flower frames also make thoughtful gifts for birthdays, anniversaries, and other special occasions.
Materials You Will Need
- Pressed flowers
- A picture frame
- Cardstock
- Tweezers
- Suitable craft adhesive
- Scissors
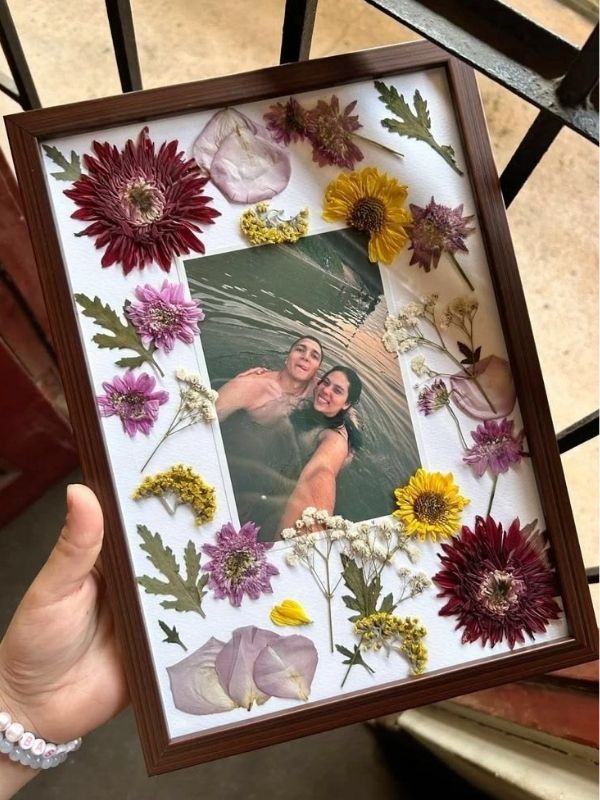
How to Make a Pressed Flower Frame
Step 1: Press your flowers.
Choose flowers with petals that are not too thick. Place each flower between sheets of absorbent paper and position the paper inside a heavy book.
Keep the book in a dry location and allow the flowers to press for several days to a few weeks, depending on their thickness and moisture content.
You can also use a flower press designed for this purpose.
Check the flowers periodically. They should be dry and flat before you use them in your project.
Step 2: Prepare the background.
Cut a piece of cardstock to fit the frame. White, cream, and pale grey backgrounds work well because they help the flowers stand out.
Step 3: Arrange the flowers.
Use tweezers to position the flowers on the cardstock.
You might create a small bouquet in the centre, arrange flowers along the edges, or leave plenty of empty space around a single bloom.
Try several arrangements before attaching the flowers.
Step 4: Attach the flowers carefully.
Use a tiny amount of suitable adhesive to secure the flowers. Pressed petals can tear easily, so avoid applying too much pressure.
Allow the adhesive to dry fully.
Step 5: Assemble the frame.
Place the design inside the frame and secure the backing. Make sure the flowers lie flat and do not interfere with the frame’s closure.
Styling Tips
Pressed flower frames look attractive when displayed in pairs or small groups.
You can use flowers from the same colour family to create a coordinated collection or choose different flowers for each frame.
For a more personal project, press flowers from a special bouquet and use them to create a keepsake.
Keep the finished frames away from direct sunlight and damp areas. Some flowers naturally lose colour over time, so proper placement can help preserve their appearance.
If you enjoy making thoughtful gifts, Check these Handmade crafts for gifts That Look Cute without costing a fortune for more creative ideas you can make for family and friends.
6. Make a Dried Flower Dining Table Centrepiece
A dried flower centrepiece can make an ordinary dining table feel more thoughtfully decorated. It is useful for everyday styling, dinner parties, celebrations, and seasonal displays.
The key is to choose an arrangement that suits the size of your table. A very large display can make it difficult for people to talk across the table, while a small arrangement can add a decorative touch without taking up too much room.
Materials You Will Need
- Dried flowers
- A vase or decorative container
- Scissors
- A table runner, optional
- Decorative tray, optional
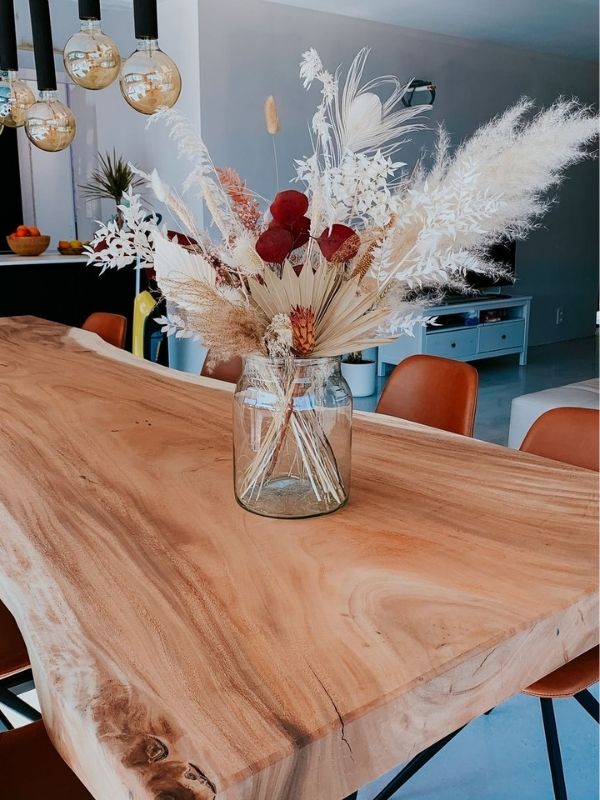
How to Create a Centrepiece
Step 1: Choose a colour palette.
Start by selecting two or three colours that complement your dining area.
Cream and beige create a soft neutral look. Pink and white add a gentle touch of colour, while rust, burgundy, and golden yellow work well for autumn-inspired decorating.
Step 2: Select a suitable container.
Choose a vase that allows the flowers to sit securely. A low vase is useful for a table where people sit opposite one another.
If you are using a taller arrangement, make sure it does not block people’s view.
Step 3: Arrange the flowers.
Place the largest stems in the vase first. Add smaller flowers and grasses to fill the spaces.
Rotate the vase as you work so the arrangement looks balanced from different angles.
Step 4: Style the table around the arrangement.
Place the vase on a decorative tray or table runner if it suits your design. You can add simple napkins, tableware, or a few other decorative pieces.
Avoid overcrowding the table with too many accessories.
Step 5: Check the final display.
Sit at the table and look at the arrangement from different positions. Move any stems that block the view or appear too large for the space.
Styling Tips
For everyday decor, a simple vase of dried flowers may be enough. You do not need to add many accessories to make the table look attractive.
For a special occasion, coordinate the flowers with your tablecloth, napkins, and dinnerware.
If you are decorating for autumn, use warm-toned flowers and natural materials. For a spring-inspired table, choose softer colours and lighter arrangements.
I Have a post on Fun Natural Table Settings Ideas that will help you more this centerpiece decorations
Important safety advice: Keep dried flowers away from open flames, hot cookware, and other heat sources. If you use candles on the table, position them well away from the flowers and never leave burning candles unattended.
7. Make Handmade Dried Flower Bookmarks
If you enjoy reading or need a small handmade gift, dried flower bookmarks are a lovely project to try.
They are lightweight, easy to personalise, and suitable for different occasions. You can make them for friends, family members, teachers, or anyone who enjoys books.
Pressed flowers are usually the best option because they are flat enough to fit between the pages of a book without adding too much bulk.
Materials You Will Need
- Pressed flowers
- Thick cardstock
- Clear adhesive suitable for paper and flowers
- Scissors or a paper trimmer
- A ruler
- A pencil
- Laminating sheets or a laminator, optional
- Ribbon, optional
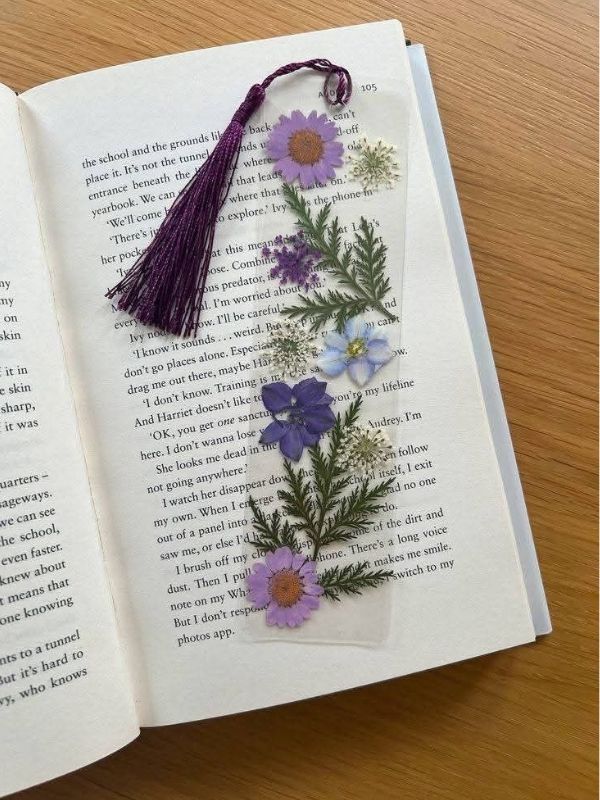
How to Make Dried Flower Bookmarks
Step 1: Cut the cardstock.
Choose the size you want for your bookmark. A simple starting point is approximately 5 cm wide and 15 cm long, although you can adjust the measurements to suit your preference.
Use a ruler to mark the cardstock and cut it neatly.
Step 2: Arrange your pressed flowers.
Place the flowers on the cardstock before attaching them.
You can position one small flower at the top, create a line of flowers down the centre, or arrange a few blooms near the bottom.
Leave enough space around the flowers so the design does not feel crowded.
Step 3: Attach the flowers.
Use a small amount of suitable adhesive to secure the flowers. Allow everything to dry according to the product instructions.
Step 4: Protect the bookmark.
If you want a more durable bookmark, laminate it after making sure the adhesive has dried completely.
Follow the laminator manufacturer’s instructions and avoid using flowers that are too thick for the laminating sheets.
If you prefer not to laminate the bookmark, you can leave it as it is, although it may be more delicate.
Step 5: Add a finishing touch.
Punch a small hole near the top and add a ribbon if you like. Choose a ribbon colour that complements the flowers.
I have a post on On How To Make DIY paper flower An Easy Step by step Tutorial
8. Decorate a Mirror or Picture Frame With Dried Flowers
If you have a plain mirror or picture frame that looks a little ordinary, dried flowers can help give it a new appearance.
This project is especially useful when you want to update your decor without replacing an item you already own.
You can decorate the corners, cover one side, or create a floral design along the bottom edge. The amount of decoration depends on the frame’s size and the style you prefer.
Materials You Will Need
- A mirror or picture frame
- Small dried flowers
- Suitable craft adhesive
- Scissors
- Tweezers
- A soft cloth
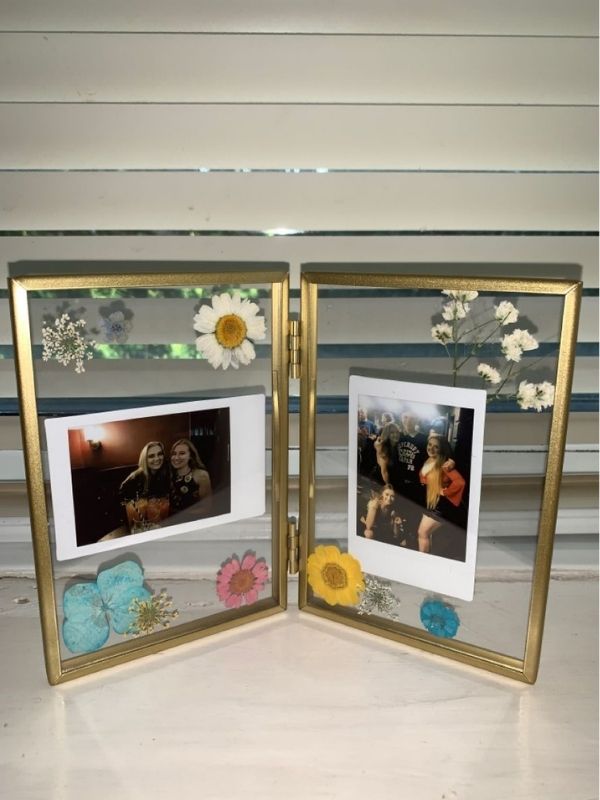
How to Decorate a Frame
Step 1: Clean the frame.
Wipe away dust and dirt, then allow the surface to dry completely.
If you are decorating a mirror, clean the glass carefully. Keep adhesive away from the reflective surface.
Step 2: Choose your design.
Place the flowers around the frame without attaching them.
For a simple appearance, decorate only two opposite corners. If you prefer a fuller design, arrange flowers along one side or around the entire border.
Step 3: Attach the flowers.
Use a suitable adhesive for the frame material. Apply a small amount to each flower or stem and press it gently into place.
Check that the flowers are secure before adding more decorations.
Step 4: Build the arrangement.
Add smaller flowers or leaves to fill selected spaces. Avoid making the decoration so thick that it interferes with the frame’s function.
Step 5: Allow it to dry.
Leave the frame undisturbed until the adhesive has dried completely.
Styling Tips
A wooden frame works well with dried flowers because the natural materials complement each other. White frames can make colourful flowers stand out, while dark frames can create a stronger contrast.
A decorated mirror can look attractive in a bedroom or dressing area. A floral picture frame can be displayed on a shelf, dresser, or side table.
If the frame is used in a bathroom, remember that humidity can damage dried flowers. A dry room is generally a better choice.
For mirrors that are handled frequently, avoid placing flowers where they are likely to be brushed or knocked off.
Go Through my guide to see 25 room inspo ideas for New year decor That you may find useful.
9. Make a Dried Flower Candle Holder Decoration
Dried flowers can add a decorative touch to candle holders, especially when the flowers are used around the outside of a holder or as part of a display that does not expose them to heat.
This project can create a beautiful table accessory or handmade gift. However, it is important to remember that dried flowers are flammable.
For safety, do not place dried flowers inside a candle holder where they can come into contact with a flame, hot wax, or heated surfaces. Never attach dried flowers to a candle that will be burned. A safer option is to decorate the outside of a separate glass container and use a battery-operated LED candle, provided the materials remain clear of the light’s heat and the product’s instructions allow it.
Materials You Will Need
- A clean glass container or decorative holder
- Dried flowers
- Suitable craft adhesive
- Scissors
- Ribbon or twine, optional
- A battery-operated LED candle

How to Make the Decoration
Step 1: Choose your container.
Select a glass container with enough space for the LED candle. Make sure the opening is wide enough to place and remove the light easily.
Step 2: Plan the floral design.
Arrange a few small flowers on the outside of the container. You can decorate one side or create a simple design around the lower exterior.
Keep the top opening and the area around the LED light clear.
Step 3: Attach the flowers.
Use an adhesive suitable for the glass and the flowers. Follow the manufacturer’s instructions and allow the adhesive to dry completely.
Step 4: Add a decorative detail.
Tie a small ribbon or piece of twine around the outside of the container if you wish. Keep loose material away from any heat source.
Step 5: Add the LED candle.
Place the battery-operated LED candle inside the container. Check that the light fits securely and that the flowers and other materials do not obstruct it.
Styling Tips
This decoration can work well on a shelf, side table, or dining table. You can make two or three matching holders for a coordinated display.
Choose flowers that complement your room’s colours. Soft pink and cream can create a delicate appearance, while warm orange and brown shades can suit autumn decor.
Remember that a battery-operated light is the safer choice for a holder decorated with dried flowers. Do not replace it with a real flame, even if the decoration appears to be far from the wick.
Candles and dried flowers can work beautifully together when arranged thoughtfully, I have post on 12 Candle making Ideas that smell better than store bought
10. Decorate a Gift Box With Dried Flowers
A beautifully decorated gift box can make a present feel more personal before the recipient even opens it.
Dried flowers are a simple way to add colour and texture to gift packaging. This idea works for birthdays, Mother’s Day, anniversaries, thank-you gifts, and other special occasions.
You can decorate a purchased gift box or reuse a clean, sturdy box you already have.
Materials You Will Need
- A gift box
- Dried flowers
- Ribbon or twine
- Suitable craft adhesive
- Scissors
- Tissue paper, optional
- A gift tag, optional
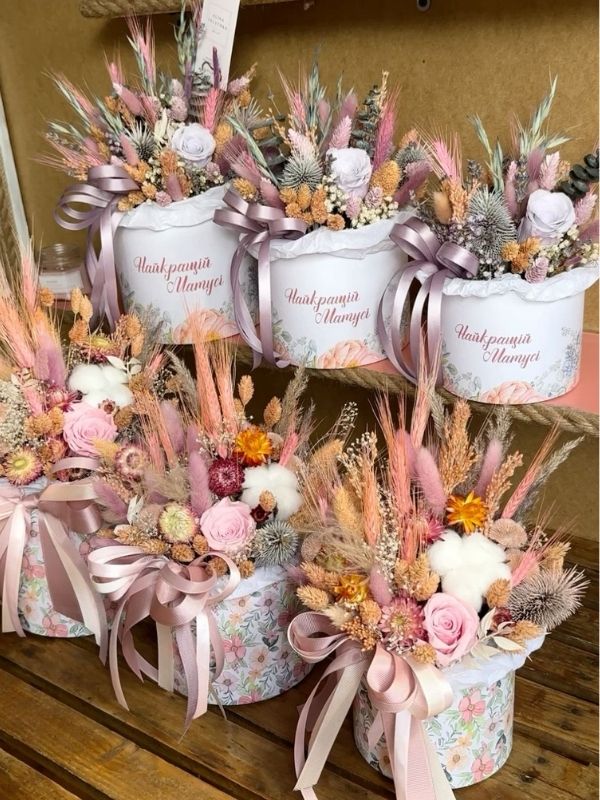
How to Decorate a Gift Box
Step 1: Choose the box.
Select a box that is large enough for your gift and strong enough to hold it securely.
Plain boxes in white, cream, brown, or pastel colours provide a good background for dried flowers.
Step 2: Wrap the gift if necessary.
If you are placing a separate gift inside the box, arrange it neatly with tissue paper or another suitable protective material.
Make sure the box closes properly before decorating the outside.
Step 3: Tie the ribbon.
Wrap ribbon or twine around the box and tie it into a bow. You can position the bow in the centre or slightly to one side.
Step 4: Arrange the flowers.
Place a few dried flowers near the ribbon or along one corner of the box.
Keep the arrangement relatively flat so the box can still be handled and stored easily.
Step 5: Attach the flowers.
Use a small amount of suitable adhesive to secure the flowers to the ribbon or box. If you do not want to glue flowers directly onto the box, attach them to the ribbon instead.
This makes it easier to remove the decoration without damaging the packaging.
Step 6: Add a gift tag.
Write a short message on a tag and attach it to the ribbon. A handwritten note can make the gift feel even more thoughtful.
Gift Ideas to Pair With Dried Flower Packaging
You can use this decoration for handmade jewellery, a small candle in suitable packaging, stationery, a notebook, a framed picture, or another gift that fits the box.
For a nature-inspired gift, choose brown kraft paper, cream ribbon, and small dried flowers. For a more colourful look, use pastel paper and flowers in matching shades.
If you are sending the gift by post, protect the flowers with suitable packaging so they do not break during transit.
You should also avoid placing loose dried flowers directly against food or other items that require hygienic packaging.
Dried flowers can turn a simple handmade present into something your mom can treasure for years. You could create a framed dried flower arrangement, decorate a keepsake box with pressed flowers, or make a small floral display that reminds her of your love every time she sees it. see Inspiration on Christmas Gift Ideas for mom that says I Love You without saying a word
How to Dry Flowers for Your DIY Projects
If you want to make your own dried flower crafts, learning how to dry flowers properly will help you get better results.
Different flowers dry in different ways. Some retain their shape well when hung upside down, while others are better suited to pressing.
The method you choose depends on the type of flower, how you intend to use it, and the appearance you want to achieve.
You can use Dried Flowers in decorating your home, check small space decorating ideas to see more inspos
1. Air-Drying Flowers
Air-drying is one of the simplest methods.
It works well for flowers with sturdy stems and blooms that can hold their shape as they dry.
How to do it:
- Choose flowers that are in good condition.
- Remove unwanted leaves from the lower stems.
- Gather the stems into small bundles.
- Secure each bundle with string or a rubber band.
- Hang the flowers upside down in a dry, dark, well-ventilated location.
- Allow them to dry until the stems and petals feel dry.
The drying time depends on the flowers, their moisture content, and the conditions in the room.
Avoid hanging large, tightly packed bundles because they may dry unevenly. Good airflow helps reduce the risk of mould.
2. Pressing Flowers
Pressing works well for flowers you want to use in wall art, bookmarks, and picture frames.
How to do it:
- Select flowers with relatively flat petals.
- Place each flower between sheets of absorbent paper.
- Put the paper inside a heavy book or flower press.
- Add weight if you are using a book and it is safe to do so.
- Leave the flowers undisturbed for several days or longer.
- Check that they are completely dry before removing them.
Change the absorbent paper if it becomes damp.
Pressed flowers can be delicate, so lift them carefully with tweezers when using them in crafts.
Christmas mantel decor ideas that make your Fireplace the star, is a great article that will help you for flower decorations on your mantel.
3. Using Silica Gel
Silica gel can help preserve the shape of flowers that may lose their form when hung upside down.
It is often used for decorative flowers with fuller petals.
How to do it:
- Choose a suitable airtight container.
- Add a layer of silica gel according to the product instructions.
- Position the flowers carefully inside the container.
- Gently add more silica gel around the flowers until they are covered.
- Close the container and leave the flowers for the time recommended for the product and flower type.
- Remove the flowers carefully and brush away any remaining granules.
Follow the silica gel manufacturer’s safety instructions. Keep the material away from children and pets, and do not use it for food preparation.
Which Drying Method Should You Choose?
Choose air-drying when you want flowers with stems for vases and wreaths.
Choose pressing when you want flat flowers for artwork, bookmarks, or picture frames.
Silica gel may be a better option when you want to preserve the shape of fuller blooms.
Whichever method you use, make sure the flowers are fully dry before incorporating them into your projects. Flowers that still contain moisture can develop mould or deteriorate after being enclosed in a frame or container.
Tips for Making Dried Flower Crafts Look Beautiful
You do not need expensive supplies to create attractive dried flower decorations. A few simple choices can make a big difference to the finished result.
Choose Colours That Work Together
Before you begin, decide which colours you want to use.
You might choose one main colour and add a second colour for contrast. Alternatively, you can work with neutral shades such as cream, beige, and muted green.
Using a limited colour palette can help your decorations look coordinated, especially if you intend to display several projects in the same room.
Handle Flowers Carefully
Dried flowers can break easily, particularly when their petals and stems are thin.
Avoid squeezing the flowers while arranging them. Use tweezers for delicate pieces and trim stems gently with suitable scissors.
Keep extra flowers nearby so you can replace any that break during the project.
Avoid Overcrowding Your Design
It can be tempting to fill every empty space, especially when you have many beautiful flowers to use.
However, a simpler arrangement often allows each flower to stand out.
Start with a few larger flowers, then add smaller details where needed. Step back from the project occasionally to check how the arrangement looks as a whole.
Choose the Right Adhesive
Different materials require different adhesives.
A product that works on cardstock may not hold flowers securely on glass or wood. Check the manufacturer’s instructions to make sure the adhesive is suitable for your project.
Use only the amount needed to secure the flowers. Too much adhesive can leave visible marks or damage delicate petals.
Allow the project to dry completely before displaying or handling it.
Keep Dried Flowers Away From Moisture
Moisture can cause dried flowers to soften, lose their shape, or develop mould.
For this reason, avoid placing delicate dried flower decorations near sinks, showers, or other damp areas.
If you display your crafts in a room that sometimes becomes humid, check them regularly for signs of damage.
Where Can You Display Dried Flower Decor?
Dried flower decorations can work in several areas of your home. The most suitable project depends on the size of the room, the available space, and your decorating preferences.
Living Room
A dried flower vase arrangement can add colour to a coffee table or console table.
You can also display pressed flower frames on a shelf or hang dried flower wall art above a side table.
If you already have decorative books, trays, or small ornaments, choose a flower arrangement that complements those items rather than competing with them.
Bedroom
Pressed flower artwork can look lovely on a bedroom wall, particularly when the colours complement your bedding and curtains.
A small vase of dried flowers can also decorate a dresser or bedside table.
For a coordinated appearance, repeat one or two colours from your existing bedroom decor.
Dining Room
A dried flower centrepiece can help decorate your dining table for everyday meals or special occasions.
Choose a low arrangement if you want to keep the table practical for serving food and talking across the table.
You can also use a dried flower wreath on a nearby wall or display pressed flower art in the dining area.
Entryway
A wreath or framed dried flower arrangement can make an entryway feel more welcoming.
If you have a console table near the entrance, a small vase of dried flowers can add a natural detail without taking up too much space.
Keep decorations away from areas where bags, coats, or frequently used items might knock them over.
I have an article on Modern Entryway wall decor ideas
Home Office
Dried flower wall art can add colour to a home office without taking up valuable desk space.
A small arrangement on a shelf is another option, especially if you prefer to keep your working area clear.
Choose decorations that fit comfortably into the room without distracting you from your work.
Check my Feminine Office decor Ideas to see more inspos.
Common Mistakes to Avoid When Making Dried Flower Crafts
Even simple DIY projects can become frustrating if the flowers break, the adhesive does not hold, or the finished decoration does not look the way you expected.
Check out How to style a bar cart if you don’t drink, you can find the article useful.
Here are a few mistakes to watch out for.
Using flowers that are not completely dry: Flowers that still contain moisture may deteriorate after being placed inside frames or containers. Make sure they are fully dry before using them.
Applying too much glue: Excess adhesive can leave marks on petals, glass, and paper. Start with a small amount and add more only when necessary.
Choosing flowers that are too bulky: Thick flowers may not fit inside ordinary picture frames or bookmarks. Choose flatter flowers for projects that need a smooth finish.
Mixing too many colours: A large variety of colours can make an arrangement feel busy. Try choosing a few complementary shades before you start.
Ignoring the size of the display area: A large wreath or vase may overwhelm a small space. Consider the available room before choosing the size of your project.
Placing flowers near heat or open flames: Dried flowers are flammable. Keep them away from candles, fireplaces, hot bulbs, and other heat sources. Use battery-operated LED candles for decorations that contain dried flowers.
Displaying flowers in damp locations: Bathrooms and other humid areas can shorten the life of dried flower crafts. Choose a dry location whenever possible.
Frequently Asked Questions About Dried Flower Crafts
How long do dried flower decorations last?
Dried flower decorations can last for months or longer, depending on the flower type, drying method, and storage conditions.
Keeping them dry and away from direct sunlight can help preserve their appearance. However, some flowers naturally become more fragile or lose colour as time passes.
Can I use flowers from a fresh bouquet?
Yes. Flowers from a fresh bouquet can be used for many dried flower projects.
Choose blooms that are still in good condition and dry them using a suitable method. Flowers that have already started to decay may not produce attractive results.
Which flowers are suitable for drying?
The best flowers depend on the project and the drying method.
Flowers with sturdy stems may work well in air-dried arrangements, while delicate, flatter flowers are often suitable for pressing.
If you are unsure how a particular flower will dry, try a small sample first.
Do I need special tools to make dried flower crafts?
No. Many projects require only basic supplies such as scissors, cardstock, a frame, a vase, and suitable craft adhesive.
Some projects may benefit from additional tools, such as a flower press, floral wire, tweezers, or a laminator, but you can choose projects based on the supplies you already have.
Can dried flower crafts be given as gifts?
Yes. Dried flower bookmarks, framed artwork, wreaths, decorated gift boxes, and vase arrangements can all make thoughtful handmade gifts.
You can personalise them by choosing the recipient’s favourite colours or creating a design that matches their home.
How can I stop dried flowers from fading?
Keep dried flowers away from strong direct sunlight and moisture. Handle them gently and store unused flowers in a dry, protective container.
Some fading is natural, so even with careful storage, the flowers may change colour over time.
Can I put dried flowers inside a candle?
Dried flowers should not be placed where they can come into contact with a burning wick, flame, or hot wax. They are flammable and can create a fire hazard.
For decorative displays, use a battery-operated LED candle and keep dried flowers away from heat sources.
Are dried flower crafts suitable for beginners?
Yes. Several projects in this article are suitable for beginners, including vase arrangements, decorated glass jars, gift boxes, and pressed flower bookmarks.
Start with a simple design and add more detail as you become comfortable working with dried flowers.
Conclusion
Dried flower crafts are a beautiful way to bring natural details into your home while exploring your creativity. With a few flowers and some basic supplies, you can create decorations that suit your personal style without spending a lot of money.
You can start with a simple vase arrangement, make pressed flower artwork for your walls, or try decorating a glass jar you already have at home. If you enjoy giving handmade gifts, dried flower bookmarks and decorated gift boxes are also lovely projects to explore.
The important thing is to choose a project that interests you and work with the materials you have available. You do not need to make every decoration at once. Start with one idea, experiment with colours and arrangements, and see what you enjoy creating.
Once you become comfortable working with dried flowers, you may find yourself looking for new ways to use leftover petals and stems in future projects.
Which of these dried flower crafts would you like to try first? I would love to know which idea caught your attention.
I have an article on Girly bedroom decor, spring home decor and Easter home decor, these are great places to use Dried flowers on.