How to Make Beautiful DIY Paper Flowers: A Simple Step-by-Step Tutorial.
I have always loved paper flowers because they can make something as simple as a piece of paper feel completely different. You start with a flat sheet of paper, a pair of scissors, and a little patience, and before you know it, you have a flower sitting in your hands.
What I also love about making paper flowers is that you can make them for so many different reasons. You can use them to decorate your room, make a handmade bouquet, decorate a gift, create a beautiful centerpiece, or even make them for a party or special occasion.
And if you have never made one before, don’t worry. You really can start as a beginner.
You don’t need to know how to use a Cricut machine, own expensive craft supplies, or have years of crafting experience. In this tutorial, I will walk you through how to make DIY paper flowers step by step, including the type of paper to use, the supplies you need, how to shape the petals, how to make the flower look fuller, and some little tricks that can make the finished flower look much prettier.
So grab your paper and scissors, and let’s make some flowers.
What You Need to Make DIY Paper Flowers
Before you start cutting anything, gather your supplies.
You may already have most of these things at home, which is one reason I enjoy this craft.
You will need:
- Colored paper or cardstock
- Scissors
- Pencil
- Ruler
- Glue
- Floral wire or a wooden skewer for the stem
- Green paper for the leaves
- Green floral tape, optional
- A small round object to trace, optional
- A hole punch, optional
- A marker or pen, optional
You don’t need every single item on this list.
For your first flower, I would keep things simple. Paper, scissors, glue, a pencil, and something you can use for the stem are enough to get started.
If you are making several flowers for a bouquet, then floral wire and green floral tape can make the finished arrangement look much neater.
What Kind of Paper Is Best for Paper Flowers?
The paper you choose can change how your flowers look and how easy they are to make.
For beginners, I recommend starting with colored craft paper or lightweight cardstock.
Regular colored paper is easy to cut and fold, especially if you are making small flowers. Cardstock is a little sturdier and can help your petals hold their shape better.

If you only have printer paper at home, you can still use it.
In fact, I would encourage a beginner to try their first flower with ordinary paper before buying anything special. This gives you a chance to practice cutting and shaping the petals without worrying about wasting your good craft paper.
Once you get comfortable with the process, you can experiment with different paper weights and textures.
You can also mix papers. A flower with darker cardstock in the center and lighter paper around the outside can look really pretty.
Choosing the Right Colors for Your Paper Flowers
This is where you can have a lot of fun.
You can make your flowers any color you want.
Pink, yellow, white, red, purple, blue, orange, and peach can all make beautiful flowers.
You can also use different shades of the same color.
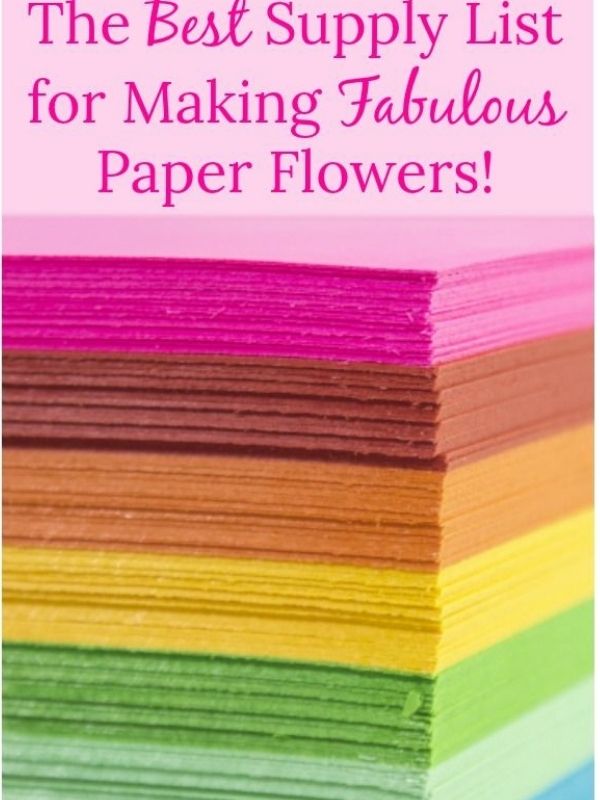
For example, you could use light pink for the outside petals and a deeper pink for the center. Or use several shades of yellow to make a sunflower-inspired flower.
If you are making flowers for your home, you might want to choose colors that already appear in your room.
For a gift, you could use the person’s favorite color.
And if you are making a bouquet, try choosing three or four colors that look good together instead of using every color you have.
It can make the finished bouquet look much more put together.
Related Articles You May Also Like
If you enjoy making things by hand, you may also like these DIY and craft ideas
- Wine Bottle Crafts Ideas
- How to Store Unbaked Polymer Clay So It Stays Soft and Ready to Use
- Popsicle Stick Crafts for Kids
- DIY Squishy Ideas for Kids
- Apple Crafts for Preschoolers
How to Make DIY Paper Flowers Step by Step
Now let’s get into the actual flower-making process.
For this beginner-friendly tutorial, we are going to make a simple layered paper flower with several rounded petals.
Once you understand this basic technique, you can change the petal shape and create many different styles.
Step 1: Choose Your Paper
Start with the paper you want to use for your flower.
For a medium-sized flower, an A4 sheet of paper or cardstock is a good starting point.
You can use one color for the entire flower or use two or three colors for the different layers.
I usually recommend making the first flower with one color because it lets you focus on learning the technique.
Once you are comfortable, you can start mixing colors.
Step 2: Draw Your Petal Shapes
Take your pencil and lightly draw several petals on the paper.
You don’t need every petal to be exactly the same.
In fact, a little variation can make handmade flowers look more natural.
You can make the petals rounded, pointed, narrow, wide, or slightly heart-shaped.

For a simple flower, try making petals that are wider at the top and slightly narrower at the bottom.
If drawing individual petals feels difficult, you can also draw a simple flower shape with several petals connected together.
The size depends on what you are making.
If you want a tiny flower for a gift box, keep the petals small.
If you want a large wall flower, make them much bigger.
Step 3: Carefully Cut Out the Petals
Now take your scissors and carefully cut along the lines you drew.
Take your time here.
You don’t need to rush through the cutting because neat edges can make your finished flower look much better.
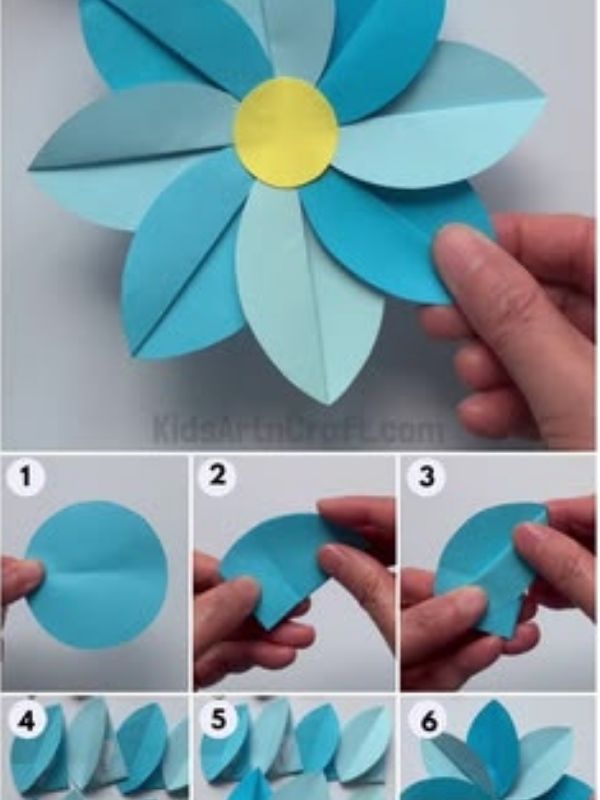
If you are making several flowers, you can fold the paper before cutting so you can create multiple pieces at once.
Just be careful not to fold very thick cardstock too many times because it can make cutting uncomfortable.
Once you finish cutting, arrange your petals in little groups so you don’t lose them.
Step 4: Give the Petals Some Shape
This is one of the steps that can really change how your paper flowers look.
Flat petals can make the flower look a little lifeless.
To give them shape, gently curl the edges of each petal around a pencil.
You don’t need to press hard.
Just wrap the paper slightly around the pencil and release it.
You can curl some petals inward and others outward.
You can also gently bend the middle of the petal with your fingers.
Be careful not to crease the paper too sharply unless that is the look you want.
The goal is to give the petals some movement.
Step 5: Start With the First Layer
Place your first group of petals in front of you.
If you made individual petals, arrange them in a circle so the bottom edges meet in the middle.
Add a small amount of glue to the bottom of each petal and attach them together.

Don’t use too much glue.
A tiny amount is usually enough, and too much can make the paper wet and difficult to work with.
Hold the pieces together for a few seconds so the glue can begin to set.
Step 6: Add the Second Layer of Petals
Now take another set of petals.
Make this layer slightly smaller or use a different shade of paper.
Place the petals between the petals from the first layer.
This creates a fuller appearance because you can see petals from both layers instead of having everything lined up directly on top of each other.
Add a little glue to the center and carefully attach the second layer.
Let it sit for a moment before moving on.
Step 7: Create the Center of the Flower
The center is what can make your flower really come together.
There are several ways to make it.
For a simple flower, cut a small circle from paper and glue it into the middle.

You could also cut a thin strip of paper, make tiny cuts along one side, and roll it tightly to create a little fringed center.
Another option is to use a small bead, button, pom-pom, or even a little piece of contrasting paper.
If you want your flower to look soft and playful, a pom-pom can be really cute.
For a more elegant flower, a small paper center in a darker shade can look beautiful.
Step 8: Add the Stem
If you want your flower to look like part of a bouquet, you will need a stem.
You can use floral wire, a wooden skewer, or another suitable craft stem.
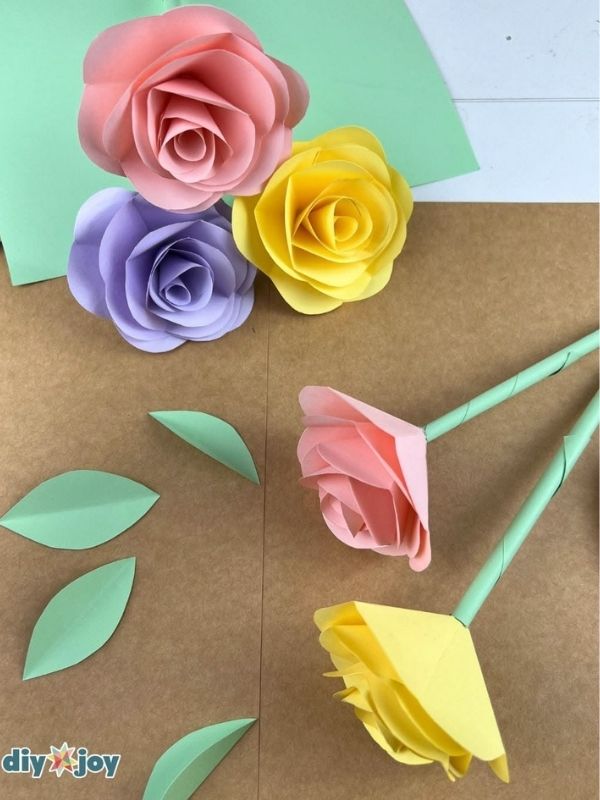
Attach the stem securely to the back of the flower with glue.
If you are using floral wire, you can wrap it with green floral tape.
If you don’t have floral tape, you can cut a long strip of green paper and wrap it around the stem with a little glue.
Take your time while wrapping it so the paper doesn’t bunch up.
Step 9: Make Some Green Leaves
A flower looks even more complete when it has a few leaves.
Take green paper and draw simple leaf shapes.
Cut them out and gently fold them down the middle.
You can also use your pencil to give the edges a slight curve.
Attach one or two leaves to the stem.
You don’t need to add too many.
Sometimes two simple leaves are enough to make the flower look finished.
Step 10: Adjust the Petals
Now comes the fun part.
Look at your finished flower and gently adjust the petals.
Some may be too flat.
Some may be covering another petal.
Some may need to curl outward a little more.
Use your fingers to gently shape them until you are happy with how the flower looks.
This is one of those parts where you can really make the flower your own.
Your flower does not have to look exactly like someone else’s.
That is part of the charm of making it by hand.
More DIY Crafts to Try
- Simple DIY Bag Charms to Make at Home
- DIY Christmas Wreath Ideas
- Rainbow Crafts for Kids
- Egg Carton Crafts for Kids
How to Make Your Paper Flowers Look Fuller
If your first flower looks a little flat, don’t worry.
You can make it fuller by adding more layers.
Try making three or four layers of petals in slightly different sizes.
Start with the largest layer at the bottom and gradually make each layer smaller as you move toward the center.
You can also alternate the position of each layer so the petals don’t sit directly on top of one another.
Another trick is to curl the outer petals outward and keep the inner petals slightly more upright.
This gives the flower more depth.
How Many Petals Should a Paper Flower Have?
There is no single number you have to follow.
A small flower might look beautiful with five or six petals.
A fuller flower could have eight, ten, or even more.
If you are making a rose-style flower, you can use many smaller petals layered closely together.
If you are making a simple daisy-style flower, fewer wider petals may work better.
I would start with six to eight petals for your first attempt and see how you like the shape.
You can always add another layer.
Easy Ways to Make Different Paper Flower Styles
Once you learn the basic method, you don’t have to keep making the exact same flower.
A few changes to the petal shape can give you a completely different look.
Make a Paper Rose
For a rose, use rounded petals and curl the edges slightly inward.
Start with smaller petals in the center and gradually add larger petals around them.
Keep the inner petals tighter and let the outer petals open more.
This creates that layered rose appearance.
Make a Paper Daisy
For a daisy, use long, narrow petals.
White petals with a yellow center are classic, but you can use any colors you like.
Make several petals around a circular center and gently bend the petals outward.
These are especially cute when you make several different sizes.
Make a Paper Sunflower
Use yellow or golden paper for the petals and brown paper for the center.
Make the petals long and slightly pointed.
You can add several layers to create a fuller sunflower.
If you want more texture in the center, cut a strip of brown paper with tiny fringes and roll it into a tight circle.
Make a Paper Tulip
Tulips have a very different shape from roses and daisies.
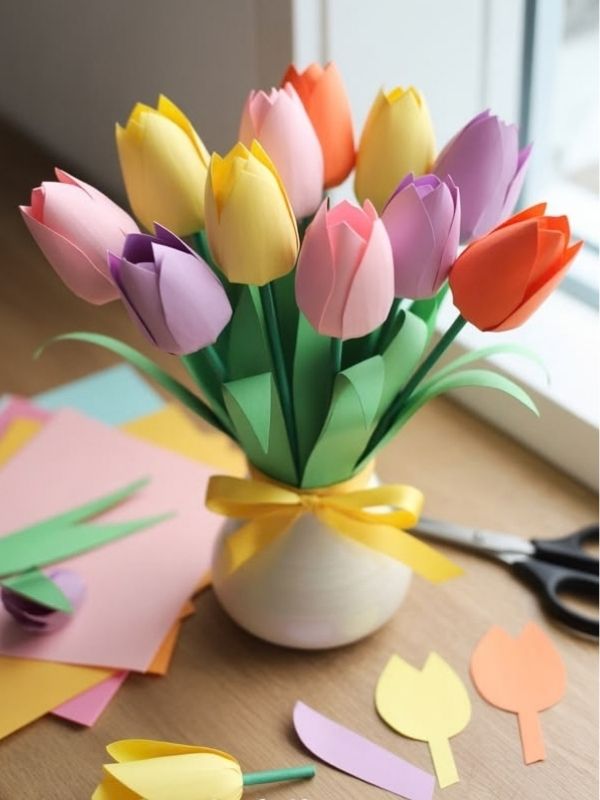
You can cut a simple tulip-shaped flower, fold the center slightly, and attach it to a stem.
Use different colors to create a small group of tulips.
Pink, purple, yellow, red, and white can look beautiful together.
How to Make Paper Flowers Without a Cricut
You may see beautiful paper flowers online that were made using a cutting machine, but you absolutely do not need one.
A Cricut can make cutting faster, especially when you are making a large number of flowers, but scissors work perfectly well for simple designs.
You can draw your own petals or print a template and trace it onto your paper.
For beginners, I actually like starting with scissors because you get to learn how different shapes behave.
Once you understand the basics, you can decide if you want to try templates or cutting machines later.
What If My Paper Flower Looks Messy?
Please don’t throw it away immediately.
Your first flower may not look exactly like the picture you had in your head.
That is normal.
Maybe the petals are uneven.
Maybe you used too much glue.
Maybe the center is slightly crooked.
Maybe the paper curled in a way you didn’t expect.
Give it another look before deciding it failed.
You can trim a petal.
Add another layer.
Cover the center with a button or paper circle.
Add more leaves.
Sometimes a small adjustment completely changes the finished flower.
And if it still doesn’t look the way you want, keep it as your practice flower and make another one.
The second one will usually be easier because your hands now understand what they are supposed to do.
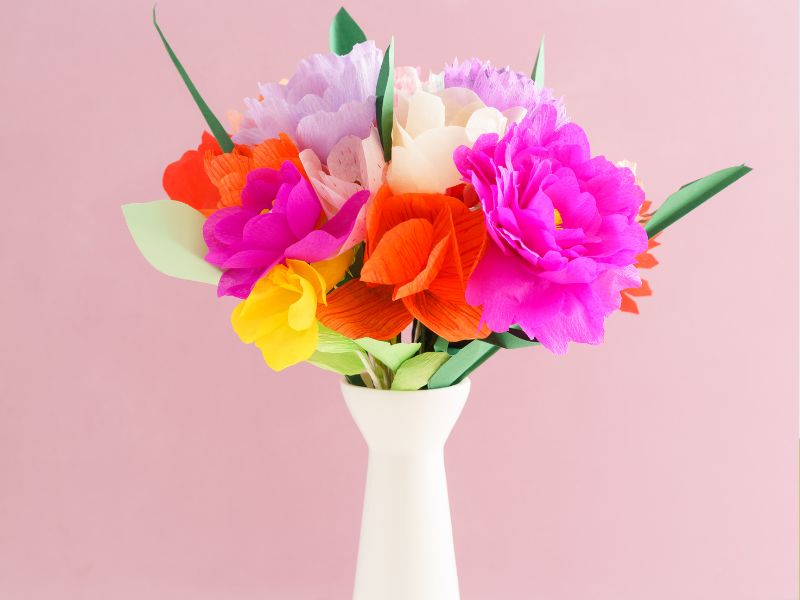
How to Make a Paper Flower Bouquet
Once you have made several flowers, you can turn them into a beautiful handmade bouquet.
Try making flowers in different sizes rather than making every flower identical.
You could have large roses, small daisies, and a few simple flowers mixed together.
Add green leaves between them and arrange the stems at different heights.
You can wrap the stems with ribbon or brown paper.
For a simple homemade vase, you could even decorate a glass jar or reuse a clean bottle.
Tie a ribbon around it, place your flowers inside, and you have a handmade decoration for your home.
What Can You Use DIY Paper Flowers For?
One reason I love this craft is that you can do so much with the finished flowers.
You can use them for:
- Home decor
- Wall decorations
- Handmade bouquets
- Birthday parties
- Baby showers
- Bridal showers
- Wedding decorations
- Gift wrapping
- Handmade cards
- Scrapbooking
- Table centerpieces
- Photo backdrops
- Nursery decor
- Christmas decorations
- Handmade gifts
You can even attach a small paper flower to a wrapped present.
It makes an ordinary gift look like you spent extra time putting everything together.
How to Use Paper Flowers as Home Decor
Large paper flowers can look beautiful on a bedroom wall, behind a desk, above a party table, or on a photo wall.
If you enjoy simple DIY projects for your home, you can also check out DIY Projects Adults Can Finish in a Day.
You can make several flowers in different sizes and arrange them together.
For a softer look, use similar shades.
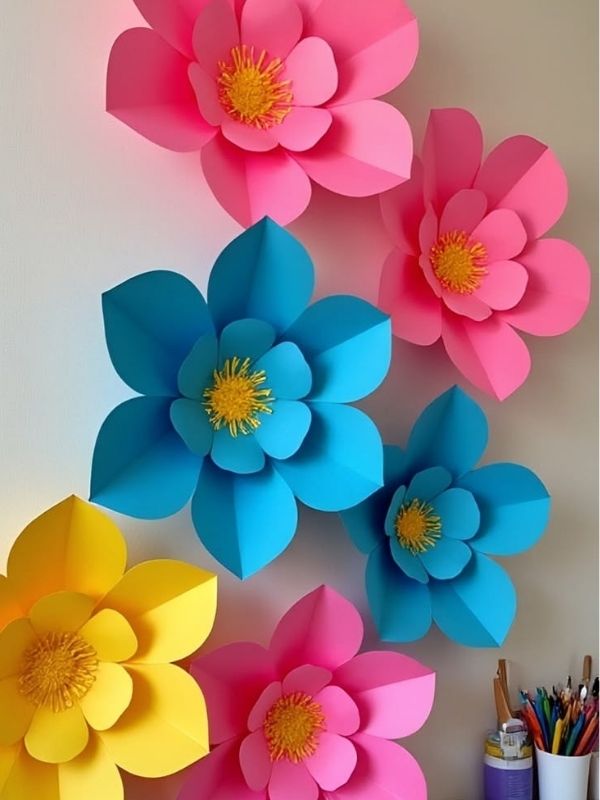
For something brighter, mix several colors.
You can attach them to a wall using removable adhesive that is suitable for your wall surface.
If you are decorating a rental or don’t want to mark the wall, test your adhesive on a small area first.
You can also put smaller paper flowers inside a vase and use them as a permanent decoration.
How to Make Paper Flowers for a Gift
Paper flowers can make a lovely handmade gift on their own, but you can also use them to make another gift feel more personal.
If you enjoy making handmade gifts, you may also like my guide on Handmade Crafts for Gifts That Look Special Without Costing a Fortune.
Attach a small flower to a gift box.

Add one to a handmade card.
Make a small bouquet for someone’s birthday.
You could even make a bouquet for Mom, a friend, teacher, sister, or someone who simply loves flowers.
Unlike fresh flowers, paper flowers can be kept for much longer when they are stored properly.
That is one of the reasons I especially like making them as gifts.
Beginner Mistakes to Avoid
When you are making paper flowers for the first time, there are a few things that can make the process harder than it needs to be.
Using too much glue
You only need a small amount.
Too much glue can make the paper wet, cause wrinkles, and take longer to dry.
Choosing paper that is too thick
Very thick cardstock can be difficult to curl and shape.
Start with lightweight cardstock or regular craft paper until you get comfortable.
Making every petal exactly the same
Handmade flowers don’t need to look machine-made.
Small differences can actually make them look more natural.
Rushing the shaping process
Take your time curling and bending the petals.
That little bit of extra shaping can make a huge difference.
Making only one layer
If your flower looks flat, try adding another layer before deciding you don’t like the design.
How to Store Your Finished Paper Flowers
Once you have spent time making your flowers, you want to keep them looking nice.
Keep them somewhere dry and away from direct moisture.
If you are storing several flowers, avoid putting heavy objects on top of them because the petals can become flattened.
A large box works well for bigger flowers.
For smaller flowers, you can place them gently in a clean container.
If a flower gets dusty, use a soft, dry brush or gently blow away the dust.
Try not to soak paper flowers with water because moisture can cause the paper to wrinkle or lose its shape.
My Favorite Part About Making Paper Flowers
I think one of the sweetest things about DIY paper flowers is how much you can create from such simple materials.
You start with paper.
Just paper.
Then you cut it, shape it, layer it, and slowly turn it into something that looks completely different.
And because you made it yourself, you can decide everything.
You choose the color.
You choose the size.
You choose the shape.
You can make one flower or make an entire bouquet.
You can make something soft and simple for your bedroom or something colorful for a party.
There are so many ways to take the same basic idea and make it your own.
Conclusion
If you have never made paper flowers before, I hope you give this DIY a try.
Don’t worry about making your first flower perfect.
Start with simple paper, make a few petals, practice curling them, and see what happens.
Your first flower might be a little uneven, and that is completely fine. The next one will feel easier. Before long, you may find yourself experimenting with different flowers, colors, sizes, and arrangements.
And once you get comfortable with the basic technique, you can start making paper flowers for gifts, home decor, parties, cards, bouquets, and so many other creative projects.
I love crafts like this because they remind me that you don’t always need a lot of supplies to make something beautiful.
Sometimes, all you need is a sheet of paper, a pair of scissors, a little patience, and the willingness to try.
And that simple piece of paper sitting on your table?
Give it a little time.
It might become a flower.