
Air Dry Clay Ideas That Look Too Pretty to Be Handmade.
If you have been looking for air dry clay ideas that are simple enough to make at home but still look like something you would pick up from a cute decor shop, you are in the right place. I have always loved crafts that do not require a long list of supplies or expensive, hard-to-find equipment, and that is one of the reasons I enjoy working with air dry clay so much.
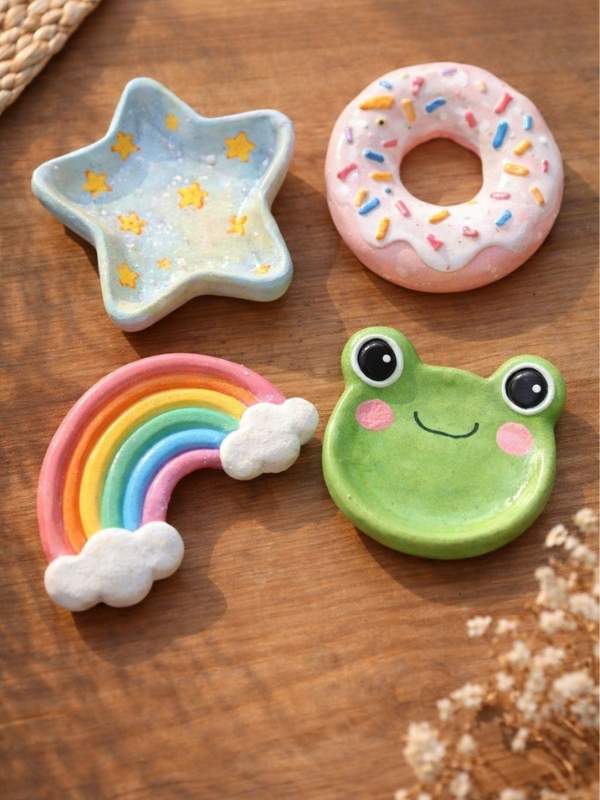
You can shape air dry clay with your hands, add little details using everyday tools, paint it in your favorite colors, and let it dry naturally without needing a kiln.
What I also love about air dry clay is how versatile it is. You can make something decorative, something useful, or simply create a little piece that makes your space feel more personal. And you do not have to be an expert at crafting to get started. I have a post on 9 simple clay ideas you wont believe are so easy to make. you can get more inspiration from it on clay ideas.
So, if you have some air dry clay sitting around and are wondering what to make with it, I have put together some simple ideas that are easy to try at home but look much more expensive and complicated than they actually are. Grab your clay, get creative, and let’s make something pretty.
What You Need for These Air Dry Clay Projects
You do not need a long list of supplies to get started. Most of these projects can be made with basic air dry clay and a few simple tools you probably already have at home.
You may need air dry clay, a rolling pin or smooth bottle, a craft knife, a small paintbrush, acrylic paint, a pencil or wooden skewer, sandpaper, a ruler, and a little water for smoothing the clay. You can also take inspiration from embroidery hoop wall art when working with air dry clay. Try pressing simple floral, leafy, or stitched looking patterns into the clay while it is still soft, then add a little paint to bring out the details once it dries.
Depending on the project, you may also need glue, ribbon, magnets, hair clips, hooks, wooden sticks, or other small accessories.
Before starting any project, check the instructions on your particular brand of air dry clay because drying times can vary.
10 Air Dry Clay Ideas That Look Too Pretty to Be Handmade.
1. Air Dry Clay Hair Clips
Plain hair clips can be transformed into cute handmade accessories with a few pieces of air dry clay. This is such a fun project if you want to create something that you can actually wear rather than another piece of home decor.
Start by shaping small pieces of clay into simple designs such as flowers, bows, hearts, stars, cherries, butterflies, or abstract shapes. Keep the pieces relatively thin so they are not too heavy when attached to a hair clip.
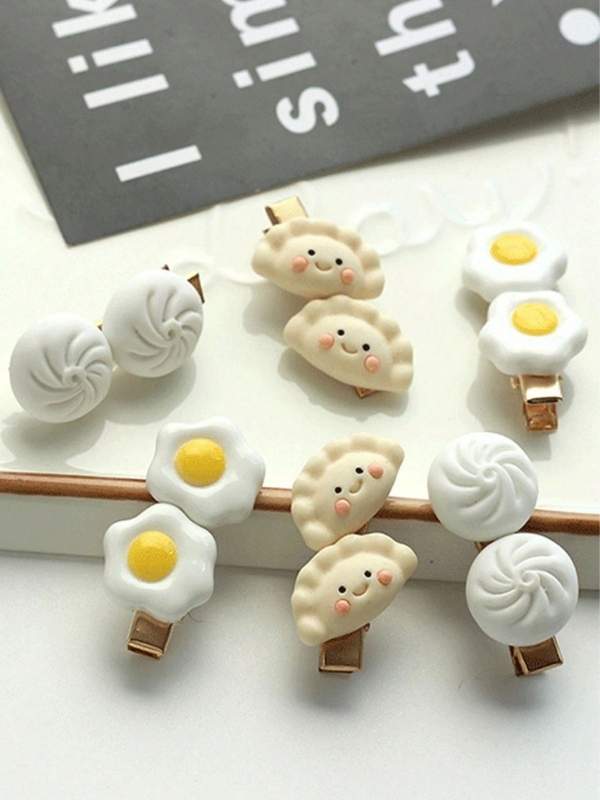
Once you are happy with the shape, allow the clay to dry completely. You can leave it in its natural color for a minimalist appearance or paint it in colors that match your wardrobe.
After the clay has completely dried, carefully attach the decoration to a plain hair clip using a suitable strong adhesive. Give the glue enough time to set before wearing the clip.
You can make several different designs so you have a little collection of handmade hair accessories. Pastel flowers, tiny bows, and colorful fruit shapes would all look adorable.
2. Air Dry Clay Photo Holders
Turn your favorite photographs, notes, or little inspirational cards into part of your decor with a handmade clay photo holder.
For this project, you can create a small clay base in any shape you like. It could be a simple rounded stone shape, a flower, a cloud, a heart, or even a little mushroom.
While the clay is still soft, make a narrow slit at the top using a craft knife or another thin tool. The slit should be deep enough to hold a photograph or card securely once the clay has dried.
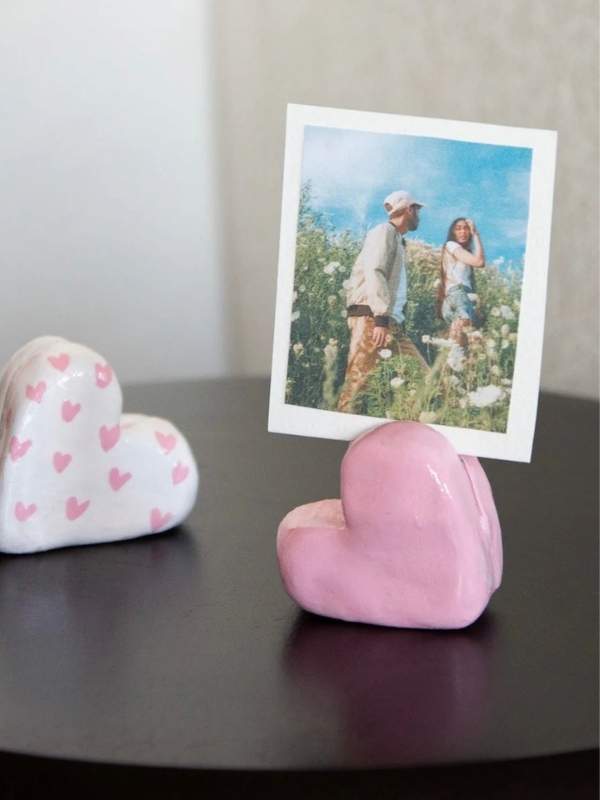
After the holder has dried completely, decorate it with paint or leave it natural. You can also add little patterns, dots, flowers, or your initials.
Place a favorite photograph inside and display it on your desk, bedside table, bookshelf, or dresser.
3. DIY Clay Drawer Knobs
If you want a project that can actually transform your furniture, try making decorative drawer knobs from air dry clay.
You can shape the clay into flowers, bows, mushrooms, shells, fruits, or simple rounded designs. The shape you choose will depend on the style of furniture you want to decorate.
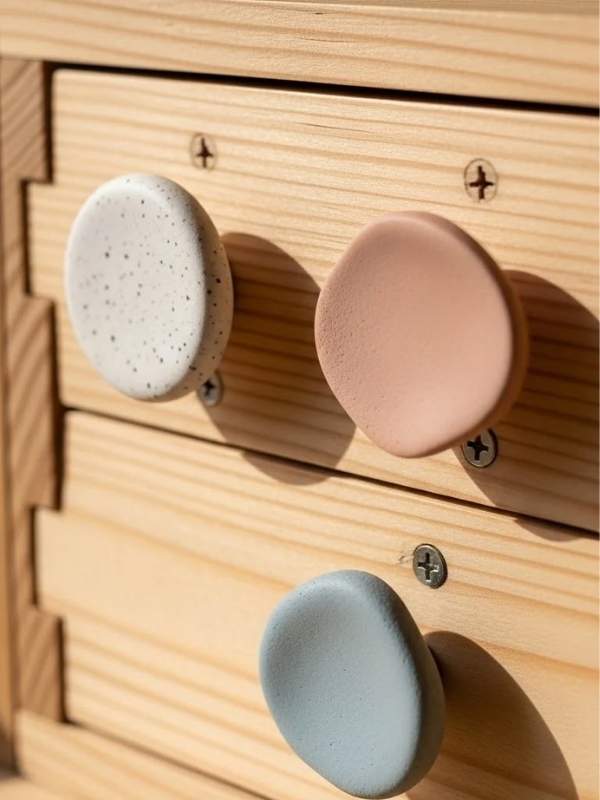
Make sure your clay design is thick enough to be durable, and create the appropriate opening for the hardware before the clay dries. You will need to make sure the finished piece can be securely attached to the drawer.
Once the clay is completely dry, paint it in your chosen color. You could create soft floral knobs for a bedroom dresser or colorful fruit-inspired knobs for a more playful piece of furniture.
These handmade knobs are a great way to give an old cabinet, bedside table, or dresser a completely different appearance without replacing the entire piece.
4. Air Dry Clay Wall Hooks
Turn a practical wall hook into a decorative feature by creating a beautiful clay backing or decorative shape around it.
You can make flowers, clouds, bows, leaves, arches, or abstract shapes from air dry clay. Once your clay design is dry, attach the appropriate hook hardware securely.
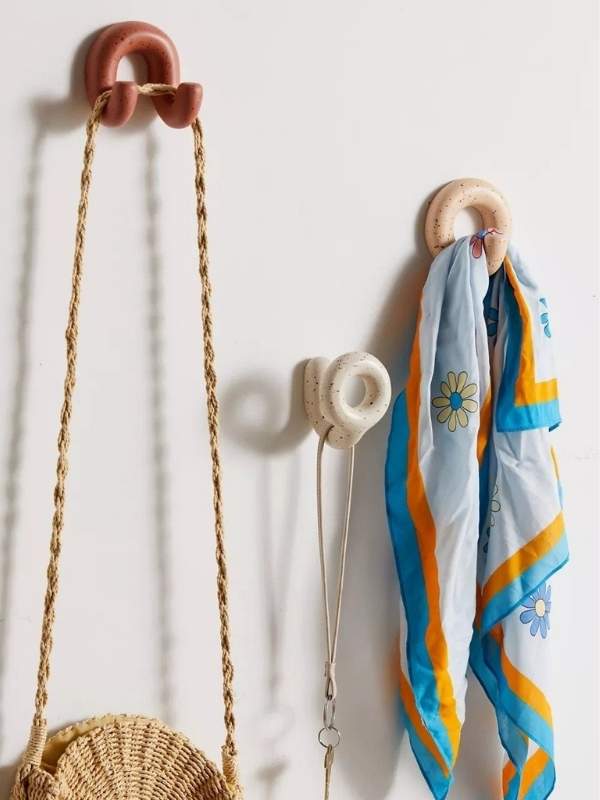
For a more minimalist appearance, paint the clay in one neutral color. If you want something more playful, use different colors for the clay and decorative details.
These clay wall hooks can be used in bedrooms, entryways, craft rooms, or bathrooms for hanging lightweight items such as scarves, accessories, or small bags.
The important thing is to make sure the finished hook is securely mounted and that you only use it for an appropriate amount of weight.
5. Air Dry Clay Jewelry Tree
Instead of keeping your jewelry hidden inside a drawer, make a small decorative jewelry tree that doubles as room decor.
Begin by creating a sturdy clay base. Then shape several thin clay branches or a small tree trunk and attach them carefully to the base while the clay is still workable.
You can create a simple branch shape or make it more whimsical with tiny leaves, flowers, or other decorative details.
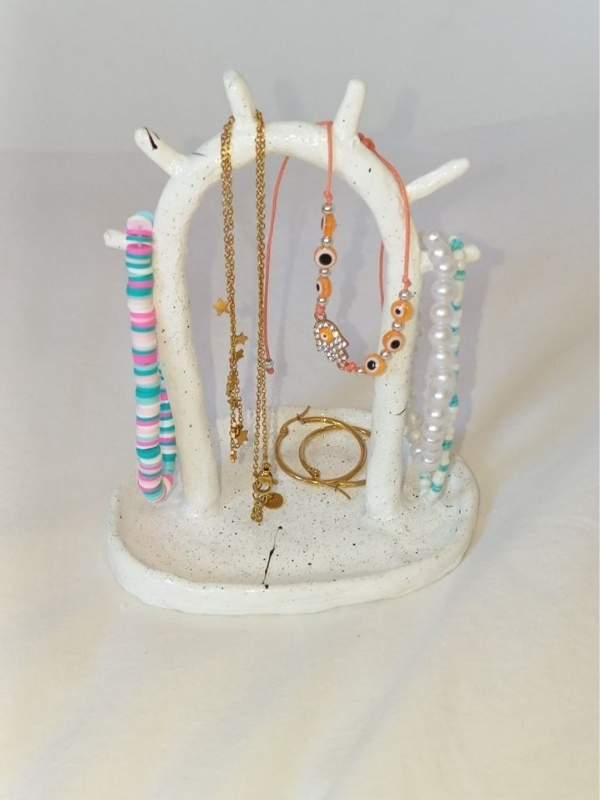
Once everything is completely dry, paint the jewelry tree in a color that complements your room. Neutral white, cream, brown, or soft pastel shades can create a delicate appearance.
The branches can then be used to hang lightweight earrings, necklaces, bracelets, or other small accessories.
This project is particularly beautiful when placed on a vanity or bedroom dresser because it looks like a decorative sculpture even when no jewelry is hanging from it.
6. Air Dry Clay Garland
If you are looking for a decorative project, an air dry clay garland is a beautiful way to add a handmade touch to your space.
Start by deciding on the shapes you want to use. You could make stars, moons, hearts, flowers, bows, leaves, clouds, or a combination of several shapes.
Roll your clay out evenly and cut out the shapes using small cookie cutters or a craft knife. Before the pieces dry, make a small hole near the top of each shape so you can thread them later.
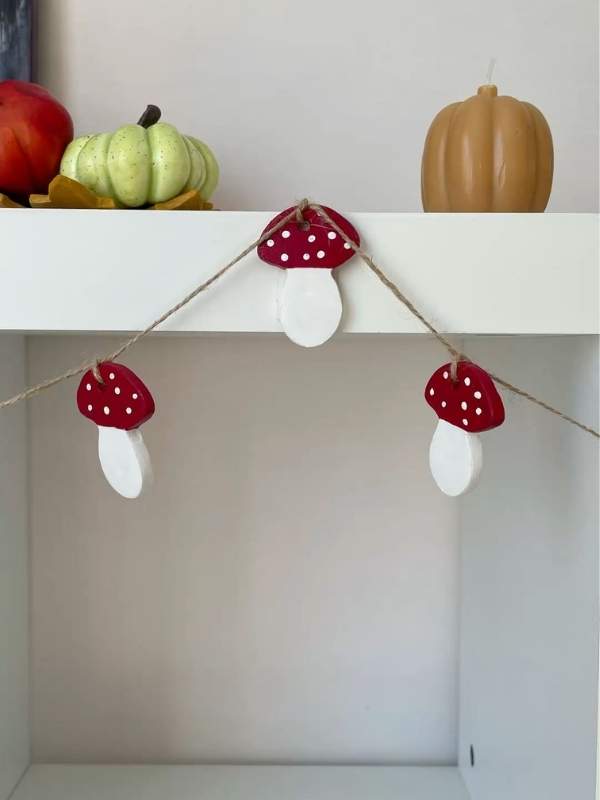
Allow all the pieces to dry completely before painting them. You can use one color throughout the garland or create a combination of colors that works with your decor.
Once everything is dry, thread the pieces onto twine, ribbon, or cord, leaving a little space between each shape.
Hang your finished garland above a desk, on a bedroom wall, across a shelf, or anywhere that needs a small decorative touch.
7. Dry Clay Fairy Garden Accessories
If you love miniature crafts, this project is going to be especially fun. Air dry clay is perfect for creating tiny accessories for a fairy garden or miniature display.
You can make tiny doors, mushrooms, benches, signs, stepping stones, flower pots, windows, or miniature houses. You do not have to make them perfectly realistic. In fact, slightly imperfect handmade details can make the miniature garden look even more charming.
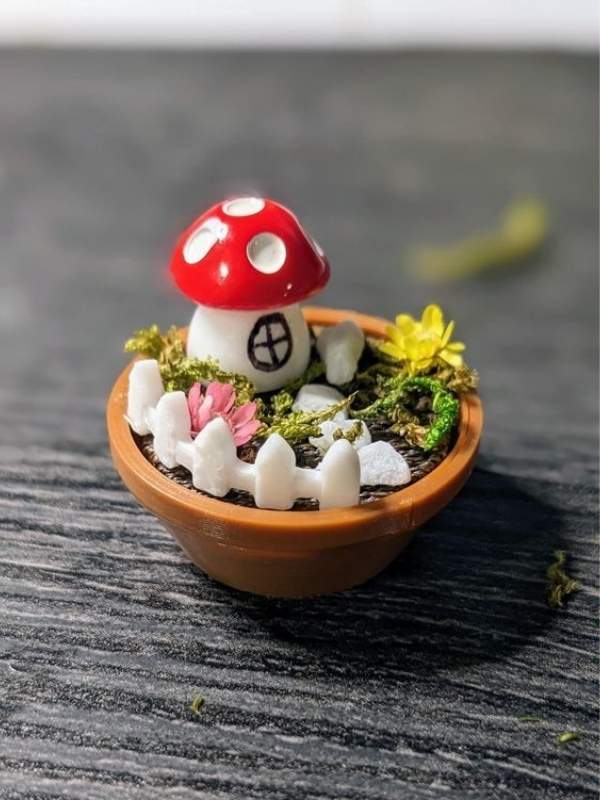
Use small tools such as a toothpick or wooden skewer to add details to the clay. You can create tiny lines on doors, little windows on houses, or patterns on miniature mushrooms.
Once everything has dried, use acrylic paint to bring your miniature pieces to life.
You can arrange your finished creations around plants or place them together in a small decorative scene. This is also a lovely project to do with children, although younger children should be supervised when using tools and craft materials.
8. Dry Clay Incense Stick Holder
An incense holder does not have to be plain. You can create one with an artistic shape that becomes part of your home decor.
Roll your clay into a long, narrow shape or create a small decorative base. Make a small hole at one end that is deep enough to hold an incense stick securely.
You can decorate the surface with flowers, stars, leaves, dots, lines, or other patterns while the clay is still soft.
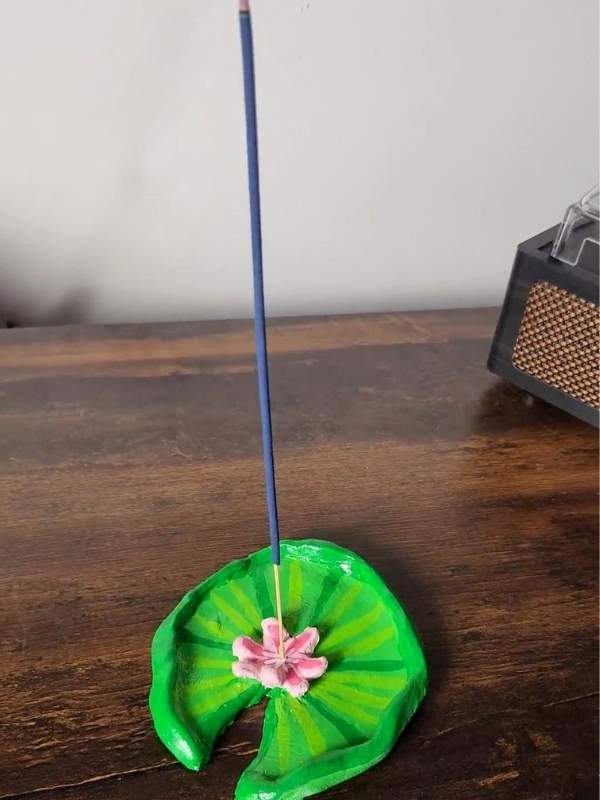
After it has dried completely, you can leave it in its natural color or paint it. Neutral shades can create a minimalist appearance, while colorful designs can make the holder feel more playful.
When using the finished holder, make sure it is placed on a stable, heat-resistant surface and never leave burning incense unattended.
9. Dry Clay Plant Pot Feet
Give your plant pots a little upgrade by making decorative feet for them using air dry clay.
You can create simple rounded feet, small arches, flowers, or other shapes that allow the pot to sit slightly above the surface. The idea is to create decorative supports that add height and personality to an ordinary plant pot.
Make sure the clay pieces are large and sturdy enough to support the pot you intend to use them with. It is also important to allow them to dry completely before placing any weight on them.
You can paint the feet in a color that matches your planter or create a contrasting shade. These little details can make a simple plant display look much more intentional and styled.
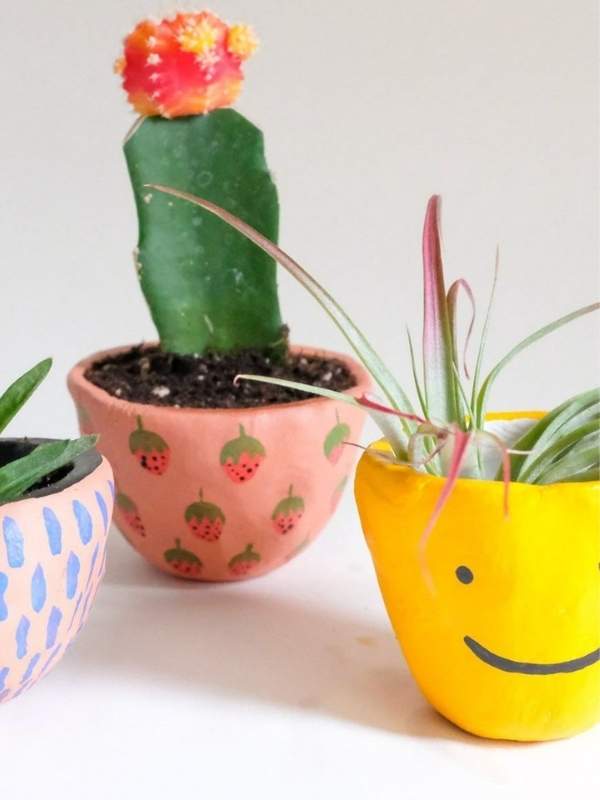
Also If you have a few plain Terracotta Pots sitting around, air dry clay can give them a completely different look, you can also shape small flowers, leaves, hearts, bows, or little fruit designs and attach them around the outside of the pot once the clay has dried. I especially like the idea of keeping the base pot simple and adding just a few raised clay details around the rim.
10. Air Dry Clay Miniature Food Decor
One of the most fun things you can make with air dry clay is miniature food. Tiny cakes, croissants, fruits, bread, cookies, ice cream, and other food shapes can be turned into adorable decorative pieces.
Start with a small amount of clay and shape it into the food you want to create. Use a toothpick or another small tool to add realistic details and textures.
For example, you can create tiny lines on a croissant, small seeds on a strawberry, or little layers on a miniature cake.
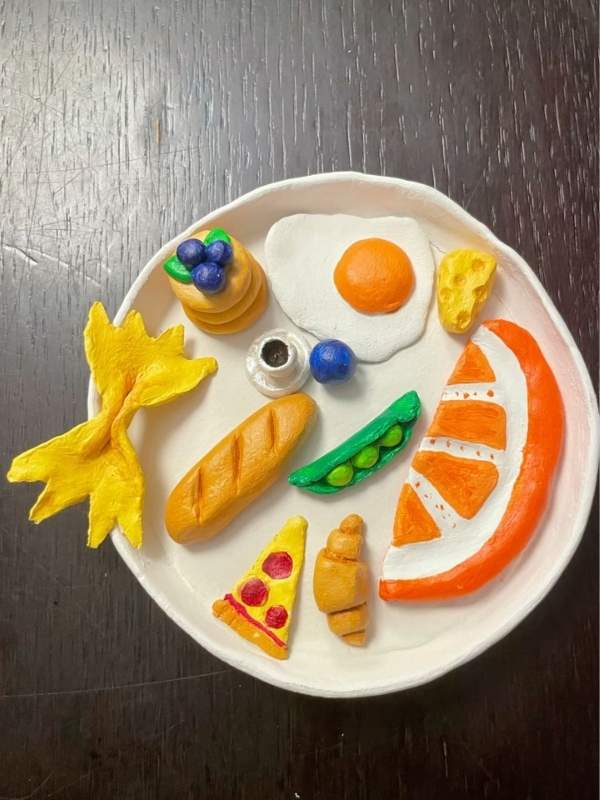
Once the pieces have dried, paint them carefully using acrylic paint. Using several shades can help create more depth and make the miniature pieces look surprisingly realistic.
You can display your miniature food pieces on a small shelf, inside a miniature kitchen scene, or use them as decorative pieces for craft projects. Just remember that these are decorative items and should not be treated as actual food.
Tips for Making Your Air Dry Clay Ideas Look More Expensive
The difference between a basic clay project and one that looks beautifully finished often comes down to the small details.
Take your time smoothing the surface of the clay before it dries. If you notice cracks or rough edges, gently smooth them with your fingers and a tiny amount of water while the clay is still workable.
Painting can also completely transform your project. Instead of covering everything with one thick layer of paint, consider using thin coats and allowing each layer to dry before adding another.
You can also add small details such as dots, lines, flowers, patterns, or metallic accents to make a simple piece look more decorative.
Another important tip is to let your clay dry completely before painting or handling it heavily. Trying to rush the drying process can cause cracks or damage the shape.
Frequently Asked Questions Air Dry Clay Ideas
How Long Does Dry Clay Take to Dry?
The drying time depends on the thickness of your project, the type of clay you are using, and the conditions in your home. Small and thin pieces may dry relatively quickly, while thicker projects can take longer.
Always follow the drying instructions provided by the manufacturer of your clay. It is better to give your project extra drying time than to start painting or assembling it while the inside is still soft.
Can Beginners Make These Dry Clay Projects?
Absolutely. One of the reasons air dry clay is so popular is that you can start with very simple shapes and gradually develop your skills.
If you are a complete beginner, start with projects such as the photo holder, clay garland, or miniature food. Once you become more comfortable shaping and smoothing the clay, you can move on to more detailed projects.
Do not worry if your first project is not perfectly symmetrical. Handmade crafts are supposed to have a little personality, and small imperfections can make them feel more special.
Do you need to bake air dry clay?
No. Air dry clay is designed to harden naturally when exposed to air, so you do not need an oven or kiln. The exact drying time depends on the thickness of your project and the brand of clay you are using.
Can you paint air dry clay after it dries?
Yes. Once your project is completely dry, you can paint it with acrylic paint. For the best result, apply thin layers and allow each layer to dry before adding another. You can also add a suitable sealer afterward if you want extra protection.
How do you prevent air dry clay from cracking?
Avoid making your projects extremely thick, smooth the clay carefully before leaving it to dry, and follow the manufacturer’s drying instructions. Letting the clay dry gradually and completely can also help reduce cracking.
Final Thoughts On Air dry clay Ideas
Air dry clay is such a fun material to experiment with, especially when you want to make something that looks unique without needing complicated equipment.
From decorative hair clips and photo holders to drawer knobs, wall hooks, miniature fairy garden accessories, and tiny food sculptures, there are so many ways to turn a simple piece of clay into something beautiful.
The thing I Love Mostly about this, is the fact that you can customize almost every project. Change the colors, experiment with different shapes, add your own patterns, or combine several ideas to create something completely original.
So, the next time you have some air dry clay sitting around, do not just make the usual tray or bowl. Try one of these pretty and creative ideas and see what you can come up with.