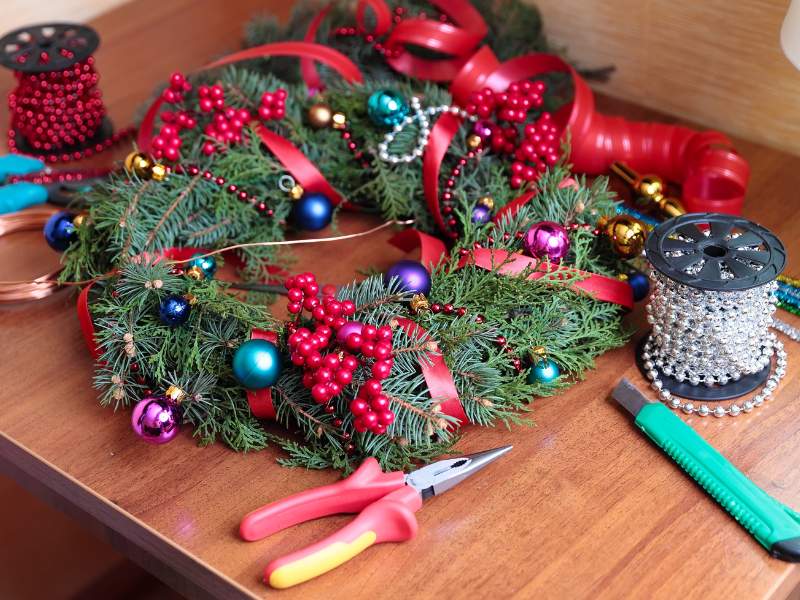

How to Make Cheap DIY Christmas Tree Decorations on a Budget: 20 Beautiful Ideas.
You don’t need to spend hundreds of dollars to have a Christmas tree that looks beautifully decorated. In fact, some of the prettiest Christmas ornaments can be made with inexpensive materials you may already have at home.
Think about it: a little twine can become a charming rustic star, a few popsicle sticks can become a miniature Christmas tree, and an ordinary pinecone can be transformed into an elegant winter ornament. With the right colors, textures, and finishing touches, inexpensive supplies can look surprisingly beautiful on your Christmas tree.

If you’re decorating on a tight budget this year, don’t worry about having to choose between a beautiful tree and saving money. These cheap DIY Christmas tree decorations are designed to be affordable, simple enough for beginners, and attractive enough to give your tree a handmade but polished appearance.
Also If you love farmhouse Christmas decor, rustic ornaments, neutral Christmas decorations, or traditional red and green, you’ll find plenty of ideas to try below. Go through this guide to see 10 Simple christmas crafts for kids to make this holiday
How to Make Cheap DIY Christmas Tree Decorations Look Expensive
Before getting into the projects, here’s an important secret: the materials don’t have to be expensive for the finished decoration to look expensive.
The way you combine your materials makes a huge difference.
Choose two or three colors for your ornaments instead of using every color at once. Red and gold, white and silver, green and gold, or natural brown with cream and red can all create a coordinated appearance.
It also helps to combine different textures. Try pairing:
- Jute twine with velvet ribbon
- Wood with greenery
- White paint with natural pinecones
- Kraft paper with gold accents
- Cinnamon sticks with red ribbon
- Fabric with wooden beads
Most importantly, take your time with the finishing touches. Straight cuts, neatly secured ribbons, clean paint, and carefully placed embellishments can make a simple DIY ornament look much more polished.
20 Cheap DIY Christmas Tree Decorations That Look Beautiful
1. Rustic Twine Christmas Stars
If you love rustic or farmhouse Christmas decorations, these twine stars are a great place to start.
Materials
- Thick cardboard
- Jute twine
- Hot glue
- Scissors
- Small ribbon
- Small faux greenery or a tiny pine sprig
- Wooden beads

How to Make It
Start by drawing a star shape on a piece of sturdy cardboard. Cut it out carefully, making sure the edges are reasonably smooth.
Place a small amount of hot glue on the back of the star and attach the end of your twine. Begin wrapping the twine around the cardboard star, keeping each section close together so the cardboard doesn’t show through.
Continue wrapping until the entire star is covered.
When you reach the end, secure the twine with hot glue and trim away the excess.
For a more finished appearance, glue a small bow, wooden bead, or piece of faux greenery to the center.
Attach a loop of twine to the top.
How It Should Look
The finished ornament should have a warm, natural appearance with the texture of the twine creating most of the visual interest. A small red or cream bow can give it a beautiful Christmas touch.
Tip: Use thicker jute twine rather than very thin string. It covers the cardboard faster and gives the star a more substantial appearance.
2. Elegant Dried Orange and Cinnamon Ornaments
Dried oranges and cinnamon sticks are perfect if you want your Christmas tree to have a natural, cozy appearance.
Materials
- Fresh oranges
- Cinnamon sticks
- Jute twine
- Small pieces of greenery
- Ribbon
- Scissors

How to Make It
Slice an orange into thin, even pieces. Place the slices on a baking tray and dry them slowly in the oven at a low temperature until they are completely dry.
Allow them to cool before making the ornaments.
Take one dried orange slice and attach a cinnamon stick and a small piece of greenery using twine or a small amount of hot glue.
Tie a loop of twine around the top for hanging.
How It Should Look
The orange’s warm color, cinnamon’s natural brown tone, and green foliage create a beautiful rustic Christmas combination.
These look particularly pretty on trees decorated with warm white lights.
Important: Make sure the orange slices are completely dry before storing them to help prevent moisture-related problems.
3. Mini Popsicle Stick Christmas Trees
Popsicle sticks can become adorable miniature Christmas trees with just a few inexpensive supplies.
Materials
- Popsicle sticks
- Green paint
- Hot glue
- Small beads
- Ribbon
- Wooden star or paper star
- Small piece of cardboard

How to Make It
Paint three popsicle sticks green and allow them to dry.
Arrange them into a triangle and glue the ends together.
Cut a small piece of cardboard or popsicle stick for the tree trunk and glue it underneath.
Now decorate the tree with tiny beads, sequins, or small buttons.
Place a small star at the top and add a ribbon or twine loop to the back.
How It Should Look
The finished ornament should resemble a tiny decorated Christmas tree.
For a more sophisticated look, don’t cover the entire tree with decorations. Use a few small embellishments and leave some green space visible.
4. Salt Dough Christmas Star Ornaments
Salt dough ornaments are inexpensive and can look beautiful when properly decorated.
Materials
- 1 cup flour
- 1/2 cup salt
- Water
- Rolling pin
- Christmas cookie cutter
- Straw or skewer
- Paint
- Ribbon
How to Make It
Combine the flour and salt in a bowl. Slowly add water while mixing until you have a firm dough.
Roll the dough out on a lightly floured surface.
Use a star-shaped cookie cutter to cut out your ornaments.
Use a straw to make a small hole near the top of each star.
Bake the ornaments at a low temperature until they are completely hard, or allow them to dry thoroughly depending on the method you prefer.
Once cool, paint them.
You can use white paint for a snowy appearance, metallic paint for an elegant look, or traditional Christmas colors.
Allow the paint to dry before adding ribbon.
How It Should Look
For a beautiful finish, try painting the entire star white and adding tiny gold details around the edges.
Avoid covering the entire ornament in chunky glitter. A few carefully placed accents usually look more polished.
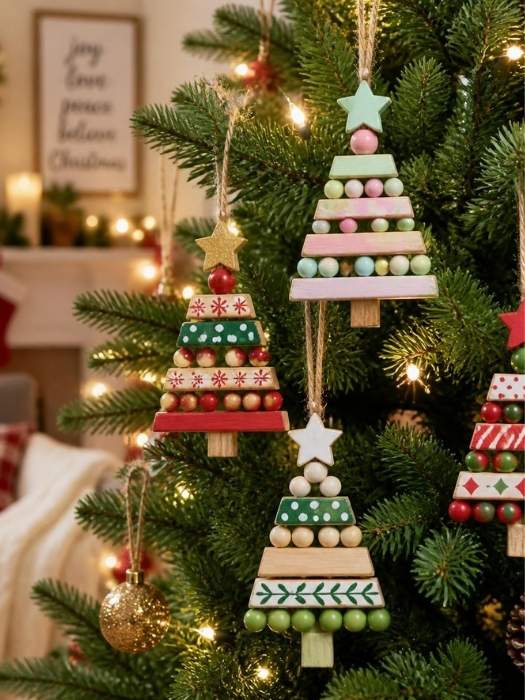
5. Wooden Bead Christmas Tree Ornaments
Wooden beads can instantly give handmade Christmas decorations a simple, natural appearance.
Materials
- Wooden beads
- Green felt
- Twine
- Small wooden star
- Scissors
- Glue
How to Make It
Cut several small triangular pieces from green felt.
Thread wooden beads onto a piece of twine, placing a felt triangle between selected beads.
Finish the ornament with a small wooden star.
Tie the top of the twine into a loop.
How It Should Look
The combination of natural wood and soft green felt creates a minimalist Christmas ornament that works particularly well with neutral or Scandinavian-style Christmas trees.
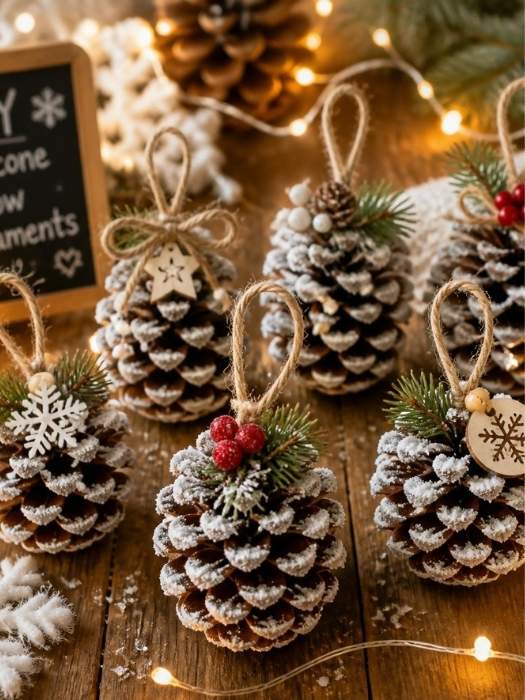
6. Pinecone Snow-Covered Ornaments
Pinecones are wonderful for creating inexpensive Christmas decorations that look natural and sophisticated.
Materials
- Pinecones
- White acrylic paint
- Small paintbrush
- Jute twine
- Ribbon
- Small faux berries
How to Make It
Clean your pinecones and make sure they are completely dry.
Use a small brush to lightly apply white paint to the tips of the pinecone scales.
Don’t completely cover the pinecone. The goal is to create the appearance of fresh snow.
Once dry, add a small ribbon bow or a few faux berries.
Attach twine to the top for hanging.
How It Should Look
The white tips should look like a light dusting of snow rather than a completely white pinecone.
This gives the ornament a much more natural appearance.
7. DIY Velvet Ribbon Bows
Sometimes you don’t need complicated ornaments to make a Christmas tree look beautiful. Ribbon bows can fill empty spaces while adding softness and color.
Materials
- Velvet ribbon
- Scissors
- Floral wire or thin craft wire

How to Make It
Cut a length of velvet ribbon and form it into a simple bow.
Secure the middle using floral wire.
Fluff the loops and adjust the tails until the bow looks balanced.
Attach the bow directly to a tree branch.
How It Should Look
Use the same ribbon throughout the tree rather than mixing too many patterns.
Deep red velvet gives a traditional and luxurious appearance, while cream or champagne-colored ribbon creates a softer neutral look.
8. Paper Honeycomb Christmas Ornaments
Paper can create surprisingly beautiful Christmas decorations when folded and layered correctly.
Materials
- Colored cardstock
- Pencil
- Scissors
- Glue
- String
- Small beads

How to Make It
Cut several identical circles from cardstock.
Fold each circle in half.
Glue the folded pieces together along their edges until you have a rounded ornament.
Open the layers carefully and connect the final edges.
Add a string loop at the top.
How It Should Look
Use several shades of the same color for a more sophisticated appearance.
For example, different shades of white and cream can create beautiful neutral ornaments.
9. DIY Fabric Christmas Tree Ornaments
Fabric scraps can be turned into soft ornaments that add texture to your tree.
Materials
- Christmas fabric scraps
- Scissors
- Cotton stuffing
- Needle and thread or fabric glue
- Ribbon
- Buttons

How to Make It
Draw a simple Christmas tree, star, or heart shape on paper and use it as a template.
Place the template on your fabric and cut out two matching pieces.
Glue or sew the pieces together, leaving a small opening.
Add a little stuffing and close the opening.
Decorate the front with a small button or ribbon.
Add a hanging loop.
How It Should Look
Choose fabric with small, simple patterns rather than very busy prints.
This helps the finished ornament look intentional rather than cluttered.
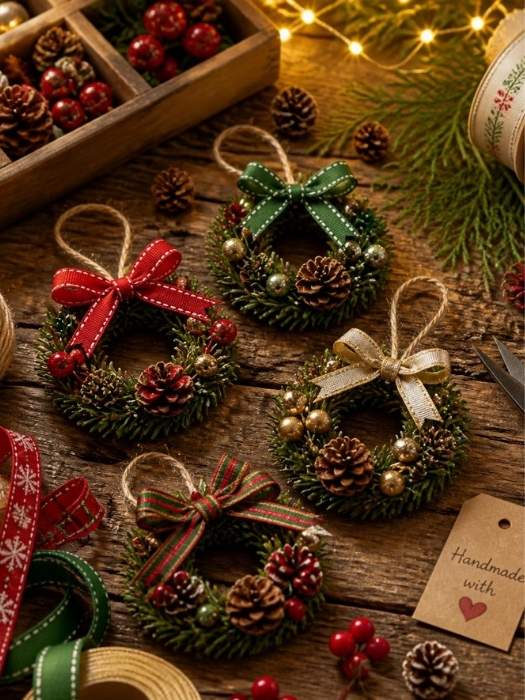
10. Mini Christmas Wreath Ornaments
Miniature wreaths can add a charming traditional touch to your Christmas tree.
Materials
- Cardboard
- Green yarn
- Red ribbon
- Small faux berries
- Scissors
- Glue
How to Make It
Cut a small circle from cardboard.
Cut out the center to create a ring.
Wrap green yarn around the entire ring until the cardboard is no longer visible.
Add a small red bow and a few faux berries.
Attach a loop of ribbon to the top.
How It Should Look
The green yarn creates the appearance of a miniature wreath while the red bow adds a traditional Christmas accent.
Make several small wreaths and spread them evenly throughout the tree.
11. Rustic Paper Gift Box Ornaments
Mini gift boxes are a fun way to add color to your tree.
Materials
- Small cardboard boxes
- Leftover wrapping paper
- Ribbon
- Glue
- Twine

How to Make It
Wrap the small boxes just as you would wrap a real Christmas present.
Secure the wrapping paper neatly.
Add a tiny ribbon bow.
Attach a loop of twine to the top or around the box so it can hang from your Christmas tree.
How It Should Look
Use leftover wrapping paper in colors that coordinate with your tree.
You can even make several tiny presents using different patterns while keeping the same ribbon color.
12. Cinnamon Stick Christmas Trees
Cinnamon sticks can become beautiful miniature Christmas trees.
Materials
- Cinnamon sticks
- Twine
- Small faux greenery
- Red ribbon
- Hot glue
- Small wooden star

How to Make It
Use one cinnamon stick as the trunk.
Attach small pieces of greenery or short cinnamon pieces horizontally, making them progressively shorter toward the top.
Secure each piece with hot glue.
Finish with a tiny star and a twine loop.
How It Should Look
The natural brown color of the cinnamon creates a warm rustic appearance.
This decoration works beautifully with dried orange slices and wooden ornaments.
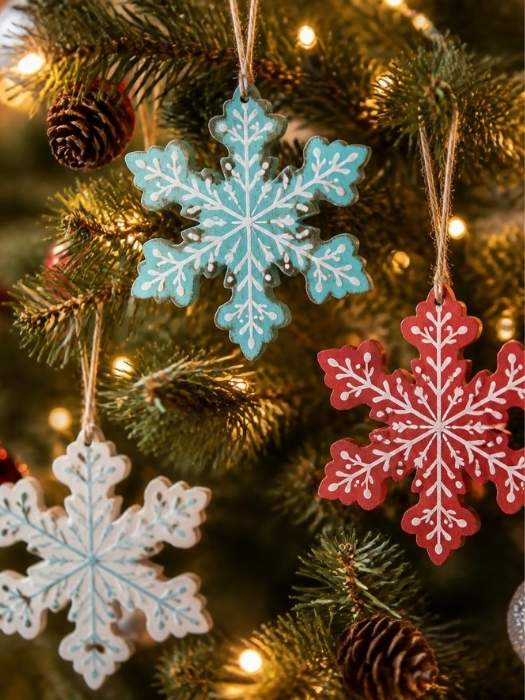
13. DIY Wooden Snowflake Ornaments
You don’t need expensive wooden ornaments from a craft store to get a natural Christmas look.
Materials
- Popsicle sticks
- White paint
- Glue
- Twine
- Small beads
How to Make It
Paint several popsicle sticks white.
Arrange them into a snowflake pattern and glue them at the center.
Once dry, add a few small beads to the middle.
Attach twine to one end.
How It Should Look
Keep the design simple. A white snowflake with a few silver or clear beads can look much more elegant than one covered in excessive decorations.
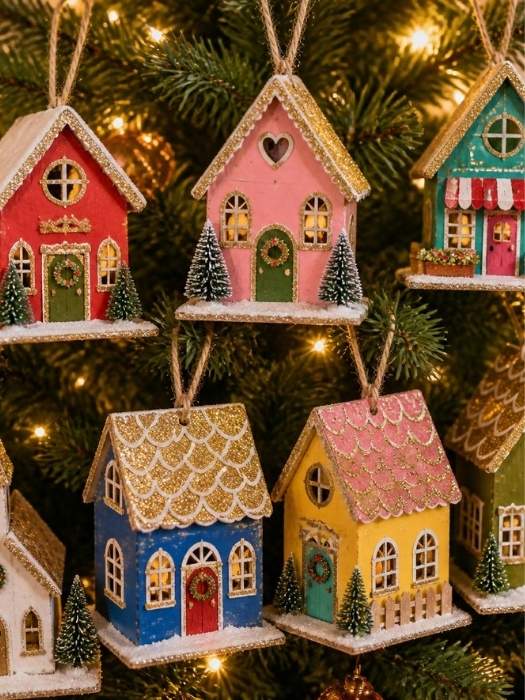
14. Cardboard Christmas Village Ornaments
This project is especially beautiful if you love cozy Christmas scenes.
Materials
- Thin cardboard
- White paint
- Pencil
- Craft knife
- Glue
- Twine
How to Make It
Draw simple houses on cardboard.
Cut them out carefully and paint them white.
Add tiny windows, doors, and roof details using a fine marker.
Glue several houses together to create a small Christmas village.
Add a twine loop at the top.
How It Should Look
The finished village should have a simple snowy appearance.
You can make several houses in slightly different shapes and sizes to create a miniature neighborhood across your tree.
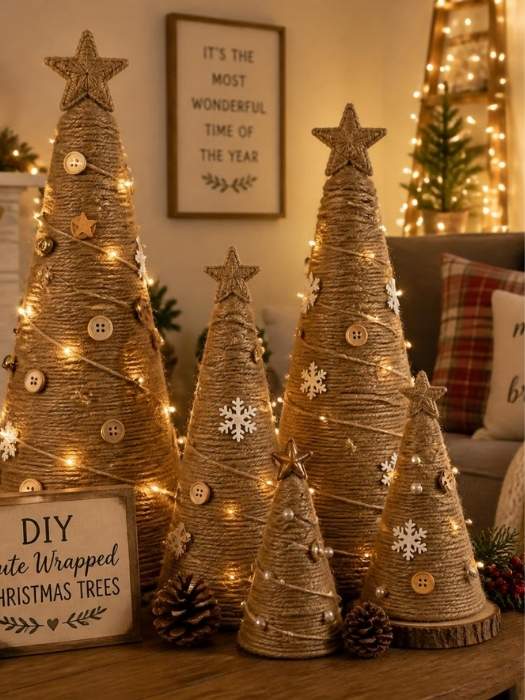
15. DIY Jute Wrapped Christmas Trees
Jute is inexpensive and gives Christmas crafts a lovely rustic texture.
Materials
- Cardboard
- Jute twine
- Glue
- Wooden beads
- Ribbon
How to Make It
Cut a triangle from cardboard.
Apply a small amount of glue and begin wrapping jute around the triangle.
Continue until the entire surface is covered.
Add a wooden bead or small bow to the front.
Attach twine to the top.
How It Should Look
The neutral brown color makes these ornaments perfect for a farmhouse or rustic Christmas tree.
For a more finished appearance, keep the jute tightly wrapped and avoid leaving large gaps.
16. DIY Paper Angel Ornaments
Paper angels are inexpensive but can look surprisingly delicate on a Christmas tree.
Materials
- White cardstock
- Gold marker
- Scissors
- Glue
- Ribbon

How to Make It
Cut a simple angel body from cardstock.
Fold the paper to create wings and a slightly dimensional dress.
Draw a small face and add gold details to the wings.
Glue a ribbon loop to the back.
How It Should Look
White cardstock with subtle gold accents creates a clean and elegant appearance.
You can make several angels and place them around the tree for a soft Christmas theme.
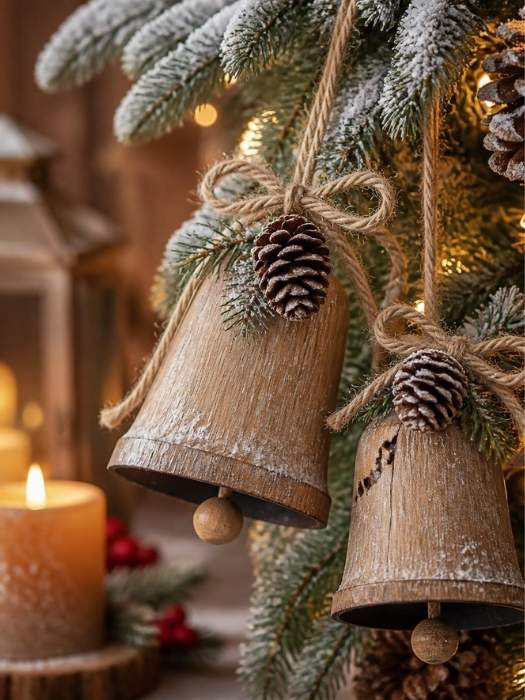
17. DIY Rustic Christmas Bells
You can make inexpensive bell-style ornaments using small lightweight craft materials.
Materials
- Small paper cups
- Metallic paint
- Ribbon
- Twine
- Small beads
How to Make It
Paint the outside of the paper cup in gold, silver, or another Christmas color.
Allow it to dry completely.
Attach a small bead beneath the opening using twine.
Add a ribbon bow near the top.
Create a hanging loop.
How It Should Look
A metallic finish instantly makes this simple project look more festive.
Use several matching bells rather than mixing too many colors.
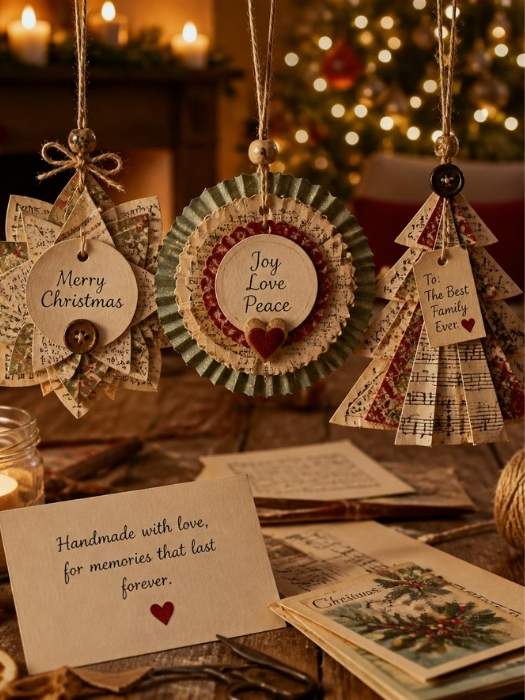
18. DIY Recycled Christmas Card Ornaments
Old Christmas cards can become beautiful keepsake ornaments.
Materials
- Old Christmas cards
- Cardboard
- Scissors
- Glue
- Ribbon
- Hole punch
How to Make It
Choose attractive sections of your old Christmas cards.
Cut them into circles, stars, trees, or other Christmas shapes.
Glue the pieces onto cardboard to make them sturdier.
Punch a small hole at the top and attach ribbon.
How It Should Look
Choose the most decorative sections of your cards and frame them with a simple border.
This makes the ornaments look more intentional and gives old cards a second life.
19. DIY Snowy Branch Ornaments
If you want something simple and natural, small branches can make beautiful Christmas decorations.
Materials
- Small dry branches
- White paint
- Twine
- Small ribbon
- Faux berries

How to Make It
Collect small dry branches that are clean and suitable for crafting.
Paint the tips lightly with white paint to create a snowy appearance.
Tie several small branches together.
Add a tiny ribbon bow and a few faux berries.
Attach twine for hanging.
How It Should Look
Keep the branches natural rather than covering them completely in paint.
The combination of brown wood, white tips, and red berries creates a beautiful winter-inspired ornament.
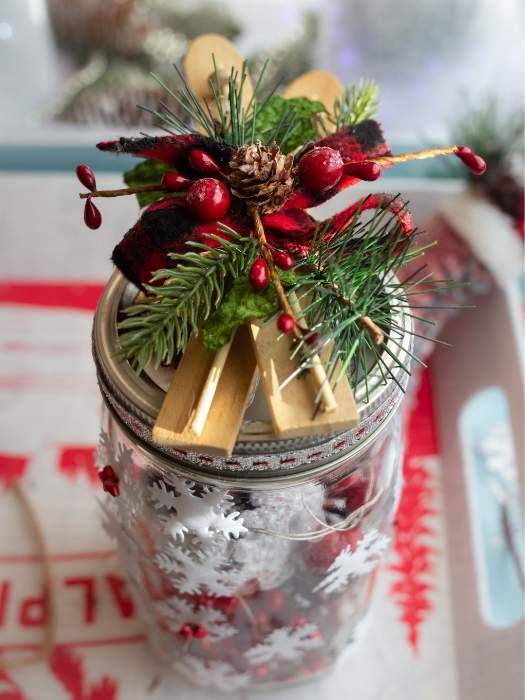
20. DIY Christmas Tree Ornament Using a Mason Jar Lid
Don’t throw away unused mason jar lids. They can become simple framed Christmas ornaments.
Materials
- Mason jar lid
- Christmas scrapbook paper or fabric
- Cardboard
- Ribbon
- Glue
- Small Christmas embellishments
How to Make It
Place the lid over your chosen paper or fabric and trace around it.
Cut the material to fit inside the lid.
Attach it securely with glue.
Add a small Christmas embellishment such as a tiny tree, star, snowflake, or bow.
Finish with ribbon around the edge and add a hanging loop.
How It Should Look
Think of the lid as a miniature Christmas picture frame.
A simple winter scene inside the frame can make this inexpensive ornament look much more decorative.
How to Choose the Best Color Scheme for Your DIY Christmas Tree
One of the easiest ways to make inexpensive ornaments look expensive is to use a consistent color palette.
Here are a few combinations you can try:
Traditional Christmas
Use:
- Red
- Green
- Gold
- Cream
This combination creates a classic and cheerful Christmas tree.
Rustic Christmas
Use:
- Brown
- Cream
- Green
- Burgundy
Add materials such as jute, pinecones, wood, and dried oranges.
Elegant Christmas
Use:
- White
- Gold
- Champagne
- Cream
Keep the decorations simple and avoid too many different patterns.
Winter Wonderland
Use:
- White
- Silver
- Pale blue
Add snowflakes, stars, white-painted pinecones, and soft ribbons.
How to Make Cheap DIY Christmas Tree Decorations Look More Expensive
If you want your DIY Christmas tree decorations to have a polished appearance, these little details matter.
Use fewer colors. A limited color palette makes different handmade ornaments look like they belong together.
Repeat materials. If you use jute twine on one ornament, use it on several others. The repetition creates consistency.
Add one beautiful finishing detail. A tiny bow, wooden bead, sprig of greenery, or metallic accent can completely change the appearance of a simple ornament.
Don’t overdecorate. Adding too much glitter, ribbon, or embellishment can make an ornament look messy. Sometimes simplicity is what makes a decoration look expensive.
Keep your edges neat. Carefully cut cardboard, properly secured ribbon, and clean paint make a noticeable difference.
How Many DIY Ornaments Do You Need for a Christmas Tree?
The number depends on the size and fullness of your tree.
Instead of trying to make dozens of completely different ornaments, choose about three to five designs and make several of each.
For example, you could make:
- 8 twine stars
- 6 dried orange ornaments
- 8 popsicle stick trees
- 6 pinecone ornaments
- 8 ribbon bows
This creates repetition while still giving your tree plenty of variety.
It can also be much cheaper than buying a completely new collection of ornaments.
Tips for Making Christmas Decorations With Kids
Many of these projects are suitable for children, but some materials and tools require adult supervision.
Children can help with projects such as paper snowflakes, popsicle stick trees, paper stars, and simple decorating.
Adults should handle hot glue guns, sharp craft knives, ovens, and other potentially dangerous tools.
You can also give children their own set of safe materials and let them choose the colors and decorations for their ornaments.
The goal doesn’t have to be perfection. Handmade ornaments are often more special because they show the personality of the person who made them.
How to Store Your Cheap DIY Christmas Tree Decorations
Once Christmas is over, don’t simply throw your handmade ornaments into a box.
Wrap fragile decorations individually in tissue paper or soft fabric.
Keep dried orange ornaments, paper crafts, and fabric decorations somewhere dry.
Place heavier ornaments at the bottom of the storage box and delicate ones toward the top.
Labeling your storage box can also make decorating next Christmas much easier.
Final Thoughts Cheap beautiful DIY Christmas tree decorations
Decorating your Christmas tree on a budget doesn’t mean settling for decorations that look cheap.
With a few inexpensive materials, thoughtful color choices, and careful finishing touches, you can create Cheap beautiful DIY Christmas tree decorations that look coordinated, festive, and personal.
The best part is that many of these projects can be customized to fit your home. Choose rustic twine and pinecones for a farmhouse tree, white and gold for an elegant look, or red and green for a traditional Christmas display.
Before buying another box of expensive ornaments, take a look around your home and see what you already have. A little cardboard, ribbon, yarn, paper, wood, or even an old Christmas card could be the beginning of your next favorite Christmas decoration.
So grab your craft supplies, put on your favorite Christmas music, and start creating. A beautiful Christmas tree doesn’t have to cost a lot—it just needs a little creativity.