
Halloween Paper Crafts for Kids That Are Almost Too Cute, you will want to make them too.
What if a few sheets of colorful paper could turn an ordinary afternoon into a little Halloween adventure? From silly ghosts and grinning pumpkins to spooky bats and friendly monsters, paper can become almost anything with a little cutting, folding, and creativity.
These Halloween paper crafts for kids are perfect for parents, teachers, and anyone looking for an easy Halloween activity that does not require expensive supplies. Most of the projects use simple materials you may already have at home, making them great for a fun afternoon of crafting. Also Look at Easy Halloween crafts for Preschoolers to make at home
If your child loves spooky Halloween decorations or prefers cute and silly characters, there is something here for everyone. So grab some paper, scissors, glue, and markers, and let’s make some Halloween magic.
Why Halloween Paper Crafts Are So Popular
Halloween paper crafts for kids have become a popular activity for kids because they are easy, affordable, and incredibly versatile. You don’t need to spend a lot of money on special craft supplies when a few sheets of construction paper, scissors, and glue can create pumpkins, ghosts, bats, spiders, witches, and other Halloween characters.
They are also popular because they are suitable for different ages and skill levels. Younger children can enjoy simple projects like paper ghosts and pumpkins, while older kids can try more detailed crafts such as paper masks, Halloween garlands, and character scenes.
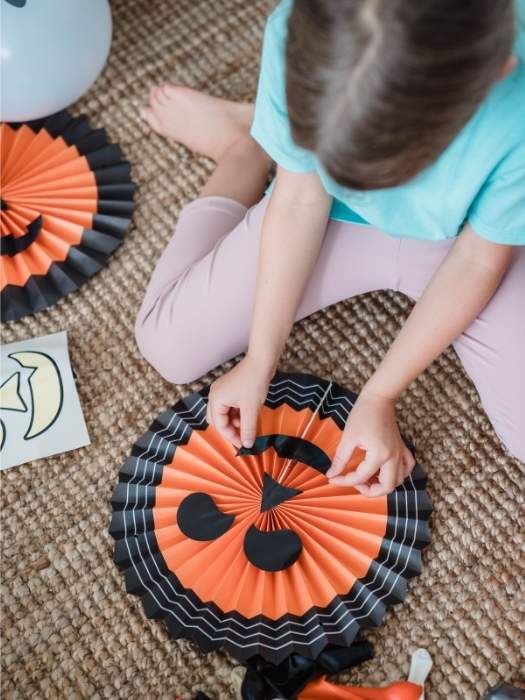
Another reason parents and teachers love Halloween paper crafts for kids is that they provide a screen-free activity. Instead of spending the afternoon watching TV or playing on a device, children can use their hands and imagination to create something they can proudly display.
Paper crafts are also perfect for Halloween parties, classroom activities, rainy afternoons, and weekend crafting sessions. Since paper is so easy to customize, children can change the colors, facial expressions, shapes, and decorations to make each project their own.
Most importantly, these crafts allow kids to participate in Halloween decorating instead of simply watching adults do it. A wall covered with homemade ghosts, bats, pumpkins, and monsters can make the holiday feel even more exciting.
1. Paper Plate Pumpkin Craft
A paper plate pumpkin is one of the easiest Halloween crafts to make. It creates a bright pumpkin decoration using just a few basic supplies.
Materials
- 1 white paper plate
- Orange paint or orange construction paper
- Black construction paper
- Green construction paper
- Glue
- Scissors
- Paintbrush, if using paint
- Pencil

Step-by-Step Instructions
Step 1: Place the paper plate on your work surface.
Step 2: Paint the entire front of the plate orange. Apply a second coat if necessary and allow it to dry completely.
Step 3: If you do not want to use paint, trace the paper plate onto orange construction paper, cut out the circle, and glue it onto the plate.
Step 4: Draw two triangular eyes, a triangular nose, and a mouth on black construction paper.
Step 5: Carefully cut out each facial feature.
Step 6: Arrange the eyes, nose, and mouth on the orange plate before gluing them down.
Step 7: Cut a small stem from green construction paper and glue it to the top of the pumpkin.
Step 8: Add green leaves or paper vines around the stem if you want more decoration.
Your finished pumpkin can be displayed on a refrigerator, wall, classroom board, or bedroom door.
2. Paper Ghost Craft
This cute paper ghost is simple enough for younger children and can easily be turned into a Halloween decoration.
Materials
- White construction paper
- Black construction paper
- Pencil
- Scissors
- Glue
- Black marker

Step-by-Step Instructions
Step 1: Fold a sheet of white construction paper in half.
Step 2: Draw half of a ghost shape along the folded edge. Make the bottom of the ghost wavy.
Step 3: Keeping the paper folded, cut along your pencil line.
Step 4: Open the paper to reveal your symmetrical ghost.
Step 5: Use black construction paper to cut out two eyes and a mouth.
Step 6: Glue the eyes and mouth onto the ghost.
Step 7: Use a black marker to add eyebrows, eyelashes, cheeks, or other details.
Step 8: Make several ghosts in different sizes and hang them together to create a simple Halloween decoration.
3. Paper Bat Craft
Make a collection of flying paper bats to decorate a wall, window, or Halloween party area.
Materials
- Black construction paper
- White paper
- Pencil
- Scissors
- Glue
- Black marker

Step-by-Step Instructions
Step 1: Draw a simple bat outline on black construction paper. Include two wings, a small body, and two pointed ears.
Step 2: Cut around the outline carefully.
Step 3: Use the first bat as a template if you want to make several bats of the same size.
Step 4: Cut two small white circles for the eyes.
Step 5: Add black pupils with a marker.
Step 6: Glue the eyes onto the bat.
Step 7: Slightly fold the wings upward along each side to give the bat a three-dimensional appearance.
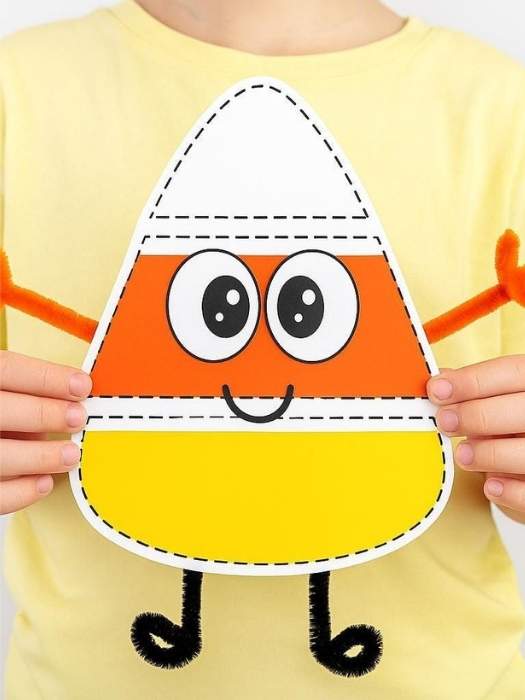
4. Paper Candy Corn Craft
Turn colorful construction paper into a cute candy corn decoration that is perfect for Halloween.
Materials
- White construction paper
- Orange construction paper
- Yellow construction paper
- Pencil
- Scissors
- Glue
- Black marker
Step-by-Step Instructions
Step 1: Draw a large triangle with slightly rounded corners on a sheet of white construction paper. This will be the base of your candy corn.
Step 2: Carefully cut out the candy corn shape.
Step 3: Place the white candy corn shape on orange construction paper and trace around it.
Step 4: Cut out the orange shape, then trim it slightly so it will fit inside the white outline.
Step 5: Repeat the process with yellow construction paper, making the yellow section slightly smaller than the orange section.
Step 6: Glue the orange section onto the middle of the white candy corn shape.
Step 7: Glue the yellow section onto the bottom portion, leaving the white section visible at the top.
Step 8: Use a black marker to add a cute face, such as eyes, eyelashes, rosy cheeks, or a smiling mouth.
Step 9: Make several candy corn characters in different sizes and expressions.
You can display the finished candy corn crafts on a wall, refrigerator, classroom board, or Halloween party table.
5. Paper Frankenstein Craft
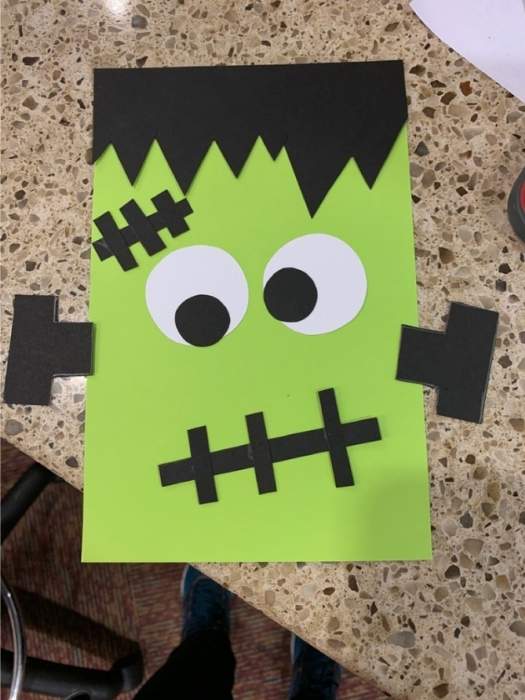
Turn construction paper into a friendly Frankenstein character with a few simple shapes.
Materials
- Green construction paper
- Black construction paper
- White construction paper
- Gray construction paper
- Pencil
- Scissors
- Glue
- Black marker
Step-by-Step Instructions
Step 1: Draw a large rectangle with slightly rounded corners on green paper.
Step 2: Cut out the shape to create Frankenstein’s head.
Step 3: Cut a strip of black paper with uneven edges for the hair.
Step 4: Glue the black hair along the top of the green head.
Step 5: Cut two white circles for the eyes and smaller black circles for the pupils.
Step 6: Glue the eyes onto Frankenstein’s face.
Step 7: Draw a mouth using a black marker.
Step 8: Cut two small gray or black rectangles and glue one to each side of the head to create Frankenstein’s bolts.
Step 9: Add small black lines across the forehead and cheeks to look like stitches.
6. Paper Witch Craft
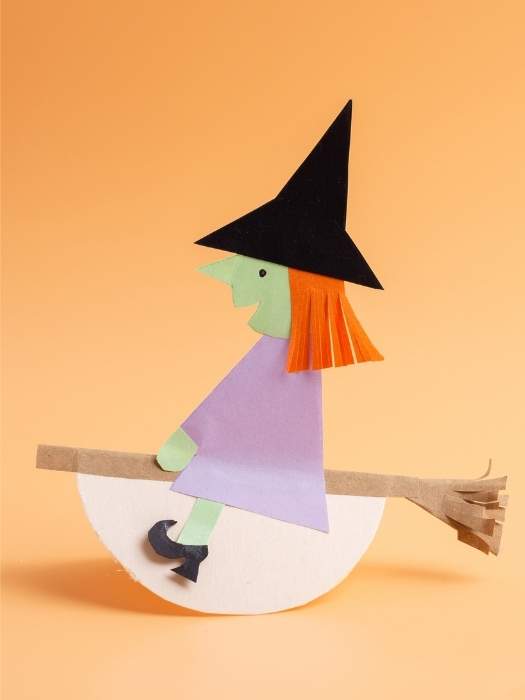
Create a cute Halloween witch using basic paper shapes.
Materials
- Black construction paper
- Purple construction paper
- Green construction paper
- Orange construction paper
- White paper
- Glue
- Scissors
- Pencil
- Black marker
Step-by-Step Instructions
Step 1: Draw a large circle on your chosen skin-tone paper and cut it out for the witch’s face.
Step 2: Cut several thin strips of orange or purple paper for the hair.
Step 3: Glue the hair around the sides and top of the face.
Step 4: Cut a large triangle from black paper for the witch’s hat.
Step 5: Cut a wide oval shape for the hat brim.
Step 6: Glue the triangle onto the brim and add a purple or orange strip around the hat.
Step 7: Glue the hat onto the witch’s head.
Step 8: Draw two eyes, a nose, and a mouth on the face.
Step 9: Add small paper stars, moons, or other shapes to decorate the hat.
7. Paper Spider Craft
Create a simple paper spider with eight legs and a silly face.
Materials
- Black construction paper
- White paper
- Glue
- Scissors
- Pencil
- Black marker

Step-by-Step Instructions
Step 1: Draw a large circle on black paper for the spider’s body.
Step 2: Cut out the circle.
Step 3: Draw eight long strips on black paper for the spider’s legs.
Step 4: Cut out all eight strips.
Step 5: Fold each leg into a slight zigzag so they have some dimension.
Step 6: Glue four legs to each side of the spider’s body.
Step 7: Cut two white circles for the eyes.
Step 8: Add black pupils and glue the eyes onto the body.
Step 9: Draw a small mouth underneath the eyes.
For a larger decoration, make several spiders and attach them to paper webs.
8. Paper Mummy Craft
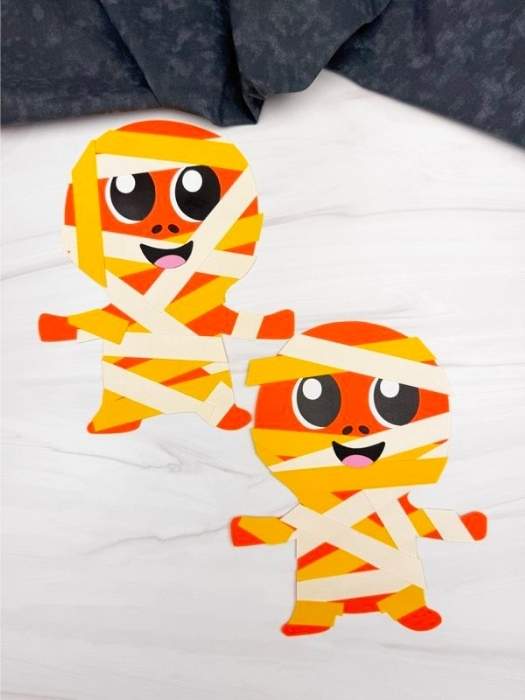
This paper mummy is easy to make and requires only a handful of materials.
Materials
- Black construction paper
- White construction paper
- Glue
- Scissors
- Pencil
- Black marker
Step-by-Step Instructions
Step 1: Draw a simple mummy shape on black paper. Make the body slightly wider at the bottom.
Step 2: Cut out the mummy shape.
Step 3: Cut several thin strips of white paper.
Step 4: Apply small amounts of glue to the mummy’s body.
Step 5: Place the white paper strips across the body in different directions.
Step 6: Leave a small section uncovered where the eyes will go.
Step 7: Cut two white circles and glue them into the uncovered area.
Step 8: Add black pupils to complete the mummy’s face.
Trim any pieces of paper that extend too far beyond the body.
9. Paper Monster Craft
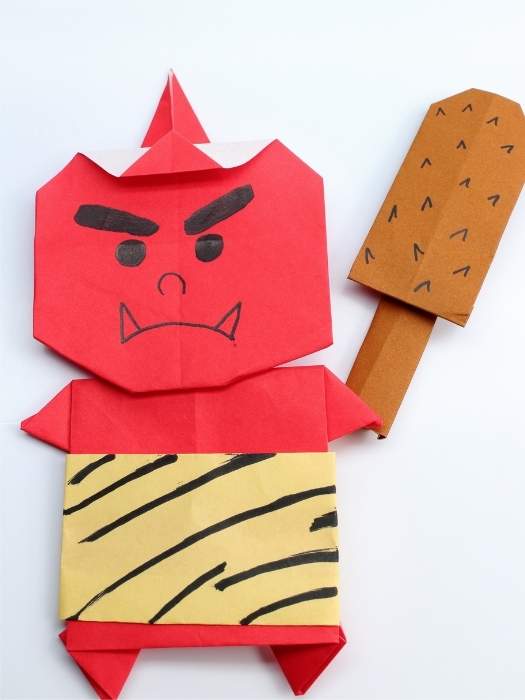
This is a fun project when kids want to create their own Halloween characters instead of following one exact design.
Materials
- Construction paper in several colors
- White paper
- Black paper
- Scissors
- Glue
- Markers
- Pencil
Step-by-Step Instructions
Step 1: Choose a color for the monster’s body.
Step 2: Draw a large oval, circle, rectangle, or irregular shape for the body.
Step 3: Cut out the body.
Step 4: Cut out different shapes for the eyes. You can make one large eye, three eyes, or several tiny eyes.
Step 5: Cut triangles from white paper for the monster’s teeth.
Step 6: Add horns, ears, hair, arms, legs, or tails using different colors of construction paper.
Step 7: Glue all the pieces onto the monster’s body.
Step 8: Use markers to add spots, scars, eyebrows, or other details.
Because there is no single correct design, each child can create a completely different monster.
10. Paper Halloween Garland
Make a colorful Halloween garland using simple paper characters.
Materials
- Orange construction paper
- Black construction paper
- White construction paper
- Green construction paper
- Scissors
- Glue
- String
- Hole punch
- Marker
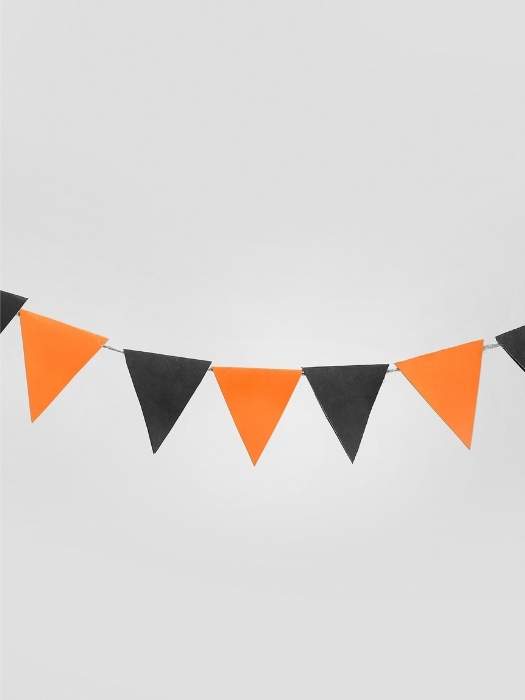
Step-by-Step Instructions
Step 1: Decide which Halloween shapes you want to include. Pumpkins, ghosts, bats, and spiders all work well.
Step 2: Draw each shape on the appropriate colored paper.
Step 3: Cut out all the shapes.
Step 4: Add faces and other details using smaller pieces of paper or markers.
Step 5: Use a hole punch to make two small holes near the top of each decoration.
Step 6: Thread the string through the holes.
Step 7: Space the decorations evenly along the string.
Step 8: Hang the finished garland across a wall, doorway, window, shelf, or party table.
11. Paper Halloween Mask
Kids can turn paper into a simple Halloween mask featuring a pumpkin, bat, cat, monster, or other character.
Materials
- Thick construction paper or cardstock
- Pencil
- Scissors
- Colored paper
- Glue
- Markers
- String or a craft stick
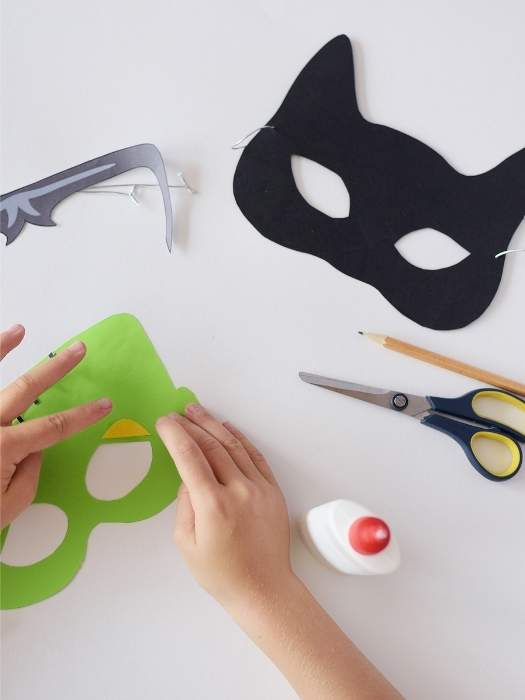
Step-by-Step Instructions
Step 1: Place the cardstock on a flat surface.
Step 2: Draw a mask shape large enough to cover the area around your child’s eyes.
Step 3: Carefully cut out the mask.
Step 4: Hold the mask up to your child’s face and mark where the eyes should be. Do not put the scissors near the child’s face.
Step 5: Cut out the two eye holes.
Step 6: Decorate the mask using colored paper. For example, add orange paper for a pumpkin mask or black paper for a bat mask.
Step 7: Add extra details such as ears, teeth, whiskers, or eyebrows.
Step 8: Attach a craft stick to the bottom of the mask for a handheld version, or make small holes on both sides and attach string for a wearable version.
Make sure an adult handles the cutting and fitting of the mask for younger children.
12. Paper Plate Spider Web
Create a spooky spider web using a paper plate and yarn.
Materials
- Paper plate
- Black paint or black construction paper
- White yarn
- Scissors
- Hole punch
- Glue
- Black construction paper
- White paper

Step-by-Step Instructions
Step 1: Paint the paper plate black and allow it to dry completely.
Step 2: Ask an adult to carefully cut out the center of the plate, leaving the outer rim intact.
Step 3: Use a hole punch to make several holes around the rim.
Step 4: Cut a long piece of white yarn.
Step 5: Tie one end of the yarn through one of the holes.
Step 6: Pull the yarn across the opening and thread it through another hole.
Step 7: Continue moving the yarn from one hole to another until a web pattern forms across the center.
Step 8: Cut a small spider from black paper.
Step 9: Add two small white eyes to the spider.
Step 10: Glue the paper spider onto the finished web.
The finished spider web can be hung on a wall, door, or window.
Simple Tips for Making These Crafts With Kids
Keep your craft supplies organized before you begin. Put the paper, glue, scissors, markers, and other materials in one place so children can focus on creating instead of searching for supplies.
For younger children, an adult should handle detailed cutting and any difficult shapes. Children can take over the safer parts, such as coloring, gluing, arranging pieces, and adding decorations.
You can also prepare templates ahead of time. Draw the basic pumpkin, ghost, bat, spider, or monster shapes on paper before the craft session begins. This can make the activity much easier for younger children.
Most importantly, don’t worry about making every craft look perfect. Slightly crooked eyes, uneven legs, and funny faces are part of what makes homemade Halloween crafts special.
Tips for Making Halloween Paper Crafts With Kids
The best thing about these crafts is that you don’t need a huge collection of expensive supplies. Construction paper, old cardboard, paper plates, glue, scissors, and markers can take you surprisingly far.
For younger children, prepare some of the cutting beforehand, especially when the craft requires small or complicated shapes. Let them take over the fun parts such as coloring, gluing, decorating, and choosing the characters.
Don’t worry if the finished crafts aren’t perfect. Halloween crafts are supposed to be playful. A crooked ghost or a funny-looking pumpkin can often have more personality than a perfectly symmetrical one.
You can also turn several crafts into a larger Halloween project. For example, children can make paper pumpkins, bats, ghosts, and spiders and then use them to decorate a bedroom, classroom, or Halloween party.
Easy Ways to Display Your Halloween Paper Crafts
Once the kids finish their crafts, don’t hide them away in a drawer. Turn their creations into part of your Halloween decorations.
Hang paper ghosts and bats from the ceiling or windows, or create a colorful garland using paper pumpkins and Halloween characters. You can also arrange several crafts on a large sheet of black paper to create a spooky Halloween scene.
For a classroom, consider giving each child a small section of a wall or bulletin board where they can display their favorite creation. At home, a refrigerator, bedroom wall, craft corner, or front-door area can become a mini Halloween gallery.
You can even take pictures of the finished crafts and create a scrapbook or digital album of your child’s Halloween creations each year. It is a simple way to preserve their creativity as they grow.
Make Halloween Extra Fun With Paper
You don’t need expensive decorations or complicated craft supplies to create a memorable Halloween activity. With a few sheets of paper and a little imagination, kids can make their own spooky characters, decorations, bookmarks, garlands, and more.
From adorable paper ghosts and pumpkins to silly monsters and creepy spiders, these Halloween paper crafts for kids are easy enough for a relaxing afternoon but creative enough to keep little hands busy.
So gather your paper and let the crafting begin. After all, Halloween is much more fun when the decorations are made by little hands—and these creations are almost too cute to spook!