
Detailed Guide On 7 Easy Arts and Crafts for Kids to Do at Home When They’re Bored
It always seems to happen at the worst time.
Your child has looked through every toy, watched enough cartoons, walked from one room to another, and then comes the familiar sentence:
“I’m bored.”
Instead of reaching for another screen, why not turn that boredom into something creative?
Arts and crafts are one of the easiest ways to keep kids busy while giving them the chance to imagine, build, paint, cut, glue, and create something they can be proud of. The easy part is that you don’t need expensive craft supplies or a trip to the store. Many fun projects can be made with things you probably already have around the house, like paper, cardboard, empty toilet paper rolls, popsicle sticks, buttons, cotton balls, and washable paint.

Crafting also helps children develop important skills without making it feel like learning. As they color, fold, cut, and decorate, they’re improving hand coordination, practicing problem solving, building patience, and learning to express their creativity in their own unique way. Every project becomes an opportunity to explore new ideas while having fun.
This collection of 7 easy arts and crafts for kids to do at home when they’re bored includes simple projects for different ages and skill levels. Some can be finished in just a few minutes, while others are perfect for a rainy afternoon or a quiet weekend. Whether your child loves animals, colorful art, pretend play, or making decorations to display around the house, there’s something here they’ll be excited to try.
Gather a few basic supplies, clear a small space at the table, and get ready for hours of creative fun. By the end of the day, your child won’t just have something to do they will have something they made with their own hands and memories they’ll be excited to share.
Let’s jump into these fun and easy craft ideas that will make boredom disappear.
I have so Many crafts for kids to recreate this summer, check out these ones. Easy Summer crafts for Kids, Fun summer Crafts for toddlers
1. Paper Plate Animals
One of the easiest ways to keep kids busy is by turning ordinary paper plates into adorable animals. This craft is simple enough for younger children to enjoy, but older kids can make their animals more detailed by adding extra decorations and creating their own stories about them.
The fun doesn’t stop once the craft is finished. Kids can use their paper plate animals for pretend play, decorate their bedrooms, or even put on a mini puppet show for the family.
Supplies
- Paper plates
- Colored construction paper
- Child-safe scissors
- Glue
- Googly eyes (optional)
- Crayons, markers, or paint
- Black marker

How to Make It
1: Decide which animal you want to create. A lion, frog, owl, fish, panda, bunny, or cat are all great choices.
2: Color or paint the paper plate to match your animal. Let it dry completely if you’re using paint.
3: Cut ears, wings, fins, tails, legs, or other body parts from colored construction paper.
4: Glue each piece onto the paper plate.
5: Add googly eyes or draw eyes with a marker.
6: Draw the nose, mouth, whiskers, feathers, spots, or stripes to bring your animal to life.
7: If you’d like, glue a craft stick to the back to turn it into a puppet.
Make It Even More Fun
Ask your child questions while they’re crafting.
- What is your animal’s name?
- Where does it live?
- What does it like to eat?
- Does it have any special powers?
- Who are its friends?
These simple questions encourage imagination and help children create their own little stories.
Helpful Tips
- Younger children may need help using scissors.
- Washable paint and markers make cleanup much easier.
- Protect your table with newspaper or an old tablecloth before you begin.
- Don’t worry if the animal doesn’t look perfect. Every child’s creation will be unique, and that’s what makes handmade crafts so special.
By the time they’re finished, kids won’t just have a colorful animal they’ll have a fun new toy they created all by themselves, making this an activity they’ll want to do again and again.
2. Toilet Paper Roll Binoculars
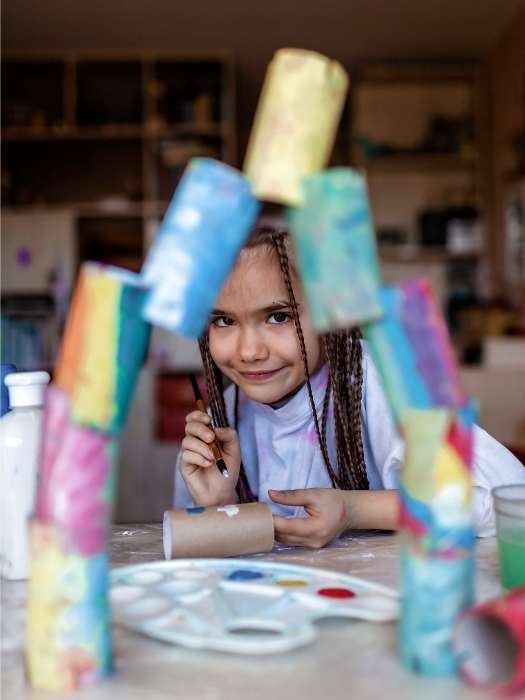
When kids are pretending to be explorers, pirates, bird watchers, or jungle adventurers, a pair of homemade binoculars can make their imagination come alive. This craft is quick to make, uses recycled materials, and gives children something they can continue playing with long after the glue has dried.
Instead of throwing away empty toilet paper rolls, save a few for this fun project. Kids will love decorating their binoculars with their favorite colors, stickers, and drawings before heading off on an exciting indoor or backyard adventure.
Supplies
- 2 empty toilet paper rolls
- Glue or tape
- Paint, crayons, or markers
- Stickers, washi tape, or colored paper for decorating
- Hole punch
- String, yarn, or ribbon
- Child-safe scissors
How to Make It
1: Place the two toilet paper rolls side by side and glue or tape them together. Hold them for a minute until they stay in place.
2: Decorate the outside any way you like. Paint them bright colors, draw fun patterns, add stickers, or wrap them with colorful paper.
3: Let everything dry completely if you used paint or glue.
4: Use a hole punch to make one small hole near the top of each outer side.
5: Thread a piece of string or ribbon through the holes and tie a knot on each end. This creates a neck strap so kids can wear their binoculars while playing.
6: Your binoculars are ready! It’s time to start exploring.
Fun Adventure Ideas
The craft becomes even more exciting when children have a mission.
- Go on a backyard bird hunt.
- Pretend you’re on a safari looking for wild animals.
- Search the house for hidden toys.
- Become a pirate looking for treasure.
- Explore the garden and look for butterflies or insects.
- Watch the clouds and describe the shapes you see.
Learning While Playing
This activity does more than keep kids entertained. It also encourages them to observe the world around them and ask questions.
For example:
- How many birds can you find?
- Can you spot something that starts with the letter B?
- What colors do you see outside?
- How many flowers can you count?
These simple games help build observation, vocabulary, and counting skills without feeling like a lesson.
Helpful Tips
- If you don’t have toilet paper rolls, paper towel rolls cut in half work just as well.
- Let kids choose their own decorations instead of copying an example. Their creativity is what makes each pair of binoculars special.
- Store the finished binoculars in a play area so they can be used again for future adventures.
3. Handprint Tree Art
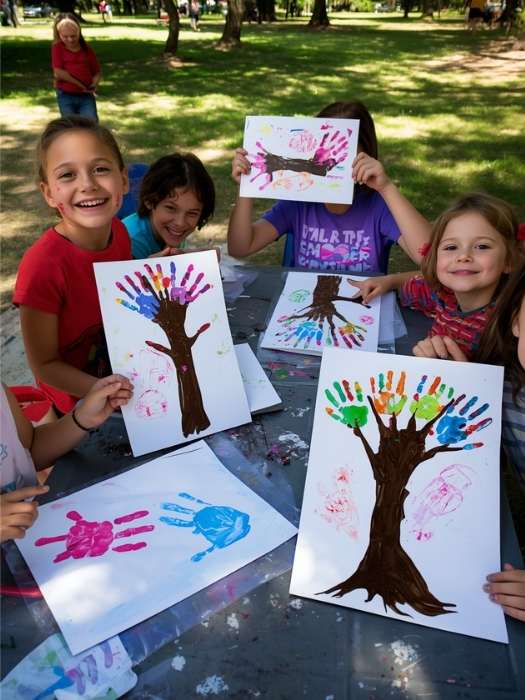
A child’s hand may be small today, but it won’t stay that way forever. That’s one reason handprint crafts are so special. They turn a simple afternoon activity into a keepsake that families can look back on for years.
This colorful handprint tree is easy to make and gives kids the chance to paint, stamp, and decorate while learning about nature and the changing seasons. Every tree will look different, and that’s exactly what makes each one unique.
Supplies
- White cardstock or thick paper
- Brown paint
- Green, red, yellow, or orange paint
- Paintbrush
- Washable paint
- Paper plate or paint tray
- Baby wipes or paper towels for cleanup
- Marker (optional)
How to Make It
1: Paint your child’s hand and wrist with brown paint.
2: Press the painted hand firmly onto the paper with the fingers pointing upward. This becomes the tree trunk and branches.
3: Wash and dry your child’s hand before moving to the next step.
4: Dip one finger into green paint and make small fingerprints around the branches to create leaves.
5: For an autumn tree, use orange, yellow, and red fingerprints instead of green.
6: Add extra details like flowers, apples, birds, butterflies, or grass around the bottom of the tree.
7: Write your child’s name and the date at the bottom. You’ll be glad you did when you look back at it in a few years.
Change It for Every Season
This craft can be made throughout the year with just a few changes.
Spring
- Green leaves
- Pink flowers
- Butterflies
- Bright blue sky
Summer
- Dark green leaves
- Birds
- Sunshine
- Colorful flowers
Fall
- Red, orange, and yellow leaves
- Falling leaves around the tree
- Pumpkins nearby
Winter
- No leaves
- White fingerprint snow
- Snowflakes
- A snowman beside the tree
Kids will enjoy seeing how the same tree changes with each season.
What Kids Learn
While creating their tree, children can also learn about:
- The four seasons
- Why leaves change color
- Trees and nature
- Colors and color mixing
- Fine motor skills through fingerprint painting
It’s a fun way to combine creativity with simple learning.
Helpful Tips
- Washable paint makes cleanup much easier.
- Place newspaper or a plastic tablecloth under your workspace before painting.
- Let the artwork dry completely before hanging it up.
- Frame your child’s favorite handprint tree or keep it in a memory box as a special keepsake.
This craft is more than just a painting it’s a snapshot of your child’s little hand at this moment in time. Years from now, you’ll smile when you see just how tiny it once was.
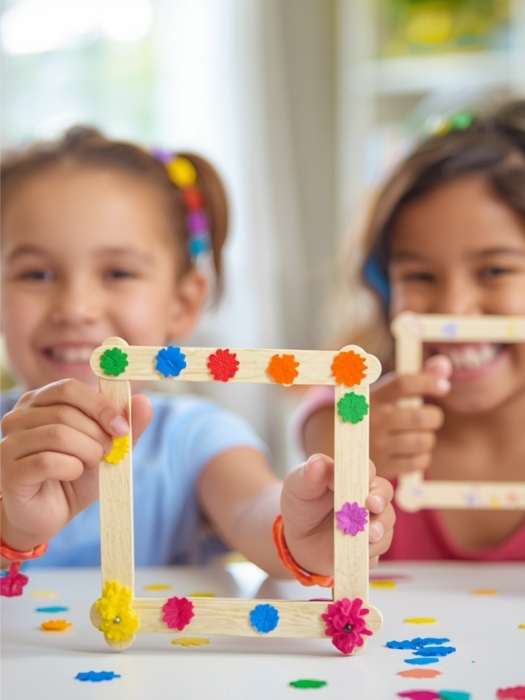
4. Popsicle Stick Picture Frames
Kids love showing off their favorite photos, drawings, and little masterpieces. Instead of buying a picture frame, why not let them make one themselves? This easy craft turns simple popsicle sticks into a colorful frame they can decorate any way they like.
It’s a fun activity that encourages creativity while giving children something they can proudly display in their bedroom or give as a thoughtful handmade gift to grandparents, teachers, or other family members.
Supplies
- 8–10 popsicle sticks
- White glue or hot glue (adult supervision if using hot glue)
- Washable paint or markers
- Paintbrush
- Stickers
- Buttons, sequins, or pom-poms (optional)
- Ribbon or string
- Child-safe scissors
- A small printed photo or drawing
How to Make It
1: Lay four popsicle sticks in a square or rectangle shape.
2: Glue another popsicle stick across the back at the top and another across the bottom to hold the frame together.
3: Allow the glue to dry completely before decorating.
4: Paint the frame in your favorite color or decorate it with markers.
5: Add stickers, buttons, glitter, pom-poms, or small foam shapes to make the frame unique.
6: Glue your favorite photo or drawing to the back of the frame so it shows through the opening.
7: Attach a ribbon to the top if you’d like to hang it on a wall, or glue another popsicle stick to the back at an angle to make a stand.
Fun Decoration Ideas
There are endless ways to personalize the frame. Kids can create a design that matches their interests or the season.
- 🌈 Rainbow colors
- 🌸 Flower decorations
- 🦋 Butterflies
- ⭐ Stars and moons
- ❤️ Hearts
- 🦕 Dinosaurs
- 🐠 Ocean theme
- 🚀 Space theme
- 🎄 Holiday decorations
- 🎃 Halloween colors
Every frame will be different, making each one extra special.
Creative Ways to Use the Frame
Once it’s finished, kids can place almost anything inside.
- A favorite family photo
- A picture of a pet
- Their own drawing
- A painting they’ve made
- A motivational quote
- A holiday picture
- A class photo
- A handmade card for someone special
Helpful Tips
- Paint the popsicle sticks before gluing them together if you want quicker drying time.
- Younger children may need help with the gluing.
- If you don’t have printed photos, let kids draw a picture to place inside the frame.
- Write the child’s name and the date on the back to remember when it was made.
This simple craft creates something children can enjoy every day. Every time they see their handmade picture frame on a shelf or hanging on the wall, they’ll remember the fun they had making it.
5. Rainbow Paper Chain
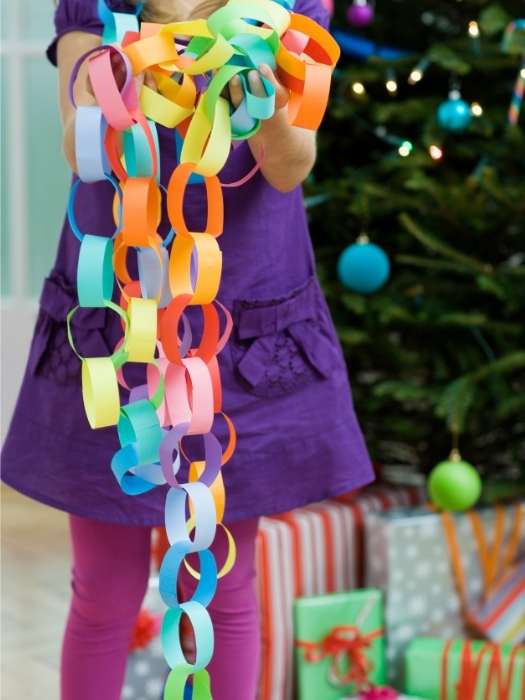
Looking for a quick craft that keeps little hands busy? A rainbow paper chain is colorful, easy to make, and perfect for decorating a bedroom, classroom, or play area. Kids also get extra practice using scissors, glue, and patterns while having fun.
Supplies
- Colored construction paper
- Child-safe scissors
- Glue stick or tape
- Ruler (optional)
- Pencil
How to Make It
1: Cut the colored paper into long strips about 1 inch (2.5 cm) wide.
2: Roll one strip into a circle and glue or tape the ends together.
3: Slide the next strip through the first loop, then glue the ends together.
4: Keep adding strips, using different colors to create a bright rainbow chain.
5: Continue until your paper chain is as long as you want.
Fun Ideas
- Hang it across a bedroom wall.
- Decorate a birthday party.
- Use holiday colors for special occasions.
- Make a chain long enough to reach across a window or doorway.
Helpful Tips
- Younger kids may need help cutting the paper.
- Try creating a color pattern, such as red, blue, yellow, and green, to make the chain even more colorful.
- Save leftover paper strips for future craft projects.
This simple craft is easy to make, brightens any room, and gives kids something they can proudly display after they’re finished.
6. Sock Puppets
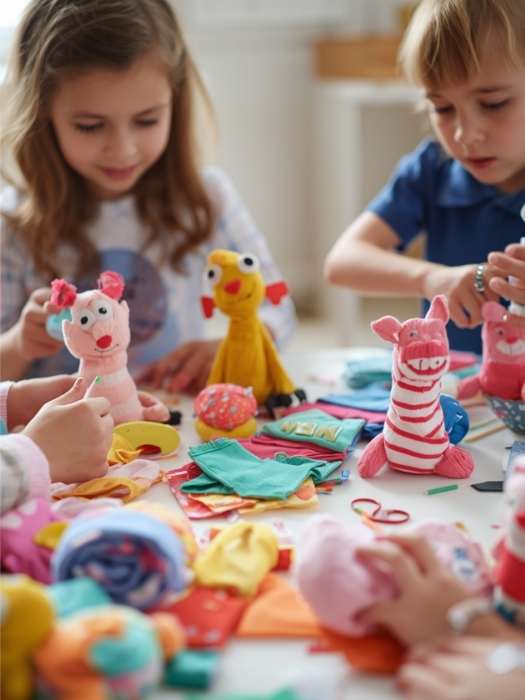
Don’t throw away old socks! With a little imagination, kids can turn them into funny puppet friends with silly faces, colorful hair, and unique personalities. After making their puppets, they can put on a puppet show and create their own stories.
Supplies
- A clean old sock
- Googly eyes or paper eyes
- Glue
- Yarn or wool for hair
- Markers
- Felt or colored paper
- Child-safe scissors
How to Make It
1: Choose a clean sock and lay it flat.
2: Glue on the eyes and add yarn for hair.
3: Cut out a mouth, ears, or a tongue from felt or colored paper and glue them onto the sock.
4: Draw extra details like eyebrows, freckles, or a funny smile with markers.
5: Let the glue dry, then slip your hand inside the sock to bring your puppet to life.
Fun Ideas
- Give your puppet a funny name.
- Put on a puppet show for family members.
- Create different voices for each puppet.
- Make a whole puppet family using different socks.
Helpful Tips
- Adults should help with cutting and gluing if needed.
- Let kids decorate their puppets however they like there’s no right or wrong design.
- Save the puppets for future playtime and storytelling.
This easy craft is fun to make and even more fun to play with, giving kids hours of creative entertainment long after the crafting is finished.
7. Egg Carton Caterpillars
Before you recycle an empty egg carton, turn it into a cute caterpillar! This simple craft lets kids paint, decorate, and learn about insects while creating a colorful little friend.
Supplies
- Empty egg carton
- Washable paint
- Paintbrush
- Googly eyes
- Pipe cleaners
- Glue
- Child-safe scissors
- Marker

How to Make It
1: Cut a strip of 4–6 egg carton cups.
2: Paint the strip in bright colors and let it dry.
3: Glue on two googly eyes at the front.
4: Poke two small holes and insert pipe cleaners to make antennae.
5: Draw a smiling face with a marker.
Fun Ideas
- Paint each section a different color.
- Make a whole family of caterpillars in different sizes.
- Pretend your caterpillar is crawling through a garden.
- Read a story about caterpillars after the craft.
Helpful Tips
- Cover your table before painting.
- Younger children may need help cutting the egg carton.
- Add glitter or pom-poms for extra color and texture.
This recycled craft is easy, colorful, and a great way to show kids that everyday items can become something fun with a little creativity.
Conclusion on 7 easy arts and crafts for kids to do at home when they’re bored
A little creativity can turn an ordinary day at home into an exciting adventure. Whether your child is painting, cutting, gluing, folding, or building something from recycled materials, every craft is an opportunity to explore new ideas and have fun.
These 7 easy arts and crafts for kids to do at home when they’re bored are perfect for rainy days, weekends, school breaks, or any moment when children are looking for something fun to do. Along the way, they’ll build confidence, practice new skills, and enjoy the satisfaction of creating something with their own hands.
The next time you hear, “I’m bored,” gather a few craft supplies and choose one of these projects to try. You may end up with colorful artwork, handmade decorations, and happy memories your child will look back on with a smile.
Happy crafting!
Check Out my post on