Beginner-Friendly Knitting Projects for Adults Anyone Can Make
Learning to knit can feel a little intimidating when you’re just getting started. You pick up a pair of knitting needles, look at a ball of yarn, and suddenly wonder where to begin. The good news is that you don’t need years of experience to make something beautiful. Every skilled knitter started with a single stitch, and with a little practice, you can too.
If you’re looking for relaxing hobbies that you can enjoy at home, knitting is a wonderful place to start. It’s a creative way to unwind after a busy day, and it’s incredibly rewarding turning a simple ball of yarn into something useful with your own hands. Whether you’re making a cozy scarf, a dishcloth for your kitchen, or a handmade gift, every project helps you build confidence and improve your skills.
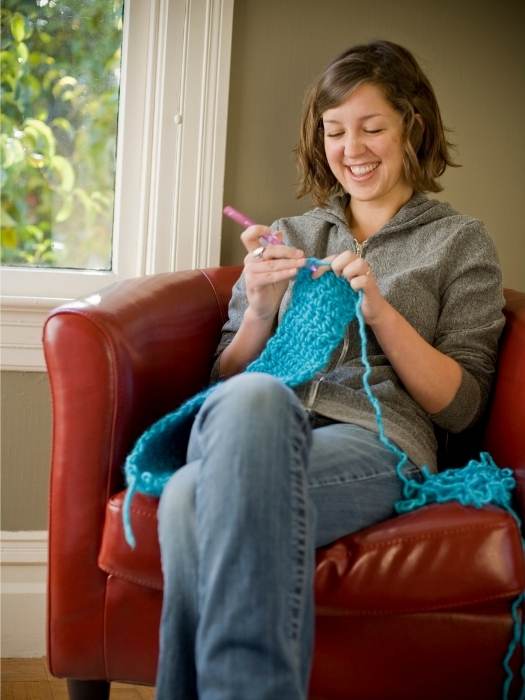
The secret to enjoying knitting as a beginner is choosing projects that match your experience level. Starting with simple patterns allows you to practice basic stitches without feeling overwhelmed. As you complete each project, you will become more comfortable holding your needles, keeping an even stitch, and following easy instructions.
In this guide, you will find beginner-friendly knitting projects for adults anyone can make. These ideas are simple, practical, and perfect for learning the basics while creating items you’ll actually use or proudly give as gifts. So grab your favorite yarn, pick up your knitting needles, and let’s get started with projects that make learning to knit enjoyable from your very first stitch.
1. Simple Garter Stitch Scarf
If you’re learning to knit for the very first time, a garter stitch scarf is one of the easiest and most rewarding projects you can make. It may look simple, but don’t underestimate it. This project teaches the basic skills that every knitter needs, including how to cast on, hold your needles comfortably, create even stitches, and bind off when you’re finished.
Unlike more advanced patterns, you don’t have to keep track of different stitches or count complicated rows. You simply repeat the same knit stitch over and over. As you continue knitting, you’ll notice your hands becoming more comfortable with the movements, and each new row will feel a little easier than the last.
Don’t worry if your first few rows look uneven. That’s completely normal for beginners. With practice, your stitches will become more consistent, and you’ll see your progress every time you pick up your needles.
What You Will Need
- A pair of knitting needles (Size US 8–10 or 5–6 mm is great for beginners)
- One or two skeins of medium-weight or chunky yarn
- Sharp scissors
- Yarn needle for weaving in loose ends
- Measuring tape (optional)
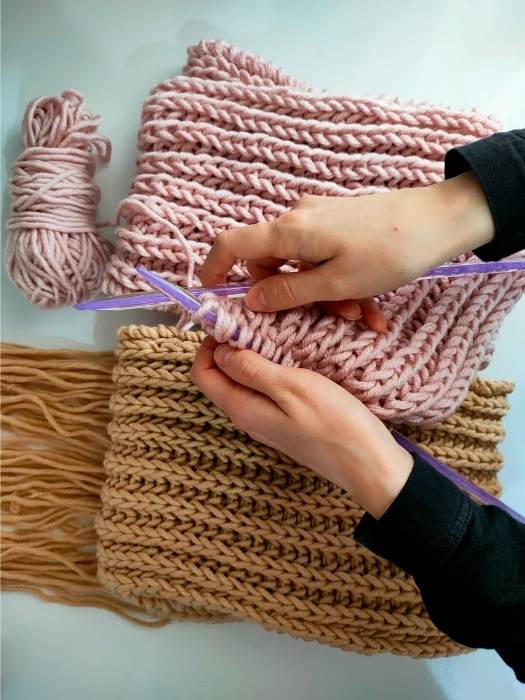
Step-by-Step Instructions
Step 1: Cast On
Begin by casting on about 25–35 stitches, depending on how wide you want your scarf. If you’re using chunky yarn, fewer stitches will create a nice width.
Don’t worry if your cast-on edge isn’t perfect. It gets easier with practice.
Step 2: Knit Every Row
Insert your right needle into the first stitch, wrap the yarn around the needle, pull a new loop through, and slide the old stitch off the left needle.
Repeat this process until you reach the end of the row.
Turn your work and knit every stitch again.
That’s all there is to the garter stitch every row is knitted exactly the same way.
Step 3: Keep Going
Continue knitting until your scarf reaches your preferred length. Most scarves are around 60–72 inches (150–180 cm) long, but you can make yours shorter or longer depending on your style.
Take breaks if your hands become tired. Knitting should feel relaxing, not rushed.
Step 4: Bind Off
Once your scarf is long enough, bind off all the stitches to prevent your work from unraveling.
Cut the yarn, leaving a small tail, and pull it through the last loop.
Step 5: Finish Your Scarf
Thread the loose yarn tails onto a yarn needle and weave them neatly into the back of the scarf. Trim any extra yarn.
Your first knitted scarf is now ready to wear or give as a handmade gift.
Why This Project Is Perfect for Beginners
- It uses only the basic knit stitch.
- You don’t have to follow a complicated pattern.
- You’ll quickly become familiar with holding the needles and yarn.
- Small mistakes are easy to spot and fix.
- It helps improve your stitch consistency with every row.
- You’ll finish with something practical that you can actually wear.
Beginner Tips for Success
- Choose a light-colored yarn because dark yarn can make it difficult to see your stitches.
- Medium-weight or chunky yarn is easier to work with than very thin yarn.
- Try not to pull the yarn too tightly. Tight stitches can be difficult to knit into on the next row.
- Count your stitches every few rows to make sure you haven’t accidentally added or dropped one.
- If you make a mistake, don’t panic. Every beginner makes them, and each one is part of the learning process.
Your first scarf doesn’t have to look perfect. What matters most is that you’re learning a new skill and becoming more confident with every stitch. By the time you finish, you’ll have a handmade scarf and the experience you’ll need to start your next knitting project.
2. Beginner Knit Dishcloth
A knit dishcloth is one of the most practical projects for beginners because it’s small, quick to finish, and helps you practice your knitting skills without committing to a large project. Even if you make a few mistakes, they’ll hardly be noticeable, and you’ll still end up with something useful for your kitchen.
Many experienced knitters recommend starting with dishcloths because they give you plenty of practice with basic stitches while helping you build confidence. Once you’ve finished one, you’ll likely want to make another in different colors or patterns.
What You’ll Need
- Medium-sized knitting needles (US 7–8 or 4.5–5 mm)
- 100% cotton yarn
- Scissors
- Yarn needle
- Measuring tape (optional)
Step-by-Step Instructions
Step 1: Cast on 30–40 stitches, depending on how large you’d like your dishcloth.
Step 2: Knit every row using the garter stitch. This creates a thick, textured fabric that’s perfect for cleaning.
Step 3: Continue knitting until your dishcloth forms a square, usually about 8–10 inches (20–25 cm) on each side.
Step 4: Bind off your stitches carefully.
Step 5: Weave in the loose yarn ends with a yarn needle and trim any excess yarn.
Wash your dishcloth before using it to soften the cotton and help it hold its shape.
Why Beginners Love This Project
- It’s much faster to finish than a scarf or blanket.
- You only need to practice one simple stitch.
- Small mistakes won’t stop the dishcloth from being useful.
- It helps improve stitch consistency and tension.
- You can make several in different colors to practice even more.
Beginner Tips
- Choose 100% cotton yarn because it’s absorbent, durable, and holds up well after repeated washing.
- Keep your stitches relaxed instead of pulling the yarn too tightly.
- Count your stitches every few rows to avoid accidentally changing the shape.
- Don’t worry if your edges aren’t perfectly straight this improves naturally as you gain more experience.
A simple dishcloth may not seem exciting at first, but it’s one of the best projects for building confidence. Every row helps you become more comfortable with your needles, and before long, you’ll be ready to tackle larger and more detailed knitting projects.
3. Cozy Knit Blanket
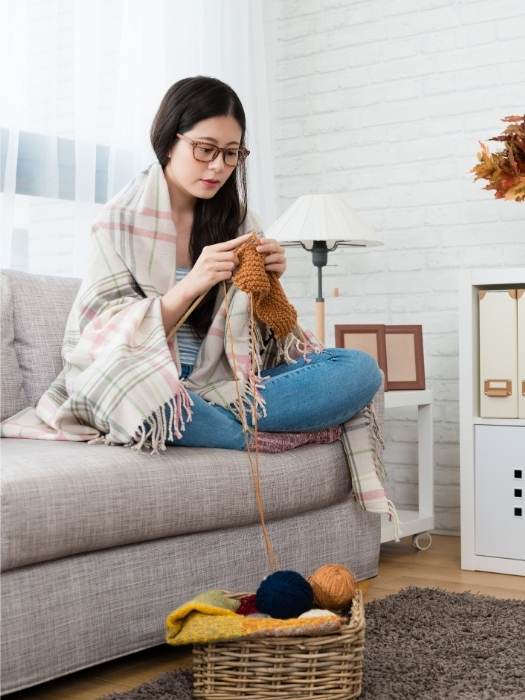
If you’ve mastered a scarf or dishcloth and you’re ready for something a little bigger, a cozy knit blanket is a wonderful next project. While it takes more time to finish, the knitting itself is still simple because you’ll repeat the same stitches over and over. There’s no need for complicated patterns, making it a relaxing project you can work on while watching TV or listening to music.
A handmade blanket also makes a thoughtful gift for a loved one or a beautiful addition to your living room or bedroom.
What You’ll Need
- Large knitting needles (US 11–15 or 8–10 mm)
- Chunky or super bulky yarn
- Scissors
- Yarn needle
- Measuring tape
Step-by-Step Instructions
Step 1: Cast on the number of stitches needed for your desired blanket width. A small lap blanket usually requires 60–90 stitches, depending on the yarn and needle size.
Step 2: Knit every row using the garter stitch. If you’re ready for a small challenge, you can also follow a simple beginner blanket pattern.
Step 3: Keep knitting until the blanket reaches your preferred length. This may take several days or weeks, so don’t rush the process.
Step 4: Bind off all the stitches once you’re happy with the size.
Step 5: Weave in all the loose yarn ends neatly with a yarn needle.
Why It’s Great for Beginners
- Repeats the same simple stitches throughout.
- Helps improve stitch consistency over a larger project.
- Gives you plenty of practice without learning difficult techniques.
- Creates something you’ll enjoy using for years.
Beginner Tips
- Chunky yarn works up faster, so you’ll see progress more quickly.
- Roll your yarn into a basket or bag to keep it clean and prevent tangles.
- Check your blanket every few rows to make sure you haven’t accidentally added or dropped stitches.
- Remember that it’s perfectly fine to work on your blanket a little each day. Small progress adds up.
A knit blanket takes patience, but every row brings you closer to a finished piece you can wrap up in on cool evenings. It’s a project that reminds you how far you’ve come since learning your very first stitch.
4. Easy Knit Headband
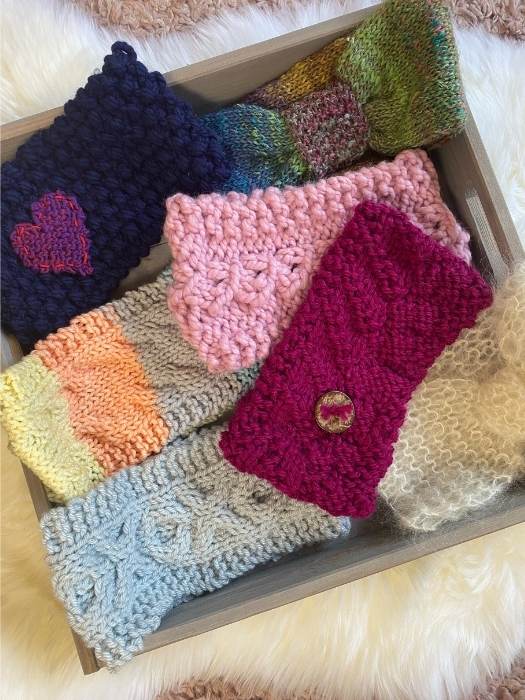
A knit headband is a fantastic beginner project because it’s small, stylish, and quick to finish. If making a full scarf or blanket feels like a big commitment, a headband is a great alternative. It lets you practice the same basic knitting techniques while creating something you can wear on chilly days or give as a thoughtful handmade gift.
Since it doesn’t require much yarn, it’s also a great way to use leftover yarn from previous projects.
What You’ll Need
- Knitting needles (US 8–10 or 5–6 mm)
- Medium-weight or chunky yarn
- Scissors
- Yarn needle
- Measuring tape
Step-by-Step Instructions
Step 1: Cast on 15–25 stitches, depending on how wide you want your headband.
Step 2: Knit every row using the garter stitch until the piece is long enough to fit comfortably around your head. For most adults, this is about 18–20 inches (46–51 cm).
Step 3: Bind off all the stitches.
Step 4: Place the two ends together and sew them neatly using a yarn needle.
Step 5: Try on your headband to make sure it fits snugly without feeling too tight.
Why It’s Great for Beginners
- It’s a smaller project that can often be finished in a day.
- You only need to practice one basic stitch.
- It helps improve your stitch tension and edge control.
- It’s useful, wearable, and makes a wonderful handmade gift.
Beginner Tips
- Use a soft yarn that’s comfortable against your skin.
- Measure the headband before sewing the ends together to make sure it fits.
- If you’d like to make it more decorative, sew a small knitted bow or twist the center before stitching the ends.
This simple project is a great confidence booster. By the time you’ve finished, you’ll have a cozy accessory that you made yourself and more experience to help you tackle your next knitting project.
5. Knit Mug Cozy
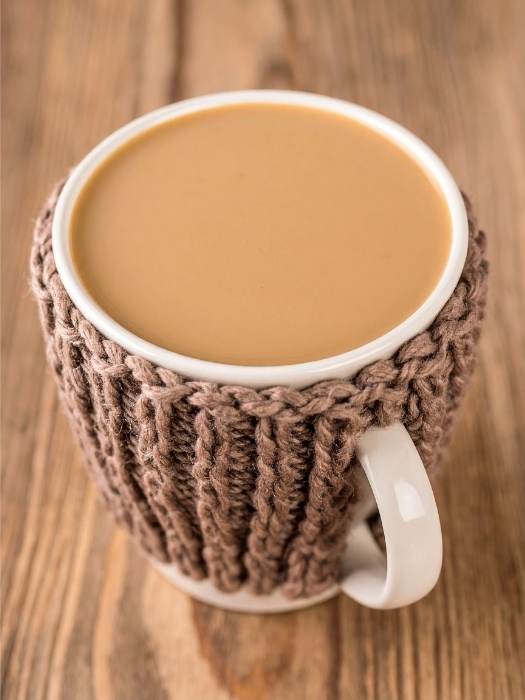
If you enjoy a warm cup of coffee, tea, or hot chocolate, a knit mug cozy is a fun project to try. It’s small enough to finish in just a few hours and gives you plenty of practice with the basic knit stitch. Once it’s wrapped around your mug, it also helps protect your hands from the heat while adding a cozy, handmade touch.
These little cozies are also thoughtful gifts for friends, family members, teachers, or coworkers.
What You’ll Need
- Knitting needles (US 7–9 or 4.5–5.5 mm)
- Medium-weight cotton or acrylic yarn
- Scissors
- Yarn needle
- 1 button (optional)
- Measuring tape
Step-by-Step Instructions
Step 1: Cast on 18–25 stitches, depending on the size of your mug.
Step 2: Knit every row until the piece wraps comfortably around your mug. It should fit snugly without stretching too much.
Step 3: Bind off all the stitches.
Step 4: Sew the loose ends neatly with a yarn needle.
Step 5: If you’d like a removable cozy, sew a button onto one end and create a small loop on the other end using yarn.
Why It’s Great for Beginners
- It works up quickly, so you can finish it in one sitting.
- You’ll practice the same basic stitch from start to finish.
- It uses only a small amount of yarn.
- It’s a practical project you’ll use every day or give as a handmade gift.
Beginner Tips
- Measure your mug before you start so the cozy fits properly.
- Cotton yarn is a great choice because it’s durable and easy to wash.
- Don’t make the cozy too loose, or it may slide off the mug.
- Try making several in different colors to match different mugs or seasons.
A knit mug cozy is proof that even a small project can be both beautiful and useful. It’s an excellent way to build your confidence while creating something you’ll reach for every time you enjoy your favorite hot drink.
6. Knit Bookmark
If you love reading or know someone who does, a knitted bookmark is a simple project that’s both useful and enjoyable to make. Because it’s small, you can usually finish it in a short amount of time, making it perfect for practicing your knitting skills without feeling overwhelmed.
A handmade bookmark also makes a thoughtful gift for teachers, friends, family members, or anyone who enjoys getting lost in a good book.
What You’ll Need
- Knitting needles (US 6–8 or 4–5 mm)
- Lightweight or medium-weight yarn
- Scissors
- Yarn needle
- Measuring tape
- Tassel or ribbon (optional)
Step-by-Step Instructions
Step 1: Cast on 8–12 stitches, depending on how wide you’d like your bookmark.
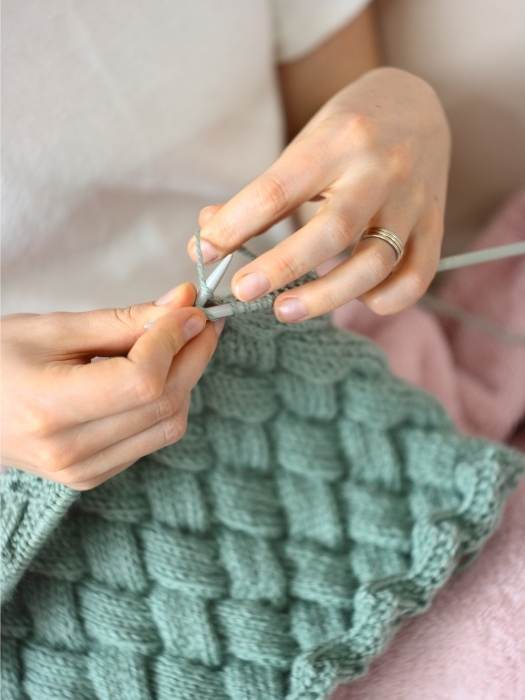
Step 2: Knit every row using the garter stitch. This creates a flat, textured bookmark that won’t curl easily.
Step 3: Continue knitting until the bookmark measures about 6–8 inches (15–20 cm) long.
Step 4: Bind off your stitches and cut the yarn.
Step 5: Use a yarn needle to weave in the loose ends. If you’d like, attach a small tassel or ribbon to one end for a decorative finish.
Why It’s Great for Beginners
- It’s one of the quickest knitting projects to complete.
- You only need to use the basic knit stitch.
- It helps you practice keeping your stitches even.
- It uses very little yarn, making it ideal for leftovers.
Beginner Tips
- Choose a smooth, light-colored yarn so it’s easier to see your stitches.
- Keep your edges neat by knitting with even tension.
- Avoid making the bookmark too thick, so it fits comfortably between the pages of a book.
- Make a few in different colors they’re perfect for gifts or keeping in your favorite books.
A knitted bookmark may be small, but it’s a great way to build your confidence and improve your skills. Every finished project brings you one step closer to tackling larger knitting patterns with ease.
7. Simple Knit Pillow Cover
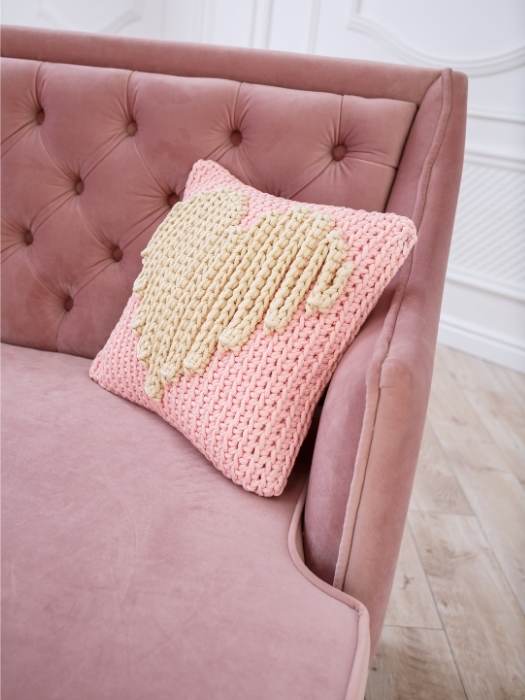
Once you’ve practiced a few smaller projects, a knit pillow cover is a great way to take your skills to the next level. It’s still beginner-friendly because you’ll mostly repeat the same stitches, but you’ll also learn how to join pieces together to create a finished item. When you’re done, you’ll have a soft, handmade pillow cover that adds warmth and personality to your sofa, bed, or favorite reading chair.
What You’ll Need
- Knitting needles (US 8–10 or 5–6 mm)
- Medium-weight or chunky yarn
- Scissors
- Yarn needle
- Measuring tape
- Pillow insert
Step-by-Step Instructions
Step 1: Measure your pillow insert before you begin so your cover fits properly.
Step 2: Cast on enough stitches to match the width of your pillow.
Step 3: Knit every row using the garter stitch until your piece is long enough to wrap around the front and back of the pillow.
Step 4: Bind off the stitches and weave in the loose ends.
Step 5: Fold the knitted piece around the pillow insert and sew the sides together with a yarn needle. If you’d like the cover to be removable, sew buttons onto one edge instead of closing it completely.
Why It’s Great for Beginners
- It gives you more practice with basic stitches.
- You’ll learn how to assemble a simple knitting project.
- It’s a practical home décor item you can use every day.
- It makes a thoughtful handmade gift for family or friends.
Beginner Tips
- Check your measurements before sewing the sides together to avoid a cover that’s too loose or too tight.
- Chunky yarn helps the project grow faster and gives the pillow a cozy texture.
- Choose a yarn color that matches your home décor or make several covers to switch with the seasons.
- Don’t rush taking your time helps you create straighter edges and neater stitches.
A handmade pillow cover is a project you’ll enjoy long after you’ve finished knitting. Every time you see it on your couch or bed, you’ll be reminded of how much your knitting skills have improved since your very first stitch.
8. Knit Coasters
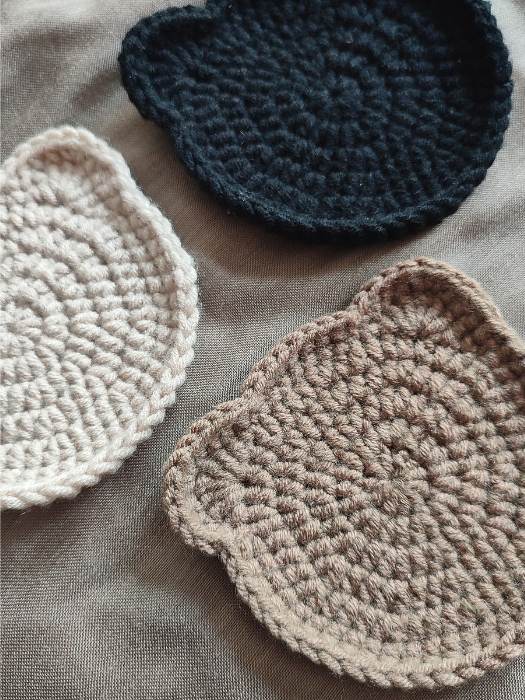
Knit coasters are one of the quickest projects for beginners and a great way to practice your stitches without using much yarn. They’re perfect for protecting tables from hot mugs and cold drinks, and you can make a matching set for your home or as a thoughtful handmade gift.
Since each coaster is small, you’ll see your progress quickly, making this a satisfying project if you’re still building confidence with knitting.
What You’ll Need
- Knitting needles (US 7–9 or 4.5–5.5 mm)
- 100% cotton yarn
- Scissors
- Yarn needle
- Measuring tape (optional)
Step-by-Step Instructions
Step 1: Cast on 18–24 stitches, depending on how large you’d like your coaster.
Step 2: Knit every row using the garter stitch until your coaster forms a square, usually about 4–5 inches (10–13 cm) wide.
Step 3: Bind off all the stitches.
Step 4: Weave in the loose ends with a yarn needle and trim any excess yarn.
Step 5: Repeat the process to make a matching set of four or six coasters.
Why It’s Great for Beginners
- It’s a fast project that can be completed in a short time.
- You’ll practice the basic knit stitch from start to finish.
- It uses very little yarn, making it perfect for leftover yarn.
- It’s useful around the house and easy to gift.
Beginner Tips
- Cotton yarn works best because it absorbs moisture and keeps its shape well.
- Check the size as you knit so each coaster matches the others.
- Try using different colors to create a fun, colorful set.
- Wash and lay your finished coasters flat to help them keep their shape.
These simple knit coasters may be small, but they’re a great way to improve your knitting skills while creating something you’ll use every day. Each finished coaster is another step toward becoming a more confident knitter.
9. Easy Knit Baby Blanket
A baby blanket is a wonderful project for beginners who are ready to make something a little bigger. While it takes more time than a coaster or dishcloth, the pattern is still simple enough for new knitters to follow. By repeating the same stitches, you’ll continue improving your technique while creating a soft blanket that’s perfect for a baby shower, a new arrival, or a special keepsake.
Don’t worry if your stitches aren’t perfect. Handmade blankets are loved because of the care and time that go into making them.
What You’ll Need
- Knitting needles (US 9–11 or 5.5–8 mm)
- Soft baby-friendly yarn
- Scissors
- Yarn needle
- Measuring tape
Step-by-Step Instructions
Step 1: Cast on enough stitches to create your desired blanket width. A common beginner size is 30–36 inches (76–91 cm) wide.
Step 2: Knit every row using the garter stitch to create a soft, textured blanket.
Step 3: Continue knitting until the blanket reaches about 36–40 inches (91–102 cm) in length, or your preferred size.
Step 4: Bind off all the stitches carefully.
Step 5: Weave in the loose ends neatly with a yarn needle and gently wash the blanket according to the yarn label before using or gifting it.
Why It’s Great for Beginners
- Uses simple stitches from beginning to end.
- Gives you lots of practice while building confidence.
- Creates a meaningful handmade gift.
- Helps improve stitch consistency over a larger project.
Beginner Tips
- Choose a soft, machine-washable yarn that’s suitable for babies.
- Check your stitch count every few rows to keep the blanket even.
- Work on the blanket a little each day instead of trying to finish it all at once.
- Store your knitting in a clean project bag to keep the yarn free from dust and tangles.
A handmade baby blanket is more than just a knitting project it’s something that can be treasured for years. Every stitch represents your time, care, and growing confidence as a knitter.
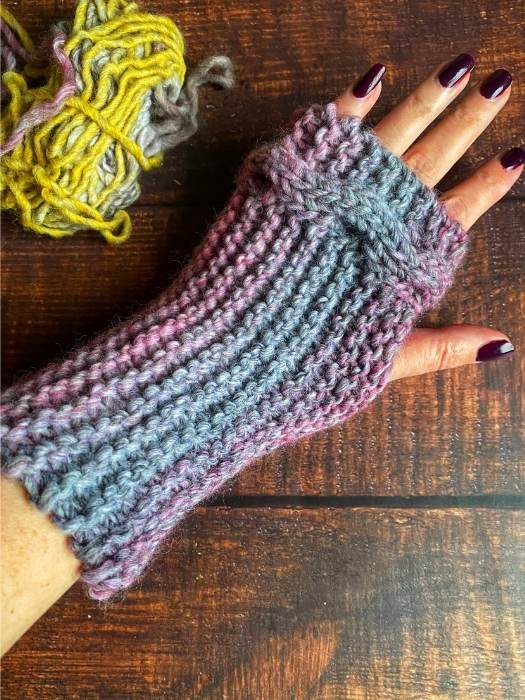
10. Fingerless Knit Gloves
Fingerless gloves are a great beginner project because they’re practical, comfortable, and surprisingly simple to make. They keep your hands warm while leaving your fingers free to type, read, write, or use your phone. Once you learn the basic steps, you can make several pairs in different colors to match your outfits or give as handmade gifts.
What You’ll Need
- Knitting needles (US 8–10 or 5–6 mm)
- Medium-weight yarn
- Scissors
- Yarn needle
- Measuring tape
Step-by-Step Instructions
Step 1: Cast on enough stitches to fit comfortably around your wrist. Measure your hand first so the gloves won’t be too tight or too loose.
Step 2: Knit every row until the piece is long enough to reach from your wrist to your knuckles.
Step 3: Bind off all the stitches.
Step 4: Fold the knitted piece in half and sew the side edges together, leaving a small opening for your thumb.
Step 5: Weave in the loose yarn ends and try on your glove. Repeat the same steps to make the second glove.
Why It’s Great for Beginners
- Uses basic knitting stitches.
- Helps you practice measuring and sewing knitted pieces together.
- Works up much faster than full-sized sweaters or socks.
- Makes a useful accessory you’ll wear during cooler weather.
Beginner Tips
- Measure your hand before casting on to get a comfortable fit.
- Knit the second glove soon after finishing the first so they match in size.
- Use a soft yarn that feels comfortable against your skin.
- If the gloves feel a little snug at first, don’t worry many yarns relax slightly after use.
Making your own fingerless gloves is a satisfying way to build your knitting skills. By the time you finish the pair, you’ll have more confidence with basic techniques and a handmade accessory you’ll be proud to wear.
Conclusion Beginner Friendly Knitting Projects for Adults Anyone Can Make
Learning to knit doesn’t happen overnight, and that’s perfectly okay. Every project you finish teaches you something new, whether it’s making neater stitches, keeping an even tension, or feeling more comfortable with your knitting needles. The more you practice, the more confident you’ll become.
These beginner-friendly knitting projects for adults are a great way to build your skills one project at a time. Start with something simple, enjoy the process, and don’t worry if your first piece isn’t perfect. Handmade items have their own charm, and each one reflects the time, patience, and care you put into creating it.
If you choose to knit a cozy scarf, a practical dishcloth, a soft blanket, or a thoughtful handmade gift, every stitch brings you closer to becoming a more confident knitter. So pick your favorite project, grab your yarn and needles, and enjoy the journey. You might discover a hobby you’ll love for years to come.
Check Out My Post On
7 Easy Arts and crafts for kids to do when they are bored