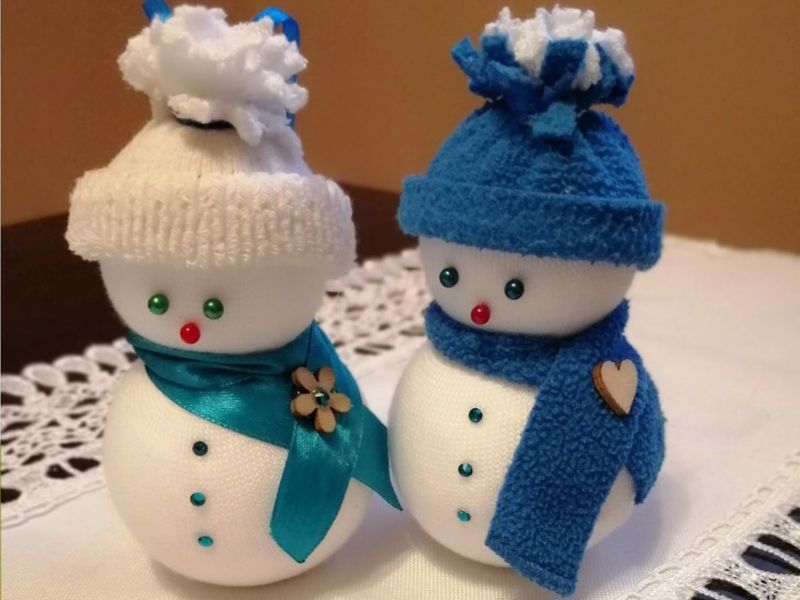
Snowman decorations are one of the sweetest ways to bring a little winter magic into your home. Even when there is no snow outside, you can still create that beautiful winter wonderland feeling with a few craft supplies, some creativity, and a little time.
What I love about DIY snowman decorations is how many different ways you can make them. You can turn old socks into adorable snowmen, transform glass jars into charming winter displays, or use scrap wood to create rustic decorations for your front porch. There are also plenty of simple projects you can make with your children or enjoy on a quiet afternoon at home.
Another lovely thing about snowman decorations is that they work throughout the winter season. Although many people associate snowmen with Christmas, you can keep these decorations on your mantel, shelves, coffee table, or porch well into January and February.
In this guide, you will discover 12 DIY snowman decorations that can help you create a charming winter atmosphere in different parts of your home. Whether you prefer rustic farmhouse decorations, cute miniature crafts, or larger outdoor displays, there is an idea here you can make your own.
Let’s get started!
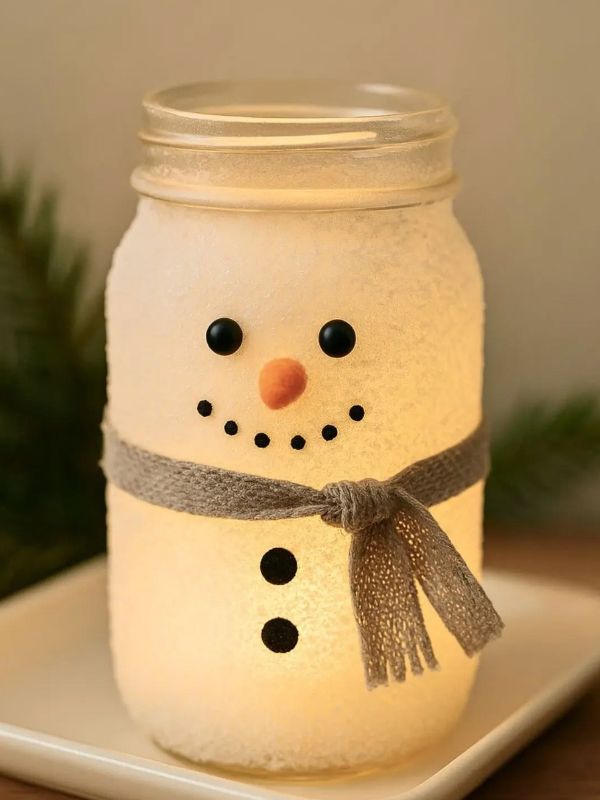
1. DIY Mason Jar Snowman Decorations
Mason jars are wonderful for DIY decorations because they are inexpensive, versatile, and easy to decorate. With a little white paint, ribbon, and a few small accessories, you can turn an ordinary glass jar into an adorable snowman that looks beautiful on a shelf, mantel, or side table.
This is also a lovely project if you want to create several matching decorations for your home without spending too much money.
What You’ll Need
- Clean, empty mason jars
- White acrylic craft paint
- Black buttons or small black paint dots
- Orange craft paint
- Black felt or fabric
- Ribbon or scrap fabric
- Craft glue suitable for your materials
- Paintbrushes
- Optional battery-operated fairy lights
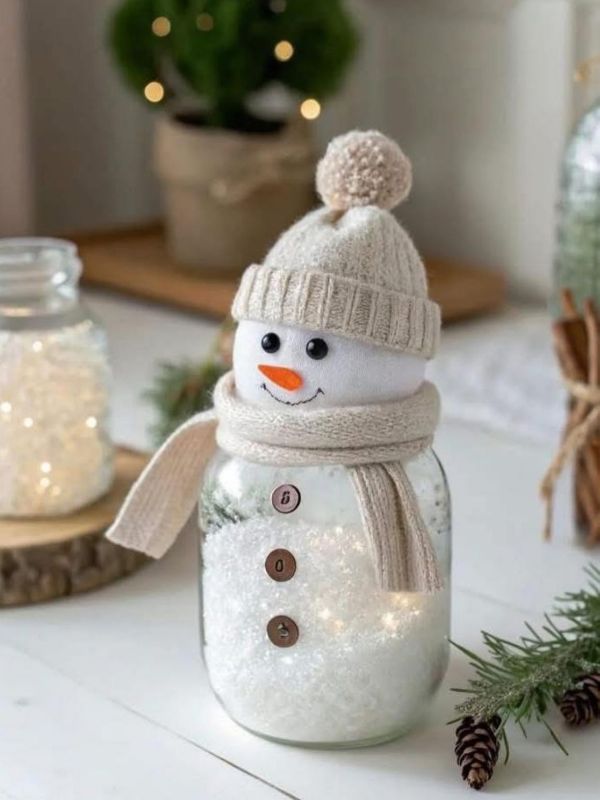
You can get your mason jars from Amazon
How to Make Mason Jar Snowmen
Step 1: Prepare your jars.
Wash the jars thoroughly and remove any labels. Make sure they are completely dry before you begin painting. If you’re using jars that previously contained food, remove any sticky residue so the paint adheres more evenly.
Step 2: Paint the jars white.
Apply white acrylic paint to the outside of each jar. Allow the first coat to dry before adding another coat if needed. Two or three thin coats often give a more even finish than one thick coat.
Follow the paint manufacturer’s instructions for drying time.
Step 3: Create the snowman’s face.
Use black paint to create two eyes and a smiling mouth. Add an orange triangle for the carrot-shaped nose.
You can make each face slightly different. One snowman might have a wide smile, while another might have tiny eyes and rosy cheeks.
Step 4: Add a scarf.
Cut a small strip of ribbon or soft fabric and tie it around the neck of the jar. Plaid fabric is lovely for a farmhouse look, while red ribbon creates a traditional Christmas appearance.
Step 5: Decorate the lid.
Cover the lid with black felt or paint it to resemble a hat. You can also glue a small pom-pom onto a fabric hat decoration if you want a playful finish.
Make sure any glued pieces are secure before displaying the jar.
Step 6: Add the finishing touches.
Arrange your finished snowman jars on a tray, bookshelf, or mantel. You can place battery-operated lights inside a suitable clear jar to create a gentle glow.
Never put candles or open flames inside these decorations, and make sure any lighting is appropriate for the container.
Decorating Tips
If you want your snowman jars to look like a coordinated set, use the same paint colors but vary their sizes and facial expressions.
You could make three snowmen and arrange them from shortest to tallest on your mantel. Add a few pinecones, artificial snow, or miniature evergreen branches around the jars to complete the display.
For a winter centerpiece, place the jars on a wooden tray and surround them with small ornaments or battery-operated lights.
You can also make these decorations for a winter party, a handmade gift, or a seasonal craft table.
If you want to get more ideas on what you can do with mason jars, check my article on How to Make DIY Glass Jar Lanterns for Your Garden: An Easy Step by Step Guide
2. DIY Sock Snowman Decorations
Do you have a few clean white socks that no longer have a matching pair? Instead of throwing them away, turn them into adorable snowman decorations.
Sock snowmen are particularly appealing because they don’t require sewing for a basic version. With rice or another suitable filling, rubber bands, and a few simple accessories, you can create a soft, rounded snowman that looks charming on a shelf or table.
This is also an excellent craft for a winter afternoon when you want something simple and inexpensive to make.
What You’ll Need
- Clean white socks
- Uncooked rice or suitable craft filling
- Small rubber bands or strong thread
- Orange felt
- Black buttons
- Ribbon or fabric scraps
- Craft glue
- Scissors
- Optional miniature hats or pom-poms
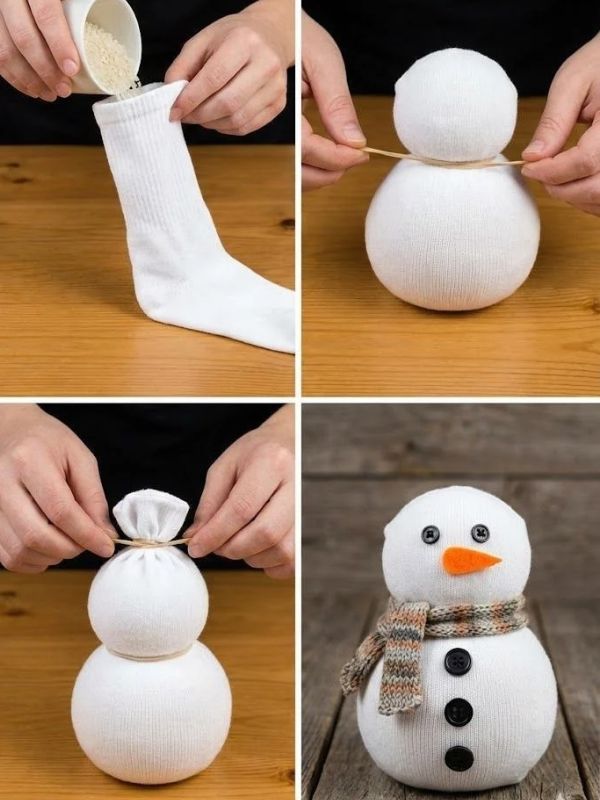
You can get these product from Amazon If you do not have one at home
How to Make a Sock Snowman
Step 1: Prepare the sock.
Choose a clean white sock with enough room to hold your filling. Cut off the section you don’t need, if necessary, leaving enough fabric to close the opening securely.
If you’re making this craft with children, an adult should handle the scissors.
Step 2: Fill the sock.
Carefully add rice or your chosen filling until the sock forms a rounded shape. Avoid overfilling it, as you need enough room to create the snowman’s head.
Rice creates a firm, weighted decoration, while soft craft stuffing gives the snowman a lighter feel.
Step 3: Shape the body and head.
Use a rubber band or strong thread to separate the head from the body. Add another band around the bottom if needed to help the snowman stand upright.
Adjust the filling until you like the shape.
Step 4: Make the face.
Glue on two small black buttons for the eyes and use orange felt to create a carrot nose. Add a few tiny black dots for the mouth.
Allow the glue to dry completely before handling the decoration.
Step 5: Add a scarf.
Cut a narrow strip of fabric and wrap it around the snowman’s neck. You can use fleece, felt, or an old scarf that you no longer need.
Tie the ends into a small knot or fringe them with scissors for a decorative finish.
Step 6: Finish with a hat.
Use the remaining sock material to create a simple hat, or add a small piece of fabric to the top.
You can also use a miniature knitted hat if you already have one available.
How to Display Sock Snowmen
Sock snowmen look especially cute in groups of two or three. Arrange them on a bookshelf, a side table, or a decorative tray.
You can give each snowman a different personality by changing the scarf color, button arrangement, and hat style.
For a farmhouse look, use cream-colored fabric, muted plaid scarves, and simple black buttons. For a more playful display, choose bright red, green, or blue accessories.
Important safety note: Rice-filled sock snowmen are not suitable toys for babies or young children who might put them in their mouths. Small buttons, rubber bands, and other decorative parts can also present choking hazards. Keep these decorations out of reach of children and pets, and use a securely closed, non-food filling if appropriate for your household.
Go through my article on Christmas Mantel Decor Ideas That Make Your Fireplace the Star of the Room You will find other interesting ways to decorate your mantel.
3. DIY Wooden Snowman Decorations
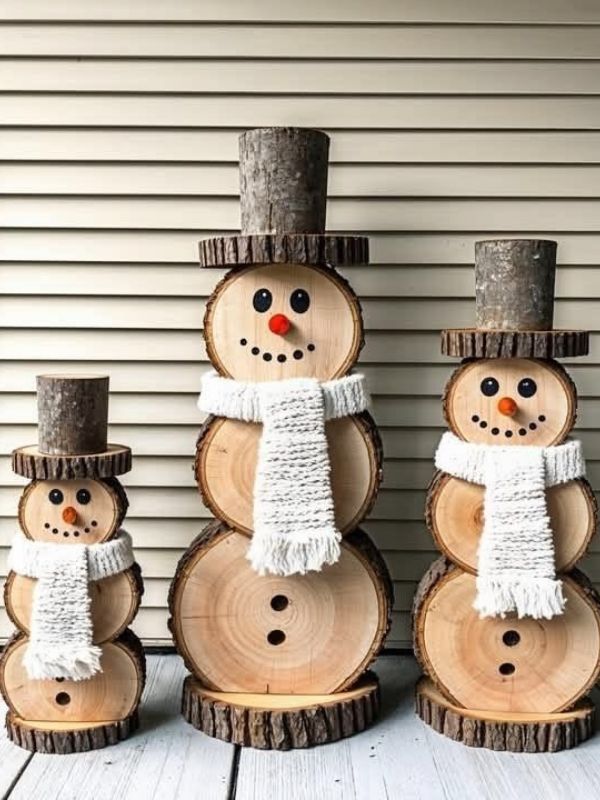
Wooden snowman decorations are perfect if you enjoy rustic farmhouse decor. They have a simple, handmade appearance that works beautifully on a mantel, entryway table, or covered porch.
You can make these decorations from scrap wood, wooden blocks, or pieces of timber left over from another project. The natural texture of the wood gives each snowman a slightly different character.
This is also a great way to use leftover materials rather than buying everything new.
What You’ll Need
- Scrap wood or unfinished wooden blocks
- White acrylic paint
- Black and orange paint
- Paintbrushes
- Sandpaper
- Fabric scraps or ribbon
- Craft glue
- Optional small wooden pieces for hats
How to Make Wooden Snowmen
Step 1: Prepare the wood.
Choose pieces of wood that can stand securely on a flat surface. Sand away rough edges and splinters before painting.
If you’re using reclaimed wood, make sure it is clean and suitable for indoor decoration.
Step 2: Paint the wood white.
Apply a coat of white acrylic paint to the front and sides. Let it dry before adding another coat if you want a brighter finish.
For a rustic appearance, you can leave small areas of natural wood visible around the edges.
Step 3: Paint the face.
Add two black eyes, a carrot-shaped orange nose, and a smiling mouth.
You can keep the expression simple or add rosy cheeks for a softer appearance.
Step 4: Create a hat.
Paint the top section black to resemble a winter hat, or attach a small wooden piece to the top.
If you prefer a farmhouse style, consider a simple black hat with a thin white band.
Step 5: Add a scarf.
Tie a narrow strip of fabric around the wooden block. Plaid patterns, red fabric, and neutral-colored linen all work well.
Step 6: Arrange your decorations.
Place your wooden snowman on a shelf or mantel, or group several blocks together to create a small winter display.
Make Your Wooden Snowmen Look More Interesting
One way to make this project stand out is to use wooden blocks of different heights.
For example, you could create three snowmen: one tall, one medium-sized, and one short. Give each one a different hat or scarf to make the arrangement look more natural.
You could also add painted buttons, small wooden stars, or tiny evergreen sprigs.
For a more weathered look, lightly sand a few painted edges after the paint has dried. This reveals some of the wood underneath and gives the decoration a rustic finish.
If you plan to display the snowmen outdoors, use suitable exterior paint and protect the wood according to the manufacturer’s instructions. Keep them in a sheltered location to help prevent moisture damage.
If you love decorating your home with creative projects, you will also enjoy these 10 Home Decor Ideas You Can DIY to Give Your Space a Beautiful New Look that can help you refresh your space with beautiful, budget-friendly decorations.
4. DIY Snowman Decorations Using Plastic Cups
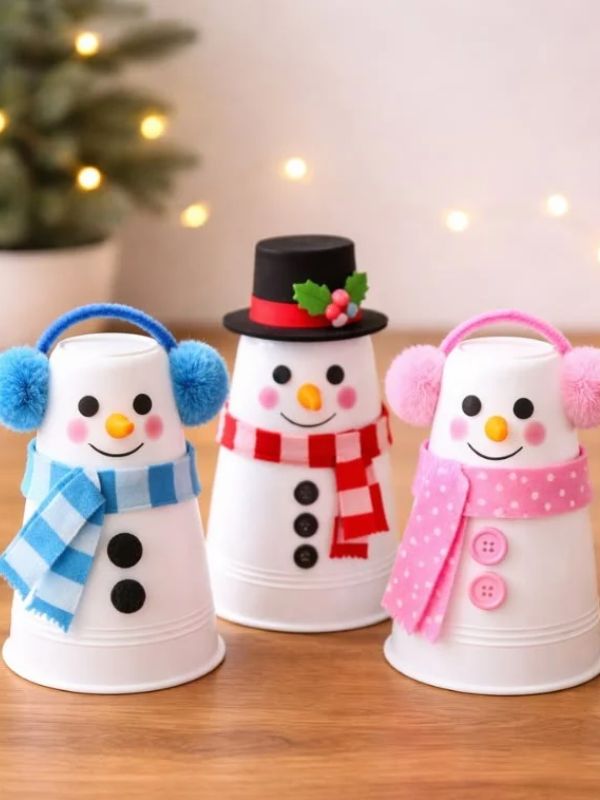
If you want to make a larger snowman without using real snow, plastic cups can help you create an oversized decoration.
This project uses multiple cups arranged into rounded sections. The finished snowman can become a fun focal point for a winter party, classroom display, or covered porch.
Because this project involves many cups and fasteners, it takes longer than the smaller crafts in this list. However, the result can be impressive.
What You’ll Need
- White plastic cups
- A stapler or suitable fasteners
- Black construction paper
- Orange construction paper
- Craft glue
- Scissors
- Ribbon or fabric
- Optional battery-operated lights
How to Make a Cup Snowman
Step 1: Plan the size.
Decide how large you want your snowman to be. A smaller version is easier to manage indoors, while a larger one needs more cups and a stable base.
Step 2: Arrange the cups.
Place the cups in a circular arrangement, with their openings facing the same direction. Connect them carefully using a suitable fastening method.
Build the structure gradually, checking that it stays balanced as you work.
Step 3: Form the body.
Continue adding cups to create a rounded section. Repeat the process for a smaller head.
The exact number of cups depends on their size and the dimensions of your design.
Step 4: Connect the sections.
Position the head above the body and secure it carefully. Make sure the decoration is stable before adding any finishing pieces.
Step 5: Add the face.
Cut eyes, a mouth, and a carrot nose from construction paper. Attach them to the front of the head.
Step 6: Add a scarf and hat.
Use ribbon or fabric for a scarf. A black paper hat or a lightweight fabric hat can complete the look.
Where to Display Your Cup Snowman
A cup snowman can look lovely at a winter-themed party, next to a Christmas tree, or in a classroom entrance.
If you want to use it outdoors, keep it sheltered from wind and rain. Lightweight cup structures can easily tip over or become damaged in poor weather.
Avoid placing electrical lights inside a structure made from combustible materials unless the lighting and materials are specifically suitable for that use. Battery-operated lights should be used according to their safety instructions.
A budget-friendly tip: Before buying new supplies, check whether you already have white cups left over from a family gathering or party. Reusing clean materials can help lower the cost of the project.
Looking for more ways to make your home feel festive? Explore these Creative Christmas Crafts for Adults That Look Store Bought but Aren’t for stylish handmade decorations that can add a special touch to your holiday home.
5. DIY Snowman Decorations Made From Tin Cans
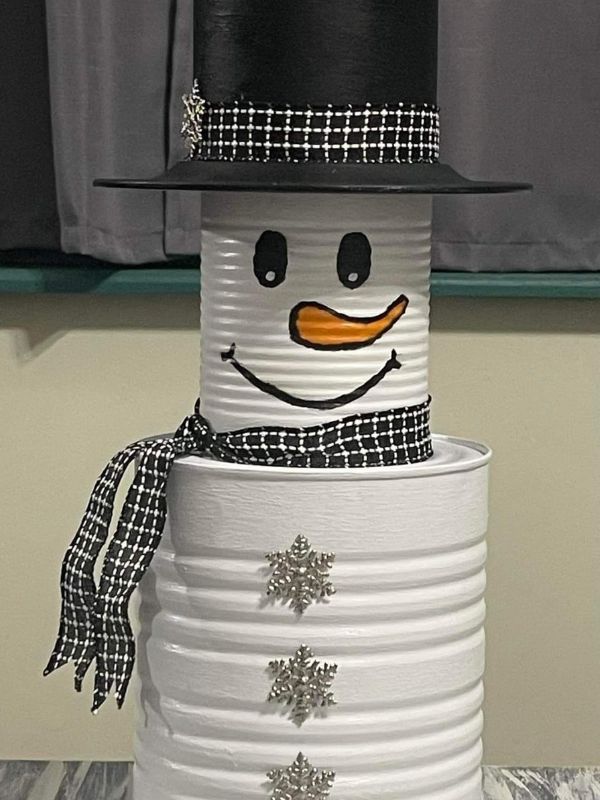
Empty tin cans can become charming snowman decorations with a little paint and imagination. This is a lovely project if you enjoy repurposing everyday household materials.
You can make a single snowman from one can or stack several cans to create a taller decoration. The finished piece works well on a shelf, entryway table, or covered porch.
What You’ll Need
- Clean, empty metal cans
- White metal-compatible paint or primer
- Black and orange paint
- Paintbrushes
- Ribbon or fabric scraps
- Craft glue suitable for metal
- Sandpaper or a suitable tool for smoothing sharp edges
How to Make a Tin Can Snowman
Step 1: Prepare the cans safely.
Wash the cans and remove any labels. Inspect the rims carefully.
Only use cans with smooth, safe edges. Discard any can with a sharp or damaged rim. An adult should handle any work involving metal edges.
Step 2: Apply primer if needed.
Follow the paint manufacturer’s instructions to determine whether a metal primer is required.
Once the surface is ready, apply white paint and allow it to dry completely.
Step 3: Paint the face.
Use black paint for the eyes and mouth, then add an orange carrot nose.
If you’re making a taller snowman from multiple cans, paint the face on the top can.
Step 4: Decorate the body.
Add black buttons down the front. You can paint them directly onto the can or use flat decorative pieces that are securely attached.
Step 5: Add a scarf.
Wrap a piece of fabric around the neck area. Tie it into a simple knot or bow.
Step 6: Create a hat.
Paint the top section black or attach a lightweight decorative hat.
Creative Ways to Use Tin Can Snowmen
You could make a row of tin can snowmen for a winter display or use one as a decorative pencil holder after ensuring that the inside edges are safe.
For an outdoor arrangement, group several snowmen beside a planter or near your front door under a covered area.
You can also change the colors to match your home. A snowman with a gray scarf and a black hat may suit a neutral farmhouse interior, while red and green accessories create a traditional Christmas look.
Safety reminder: Do not use sharp-edged cans, and never leave exposed metal edges where children or pets could reach them.
Give your front door a festive makeover by pairing your snowman decorations with a beautiful 15 Christmas Loc Styles That Will Have Everyone Asking Where You Got Your Hair Done It’s a lovely way to create a welcoming entrance and bring your winter decorations together.
6. DIY Snowman Decorations With Pine Cones
Pine cones are useful for seasonal crafts because their natural texture adds interest without requiring much decoration.
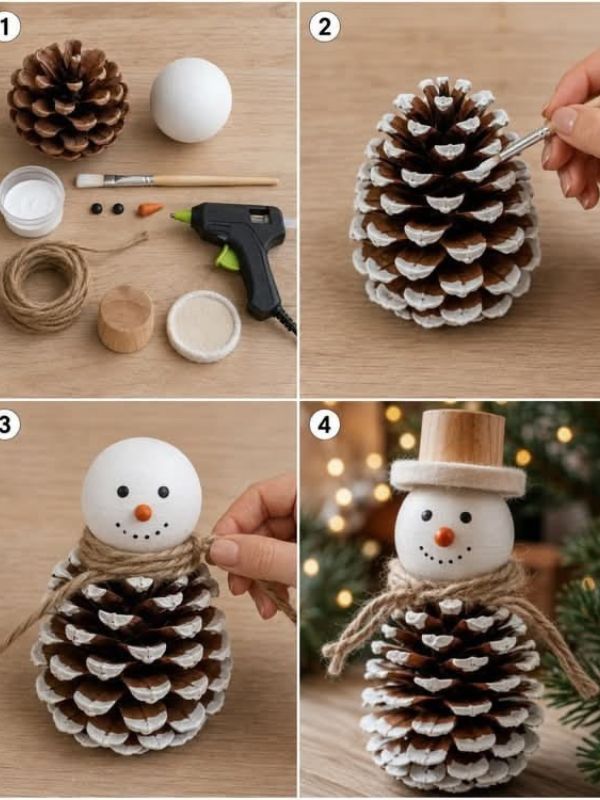
When you combine pine cones with white paint, small felt accessories, and a little ribbon, you can make miniature snowmen that look lovely on shelves, coffee tables, and winter-themed trays.
This is a good project if you enjoy nature-inspired decorations.
What You’ll Need
- You can get your Dry Pine cones from Amazon
- White paint
- Small pieces of felt
- Black beads or paint
- Orange felt or paint
- Craft glue
- Ribbon
- Small wooden discs or another stable base
How to Make Pine Cone Snowmen
Step 1: Prepare the pine cones.
Choose pine cones that are dry and free from visible mold or insects. If collecting them outdoors, inspect them carefully and prepare them appropriately before bringing them inside.
Step 2: Add a snowy finish.
Use a paintbrush to apply white paint to the edges of the pine cone scales.
You don’t need to cover the entire pine cone. Leaving some of the natural brown color visible gives the decoration a more interesting appearance.
Step 3: Create the face.
Depending on the pine cone’s shape, attach a small felt face to one end or use a wooden bead as the head.
Add black eyes and an orange nose.
Step 4: Add a scarf.
Wrap a thin strip of felt or ribbon around the neck area.
Choose a color that complements your winter decor.
Step 5: Create a stable base.
Attach the pine cone to a small wooden disc or another stable base if needed. Allow the glue to dry completely.
Step 6: Make a small collection.
Repeat the process with several pine cones of different sizes.
How to Style Pine Cone Snowmen
Arrange your finished snowmen on a wooden tray with artificial snow, small evergreen branches, and battery-operated lights.
They also look lovely on a winter mantel alongside wooden decorations and glass jars.
For a more natural appearance, use neutral colors such as white, brown, cream, and forest green.
For a children’s craft session, prepare the materials in advance and let children paint the pine cones and choose scarf colors. Adults should handle hot glue, sharp tools, and small decorative parts.
If you love using natural materials to create beautiful handmade decorations, check out these 10 Beautiful DIY Acorn Crafts for Adult to Make This Fall for more creative ways to bring a touch of nature into your home this season.
7. DIY Snowman Decorations Using Glass Jars
Glass jars are ideal for creating elegant winter displays. Unlike a fully painted snowman jar, this version uses the transparent glass as part of the design.
You can fill the jar with artificial snow, small winter-themed ornaments, or a simple miniature scene. Add a snowman face to the outside, and you have a decoration that works beautifully on a mantel, side table, or bookshelf.
What You’ll Need
- Clean glass jars
- Artificial snow or white paper filler
- Shop Snowman face stickers From Amazon
- Ribbon
- Small winter-themed decorations
- Battery-operated fairy lights, if desired
How to Make Glass Jar Snowman Decorations
Step 1: Clean the jar.
Remove labels and adhesive residue. Wash and dry the jar thoroughly.
Step 2: Create the snowman face.
Paint a simple snowman face on the front or use suitable decorative stickers.
If painting on glass, select paint designed for that surface and follow the manufacturer’s instructions.
Step 3: Add the filling.
Pour a small amount of artificial snow or white paper filler into the jar.
You can also add a few miniature winter decorations to create a little scene.
Step 4: Decorate the lid.
Paint the lid or cover it with fabric. A simple black lid creates the appearance of a snowman’s hat.
Step 5: Add ribbon.
Tie ribbon around the neck of the jar or across the lid.
Step 6: Arrange the finished display.
Place the jar on a tray or shelf. If you use lights, choose battery-operated lights suitable for the container and follow their instructions.
Ideas for Personalizing Your Glass Jar Snowmen
You could create a family of snowman jars with different facial expressions or scarf colors.
Another option is to make a winter village by combining the jars with miniature houses, tiny evergreen trees, and artificial snow.
For a simple centerpiece, group three jars together and surround them with pinecones or other seasonal decorations.
If you prefer a minimalist look, skip the extra ornaments and use only white filler, a black lid, and a small ribbon.
This project also makes a thoughtful handmade gift because the design can be adapted to suit different decorating styles.
If you love decorating your home with natural materials and handmade pieces, you’ll also enjoy these. 10 Dried Flower Crafts and Decor Ideas That Make Your Home Look Beautiful.From beautiful dried flower arrangements to creative DIY decorations, these projects can help you add a lovely, natural touch to your home.
8. DIY Snowman Decorations From Wooden Slices
Wood slices bring a natural, rustic look to winter crafts. Their round shape makes them particularly suitable for snowman ornaments, small tabletop decorations, and handmade garlands.
You can use one large slice for a simple snowman face or connect several slices to create a more traditional snowman shape.
What You’ll Need
- Flat wooden slices
- White paint
- Black and orange paint
- Paintbrushes
- Ribbon or twine
- Craft glue
- Optional small pieces of felt
How to Make Wooden Slice Snowmen
Step 1: Choose your wood slices.
Select pieces that are dry, smooth, and suitable for indoor crafts. Sand any rough surfaces before painting.
Step 2: Paint the snowman.
For a single-slice decoration, paint a white circle in the center and leave some of the wood grain visible around the edges.
For a traditional snowman, connect two or three wooden slices of different sizes.
Step 3: Paint the face.
Add two black eyes, an orange nose, and a curved mouth.
Step 4: Add buttons.
If you are using multiple slices, paint black buttons down the body.
Step 5: Attach a scarf.
Use ribbon or a narrow piece of felt to create a scarf between the head and body.
Step 6: Add a hanging loop if needed.
For a lightweight ornament, attach a suitable hanging loop securely. Make sure the wood slice and fastening are appropriate for the intended use.
Decorating With Wooden Slice Snowmen
Small wooden snowmen can be arranged on shelves, placed beside miniature Christmas trees, or used as part of a winter centerpiece.
You could also make a set of matching ornaments for a rustic Christmas tree.
For a more natural style, keep the wooden edges visible and use muted colors. If you prefer a traditional holiday appearance, add red scarves and small green details.
These decorations can also be personalized with names or dates, making them suitable for handmade gifts.
Check out these 12 Candle Making Ideas That Smell Better Than Store-Bought Candles
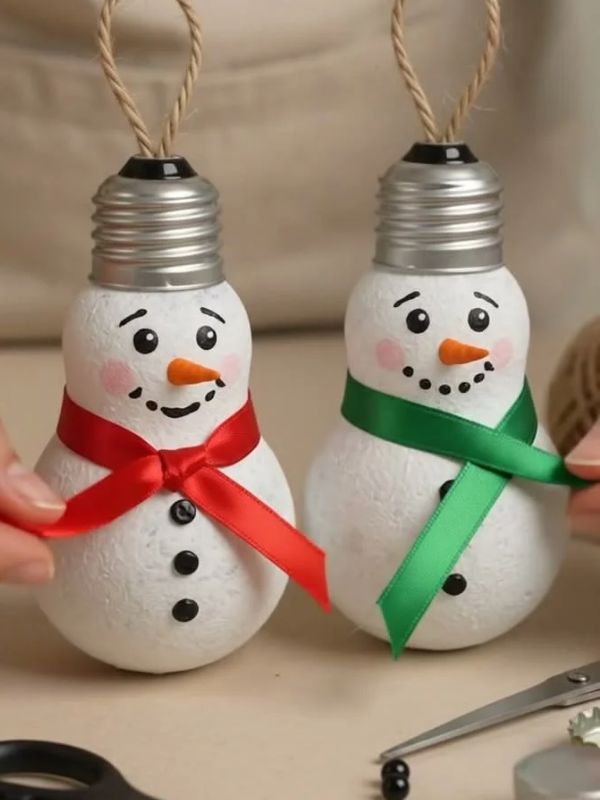
9. DIY Snowman Decorations With Old Light Bulbs
If you have suitable unused light bulbs, you can transform them into miniature snowman ornaments.
Their rounded shape makes them a natural fit for snowman crafts. This project works particularly well for tree ornaments or small decorations that can be displayed throughout winter.
Important: Use only intact, cool, nonhazardous bulbs intended for craft reuse. Avoid fluorescent bulbs, which can contain mercury, and never break a bulb to make this project. LED bulbs and their components may not be suitable for painting or repurposing, so check the manufacturer’s guidance. For a safer alternative, use plastic or wooden bulb-shaped craft blanks.
What You’ll Need
- Suitable bulb-shaped craft blanks
- White paint compatible with the material
- Black and orange paint
- Small paintbrushes
- Ribbon
- Craft glue
- Optional felt for hats
How to Make Snowman Ornaments
Step 1: Prepare the surface.
Make sure the ornament is clean and dry.
Step 2: Apply white paint.
Paint the ornament white and allow it to dry. Apply additional coats if necessary.
Step 3: Paint the face.
Create two black eyes, an orange nose, and a small smiling mouth.
Step 4: Add a scarf.
Tie a narrow piece of ribbon around the neck area.
Step 5: Decorate the top.
Attach a lightweight felt hat if you like.
Step 6: Add a hanging loop.
Use a secure hanging method appropriate for the craft blank. Make sure the ornament is lightweight enough for the intended branch or display.
How to Use These Snowman Ornaments
Hang your finished snowmen on a Christmas tree, arrange them on a decorative branch, or place them in a bowl with other seasonal ornaments.
You can create different expressions and scarf colors to make a collection.
For a winter display that lasts beyond Christmas, combine the snowmen with white, silver, and wooden ornaments rather than using only traditional holiday colors.
Christmas is also a wonderful time to show the special women in your life how much you appreciate them. If you’re looking for thoughtful presents for your mom, check out these 15 Christmas Gift Ideas for Mom That Say “I Love You” Without Saying a Word for inspiration on gifts she’ll love and appreciate this holiday season
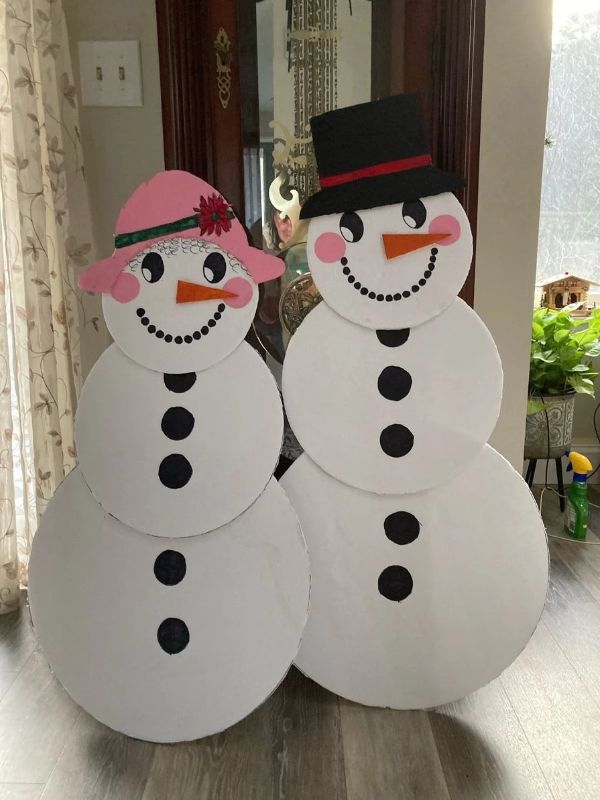
10. DIY Snowman Decorations Made From Cardboard
Cardboard is one of the most affordable materials for DIY winter decorations. You can use it to create flat snowman silhouettes, wall decorations, tabletop signs, or large cutouts for a winter party.
This is a particularly useful option if you want to make decorations in different sizes without purchasing wooden blanks.
What You’ll Need
- Clean cardboard
- Pencil
- Scissors or a craft knife
- White paint
- Black and orange construction paper
- Glue
- Ribbon or fabric
- Optional glitter or decorative embellishments
How to Make Cardboard Snowman Decorations
Step 1: Draw your snowman.
Sketch a snowman with two or three rounded sections on the cardboard.
You can create a traditional snowman or draw a more playful design with a tilted hat.
Step 2: Cut out the shape.
Cut along the outline. Adults should handle craft knives and supervise children using scissors.
Step 3: Paint the snowman white.
Apply white paint to the cardboard and let it dry completely.
Step 4: Add the face and buttons.
Use construction paper or paint to create the eyes, nose, mouth, and buttons.
Step 5: Add accessories.
Attach a paper hat and a fabric scarf.
Step 6: Make the decoration stand or hang.
For a wall decoration, attach a suitable hanging loop. For a tabletop display, add a sturdy cardboard support to the back.
Ways to Decorate With Cardboard Snowmen
Small cardboard snowmen can decorate a child’s bedroom or a winter-themed craft table.
Larger versions can be displayed beside a fireplace, in an entryway, or at a winter party.
You could also write a seasonal greeting on the snowman’s body, such as “Hello, Winter!” or “Let It Snow.”
For a more polished appearance, cover the cardboard edges with white paper or paint them carefully.
This project is especially useful if you are decorating on a tight budget because cardboard is often available at home.
If you’re decorating your home for Christmas on a budget, you can pair your handmade snowman decorations with a beautiful, affordable Christmas tree. Check out my guide on How to Make Cheap DIY Christmas Tree Decorations on a Budget: 20 Beautiful Ideas for creative ideas to make your home feel festive without spending too much money.
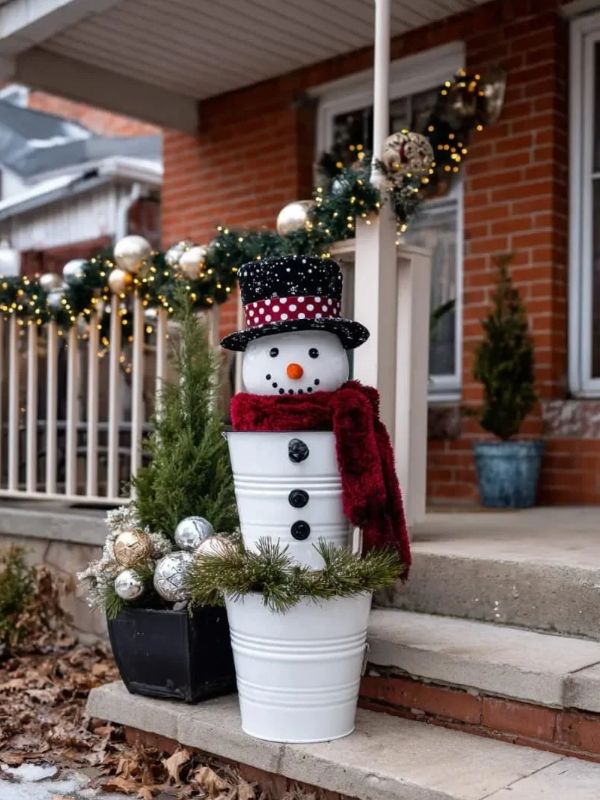
11. DIY Snowman Decorations for Your Front Porch
A front porch is a lovely place to display winter decorations because it welcomes guests before they even enter your home.
Snowman decorations can make your porch look cheerful, particularly when you combine them with evergreen branches, lanterns, planters, and seasonal signs.
You don’t need a large porch to create a beautiful display. A small arrangement beside the front door can be just as appealing as a larger setup.
What You’ll Need
- Wooden snowman decorations or weather-resistant snowman figures
- Seasonal ribbon
- Evergreen branches or artificial greenery
- Planters
- A wooden tray or outdoor-safe display surface
- Optional winter-themed welcome sign
How to Create a Snowman Porch Display
Step 1: Choose your main decoration.
Start with one larger snowman that can serve as the focal point of your display.
A wooden snowman, weather-resistant figure, or handmade decoration with a suitable protective finish can work well.
Step 2: Add greenery.
Place artificial evergreen branches around the base of the snowman or arrange them in nearby planters.
Greenery adds texture and creates a seasonal appearance.
Step 3: Introduce a little color.
Use red ribbon, plaid fabric, or another accent color that complements your front door.
You can tie ribbon around a planter or use it to decorate the snowman’s scarf.
Step 4: Add height.
A tall lantern, decorative sign, or second snowman can help create a layered arrangement.
Keep the tallest object toward the back so the smaller decorations remain visible.
Step 5: Check the weather resistance.
If the porch is exposed to rain or strong winds, choose suitable materials and secure lightweight decorations.
Keep pathways clear and avoid placing objects where people might trip.
How to Make a Small Porch Look Beautiful
If you have limited space, use a simple arrangement with three elements: one snowman, one planter, and one seasonal sign.
Choose decorations that complement one another instead of filling every available space.
For example, a white wooden snowman with a plaid scarf can look lovely beside a dark planter filled with artificial evergreen branches.
If you already have a winter wreath on your door, choose a matching scarf or ribbon color to tie the display together.
Once fall arrives, it’s the perfect time to refresh your home with seasonal decorations before transitioning to Christmas. If you’re looking for inspiration for the autumn season, check out these Cheap Fall Home Decor Ideas for Your Living Room to discover beautiful ways to bring the warmth of fall into your home.
12. DIY Snowman Decorations for a Winter Mantel
A mantel is an ideal place to display snowman decorations because it gives you a clear surface for arranging different heights, textures, and colors.
Even if you don’t have a fireplace, you can recreate the same look on a console table, bookshelf, or long floating shelf.
The key is to create a balanced display rather than arranging every decoration in a straight line.
What You’ll Need
- Small wooden or ceramic snowman decorations
- Artificial evergreen garland
- Battery-operated lights
- Small decorative trees
- Candlestick-style LED lights
- A tray or decorative books
- Optional winter-themed artwork

How to Style a Snowman Mantel
Step 1: Start with greenery.
Place an artificial evergreen garland along the mantel. You can leave it simple or add a few decorative branches.
Step 2: Choose your focal point.
Place a larger snowman decoration near the center or slightly to one side.
A wooden snowman works well for rustic interiors, while a white ceramic figure suits a cleaner, more traditional look.
Step 3: Add smaller decorations.
Arrange two or three smaller snowmen around the focal point.
Vary their heights so the display looks more interesting.
Step 4: Add lighting.
Battery-operated fairy lights can add a soft glow to the arrangement.
Choose lights that are suitable for indoor decorative use and keep wires away from heat sources.
Step 5: Balance the arrangement.
Place a small decorative tree or lantern on the opposite side of the focal point.
Step back and check whether one side looks too crowded.
Choosing a Color Scheme
A coordinated color palette can help your mantel look polished.
Here are three combinations to consider:
- Classic winter: White, silver, and soft gray.
- Traditional Christmas: White, red, and green.
- Rustic farmhouse: White, natural wood, cream, and muted green.
You can also use black accents in hats and buttons to create contrast.
If you want the mantel to remain decorated after Christmas, use fewer holiday-specific ornaments and focus on snowmen, greenery, wooden pieces, and neutral colors.
Your front door is a lovely place to start when decorating your home for a new season. Before switching to Christmas decorations, you can welcome autumn with a beautiful handmade wreath that adds warmth and seasonal charm to your entrance. Check out my guide on 10 Beautiful DIY Fall Wreath Ideas for Front Door Decor to Welcome Autumn for creative wreath ideas that will make your front door look beautiful.
How to Save Money on DIY Snowman Decorations
Start by checking your existing craft supplies before purchasing anything new.
You may already have white paint, ribbon, glass jars, fabric scraps, or cardboard that can be used for these projects.
Choose one or two colors for your decorations so you can reuse the same materials across several crafts.
For example, a roll of red plaid ribbon could decorate a mason jar snowman, a wooden snowman, and a porch arrangement.
You can also make decorations in different sizes using the same basic materials.
This approach helps you create a coordinated winter display without buying a large collection of unrelated items.
How to Decorate Your Home With DIY Snowman Decorations
Once you’ve made a few snowman decorations, the next step is deciding where to display them.
You don’t need to place a snowman in every corner of your home. A few thoughtfully arranged pieces can create a seasonal atmosphere without making your space feel cluttered.
Here are some simple ways to use your handmade decorations throughout the house.
1. Create a Snowman Coffee Table Display
Your coffee table is a good place for a small winter arrangement.
Start with a wooden or neutral-colored tray. Place one medium-sized snowman in the center and add two smaller decorations beside it.
You can finish the arrangement with a few pinecones, artificial greenery, or a small battery-operated light.
Keep the arrangement low enough that it doesn’t block conversation or take up too much usable space.
If your coffee table is small, use only one snowman and a few decorative accents.
Your coffee table Decor is another lovely spot to display your seasonal decorations. You can arrange a handmade snowman figurine on a decorative tray, add a few candles, and finish the look with small winter accents
2. Decorate Your Entryway
An entryway display can make your home feel welcoming during the winter season.
Place a wooden snowman on a console table and add a small tray for keys or other everyday items.
If you have space, include a miniature evergreen tree or a simple seasonal sign.
Keep practical items separate from the decorations so the entryway remains easy to use.
For a small entryway, a single snowman beside a vase of greenery may be all you need.
3. Add Snowman Decorations to Your Bookshelves
Bookshelves are ideal for smaller decorations such as cork snowmen, felt ornaments, and miniature wooden figures.
Try placing a snowman beside a stack of books or next to a small decorative tree.
Vary the heights of the objects and leave some open space between them.
You can also group decorations by color. For example, white snowmen, wooden accessories, and green branches create a natural winter display.
4. Decorate a Side Table
A side table beside a sofa or armchair can accommodate a simple seasonal arrangement.
Place a small snowman on a decorative tray and add a battery-operated light or a miniature evergreen tree.
If the table already holds a lamp, choose decorations that fit around it without overcrowding the surface.
This is an easy way to bring winter decor into your living room without changing the entire room.
If you’re planning a festive dinner or hosting family and friends during the holiday season, your table deserves some attention too. You can pair your handmade snowman decorations with natural elements like pinecones, greenery, wooden accents, and simple candles to create a beautiful seasonal display. For more inspiration, check these Fun natural table settings
5. Make a Winter-Themed Dining Table Centerpiece
Snowman decorations can also be used on a dining table.
Choose a low tray and arrange a few small snowmen with artificial greenery and pinecones.
Keep the centerpiece low enough that people can see one another across the table.
If you’re using the table for meals, make sure the arrangement can be moved easily and that decorations are kept away from food.
Battery-operated lights are a practical alternative to open flames for this type of display.
How to Make Your DIY Snowman Decorations Look More Expensive
You don’t need costly materials to create attractive winter decorations. The way you combine colors, textures, and shapes can make a significant difference to the finished display.
Here are a few tips to help your handmade snowmen look polished.
Choose a Consistent Color Palette
Using too many colors can make a display look busy.
Instead, choose two or three main colors and repeat them throughout your decorations.
For example, white, black, and red create a traditional snowman look, while white, cream, and natural wood suit a farmhouse interior.
If you prefer a modern winter display, try white, silver, and gray.
You can still introduce other colors in small amounts, but repeating the same shades helps everything look connected.
Mix Different Textures
Combining materials makes a display more interesting.
You could pair a smooth glass jar snowman with a soft felt snowman and a rustic wooden figure.
The different textures help each decoration stand out without requiring elaborate designs.
Artificial greenery, ribbon, wood, glass, and fabric can work well together.
Vary the Heights
When arranging several decorations, avoid making every item the same height.
Place a taller snowman toward the back and smaller figures toward the front.
You can also use a small decorative box or wooden riser to elevate one item.
This creates a layered appearance and makes the display easier to see.
Leave Some Empty Space
It can be tempting to fill every available space with decorations, especially when you have spent time making them.
However, leaving a little room around each piece helps the display feel more organized.
Start with a few decorations, step back, and add more only if the arrangement needs them.
Pay Attention to Small Details
A neat scarf, carefully painted face, or well-finished wooden edge can make a simple craft look more polished.
Take your time with the final details and allow paint and glue to dry fully before displaying the decoration.
If you’re making several matching snowmen, use the same paint colors and similar scarf styles.
Where to Buy Supplies for DIY Snowman Decorations
You can make most of these decorations with affordable materials, but there may be times when you need to purchase a few supplies.
Before shopping, write down what each project requires and check what you already own.
Here are some useful supplies to consider.
1. Acrylic Paint
White, black, and orange acrylic paint are useful for many of the snowman projects in this article.
You can use them for suitable wooden decorations, craft blanks, and other paint-compatible surfaces.
Shop white, black, and orange acrylic paint set from Amazon
2. Craft Glue
A suitable craft adhesive can help attach felt, ribbon, and lightweight decorative pieces.
Choose glue based on the materials you’re joining and follow the manufacturer’s instructions.
Shop glue suitable for felt, wood, and other craft materials From Amazon
3. Felt Sheets
Felt is useful for making scarves, hats, noses, and other small decorative pieces.
A pack containing several colors can be used across multiple projects.
Shop assorted craft felt sheets from Amazon.
4. Decorative Ribbon
Ribbon can make a simple snowman look more finished.
Plaid ribbon works well for farmhouse decor, while solid red, green, white, or silver ribbon suits traditional winter displays.
Shop seasonal decorative ribbon.
5. Wooden Craft Blanks
Wooden blocks, slices, and unfinished ornaments are useful for creating rustic snowman decorations.
Choose sizes that suit your planned project.
Shop unfinished wooden craft blocks or wood slices.
6. Battery-Operated Fairy Lights
Small battery-operated lights can add a gentle glow to a winter centerpiece or glass jar display.
Choose products suitable for indoor decorative use and follow their safety instructions.
Shop battery-operated fairy lights from Amazon
Frequently Asked Questions About DIY Snowman Decorations
1. What can I use to make DIY snowman decorations?
You can use many different materials, including mason jars, old socks, wooden blocks, pinecones, cardboard, felt, and suitable craft blanks.
The best material depends on the size and style of decoration you want to create.
For a small indoor decoration, a mason jar or sock snowman may be a good choice. For rustic farmhouse decor, wooden blocks and wood slices work particularly well.
2. How can I make snowman decorations on a budget?
Start by using materials you already have at home.
Empty jars, fabric scraps, cardboard, leftover ribbon, and suitable pieces of wood can all be useful for winter crafts.
You can also choose one basic design and make several versions using different scarf colors or facial expressions.
This lets you create a coordinated display without purchasing many different supplies.
3. What are the easiest DIY snowman decorations for beginners?
Mason jar snowmen, cardboard snowmen, and simple wooden block snowmen are good starting points.
They require relatively few materials and allow you to practice basic painting and decorating techniques.
Sock snowmen are another option, although filling and shaping them neatly may take a little practice.
4. Can I use DIY snowman decorations after Christmas?
Yes! Snowman decorations can be displayed throughout winter, not only during Christmas.
To make them suitable for January and February, use neutral colors such as white, gray, cream, and natural wood.
You can also combine them with evergreen branches, simple winter signs, and miniature trees.
5. How do I make outdoor snowman decorations last longer?
Choose materials suitable for outdoor use and protect them according to the manufacturer’s instructions.
For example, wooden decorations should be treated appropriately for their intended exposure, while fabric and cardboard pieces are generally better suited to sheltered indoor spaces.
Secure lightweight decorations against wind and bring delicate pieces indoors during bad weather.
6. What colors work best for snowman decorations?
White is the traditional base color, while black is often used for eyes, buttons, and hats.
Orange works well for the carrot nose.
For accessories, red, green, blue, silver, and plaid patterns are popular choices. Neutral shades such as cream, gray, and natural wood can also create a beautiful farmhouse-style display.
7. Can children make DIY snowman decorations?
Yes. Children can help paint cardboard snowmen, decorate paper shapes, and choose colors for simple craft projects.
Adults should supervise the use of scissors, adhesives, and other tools.
Avoid small detachable parts for young children, and keep hot glue guns, sharp metal edges, and other hazardous materials away from them.
8. How do I make a snowman decoration without snow?
You can create a snowman using materials such as white-painted wood, socks, mason jars, cardboard, felt, or suitable craft blanks.
These materials allow you to create the traditional snowman shape without needing real snow.
Choose a design that suits your available supplies and the space where you plan to display it.
9. How can I make a farmhouse-style snowman decoration?
Use natural wood, white paint, black accents, and simple fabric scarves.
Plaid ribbon, distressed wooden edges, and neutral accessories can help create a rustic appearance.
Keep the design relatively simple so the natural textures remain visible.
10. Where should I display DIY snowman decorations?
Popular places include mantels, coffee tables, entryway consoles, bookshelves, dining tables, and covered porches.
Choose decorations that suit the available space and keep frequently used surfaces practical.
Smaller snowmen work well on shelves, while larger weather-resistant decorations can serve as focal points on a porch.
Conclusion on DIY Snowman Decorations
Creating DIY snowman decorations is a lovely way to make your home feel more festive during the winter season. With a few affordable supplies and a little creativity, you can transform everyday materials into charming handmade pieces.
From mason jar snowmen and rustic wooden decorations to felt ornaments and porch displays, there are plenty of options to suit different decorating styles and budgets.
You can also personalize each snowman with different scarves, hats, facial expressions, and colors to make your decorations feel unique.
The most important thing is to choose projects you enjoy making and decorations that work well in your home.
Which of these DIY snowman decorations would you like to try first? I’d love to know whether you prefer the mason jar snowmen, rustic wooden designs, or the larger front porch decorations.
For more fun projects to keep your children busy, check out these 12 Cardboard Crafts for Preschool That Prove You Don’t Need Fancy Supplies for easy and creative ideas they can enjoy making at home.”