New Year’s Eve crafts is a wonderful opportunity to bring everyone together, share a few laughs, and create memories before the year comes to an end. If you’re planning a family party at home, adding a few handmade decorations and fun craft activities can make the celebration feel more personal without stretching your budget.
One of my favorite things about family crafts is that everyone can contribute something. The children can decorate party hats, the adults can help arrange the decorations, and everyone can participate in activities that capture their hopes for the coming year.
Why I So Much Love this New Year’s Eve Crafts is that with materials like cardstock, paper plates, empty jars, ribbons, and markers, you can create decorations and activities that children and adults will enjoy making together.
In this guide, you will discover 11 thoughtful New Year’s Eve crafts for family parties at home. These ideas include festive decorations, interactive activities, keepsakes, and simple projects that can help make your celebration memorable.
1. DIY New Year’s Eve Party Hats
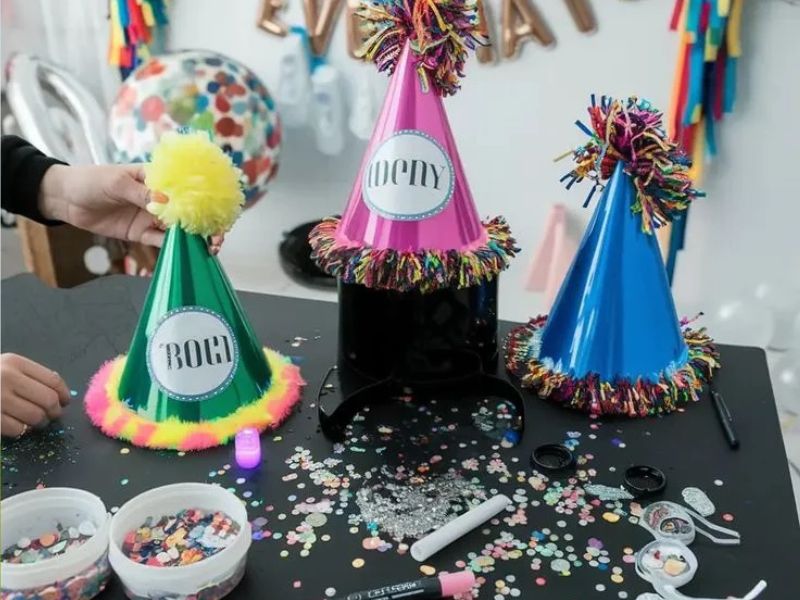
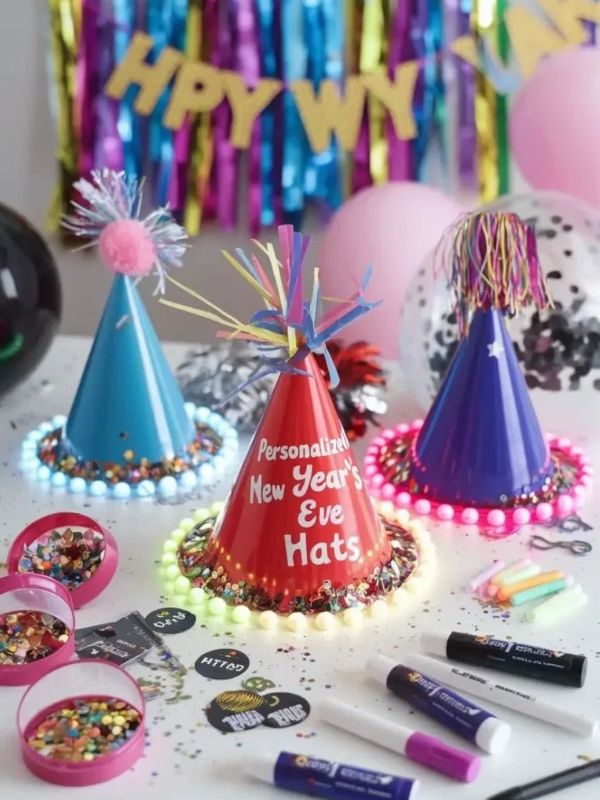
Party hats are a fun way to get everyone into the New Year’s Eve spirit. Instead of buying matching hats for the whole family, you can make your own using cardstock, colorful paper, ribbons, and decorative stickers.
This is also a lovely activity to set up before your guests arrive. Everyone can decorate a hat according to their personality, making the finished party accessories more meaningful than store-bought ones.
Materials you’ll need:
- Gold, silver, black, or colorful cardstock
- Scissors
- Glue sticks
- Ribbon or elastic cord
- Star stickers
- Markers
- Decorative paper or glitter cardstock
How to make them:
Step 1: Create the hat shape. Cut a large semicircle from your cardstock. Roll it into a cone shape, adjusting the size until it fits comfortably on the wearer’s head.
Step 2: Secure the edges. Use glue or tape to hold the cone together. Allow the glue to dry before decorating the hat.
Step 3: Add festive decorations. Let everyone decorate their hats with paper stars, stickers, ribbons, or small shapes cut from metallic cardstock. You can also write messages such as “Hello, New Year!” or “Cheers to New Beginnings.”
Step 4: Make the hats wearable. An adult can carefully attach elastic cord or ribbon to the sides. Make sure the fit is comfortable and the attachments are secure.
Step 5: Display them before the party. Place the finished hats in a basket near the entrance or on the party table so everyone can choose one.
If your kids enjoy making things with materials you already have at home, 12 Cardboard Crafts for Preschool That Prove You Don’t Need Fancy Supplies is another great material to explore.
Make It More Special
Give each family member a different decorating theme. One person might choose stars, another might use colorful stripes, and someone else might create a hat covered in little paper fireworks.
For younger children, prepare the hat shapes in advance so they can focus on decorating. This makes the activity easier and gives everyone a chance to participate.
I Sourced some Amazon products to consider for you to make this craft time easy for you.
2. DIY New Year’s Eve Countdown Clock
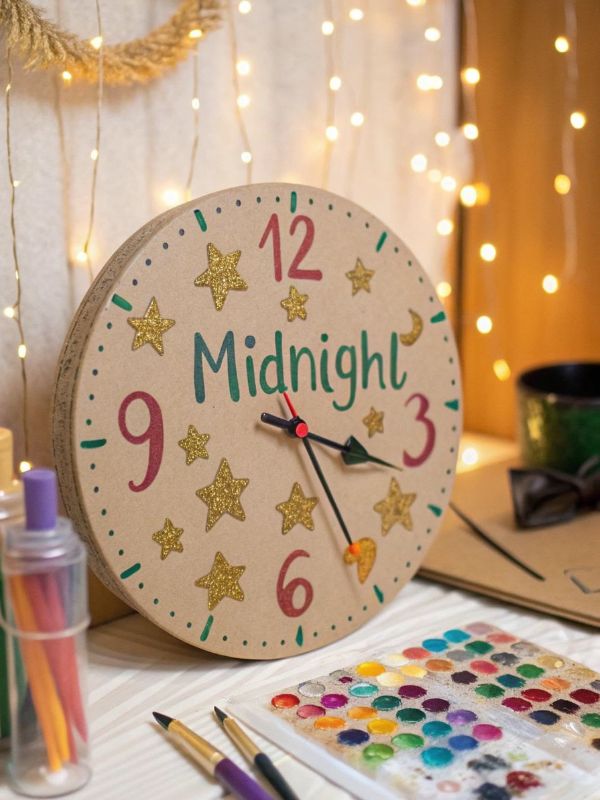
A handmade countdown clock is a fun decoration that can help children understand how much time remains before the New Year arrives.
It also gives everyone something to gather around as the celebration progresses. You can place the clock on a table, hang it on the wall, or use it as part of a family countdown activity.
Materials you will need:
- One paper plate or a circle cut from cardboard
- Markers or crayons
- Colored cardstock
- Scissors
- A paper fastener
- Glue
- Stickers or decorative paper
How to make it:
Step 1: Prepare the clock face. Use a paper plate as your base. If you’re using cardboard, cut it into a large circle.
Step 2: Add the numbers. Write the numbers around the edge of the plate, just as you would on a regular clock. Children can help with this step using markers.
Step 3: Make the clock hands. Cut two narrow strips from cardstock, one longer than the other.
Step 4: Attach the hands. An adult can carefully make a small hole in the center and secure the hands with a paper fastener. They should be able to move around the clock face.
Step 5: Decorate the clock. Add stars, little fireworks, confetti shapes, or a message such as “Happy New Year.”
Turn It Into a Family Activity
Instead of using the clock only as a decoration, create a countdown schedule for the evening.
For example, the family might decorate cookies at 6 p.m., play games at 7 p.m., make a family wish jar at 8 p.m., and have a special countdown at the time that works best for everyone.
You can move the clock hands as each activity begins.
Families with younger children don’t have to wait until midnight. An earlier countdown can make the celebration enjoyable without keeping tired children awake late into the night.
Looking for more fun activities to keep your little ones busy during the holiday season? Try these 10 Simple Christmas Crafts for Kids That Are Fun and Simple to Make or creative projects children can make at home using easy-to-find supplies.
Amazon products to consider for this Product.
3. New Year’s Eve Family Wish Jar
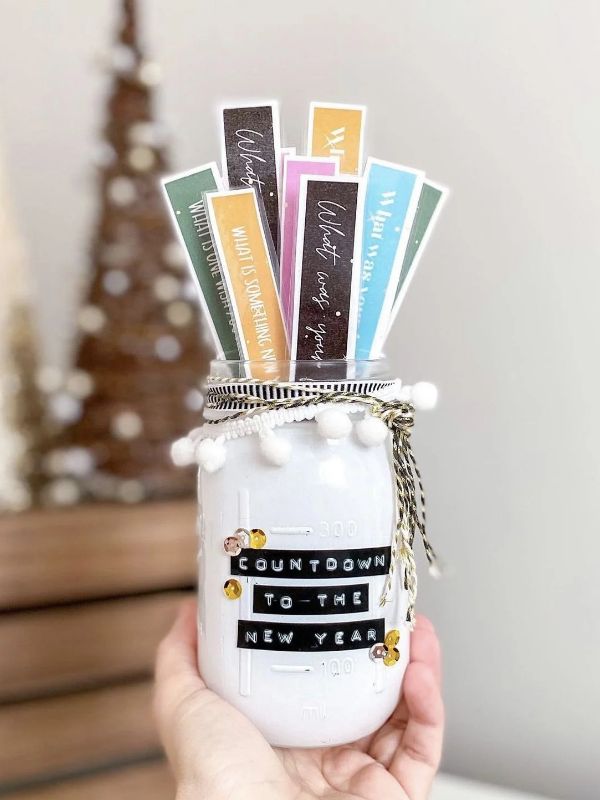
A family wish jar is one of the most meaningful crafts you can make for the New Year. Instead of creating something purely decorative, you’ll be making a keepsake filled with hopes, goals, and kind messages from everyone in the family.
The idea is simple: each person writes down wishes for the coming year and places them inside the jar.
Some wishes might be about learning a new skill, spending more time together, traveling somewhere special, or developing a healthier habit.
Materials you will need:
- A clean, empty glass jar
- Small pieces of paper
- Pens or markers
- Ribbon
- Decorative stickers
- Cardstock for a label
- Glue or double-sided tape
How to make it:
Step 1: Clean your jar. Wash and dry a glass jar you already have at home. A mason jar or a clean food jar works well.
Step 2: Prepare the wishes. Cut your paper into small rectangles. Give everyone several pieces so they can write down more than one wish.
Step 3: Write personal messages. Ask each family member to write a goal, hope, or kind message for the coming year. Younger children can draw pictures instead of writing sentences.
Step 4: Decorate the jar. Add a ribbon around the top and attach a label reading “Our Family Wishes” or “Wishes for the New Year.”
Step 5: Fill the jar. Fold the notes and place them inside. You can leave the jar open during the party so guests can continue adding wishes.
Create a New Family Tradition
Choose a date to open the jar again. You could read the notes on the following New Year’s Eve, on a family celebration day, or at the end of the year.
It can be interesting to see which wishes came true and which goals changed along the way.
The activity also encourages children to express their hopes in a positive way. Rather than focusing only on material gifts, they can think about friendships, learning, family time, and experiences they want to enjoy.
Shop These Amazon products For The Crafts
If you enjoy turning everyday materials into beautiful handmade pieces, Check these 12 DIY Bible Verse Home Decor Ideas That Bring Scripture to Life for more creative projects you can make for your home.”
4. Handmade New Year’s Eve Photo Booth Props
A family photo booth gives everyone an opportunity to take fun pictures together. You don’t need to rent equipment or purchase an expensive backdrop. A few handmade props and a simple wall decoration can create a lovely photo corner at home.
This craft is especially useful if you want to preserve photographs of your family as you welcome the New Year.
Materials you’ll need:
- Cardstock
- Scissors
- Wooden craft sticks
- Glue or strong tape
- Markers
- Pencils
- Printed lettering or number templates, if desired
- Decorative stickers

How to make it:
Step 1: Choose your prop designs. Ideas include oversized glasses, stars, party hats, speech bubbles, and signs that say “Happy New Year.”
Step 2: Draw your shapes. Sketch each design on cardstock. You can draw freehand or use simple templates as a guide.
Step 3: Cut out the shapes. Carefully cut around each design. Younger children should use age-appropriate scissors under adult supervision.
Step 4: Add the details. Decorate the props with markers, stickers, and paper shapes. You can make a few in gold and silver for a classic party theme or use bright colors for a playful family celebration.
Step 5: Attach the handles. Secure a craft stick to the back of each prop with strong tape or suitable glue. Allow everything to dry before using the props.
Step 6: Create a photo corner. Hang a simple banner on a clear wall and place the props in a basket nearby.
Ideas for Family Photos
You can take individual pictures, group photographs, or silly pictures with everyone choosing a different prop.
Another idea is to take one photograph at the beginning of the party and another at the end. You can keep the pictures together as a record of your family’s celebration.
If you have a phone tripod, place it on a stable surface and use a timer so everyone can join the photographs.
Check out my 15 New year wall decor for your home decorations.
5. DIY New Year’s Eve Paper Garland
Paper garlands are a simple way to decorate a living room, dining area, or party table. They’re also a useful choice if you’re working with a small budget because you can make them using basic craft paper.
For a New Year’s Eve celebration, choose colors that complement your other decorations. Gold, silver, black, white, and bright colors can all work beautifully.
Materials you’ll need:
- Colored cardstock or construction paper
- Scissors
- Glue stick or tape
- String or twine
- Pencil
- Ruler
- Star-shaped paper cutouts, optional
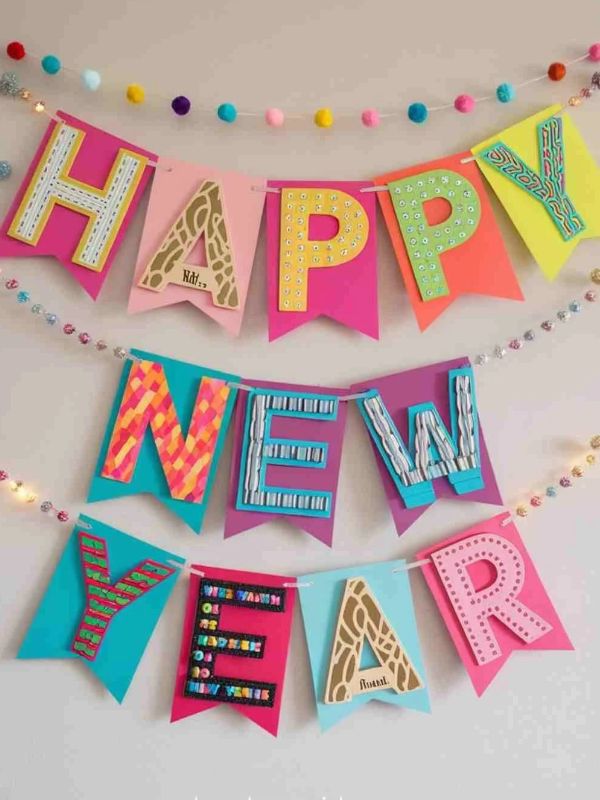
Photo credit
How to make it:
Step 1: Cut the paper into strips. Use a ruler to create strips of similar width. Around 2–3 cm wide is a useful starting point, although you can make wider strips for a bold look.
Step 2: Make the first loop. Bend one strip into a circle and secure the ends with glue or tape.
Step 3: Add another strip. Pass a second strip through the first loop before securing its ends.
Step 4: Continue the chain. Repeat the process, alternating colors to create a pattern.
Step 5: Add decorative details. You can attach paper stars between sections or make a separate garland with circles and numbers.
Step 6: Display your garland. Hang it along a wall, above a doorway, or across a table backdrop. Use removable hooks or suitable tape to protect the surface.
Make It Personal
Invite each family member to write a word they want to carry into the New Year on one of the paper loops.
Words such as kindness, courage, joy, patience, and gratitude can turn an ordinary decoration into a meaningful family project.
For a more colorful party, ask everyone to decorate a few strips before assembling the garland together.
Amazon products to Buy for this crafts
6. DIY New Year’s Eve Noisemakers
A New Year’s Eve party feels more exciting when everyone can join the countdown. Homemade noisemakers give children and adults a simple craft to make before the celebration begins.
You can create them using paper plates, cardboard tubes, or clean, empty plastic containers. Choose the design that best suits the ages of the people attending your party.
Materials you’ll need:
- Two sturdy paper plates or a clean, empty container
- Markers or crayons
- Decorative paper
- Glue or tape
- Ribbon or stickers
- A small amount of dry rice or beans, if using a shaker design

How to make paper plate noisemakers:
Step 1: Decorate the plates. Give each child two paper plates and let them decorate the backs with stars, numbers, or fireworks.
Step 2: Prepare the filling. An adult can place a small amount of dry rice or beans between the plates.
Step 3: Seal the plates. An adult should securely fasten the edges using a stapler or strong tape, making sure no filling can escape.
Step 4: Add finishing touches. Decorate the edges with paper strips or ribbon. Check that every piece is firmly attached.
Step 5: Test the sound. Shake the noisemaker gently to check that it works and remains securely closed.
A Safety Note for Families With Young Children
Dry rice and beans can pose a choking risk, so don’t use loose fillings around babies or toddlers. For very young children, choose a large, securely assembled noisemaker without small detachable pieces, or make a shaker that an adult controls.
You can also make a simple noise-making wand using paper decorations attached to a sturdy craft stick, without any loose filling.
Use Them During the Countdown
Give everyone a noisemaker and let the family practice the countdown together. When the celebration reaches its chosen time, everyone can shake their creations and welcome the New Year.
If you prefer a quieter celebration, decorate the noisemakers with ribbons and use them as party accessories rather than making a lot of noise.
This New Year Self Care Challenge Is worth Trying.
7. New Year’s Eve Memory Cards
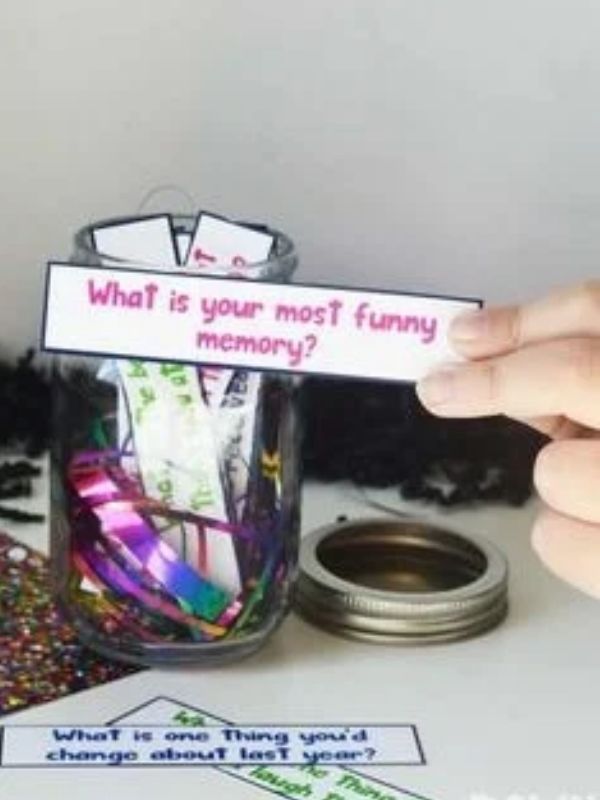
A new year is a good opportunity to look back on the moments that made the previous year special. Memory cards let everyone share a favorite experience, something they learned, or a moment that made them laugh.
This craft works particularly well for family parties because it encourages conversation across generations.
Materials you’ll need:
- Blank index cards or cardstock
- Pens and markers
- Scissors
- Stickers
- A small box or envelope
- Ribbon, optional
How to make them:
Step 1: Cut the cards. If you’re using cardstock, cut it into small rectangles. Index cards are already a convenient size.
Step 2: Decorate the cards. Add small stars, colorful borders, or New Year designs.
Step 3: Write memory prompts. Create questions such as:
- What was your favorite family moment this year?
- What new thing did you learn?
- What made you laugh the most?
- What is one kind thing someone did for you?
- What would you love to do together next year?
Step 4: Let everyone answer. Give each person a few cards and invite them to write their answers. Younger children can draw pictures or ask an adult to help write their thoughts.
Step 5: Share the memories. Place the completed cards in a box and invite family members to read selected answers aloud.
Keep the Cards for Next Year
Put the finished cards in an envelope labeled with the year. You can open them during a future New Year’s Eve celebration and see which memories everyone still remembers.
If your family enjoys scrapbooking, add the cards to a family memory book with photographs from the party.
Check these 30 New Year Nail Designs
8. DIY New Year’s Eve Table Centerpiece
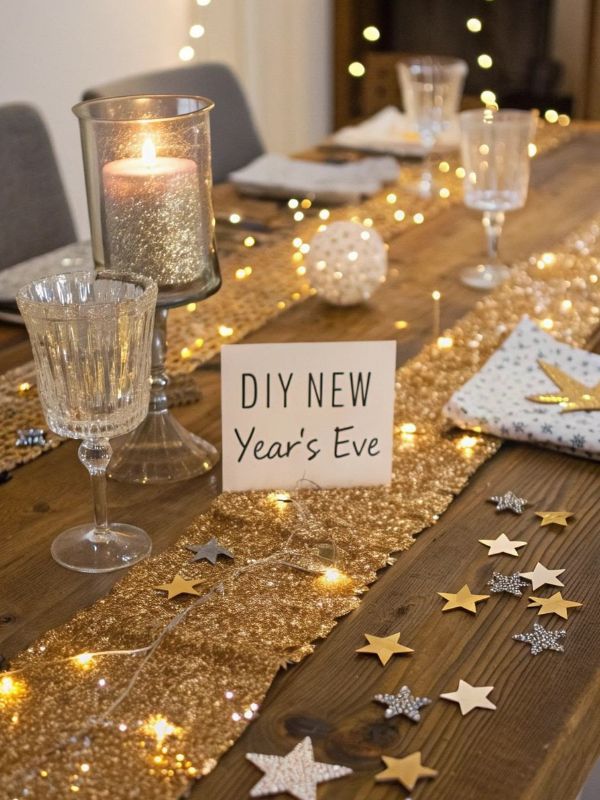
A handmade centerpiece can make your family party table feel more festive without requiring a large decoration budget.
The idea is to combine a few simple elements into one attractive arrangement. You can use a jar, paper stars, ribbons, and small decorative items to create a centerpiece that matches your party colors.
Materials you’ll need:
- A clean glass jar or small vase
- Cardstock
- Wooden skewers or paper straws
- Ribbon
- Scissors
- Glue
- Markers
- Optional battery-operated string lights
How to make it:
Step 1: Prepare the container. Clean and dry a jar or vase. If you have a plain glass jar, wrap a ribbon around the neck and secure it with a small bow.
Step 2: Make paper stars. Draw stars on cardstock and cut them out. You can use different sizes to give the centerpiece more variety.
Step 3: Attach the stars. Secure the stars to paper straws or wooden skewers. Adults should handle sharp tools and ensure the supports are safe to use.
Step 4: Arrange the decorations. Place the star sticks in the jar. Adjust their heights so the arrangement looks balanced.
Step 5: Add finishing details. Add a few paper circles, a small greeting card, or a ribbon in a complementary color.
Step 6: Display the centerpiece. Place it in the middle of your dining table, leaving enough room for serving dishes and guests.
Make It Match Your Home
For a classic look, combine gold, silver, and white. For a playful family party, use bright paper in several colors.
You can also create smaller versions for side tables or the entryway.
If you’re using lights, choose battery-operated lights suitable for the container and keep them away from water and flammable materials. Avoid using real candles near paper decorations.
If you want to create a beautiful party table with natural materials and simple decorative touches, explore my guide to Fun Natural Table Settings for more inspiration.”
9. DIY New Year’s Eve Confetti Cones
Confetti cones can be used as party-table decorations or handed out before a family countdown. They’re simple to make, easy to customize, and useful for holding small paper shapes.
For a family-friendly version, you can use paper stars or circles instead of plastic confetti or glitter.
Materials you’ll need:
- Colored paper or lightweight cardstock
- Scissors
- Glue or tape
- Markers
- Star-shaped paper punches, optional
- A small basket or container for displaying the finished cones
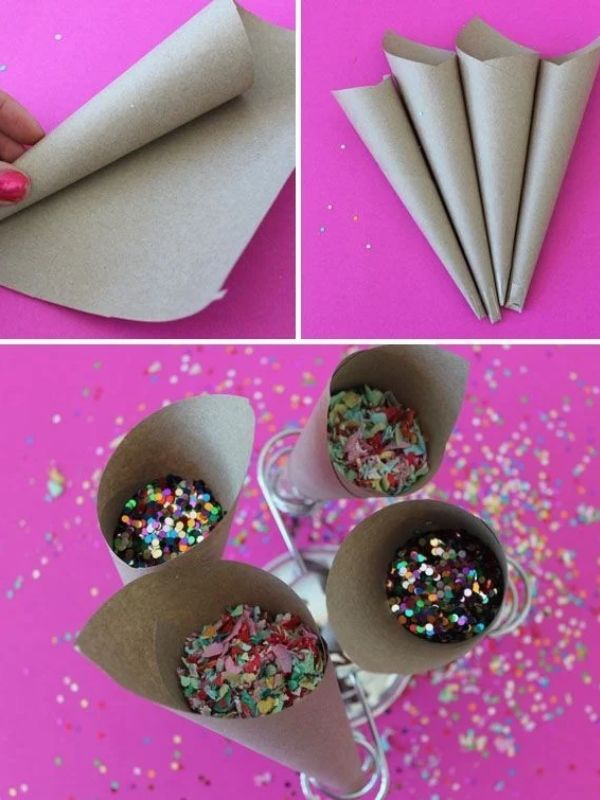
How to make them:
Step 1: Prepare the paper. Cut your paper into squares or rectangles, depending on the size of cone you want.
Step 2: Form the cone. Roll each piece of paper into a cone shape, leaving a small opening at the top.
Step 3: Secure the edge. Use tape or glue to hold the cone in place. Allow the glue to dry.
Step 4: Decorate the outside. Add paper stars, numbers, or a small “Happy New Year” message.
Step 5: Make paper confetti. Cut small circles or stars from leftover paper. You can also use a paper punch to speed up the process.
Step 6: Fill the cones. Add a small amount of paper confetti and place the cones in a basket until the countdown.
A More Eco-Friendly Way to Celebrate
Choose paper that can be recycled after the party, and avoid plastic glitter or metallic confetti that may be difficult to clean up or recover.
You could also skip throwing confetti altogether and let guests open the cones to reveal little wishes or messages for the year ahead.
For families with very young children, supervise the activity and keep small paper pieces away from children who may put them in their mouths.
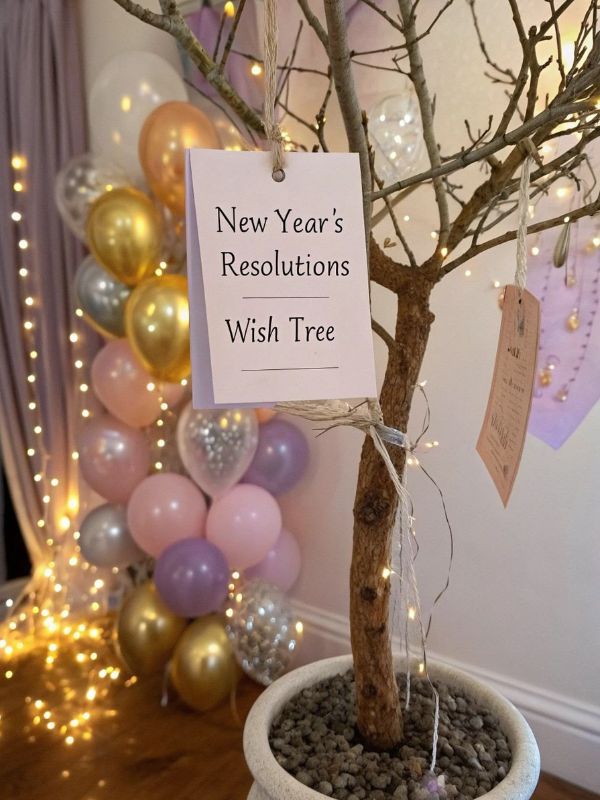
10. New Year’s Eve Gratitude Tree
A gratitude tree is a thoughtful craft that gives family members an opportunity to reflect on the good things they experienced during the year.
Unlike a traditional holiday tree, this one can be made with a few branches, paper leaves, and handwritten notes.
It can become a meaningful focal point for your New Year’s Eve gathering and give everyone a chance to express appreciation.
Materials you’ll need:
- A few clean, fallen branches
- A sturdy jar or vase
- Small pieces of colored paper or cardstock
- Scissors
- Pens or markers
- String or ribbon
- Tape or a hole punch
How to make it:
Step 1: Prepare the branches. Choose clean, dry branches that can stand safely in a sturdy vase. Avoid branches with sharp ends or loose debris.
Step 2: Cut out paper leaves. Draw simple leaf shapes on colored paper and cut them out. You can use green, yellow, orange, or any colors that complement your party decorations.
Step 3: Make hanging loops. Punch a small hole near the top of each leaf and thread a piece of string through it. An adult can help younger children with this step.
Step 4: Write gratitude notes. Ask each family member to write something they appreciated during the year. These could include a memorable family trip, support from a loved one, a new friendship, or a personal achievement.
Step 5: Hang the leaves. Tie the notes to the branches and arrange them so they hang at different heights.
Step 6: Share the messages. Invite everyone to read a note aloud if they’re comfortable doing so.
Make It a Yearly Tradition
Take a photograph of the finished gratitude tree and save it with your family photographs. You could create a new tree each year and compare the notes over time.
This craft is also a lovely way to encourage children to notice acts of kindness and appreciate experiences that might otherwise be forgotten.
You may find this article on 12 DIY Snowman Decorations That Make Your Home Feel Like a Winter Wonderland Useful.
11. DIY New Year’s Eve Family Time Capsule
A family time capsule is a lovely way to end the year because it preserves small details about the people you are today.
You don’t need a special container or expensive materials. A clean box, a few cards, and some family photographs are enough to get started.
The idea is to collect memories, hopes, and small reminders of the year, then open the capsule at a future date.
Materials you will need:
- A sturdy cardboard box or keepsake box
- Paper and pens
- Family photographs or printed pictures
- Envelopes
- Tape
- Markers
- Decorative paper and stickers
How to make it:
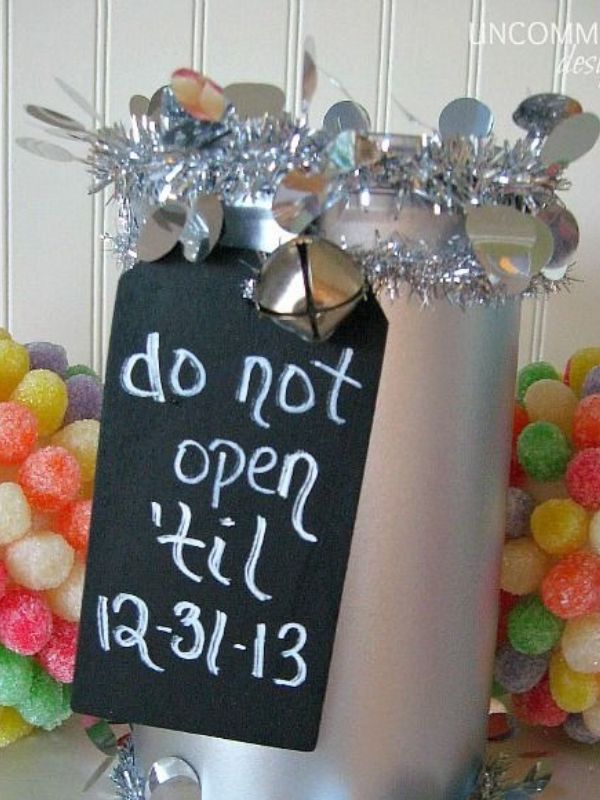
Step 1: Choose a container. Find a clean, dry box that is large enough to hold your notes and photographs. A decorative keepsake box is another option.
Step 2: Create memory cards. Ask each family member to write down a favorite memory, something they learned, or an experience they want to remember.
Step 3: Add predictions. Everyone can write one prediction about the coming year. Children might guess what new skill they will learn, while adults might write down a personal goal.
Step 4: Include photographs. Add a family photograph from the celebration or printed pictures from memorable moments during the year.
Step 5: Decorate the box. Write the year on the outside and decorate it with paper stars, stickers, or a handmade label.
Step 6: Seal and store it. Close the box securely and keep it somewhere dry and safe. Decide when the family will open it again.
What Should You Put Inside?
Here are a few ideas to get everyone started:
- A favorite family memory
- A photograph from the year
- A drawing made by a child
- A letter to your future self
- A list of favorite books, songs, or movies
- A prediction for the coming year
- A goal everyone hopes to achieve together
Avoid storing food, liquids, or anything that could spoil or damage the other items.
Why Families May Love This Craft
A time capsule gives everyone something to look forward to after the celebration. When you open it in a year or two, you can revisit the memories and see how much has changed.
It can also be a beautiful way to preserve childhood drawings and notes that might otherwise get lost.
I have an article on Coffee Table Decor Ideas for a Small Living Room
How to Make Your New Year’s Eve Crafts Party More Memorable
Once you’ve chosen your favorite crafts, a little preparation can help the evening run smoothly.
Set Up a Craft Station
Choose a table or a clear section of your dining area and arrange the supplies before guests arrive. Place paper, markers, scissors, glue, and decorative materials in separate containers so everyone can find what they need.
You don’t have to prepare all 11 crafts. Choose three or four that suit your family and leave enough time to enjoy them.
Choose a Simple Color Scheme
Using a consistent color palette can make handmade decorations look coordinated. Gold and silver are classic choices, but black and white, bright rainbow colors, or a combination of your family’s favorite colors can work just as well.
You can use the same colors for your paper garland, party hats, centerpiece, and photo booth props.
Prepare Different Activities for Different Ages
If children and adults will be crafting together, select projects with different levels of difficulty.
Younger children can decorate paper hats or make simple drawings. Older children can assemble photo booth props, while adults can help with cutting, attaching decorations, or preparing the table.
This allows everyone to participate without making the activities too difficult for younger guests.
Keep the Budget Under Control
Before buying anything, look around your home for materials you can reuse.
Clean jars, leftover wrapping paper, cardboard packaging, ribbon, and spare cardstock can all be useful. You can purchase only the supplies you genuinely need.
Make Time for the Family
Remember that the purpose of the crafts is to make the celebration more enjoyable, not to create extra work.
Prepare the projects that interest your family most, take photographs of the finished creations, and leave some time for conversation, games, and the countdown.
If young children are joining the celebration, an earlier countdown can be just as exciting as waiting until midnight.
Frequently Asked Questions on New Year’s Eve Crafts
1. What are some easy New Year’s Eve crafts for family parties?
Easy options include handmade party hats, paper garlands, countdown clocks, wish jars, photo booth props, and memory cards. Most can be made with basic supplies such as paper, markers, scissors, glue, and recycled containers.
2. What New Year’s Eve crafts can adults and kids make together?
Families can make a gratitude tree, a time capsule, a family wish jar, or a handmade centerpiece. These projects allow children to decorate and draw while adults help with assembly and preparation.
3. How can I make New Year’s Eve decorations on a budget?
Reuse materials you already own, including cardboard, jars, leftover wrapping paper, and spare ribbon. Choose a few projects that share the same supplies instead of purchasing separate materials for every craft.
4. What are some meaningful New Year’s Eve crafts?
A family wish jar, gratitude tree, memory cards, and time capsule are meaningful options because they help family members reflect on the past year and share hopes for the future.
5. What crafts are suitable for younger children?
Paper hats, simple garlands, decorated cards, and paper plate crafts are good starting points. Adults should supervise cutting, gluing, and any activity involving small pieces or potentially hazardous materials.
6. How many crafts should I prepare for a family New Year’s Eve party?
Three or four well-chosen crafts are often enough for a family gathering. Consider the ages of your guests, the amount of time available, and whether you want the projects to serve as decorations, activities, or keepsakes.
7. Can I make New Year’s Eve crafts using recycled materials?
Yes. Clean cardboard, empty jars, leftover paper, and suitable packaging can be used to make decorations, memory boxes, and other craft projects. Reusing materials can also help reduce spending and waste.
Conclusion on New Year’s Eve crafts
Sometimes, the most enjoyable moments come from sitting around a table, sharing supplies, making decorations, and laughing at everyone’s creative ideas.
From handmade party hats and paper garlands to a family gratitude tree and a time capsule, these 11 thoughtful New Year’s Eve crafts offer different ways to celebrate together at home.
Choose the projects that suit your family, gather the materials you already have, and let everyone contribute in their own way. The decorations will make the celebration feel festive, while the keepsakes can help you remember the people, hopes, and experiences that made the year special.