Christmas Crafts for Adults That Look Store Bought but Aren’t.
Christmas decorations can get expensive really quickly. You see a beautiful wreath, centerpiece, ornament, or Christmas decoration in a store, love it, and then look at the price and think, “I can probably make this myself.”. The problem is that those decorations can be surprisingly expensive, especially when you want to decorate an entire home.
But what if you could create that same expensive-looking Christmas style yourself using simple craft supplies?

That is exactly what makes these Christmas crafts for adults so exciting. Some of the projects below start with ordinary materials that you probably would not expect to become beautiful Christmas decorations. A simple glass jar can become an elegant glowing centerpiece. Basic ornaments can be transformed into sophisticated holiday decor. Even inexpensive supplies can be turned into pieces that look polished enough to make your guests wonder where you bought them. I have a guide on Cheap Diy Christmas Tree Decoration on a budget, that you really need to go through for setting up you christmas tree.
And you do not need to be an expert crafter to make them.
This guide includes 10 Easy Christmas crafts for adults ranging from elegant Christmas decorations and table centerpieces to beautiful ornaments and handmade pieces that can make your home feel more festive. The projects are designed with adults in mind, so they focus on creating decorations that feel stylish rather than overly childish.
Many of these crafts can be customized to match your existing Christmas decor. So before you spend a fortune buying new Christmas decorations, look through these ideas. You may be surprised by how luxurious a few simple supplies can look when they are put together thoughtfully.
1. DIY Elegant Christmas Candle Jars
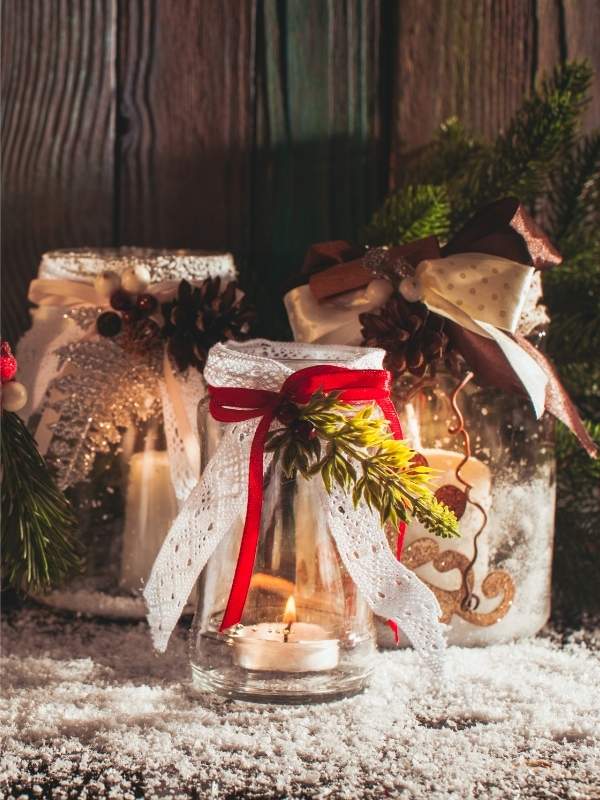
If you want a Christmas decoration that looks expensive without requiring complicated crafting skills, these elegant candle jars are a great place to start. Go through this guide for a step by step guideline on 10 Simple christmas crafts for kids to keep little hands busy this christmas.
They can be used as table centerpieces, mantel decorations, bathroom accents, or small pieces of holiday decor around your home.
What You Need
- Clear glass jars or small glass candle holders
- Battery-operated tea lights
- Epsom salt
- White or silver glitter
- Christmas ribbon
- Small artificial pine branches
- Pinecones
- Hot glue gun
- Scissors
- Optional small Christmas berries
How to Make Them
Start by cleaning your glass jars thoroughly and allowing them to dry.
Pour a small amount of Epsom salt into the bottom of each jar. The salt creates a snowy appearance that makes the jar look like a miniature winter scene.
Add a very small amount of white or silver glitter if you want additional sparkle. You do not need much because too much glitter can make the decoration look messy rather than elegant.
Place a battery-operated tea light inside the jar.
Next, decorate the outside of the jar. Wrap a Christmas ribbon around the top or middle and secure it with a small amount of hot glue.
Glue a tiny pine branch and a miniature pinecone near the ribbon.
For a more sophisticated appearance, keep the color palette simple. White ribbon with greenery and silver details can create a beautiful winter look, while burgundy ribbon with natural pinecones creates a warmer traditional appearance.
How to Make It Look Store Bought
The secret is not overcrowding the jar.
Choose two or three decorative elements and keep the design clean. Matching several jars together will also make the display look more expensive.
Arrange three jars of different heights on a tray with a few pine branches around them for an elegant Christmas centerpiece.
2. DIY Luxury Christmas Ornament Wreath
A Christmas ornament wreath can completely transform a front door, wall, fireplace, or large window. Although store-bought versions can be expensive, you can create your own using inexpensive ornaments.
What You Need
- Wire wreath frame
- Christmas ornaments in different sizes
- Hot glue gun
- Artificial greenery
- Ribbon
- Pinecones
- Small Christmas berries
- Wire or floral wire

How to Make It
Start with a sturdy wire wreath frame.
Choose a color scheme before attaching anything. For example, you could use gold and champagne ornaments for an elegant look, red and gold for traditional Christmas decor, or white and silver for a winter wonderland theme.
Begin attaching the largest ornaments around the wreath.
Use floral wire to secure them tightly to the frame. Add smaller ornaments to fill the spaces between the larger ones.
Once the main ornament arrangement is complete, add small pieces of artificial greenery around the wreath.
You can also add pinecones and small berry stems.
Finally, attach a large ribbon bow to the bottom or top of the wreath.
How to Make It Look More Expensive
Avoid using too many different colors.
A coordinated color palette makes homemade decorations look much more polished.
Another trick is to use ornaments with different textures. Combine shiny ornaments with matte, glittery, metallic, and textured finishes.
The variation gives the wreath the layered appearance of a professionally designed Christmas decoration.
3. DIY Frosted Christmas Mason Jars
Ordinary mason jars can become beautiful frosted Christmas decorations with just a few supplies.
These are perfect for creating a cozy winter atmosphere without spending much money.
What You Need
- Mason jars
- White acrylic paint
- Small paintbrush
- Mod Podge
- Epsom salt
- Twine
- Artificial greenery
- Pinecones
- Battery-operated candles
- Small Christmas berries
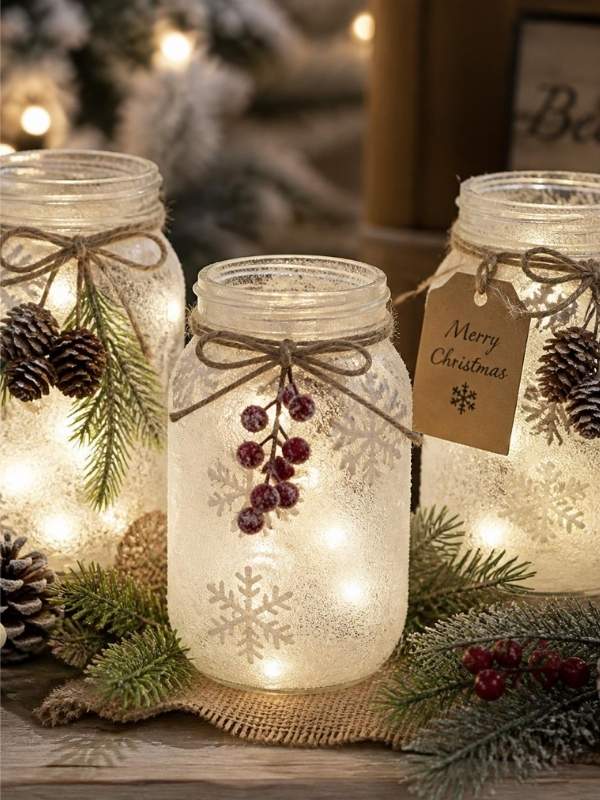
How to Make Them
Clean and dry your mason jars.
Use a paintbrush to lightly apply white acrylic paint to the outside of the jar.
You do not need complete coverage. Leaving some areas slightly transparent will create a frosted glass effect.
Allow the paint to dry.
Brush a thin layer of Mod Podge over selected sections of the jar and sprinkle Epsom salt over those areas.
Shake off the excess and allow the jar to dry completely.
Wrap twine around the top of the jar.
Add a small piece of artificial greenery, a tiny pinecone, and a few berries.
Place a battery-operated candle inside.
Decorating Tip
Group several jars together instead of displaying one alone.
Place them on a wooden tray with greenery surrounding them. The combination of frosted glass, greenery, and warm candlelight creates a cozy Christmas centerpiece.
4. DIY Christmas Tree Cone Decorations
These elegant Christmas tree cones are perfect for a mantel, coffee table, bookshelf, or dining table.
They are especially useful if you want Christmas decorations that have a modern and sophisticated appearance.
What You Need
- Foam cones or cardboard cones
- Decorative wrapping paper
- Burlap
- Ribbon
- Artificial greenery
- Hot glue gun
- Small ornaments
- Pearl beads
- Scissors
- Optional glitter

How to Make Them
Start with your cone.
If you are using cardboard, make sure it is sturdy enough to stand upright.
Cover the cone with your chosen material.
For a rustic design, use burlap. If you want a glamorous design, use metallic wrapping paper. For a traditional Christmas style, use red or green fabric.
Secure the material carefully with hot glue.
Once the base is covered, decorate the cone with ribbon, pearls, greenery, or small ornaments.
You can wrap ribbon around the cone in a spiral pattern from bottom to top.
Add small ornaments between the ribbon sections.
How to Create a Boutique Look
Make three trees in different sizes.
Place them together as a small Christmas forest.
Use the same color palette for all three but vary the textures.
For example, combine a gold tree, a cream tree, and a greenery-covered tree.
The different heights will make the display look professionally styled.
5. DIY Christmas Table Centerpiece With a Glass Vase
A beautiful centerpiece can make an ordinary Christmas dinner table feel much more special.
This project combines simple materials to create a centerpiece that looks elegant without requiring advanced crafting skills.
What You Need
- Clear glass vase
- Artificial Christmas greenery
- Pinecones
- Christmas ornaments
- Battery-operated fairy lights
- Ribbon
- Small Christmas berries
- Wooden or decorative tray
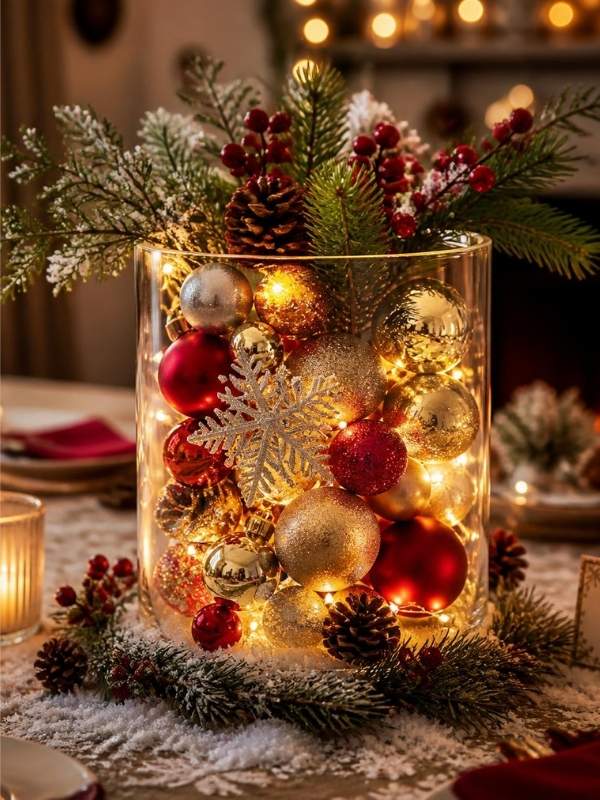
How to Make It
Place the glass vase in the center of your tray.
Add artificial greenery around the outside of the vase.
Place several pinecones between the greenery.
Add a few Christmas ornaments around the arrangement.
For additional warmth, place battery-operated fairy lights inside or around the greenery.
Tie a ribbon around the vase.
Add a few small berries to complete the arrangement.
Make It Look More Luxurious
Use a restrained color palette.
Gold, cream, and greenery can create a sophisticated appearance.
For a traditional look, combine red berries, green branches, and gold ornaments.
If you prefer minimalist Christmas decor, use white, silver, and greenery.
The key is to make the centerpiece look intentional rather than crowded.
6. DIY Personalized Christmas Ornaments
Personalized ornaments are one of the easiest ways to make Christmas decorations feel special.
Instead of buying expensive personalized ornaments, you can create your own versions for your family.
What You Need
- Clear plastic or glass ornaments
- Acrylic paint
- Paint pens
- Ribbon
- Artificial greenery
- Small decorative pieces
- Glitter
- Vinyl letters if available

How to Make Them
Remove the top of the ornament carefully.
If the ornament is fillable, add small decorative materials inside.
You could use:
- Fake snow
- Small pom-poms
- Glitter
- Tiny bells
- Artificial greenery
- Small beads
Replace the top.
Use a paint pen to write a name, family name, year, or short Christmas message on the outside.
Add a ribbon to the top.
You can also decorate the ornament with small painted stars, snowflakes, dots, or Christmas trees.
Personalization Ideas
Create one ornament for every member of the family.
You could write:
Emma | Christmas 2026
or
Our First Christmas
or
The Smith Family
These ornaments can become decorations that your family brings out every Christmas.
7. DIY Christmas Village in a Glass Jar
A miniature Christmas village inside a glass jar can become one of the most eye-catching decorations in your home.
It looks complicated, but the process is surprisingly simple.
What You Need
- Large clear glass jar or glass container
- Small Christmas figurines
- Artificial snow
- Miniature Christmas trees
- Battery-operated fairy lights
- Small pieces of cardboard
- White paint
- Optional miniature house

How to Make It
Start by cleaning the glass container.
Create a snowy base by adding artificial snow to the bottom.
Arrange your miniature Christmas houses and trees.
Take your time arranging the pieces because the composition will determine how realistic the finished village looks.
Add a small amount of artificial snow around the buildings.
Place battery-operated fairy lights behind or around the village.
Turn the lights on and place the lid on the jar.
The Important Detail
Do not fill the jar with too many objects.
Leave enough open space for the individual elements to be visible.
A simple village with a few trees and one or two houses can look much more sophisticated than an overcrowded arrangement.
8. DIY Rustic Christmas Garland
Garlands can instantly make a fireplace, staircase, doorway, or dining table feel festive.
Instead of buying a ready-made garland, create one using natural-looking materials.
What You Need
- Artificial pine branches
- Twine
- Pinecones
- Dried orange slices
- Cinnamon sticks
- Red berries
- Christmas ribbon
- Hot glue gun
- Floral wire
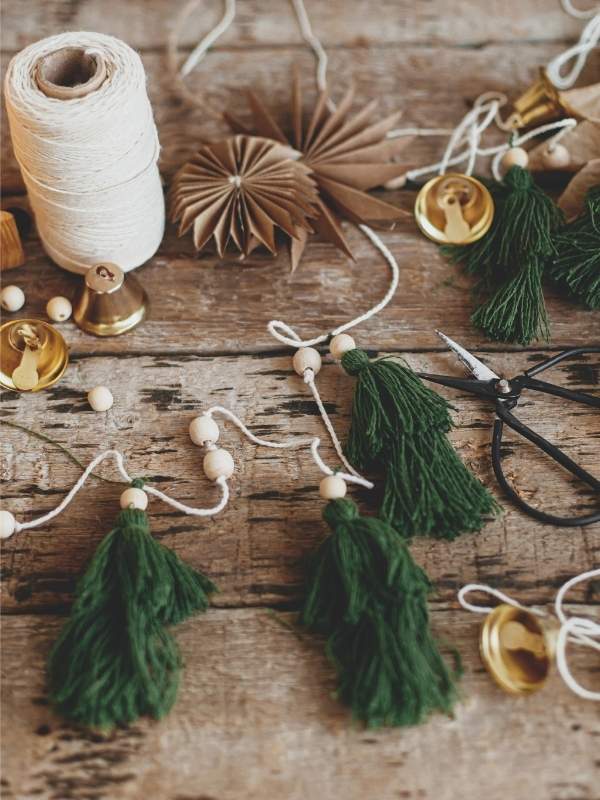
How to Make It
Start by arranging the artificial pine branches.
Secure them together with floral wire.
Add pinecones throughout the garland.
Attach dried orange slices using twine.
Add cinnamon sticks in small groups.
Place red berries between the greenery.
Finish with a few ribbon bows.
Why This Looks Expensive
The combination of greenery, natural textures, and warm colors creates the appearance of handmade boutique Christmas decor.
The dried oranges and cinnamon sticks also give the garland a cozy seasonal feel.
Hang the finished garland over your fireplace or drape it along a staircase.
9. DIY Christmas Snow Globe
A homemade snow globe is another craft that can look surprisingly professional when made carefully.
You can create one as a decoration or make several as thoughtful handmade gifts.
What You Need
- Clear glass jar with a secure lid
- Small Christmas figurine
- Waterproof glue
- Distilled water
- Glycerin
- Fine glitter
- Optional artificial snow
- Ribbon
- Decorative paint
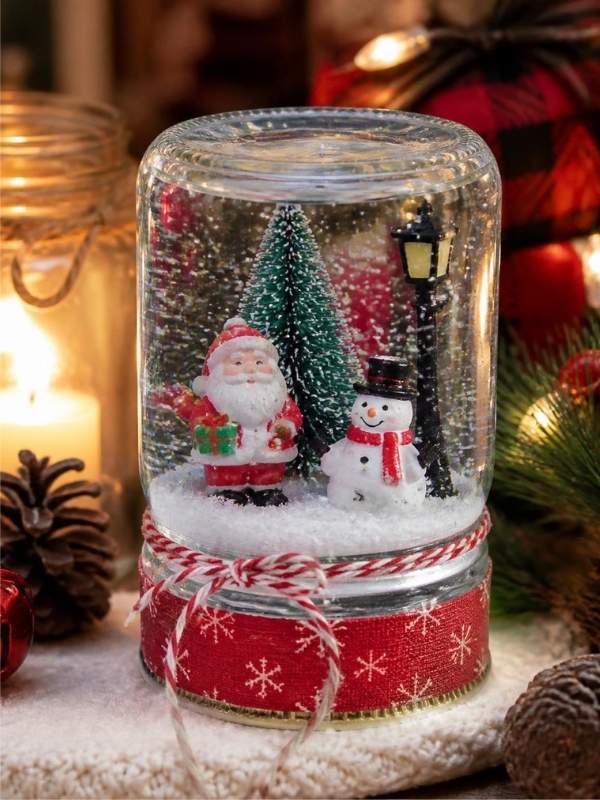
How to Make It
Start by choosing a small Christmas figurine that fits inside the jar.
Glue the figurine securely to the inside of the jar lid.
Allow the glue to dry completely.
Fill the jar with distilled water.
Add a small amount of glycerin. This helps the glitter move more slowly through the water.
Add a small amount of fine glitter.
Do not add too much glitter because it can make the water cloudy and prevent you from seeing the figurine clearly.
Carefully screw the lid onto the jar.
Make sure the lid is tightly sealed.
Turn the jar upside down and gently shake it.
You should now have your own miniature Christmas scene.
Finishing Touch
Wrap a beautiful ribbon around the lid.
You can also paint the lid gold, silver, white, or red to match your Christmas decorating theme.
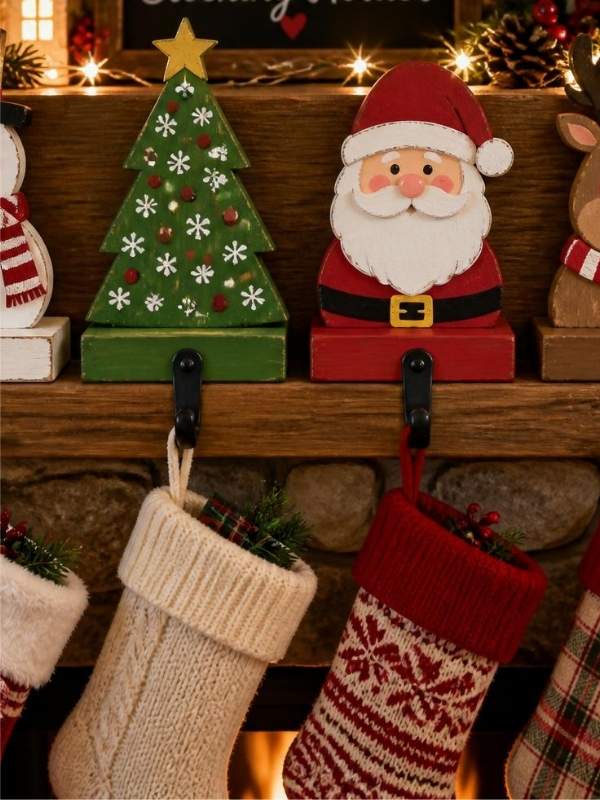
10. DIY Christmas Stocking Holder
If you want a Christmas craft that is both beautiful and useful, make your own stocking holder.
This project can become part of your Christmas decor year after year.
What You Need
- Wooden board
- Sandpaper
- Paint or wood stain
- Paintbrush
- Decorative hooks
- Christmas stencil or vinyl lettering
- Artificial greenery
- Pinecones
- Ribbon
- Hot glue gun
- Screws or appropriate hardware
How to Make It
Start by sanding the wooden board so the surface is smooth.
Paint or stain the board in your preferred color.
For a farmhouse-inspired design, you could use a natural wood finish.
For a more traditional Christmas look, use white, deep green, or red.
Allow the board to dry completely.
Add a Christmas message using a stencil or vinyl lettering.
You could write:
Merry Christmas
Santa’s Workshop
Christmas Wishes
or
The Christmas Stockings
Attach decorative hooks evenly across the bottom of the board.
Make sure they are securely attached before hanging stockings.
Finally, decorate the top of the board with artificial greenery, pinecones, berries, or a Christmas ribbon.
Make It Look Store Bought
The secret is in the finishing details.
Sand the edges properly, keep the lettering straight, space the hooks evenly, and avoid adding too many decorations.
A clean design will make the finished stocking holder look much more professional.
How to Make Homemade Christmas Crafts Look Expensive
Making a Christmas craft is one thing, but making it look like something you could have purchased from an expensive home decor store is another.
Fortunately, a few simple tricks can make a huge difference.
Stick to a Color Palette
Choose two or three main colors rather than using every Christmas color at once.
Gold and cream can create an elegant look.
Red and green create a traditional Christmas feel.
White and silver create a winter-inspired appearance.
Greenery, brown, and cream work beautifully for rustic Christmas decor.
Mix Different Textures
Combining textures makes handmade decorations look more interesting.
Try mixing:
- Velvet ribbon
- Pinecones
- Faux greenery
- Wood
- Glass
- Metallic ornaments
- Dried oranges
- Burlap
The contrast makes even simple decorations look thoughtfully designed.
Do Not Overdecorate
One of the biggest mistakes people make when crafting Christmas decorations is adding too many details.
Sometimes a simple design looks much more expensive.
Choose a main decorative element and add only a few smaller details around it.
Pay Attention to Finishing
Remove visible glue strings.
Trim ribbons neatly.
Make sure paint is even.
Keep lettering straight.
Clean glass surfaces before displaying them.
These little details can make a homemade craft look significantly more polished.
Where to Display Your Handmade Christmas Crafts
You do not need a huge house to enjoy these decorations.
A small Christmas craft can make a big difference when placed in the right location.
Display your candle jars on a dining table or mantel.
Place Christmas cone trees on a coffee table or bookshelf.
Hang the ornament wreath on your front door.
Use the rustic garland on a staircase or fireplace.
Place the Christmas village somewhere where its lights can be enjoyed in the evening.
Personalized ornaments can go directly on your Christmas tree.
A handmade stocking holder can become a permanent part of your holiday decorating tradition.
Create Christmas Decor You Will Love
You do not have to spend a fortune to create a Christmas home that feels beautiful, cozy, and thoughtfully decorated.
These Christmas crafts for adults prove that ordinary materials can become impressive holiday decorations when you combine the right colors, textures, and details.
From glowing candle jars and elegant ornament wreaths to personalized ornaments, rustic garlands, and miniature Christmas villages, there are plenty of ways to give your home a festive makeover without filling your shopping cart with expensive decorations.
And perhaps the best thing about making your own Christmas decor is that you can create pieces that actually reflect your personality and decorating style.
So before buying another expensive decoration this holiday season, look around your craft supplies and see what you can transform. You might create something that looks so good that your guests will never guess you made it yourself.