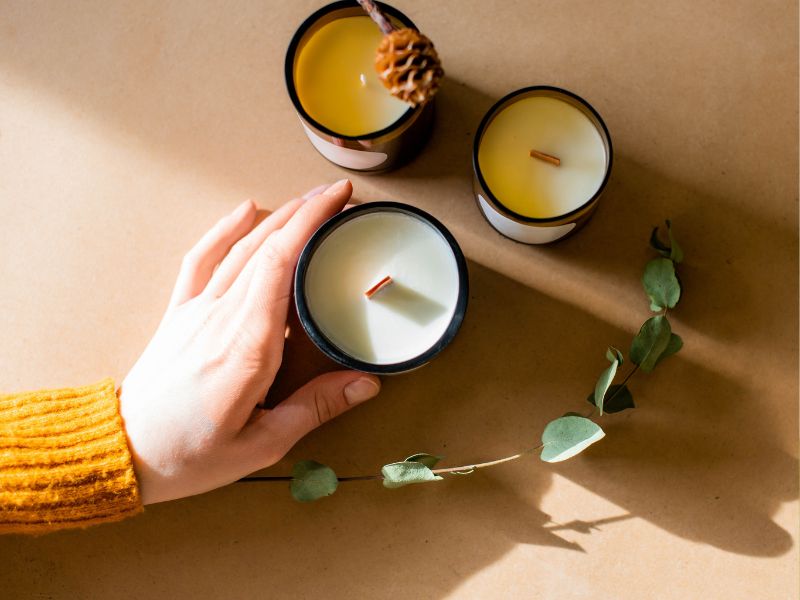
Have you ever walked into a room and immediately noticed how good it smells? Sometimes, it is the soft fragrance of vanilla, the fresh scent of citrus, or a beautiful combination of floral and woody notes that makes a space feel inviting. I love the idea of being able to create that kind of atmosphere at home with candles made by hand.
Making your own candles can be a fun way to explore different fragrances, experiment with colors, and create something beautiful for your home. You can make candles for your bedroom, living room, bathroom, or even your workspace. They also make thoughtful handmade gifts for birthdays, Christmas, housewarmings, and other special occasions.
Another lovely thing about candle making is that you can choose the fragrances and designs that suit your taste. If you prefer sweet scents, you can experiment with vanilla and caramel-inspired fragrance oils. If fresh scents are more your style, citrus and herbal combinations may be worth trying. You can also explore floral, fruity, and warm woody fragrances.
In this guide, I am sharing 12 candle making ideas that combine beautiful scents with attractive designs. You will learn what makes each idea special, which materials you need, how to make the candles, and how to choose fragrances that work well together.
Making your own candles is one way to add a personal touch to your home, but there are plenty of other creative projects you can try. If you enjoy making things yourself, Check out these guide on 10 Home Decor Ideas You Can DIY to Give Your Space a Beautiful New Look
What You Should Know Before Making Your Own Candles
Before choosing your first project, it helps to understand a few basics. Candle making involves more than melting wax and adding fragrance. The wax, wick, container, and fragrance all work together to determine how a candle burns and how well it releases its scent.
Taking time to understand these materials can help you avoid common problems, such as candles that produce very little fragrance, wicks that struggle to stay lit, or wax that develops an uneven surface.
Choose the Right Wax for Your Project
The type of wax you choose affects the candle’s appearance, fragrance performance, and burning characteristics.
Soy wax: Soy wax is a popular choice for container candles. It is often used for homemade scented candles because it is designed to work in jars and other suitable containers. It can develop a creamy appearance, although the finished surface may sometimes look uneven or develop small marks as it cools.
Beeswax: Beeswax is known for its natural golden color and subtle honey-like aroma. It can be used for certain container or molded candle projects, depending on the wax and product specifications. Its natural scent may influence the fragrance of the finished candle.
Paraffin wax: Paraffin wax is commonly used in commercial candle making. Depending on the formulation, it can work well for different candle styles and fragrance applications.
Keeping your candle-making supplies organized makes it easier to find everything you need when inspiration strikes. The same approach can make a difference in other parts of your home, too. Take a look at these 20 Genius Pantry Organization Ideas That Save Room & Stop Clutter
Coconut and blended waxes: Some candle makers use coconut wax or blends containing coconut, soy, or other waxes. These products vary, so follow the manufacturer’s instructions for the particular blend you purchase.
For your first project, I recommend choosing a wax specifically formulated for the type of candle you want to make. Container wax is a sensible starting point if you want to create scented candles in glass jars.
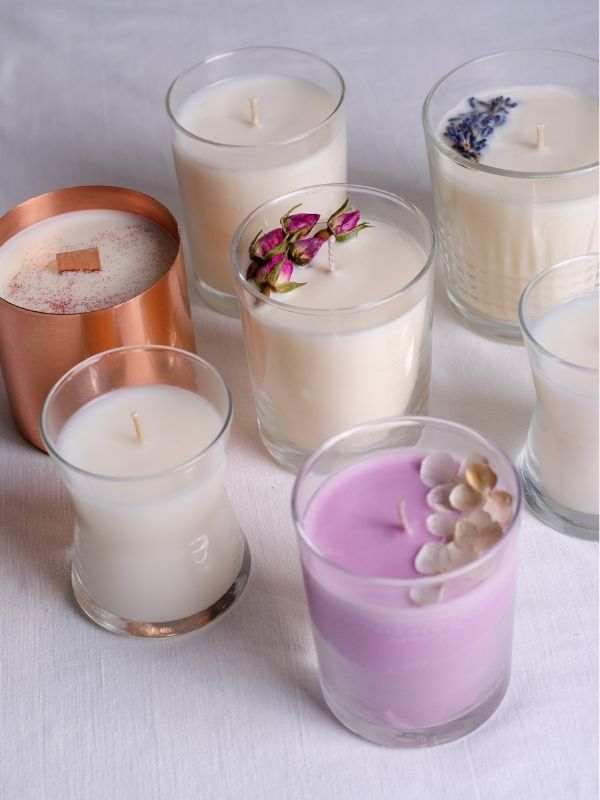
Choose Fragrance Oils Made for Candles
The fragrance is one of the most important parts of a scented candle.
You might love the smell of a particular perfume, body oil, or essential oil, but that does not automatically mean it is suitable for candle making. Products designed for skin or diffusers may not be appropriate for use in burning candles.
Look for fragrance oils specifically intended for candle making. Check the supplier’s recommended usage rate, compatibility with your wax, and any safety documentation provided.
You should also understand the difference between a candle’s cold throw and hot throw.
The cold throw is the fragrance you notice when the candle is not burning. The hot throw is the fragrance released when the candle is burning.
A candle can smell wonderful in its container but release very little fragrance when lit. This is one reason testing matters.
Adding more fragrance oil does not automatically produce a stronger scent. Too much fragrance can interfere with the candle’s performance and may create safety problems. Always stay within the wax manufacturer’s and fragrance supplier’s recommended limits.
Select a Suitable Wick
The wick helps control how the candle burns. Its size and type should match the wax, container diameter, and formulation.
A wick that is too small may struggle to maintain a suitable melt pool. A wick that is too large may produce excessive flame height, smoke, or soot.
Follow the wick manufacturer’s sizing guidance and test your finished candle. Do not assume that a wick that works in one jar will work equally well in another.
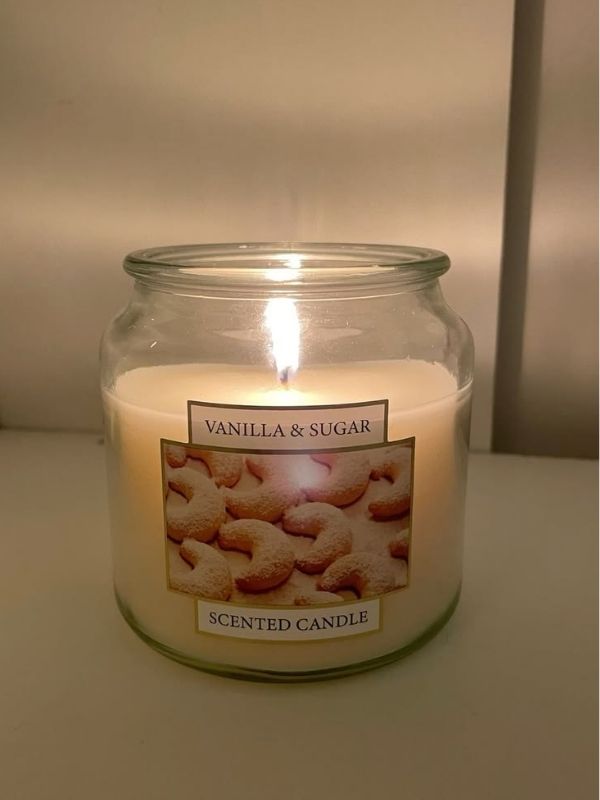
1. Vanilla and Warm Sugar Scented Candles
Vanilla-inspired candles are a lovely place to start if you enjoy sweet, warm fragrances. Their scent can make a room feel welcoming without requiring an elaborate candle design.
A vanilla candle can work well on a bedside table, a living room shelf, or a bathroom counter. You can also make several small candles in matching jars and arrange them together as a handmade gift set.
For this project, the fragrance is the main attraction. A simple glass container allows the wax and finished candle to remain the focus.
Once your candles are ready, you can use them to decorate different areas of your home. A coffee table is a lovely place to display a candle alongside a small vase, a decorative book, or a tray. For more inspiration, Check Coffee Table Decor Ideas for a small living room
What You Will Need
- Candle-making soy wax suitable for containers
- Candle-safe vanilla fragrance oil
- Candle wick sized for your chosen container
- Heat-resistant candle-making container
- Melting pot and suitable thermometer
- Wick holder or centering tool
- Digital scale
- Heat-resistant stirring utensil
Optional supplies include a candle-safe warm sugar fragrance oil and a simple label for the finished jar.
How to Make It
Step 1: Prepare your container.
Make sure the container is clean, completely dry, and suitable for candle making. Secure the wick in the center of the bottom using a wick adhesive designed for candle making.
The wick should remain straight while the wax cools. A wick holder placed across the top of the container can help keep it centered.
Step 2: Measure the wax.
Estimate the amount of wax needed for your container and weigh it using a digital scale.
Measuring by weight is more reliable than using cups because wax density varies. Prepare only the quantity you need for the project.
Step 3: Melt the wax.
Melt the wax using the method and temperature recommended by its manufacturer. A controlled melting setup helps you heat the wax evenly.
Avoid overheating the wax. The correct temperature depends on the formulation you are using.
Step 4: Add the fragrance.
Measure the vanilla fragrance oil according to the supplier’s recommended usage rate for your wax.
If you want to combine vanilla with a warm sugar fragrance, first confirm that both products are suitable for candle making. You can experiment with different proportions, provided the total fragrance remains within the recommended limit.
Stir according to the manufacturer’s instructions so the fragrance is distributed throughout the wax.
Step 5: Pour and allow it to cool.
Pour the wax at the temperature recommended for your wax and container. Keep the wick centered while the candle cools.
Allow the candle to set undisturbed. Avoid moving it while the wax is still soft.
Step 6: Allow the candle to cure.
Some waxes need time for the fragrance to develop properly. Follow the wax manufacturer’s curing recommendations before evaluating the candle’s scent.
How to Make the Fragrance More Noticeable
Start with a candle-safe fragrance oil that is designed to perform well in your chosen wax.
If the candle smells strong before lighting but weak when burning, review the fragrance load, mixing temperature, wick selection, and curing time. Change one variable at a time so you can identify what improves the result.
Do not keep adding fragrance oil without checking the manufacturer’s limits.
Styling Ideas
Use a clear jar for a simple look, or choose a heat-safe candle vessel in a neutral color. A small label with the fragrance name can make the candle look polished.
If you are preparing a gift, pair the finished candle with a handwritten card. You can also create a set with vanilla, citrus, and floral fragrances for someone who enjoys trying different scents.
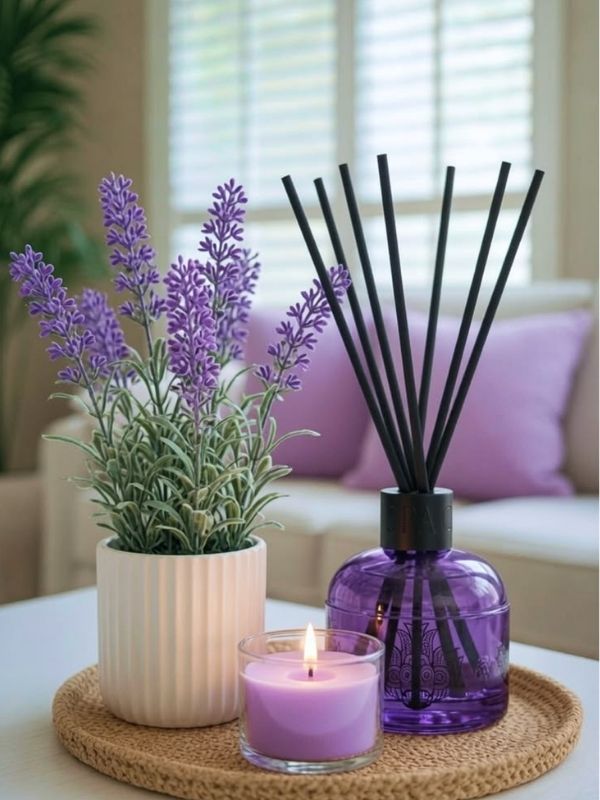
2. Lavender and Soft Floral Candles
If you enjoy floral fragrances, lavender-inspired candles are another beautiful option.
Lavender has a recognizable herbal-floral aroma that works well on its own or in carefully selected fragrance blends. You can combine it with candle-safe vanilla, a light floral fragrance, or a suitable woody fragrance to create a more complex scent.
This style is particularly suitable for bedrooms, reading corners, and other spaces where you want a gentle fragrance.
Materials You Will Need
- Container candle wax
- Candle-safe lavender fragrance oil
- A compatible candle wick
- A suitable heat-resistant jar
- Melting equipment
- Digital scale
- Thermometer
- Wick-centering tool
You may also use a candle-compatible colorant if you want a lightly tinted candle.
Step-by-Step Instructions
Step 1: Choose the fragrance profile.
Decide whether you want a predominantly lavender scent or a more complex fragrance.
For a simple option, use lavender fragrance oil by itself. If something warmer, experiment with a small amount of a candle-safe vanilla fragrance. For a fresher scent, consider a fragrance blend designed to combine herbal and citrus notes.
Purchase products intended for candle making rather than assuming that a product is suitable because it smells pleasant.
Step 2: Prepare the jar and wick.
Secure the wick in the center of the container. Check that it stands straight and remains firmly attached to the base.
Step 3: Melt the wax.
Follow the wax manufacturer’s heating instructions. Keep the thermometer nearby so you can monitor the temperature.
Step 4: Measure and mix the fragrance.
Weigh the fragrance carefully. Follow the supplier’s recommended fragrance load and the wax manufacturer’s instructions for when to add the oil.
Stir gently and thoroughly for the time recommended for your wax.
Step 5: Pour the candle.
Pour the wax at the appropriate temperature and leave the candle to cool without disturbance.
Step 6: Inspect the finished candle.
After the candle has set, check the wick position and the surface of the wax. If the candle has cracks, sinkholes, or an uneven surface, consult the wax manufacturer’s troubleshooting guidance before making changes.
The container you choose can make your finished candle look like a decorative accessory rather than something you use only for its fragrance. You can display your candles on a bookshelf alongside framed pictures, small plants, and other decorative objects. These shelf Kitchen styling ideas can help you put together a display that feels balanced and attractive.
Should You Add Dried Lavender Flowers?
Dried lavender can look attractive in photographs, but do not place dried flowers near the wick or embed them in the burnable wax. Plant material can ignite when a candle burns, creating a fire hazard.
You can achieve a floral appearance more safely by choosing a lavender-colored container, using a candle-compatible colorant, or decorating the outside of the container with a label.
Keep all exterior decorations away from the flame and hot surfaces.
How to Style Lavender Candles
A simple jar with a white, lavender, or muted green label can complement the fragrance. If you are making a collection, use the same jar style for each candle and change only the label color.
This makes the set look coordinated without requiring expensive containers.
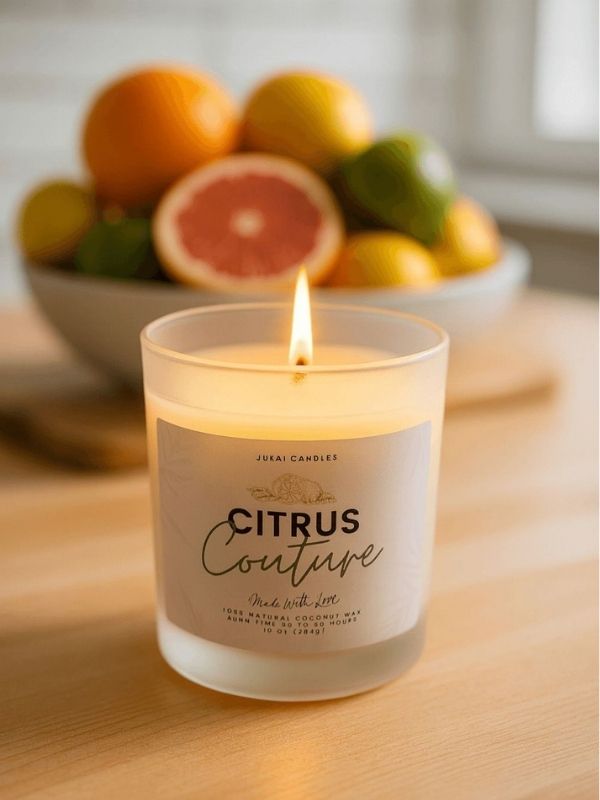
3. Citrus Candles With Orange and Lemon Notes
Citrus candles are a good choice for people who prefer fresh, bright fragrances over very sweet or heavy scents.
Orange, lemon, grapefruit, and other citrus-inspired fragrance oils can create different effects. Orange often has a sweeter citrus character, while lemon-inspired scents tend to smell sharper and fresher. Grapefruit fragrances may offer a more complex balance of tart and sweet notes.
You can make one fragrance the focus or experiment with blends designed for candle use.
What You Will Need
- Container candle wax
- Candle-safe citrus fragrance oil
- A suitable wick
- A heat-resistant container
- Digital scale
- Melting pot
- Thermometer
- Wick holder
How to Make Citrus Candles
Step 1: Decide on your scent combination.
For a straightforward candle, choose an orange fragrance oil designed for candle making.
If you prefer a more complex fragrance, test a blend of orange and lemon candle fragrance oils. Start with small test batches rather than committing all your wax to a fragrance combination you have not tested.
Step 2: Prepare your equipment.
Secure the wick and measure the wax. Make sure the container is clean and completely dry.
Step 3: Melt the wax.
Heat the wax according to the manufacturer’s instructions.
Step 4: Add the fragrance.
Weigh the fragrance oils separately before combining them. Keep the total amount within the permitted fragrance load for your wax.
Follow the suppliers’ temperature and mixing recommendations.
Step 5: Pour and cool.
Pour the wax at the recommended temperature. Keep the wick centered and allow the candle to cool naturally.
Step 6: Test the candle.
Once the candle has cured for the recommended period, evaluate its cold throw and conduct appropriate supervised burn testing.
Check that the candle burns consistently and does not produce excessive smoke or soot.
Homemade candles can also become part of a beautiful decorative display. If you have a bar cart at home, try styling a candle alongside a small vase, a decorative tray, or a few of your favorite accessories. You can find more inspiration in these How to Style a Bar Cart If You Don’t Drink: 10 Beautiful Ideas
A Simple Fragrance Experiment
You could prepare three small test candles using the same wax, wick, and container.
- Test A: Orange fragrance.
- Test B: Lemon fragrance.
- Test C: A blend of orange and lemon.
Keep the total fragrance load consistent within the manufacturer’s recommendations.
After curing, compare the cold throw and hot throw of each candle. Record the fragrance amounts and other details so you can repeat the best result.
Styling Ideas
Citrus candles look attractive in clear or pale-colored vessels. A simple white label with the fragrance name keeps the presentation clean.
You can also create a collection of fresh-inspired candles featuring different citrus fragrances. This gives you several designs to explore without changing your basic candle-making process.
Avoid placing fresh orange slices, lemon peel, or other combustible decorations in the candle wax.
4. Vanilla and Coffee-Inspired Candles
Coffee-inspired candles are a creative option for anyone who enjoys rich, warm fragrances.
Depending on the fragrance oil, a coffee candle may smell roasted, creamy, sweet, or slightly chocolate-like. Vanilla can complement these notes and create a fragrance reminiscent of a coffee shop or a freshly prepared dessert.
The goal is to create the impression of coffee through a suitable candle fragrance, not to place actual coffee ingredients in the burning candle.
Materials Needed
- Container candle wax
- Candle-safe coffee fragrance oil
- Candle-safe vanilla fragrance oil, if desired
- A compatible wick
- A suitable heat-resistant container
- Digital scale
- Melting equipment
- Thermometer
- Wick holder
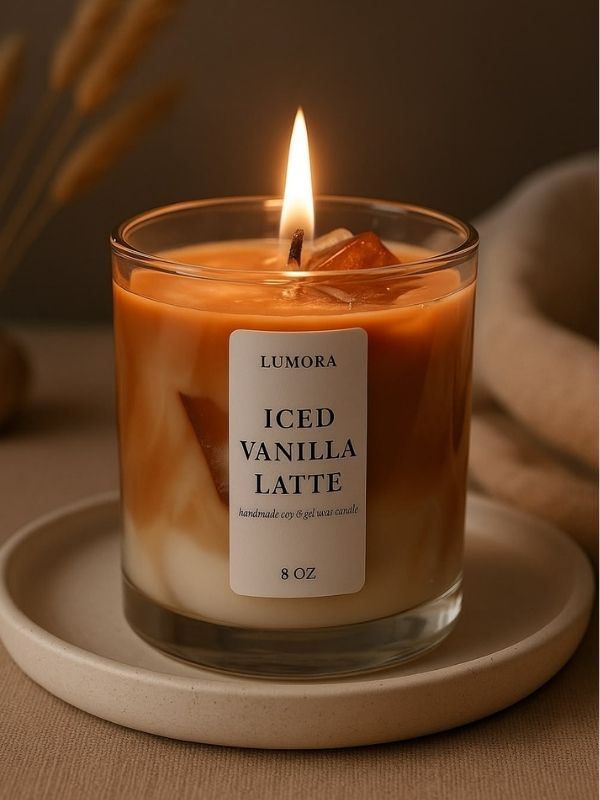
Photo credit
How to Make It
Step 1: Select your coffee fragrance.
Different coffee fragrance oils can smell very different. Read the supplier’s description and, where possible, purchase a small sample before buying a larger quantity.
Some coffee fragrances are rich and roasted, while others smell sweeter and creamier.
Step 2: Prepare the candle container.
Secure the wick in the center and make sure it is straight.
Step 3: Measure and melt the wax.
Weigh the wax and melt it according to the manufacturer’s instructions.
Step 4: Add the fragrance.
For a coffee-and-vanilla candle, experiment with the proportions of two compatible fragrance oils. Keep the combined fragrance load within the recommended limit.
Make a small test batch first. Vanilla can soften the sharpness of a coffee fragrance, but the final result depends on the specific products you choose.
Step 5: Pour and allow the candle to cool.
Use the recommended pouring temperature and leave the candle undisturbed.
Step 6: Cure and test.
Allow the candle to cure for the period recommended by the wax manufacturer. Then evaluate its scent and burning performance.
If you enjoy making candles regularly, you may eventually collect different waxes, containers, molds, and other supplies. Finding a practical place to store everything can help you keep your crafting area organized. Clever Under-Bed Storage Ideas that actually save space
Should You Add Real Coffee Beans?
You may have seen decorative candles containing coffee beans around the top or sides. Although this can look appealing in photographs, coffee beans and other combustible materials should not be placed where they can contact the flame or hot melt pool.
For a safer design, use a coffee-colored candle, a suitable vessel, or an exterior label featuring a coffee-inspired design.
Ways to Make It Look Beautiful
Choose a simple container in a coffee, cream, or dark brown shade. A minimal label can make the candle look like something you might find in a specialty shop.
A set of coffee-inspired and vanilla-inspired candles can also make a thoughtful gift for someone who enjoys rich fragrance profiles.
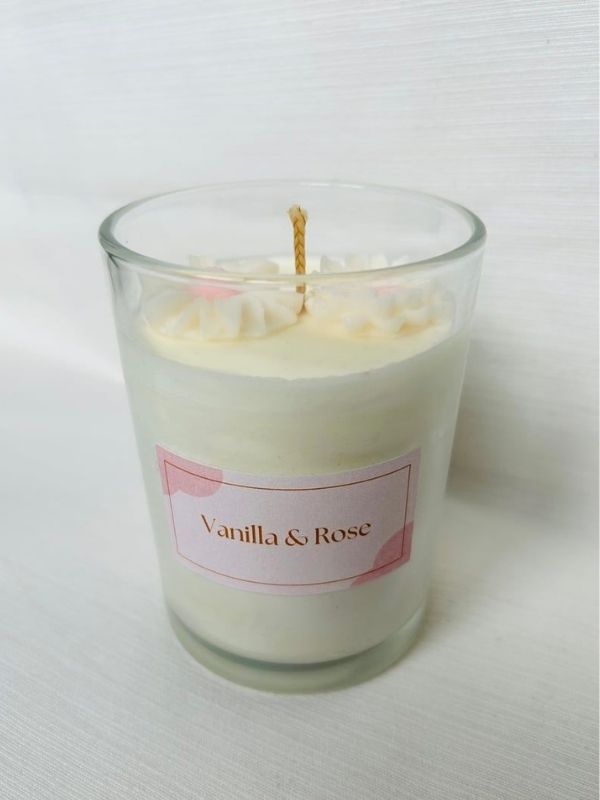
5. Rose and Vanilla Candles
Rose and vanilla can make an appealing fragrance combination for people who enjoy floral scents with a warm finish.
A rose fragrance on its own may smell fresh, powdery, sweet, or deep, depending on the formulation. Vanilla can add a creamy quality that complements some rose fragrances.
This project is especially suitable for decorative candles and handmade gift collections.
Supplies
- Container candle wax
- Candle-safe rose fragrance oil
- Candle-safe vanilla fragrance oil
- A compatible wick
- A heat-resistant container
- Digital scale
- Melting equipment
- Thermometer
- Wick holder
Instructions
Step 1: Choose the right rose fragrance.
Rose fragrances vary considerably. Some smell like fresh flowers, while others have a powdery or perfume-like character.
Choose a candle fragrance that suits the style you want.
Step 2: Decide how prominent the vanilla should be.
If you want a floral candle, make rose the main fragrance. If you prefer something warmer, experiment with a greater proportion of a compatible vanilla fragrance.
The exact proportions will depend on the fragrance oils. Prepare small batches and record your results.
Step 3: Prepare the container.
Secure the wick and make sure the container is suitable for candle making.
Step 4: Melt the wax.
Follow the instructions for your wax, including the recommended heating temperature.
Step 5: Add the fragrance blend.
Measure the total fragrance load carefully. Add the fragrance at the recommended temperature and stir as instructed by the supplier.
Step 6: Pour and cool.
Pour the wax and leave it to cool without moving the container.
Step 7: Cure and test.
Follow the recommended curing period and test the finished candle for fragrance performance and safe burning.
When decorating a small room, even little details can contribute to the overall look of the space. A carefully chosen candle can add color, fragrance, and a decorative touch without taking up too much room. If you’re looking for more ways to decorate a smaller space, these small space decorating ideas Will give you more inspirations.
How to Decorate the Candle
A rose-colored label or a soft pink container can complement the fragrance. You can also choose a clear jar with a simple white label.
Avoid placing rose petals inside the burnable wax. Dried petals are combustible and can become a fire hazard when the candle is lit.
If you want to make a rose-themed gift, use an exterior gift box and paper decorations kept away from the flame. The candle itself should remain free of loose decorative materials.
6. Coconut and Vanilla Candles
Coconut and vanilla candles can create a sweet, creamy fragrance that reminds some people of tropical desserts or warm-weather holidays.
This combination can work well in bedrooms, living rooms, and other areas where you want a sweet scent. It may also be a good addition to a handmade candle gift set.
The important thing is to choose compatible candle fragrance oils rather than assuming that food extracts or body-care products will work in wax.
Homemade candles can be a lovely addition to your dining table, especially when you’re setting the table for a family dinner, a special occasion, or a gathering with friends. You can pair them with flowers, natural textures, and simple table accessories to create a beautiful arrangement. If you need more inspiration, check Fun natural table setting ideas
Materials
- Container candle wax
- Candle-safe coconut fragrance oil
- Candle-safe vanilla fragrance oil
- Suitable candle wick
- Heat-resistant candle container
- Digital scale
- Melting pot
- Thermometer
- Wick holder
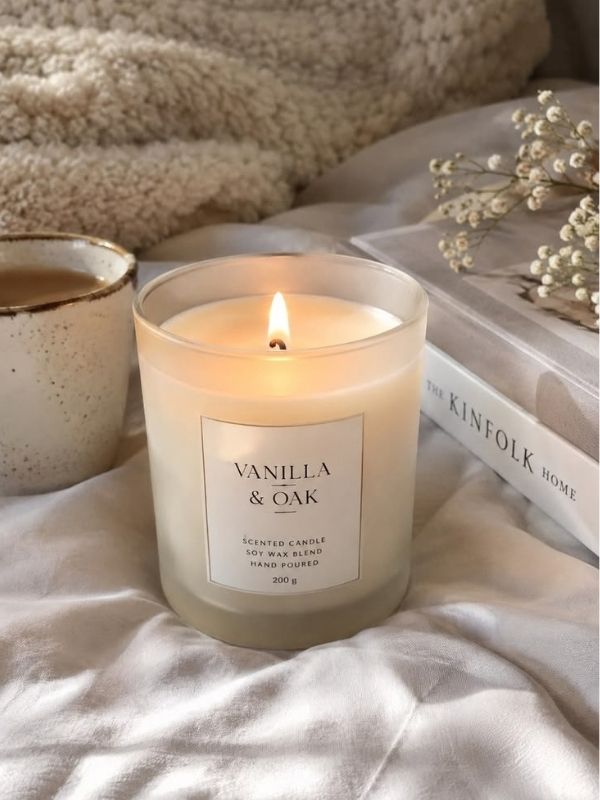
Photo credit
Step-by-Step Guide
Step 1: Choose your coconut fragrance.
Some coconut fragrances smell creamy and sweet, while others have a lighter tropical character. Read the supplier’s description before selecting one.
Step 2: Select a compatible vanilla fragrance.
Vanilla can add warmth to the coconut fragrance, but the result depends on the individual oils. A small test batch helps you determine whether the combination suits your taste.
Step 3: Prepare your container and wick.
Secure the wick at the center of the container.
Step 4: Weigh and melt the wax.
Use a digital scale to measure the wax. Melt it according to the manufacturer’s instructions.
Step 5: Add the fragrance oils.
Measure both fragrance oils and ensure their combined weight does not exceed the recommended fragrance load.
Follow the instructions for adding and mixing the oils.
Step 6: Pour and cool the candle.
Pour at the recommended temperature. Leave the candle in a safe place to cool completely.
Step 7: Allow it to cure and test it.
Give the candle the curing time recommended for the wax. Evaluate its fragrance and burning performance before deciding whether to make a larger batch.
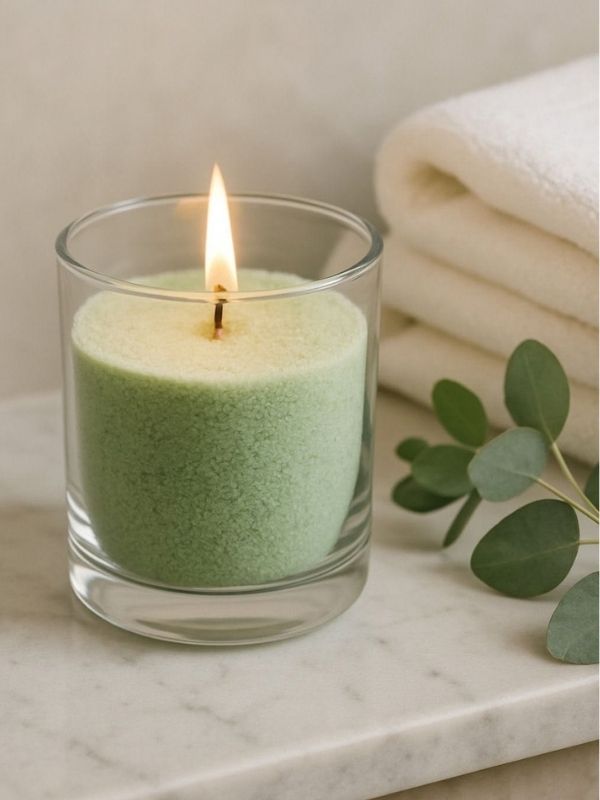
7. Eucalyptus and Mint-Inspired Candles
If you prefer fresh, herbal fragrances, a eucalyptus and mint-inspired candle is worth exploring.
Eucalyptus fragrances often have a fresh, green, slightly woody character. Mint-inspired fragrances can add a crisp note. Depending on the specific products, the combination may smell refreshing and clean.
This style can suit a bathroom, hallway, or home office.
What You Need
- Container candle wax
- Candle-safe eucalyptus fragrance oil
- Candle-safe mint fragrance oil
- Suitable wick
- Heat-resistant candle container
- Digital scale
- Melting equipment
- Thermometer
- Wick holder
Your homemade candles can also add a decorative touch to an entryway console or a small table near your front door. Pairing a candle with a small vase or decorative tray can help create a welcoming display. For more ideas, take a look at these Entryway wall Decor Ideas
How to Make It
Step 1: Choose the fragrance oils.
Look for eucalyptus and mint fragrances intended for candle making. Their descriptions will help you understand how sharp, herbal, or sweet the finished fragrance may be.
Step 2: Prepare the container.
Secure the wick and check that it is centered.
Step 3: Melt the wax.
Follow the recommended heating instructions for your chosen wax.
Step 4: Blend the fragrance.
You can begin with eucalyptus as the main note and add a smaller proportion of mint fragrance. Alternatively, test a more balanced blend.
Keep the total fragrance load within the permitted limit.
Step 5: Pour the candle.
Add the fragrance at the recommended temperature, mix as directed, and pour into the prepared container.
Step 6: Cool and cure.
Allow the candle to cool and cure according to the manufacturer’s guidance.
Step 7: Test the result.
Check both the fragrance and the burning performance. If the scent is too sharp, try a different fragrance blend in a separate test batch rather than adding more oil to the finished candle.
Styling Suggestions
A simple green or white label can suit this fragrance. You can also choose a clear vessel to keep the design minimal.
For a matching collection, pair this candle with a citrus candle or a light floral candle.
Keep the design simple. The fragrance itself provides the main point of interest.
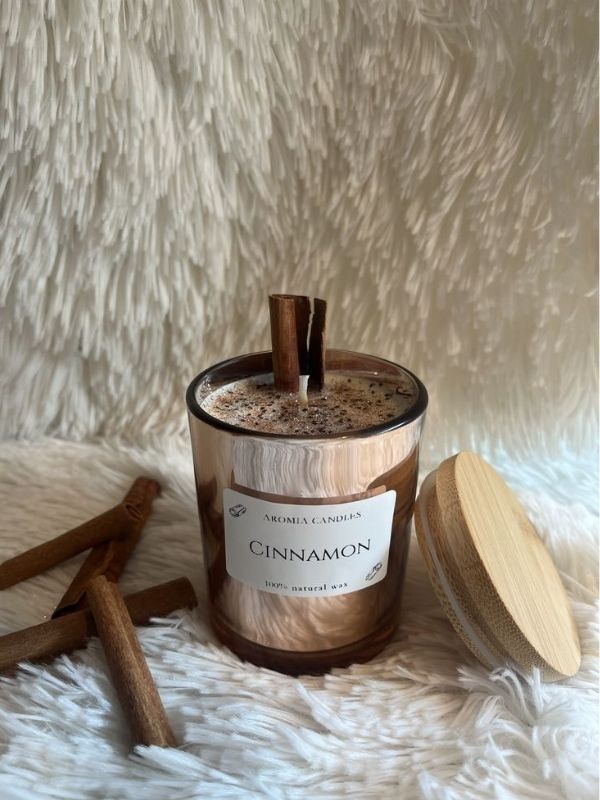
8. Cinnamon and Vanilla Candles
Cinnamon-inspired fragrances are popular in candles designed for autumn, winter, and festive home decor.
Cinnamon can smell warm, spicy, sweet, or woody depending on the fragrance formulation. Vanilla can soften some cinnamon fragrances and add a sweeter finish.
This combination may work well in a living room or as part of a seasonal candle collection.
Materials You Will Need
- Candle-making wax
- Candle-safe cinnamon fragrance oil
- Candle-safe vanilla fragrance oil
- Suitable wick
- Heat-resistant candle container
- Digital scale
- Thermometer
- Melting pot
- Wick holder
Instructions
Step 1: Select a candle-safe cinnamon fragrance.
Do not assume that ground cinnamon, kitchen spices, or cinnamon essential oil are interchangeable with fragrance oils designed for candle making.
Choose a product specifically intended for candles and follow its safety instructions.
Step 2: Choose the vanilla fragrance.
Vanilla can complement a cinnamon fragrance, but the final scent depends on the formulation. Test a small quantity before making a full batch.
Step 3: Prepare the container.
Secure the wick in the center and check that the container is suitable for candle use.
Step 4: Melt the wax.
Heat the wax according to the manufacturer’s directions.
Step 5: Add and mix the fragrance.
Measure the fragrance carefully. Follow the manufacturer’s instructions for the amount to use and the temperature at which it should be added.
Step 6: Pour and cool.
Pour the wax at the recommended temperature and allow it to cool undisturbed.
Step 7: Cure and test.
Once the candle has cured for the recommended period, assess the fragrance and burning characteristics.
A Festive Candle Design
You can give this candle a seasonal appearance by using a suitable container in a warm neutral, red, or deep brown shade.
An exterior label featuring simple seasonal artwork can also make the candle look appropriate for a holiday gift.
Avoid placing cinnamon sticks, star anise, dried orange slices, or other combustible decorations inside the candle or close to its wick. These materials can catch fire when exposed to the flame.
If you want a festive presentation, decorate the gift box rather than the burnable wax.
If you enjoy decorating your home with meaningful pieces, you can also explore ways to incorporate your favorite Bible verses into your living space. From framed scripture to decorative signs, there are different ways to create a space that reflects what matters to you. Take a look at these 12 DIY Bible Verse Home Decor Ideas That bring scripture to life
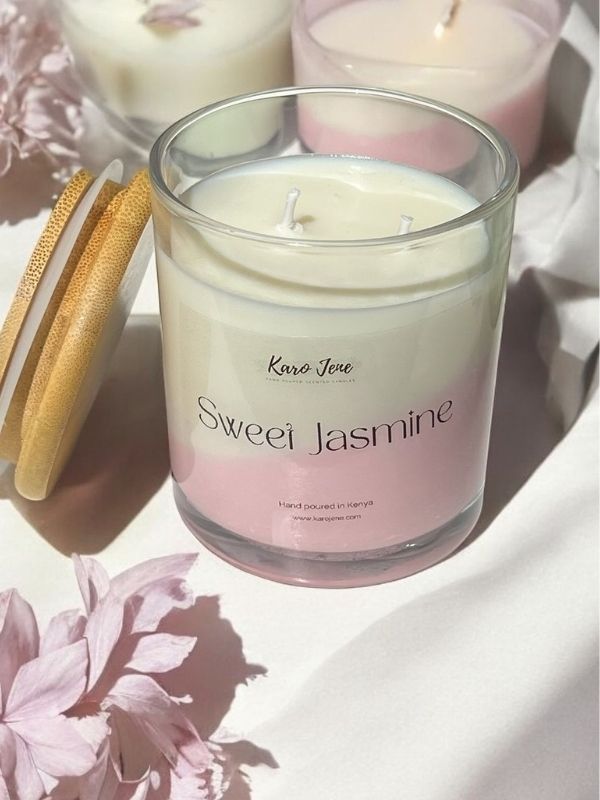
9. Jasmine and White Floral Candles
Jasmine-inspired candles are a lovely option for people who enjoy floral fragrances.
Depending on the formulation, jasmine can smell sweet, green, rich, or slightly fruity. Some white-floral fragrance blends combine jasmine with other floral notes to create a more complex scent.
This candle can suit a bedroom, living room, or decorative shelf.
Materials
- Container candle wax
- Candle-safe jasmine fragrance oil
- Optional compatible white-floral fragrance oil
- Candle wick
- Suitable heat-resistant jar
- Digital scale
- Melting equipment
- Thermometer
- Wick holder
Step-by-Step Instructions
Step 1: Select the main fragrance.
Choose a jasmine candle fragrance that matches your preference. If you want to create a blend, select a second fragrance that the supplier indicates is suitable for candle making.
Your living room is one place where homemade candles can become part of your everyday decor. You can display them on a coffee table, arrange them on a shelf, or place them on a suitable decorative surface to complement the rest of your room. For more inspiration on bringing your living room together, check out these Living Room Interior Decoration Ideas
Step 2: Prepare the container and wick.
Secure the wick and make sure it remains centered.
Step 3: Melt the wax.
Use the temperature recommended for your wax.
Step 4: Add the fragrance.
Weigh the fragrance oil and add it according to the manufacturer’s instructions. If you are blending two fragrances, keep their combined weight within the recommended fragrance load.
Step 5: Pour the candle.
Pour the wax at the appropriate temperature and leave it to cool.
Step 6: Cure the candle.
Allow sufficient curing time before evaluating the fragrance.
Step 7: Test the candle.
Check how the fragrance performs and whether the candle burns as expected. If the scent seems too strong, too weak, or unbalanced, make a new test batch with a different blend.
Making It Look Elegant
A simple white, cream, or pale green label can complement the floral scent.
For a handmade gift, you could pair a jasmine candle with a rose or lavender candle in matching containers.
This approach gives you a coordinated collection without needing elaborate candle shapes or complicated decorations.
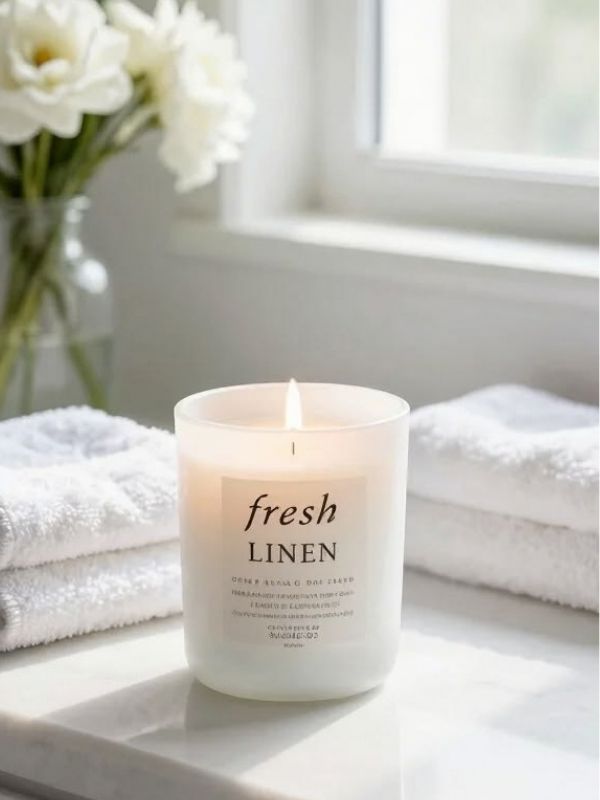
10. Fresh Linen-Inspired Candles
Fresh-linen candles are designed to evoke the clean scent of freshly washed fabric or sun-dried sheets.
The exact fragrance varies from one supplier to another. Some have a light, airy scent, while others include floral, powdery, or slightly musky notes.
This type of candle can suit a living room, bedroom, or entryway.
What You Will Need
- Container candle wax
- Candle-safe fresh-linen fragrance oil
- Suitable wick
- Heat-resistant candle container
- Digital scale
- Melting pot
- Thermometer
- Wick holder
How to Make It
Step 1: Choose your fragrance.
Read the fragrance description carefully. If possible, sample the fragrance before purchasing a larger quantity.
A fresh-linen fragrance may smell different from what you expect, so testing it before committing to a full batch is useful.
Step 2: Prepare the wick.
Secure the wick at the center of the container.
Step 3: Melt the wax.
Follow the instructions for your chosen wax.
Step 4: Measure and add the fragrance.
Use the recommended fragrance load. Stir as directed by the manufacturer.
Step 5: Pour and cool.
Pour the wax at the recommended temperature. Keep the wick straight and allow the candle to cool.
Step 6: Cure and test.
After the recommended curing period, evaluate the cold throw and hot throw.
Scented candles can also complement a bathroom’s decor when displayed safely and used appropriately. If you’re planning a bathroom refresh, you may want to think about how decorative accessories, storage, and colors work together to create the look you want. These Bathroom Makeover Ideas
Styling the Finished Candle
Fresh-linen candles work well with simple designs. A white or light gray label can complement the fragrance.
You could also make a small set with fresh-linen, citrus, and lavender candles. These fragrances offer different scent profiles while maintaining a clean, simple presentation.
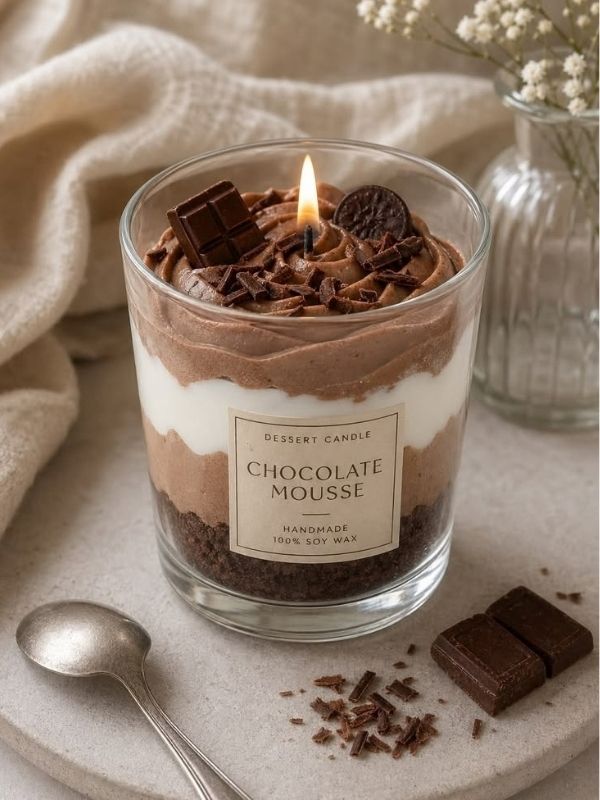
11. Chocolate and Vanilla Dessert-Inspired Candles
If you enjoy sweet fragrances, chocolate and vanilla-inspired candles are another creative project.
These candles are designed to smell like dessert rather than function as food. Depending on the fragrance oils, you may achieve a chocolate-like, creamy, sugary, or bakery-inspired scent.
This style can look attractive in a simple jar, particularly if you choose a container that complements the fragrance.
Materials
- Container candle wax
- Candle-safe chocolate fragrance oil
- Candle-safe vanilla fragrance oil
- Suitable wick
- Heat-resistant container
- Digital scale
- Melting equipment
- Thermometer
- Wick holder
Instructions
Step 1: Choose your fragrance oils.
Look for candle-safe fragrance oils with the scent profile you want. Some chocolate fragrances smell dark and rich, while others are sweeter.
Choose a vanilla fragrance that complements the chocolate note.
Step 2: Prepare the container.
Secure the wick in the center of the jar.
Step 3: Melt the wax.
Heat the wax according to the manufacturer’s instructions.
Step 4: Add the fragrance blend.
Measure the fragrance oils and make sure their combined amount stays within the recommended limit.
Stir as directed by the wax and fragrance suppliers.
Step 5: Pour the wax.
Pour at the recommended temperature and leave the candle to cool naturally.
Step 6: Allow it to cure.
Follow the curing recommendations for the wax you are using.
Step 7: Evaluate the scent and burn.
Test the candle properly before making additional batches.
How to Create a Dessert-Inspired Look
Choose a suitable container in a cream, brown, or neutral color. You can also use a simple label with a chocolate-inspired design.
Avoid putting cocoa powder, chocolate pieces, sugar, or other food ingredients into the candle wax. They are not substitutes for candle fragrance oils and can interfere with safe burning.
The fragrance and container can provide the dessert-inspired effect without adding food ingredients to the candle.
If you’re looking for more inspiration to make your home look beautiful, explore these 35 Home Interior Ideas
12. Layered Candles With Different Fragrances
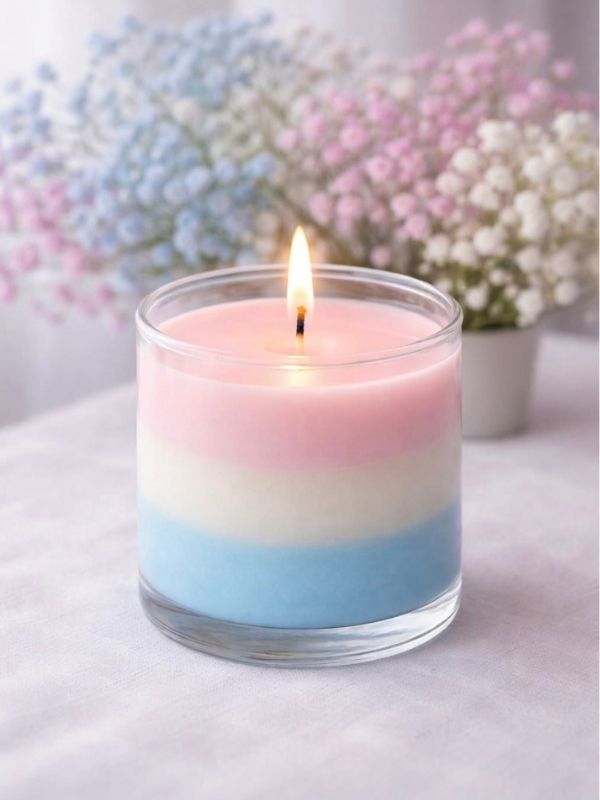
If you want a candle that looks as interesting as it smells, a layered design is worth trying.
A layered candle features two or more visible bands of wax. You can use different colors to create the layers, and you can choose a single fragrance or experiment with different fragrances in separate layers.
This project requires more patience than a basic single-pour candle, but it can produce an attractive finished design.
Homemade candles are a lovely way to add warmth and personality to your living room, especially during the fall season. You can choose autumn-inspired colors like burnt orange, brown, cream, and deep red to complement your existing decor, Go through this guide for more inspiration Cheap Fall home Decor Ideas for Your Living Room.
Materials You Will Need
- Container candle wax suitable for layered candles
- A compatible wick
- Candle-safe fragrance oils
- Candle-compatible colorants
- Heat-resistant container
- Digital scale
- Melting equipment
- Thermometer
- Wick holder
- Suitable pouring equipment
Step-by-Step Instructions
Step 1: Plan your colors and fragrances.
Before melting the wax, decide how many layers you want and which colors will appear in each one.
For example, you might use cream and pale brown for a vanilla-inspired design, or white and soft pink for a floral candle.
If you want different fragrances in each layer, confirm that the wax and fragrance products are compatible with this approach.
Step 2: Secure the wick.
Place the wick in the center of the container and use a wick holder to keep it straight.
Step 3: Prepare the first layer.
Measure the amount of wax required for the first layer. Melt it according to the manufacturer’s instructions.
Add the appropriate amount of fragrance and colorant, following the suppliers’ recommendations.
Step 4: Pour the first layer.
Pour the wax into the container and allow it to cool until it has reached the condition recommended for adding the next layer.
The timing matters. If the first layer is too hot or too soft, the colors may blend. If it is too cool or fully hardened, the layers may not adhere properly.
Follow guidance specific to your wax rather than relying on a universal cooling time.
Step 5: Prepare the second layer.
Melt another measured quantity of wax. Add the selected fragrance and colorant, keeping within the recommended usage limits.
Step 6: Pour the second layer.
Pour carefully to avoid disturbing the first layer. Allow the candle to cool according to the manufacturer’s recommendations.
Repeat the process if you are making additional layers.
Step 7: Allow the candle to cure.
Once all the layers have cooled, allow the candle to cure as recommended for your wax.
Step 8: Test the finished candle.
Layered candles may burn differently from single-pour candles. Test the finished candle to check wick performance, fragrance release, and the stability of the burn.
Color Combinations to Try
Here are a few combinations you could experiment with:
- Cream and light brown for a vanilla-inspired candle.
- White and pale pink for a floral candle.
- Pale yellow and white for a citrus-inspired candle.
- Cream and muted green for a fresh herbal candle.
- Soft pink and cream for a rose-inspired candle.
Use colorants designed for candles and follow their recommended amounts.
How to Make Homemade Candles Smell Stronger
Choosing a beautiful fragrance is only one part of making a successful scented candle. If you want your candles to smell noticeable and pleasant, you also need to consider the wax, fragrance oil, wick, curing time, and container.
Here are some practical ways to improve your results.
Making your own candles is a fun way to add a personal touch to your seasonal decorations. If you’re getting your home ready for autumn, you can also explore creative ways to decorate your front porch with pumpkins, seasonal wreaths, flower arrangements, and other fall-inspired touches. Go through this post 10 DIY Fall Wreath Front Porch Door Decor Ideas to Welcome Autumn
1. Choose Fragrance Oils Designed for Candle Making
Start with a fragrance oil that is specifically formulated for candle use.
Read the supplier’s description and check whether the fragrance is compatible with your wax. Some fragrances perform better in particular wax formulations than others.
A fragrance that smells strong in the bottle may not perform equally well in a candle.
2. Measure the Fragrance Carefully
Use a digital scale instead of estimating the amount by eye.
The recommended fragrance load varies depending on the wax and fragrance oil. Follow the manufacturer’s guidance and never exceed the applicable limit.
Adding more oil than the wax can hold does not guarantee a stronger candle. It may instead result in poor burning performance, fragrance separation, or other problems.
3. Follow the Recommended Mixing Temperature
Wax and fragrance suppliers provide guidance on the temperatures at which fragrance should be added and mixed.
Following those instructions helps you avoid unnecessary experimentation and gives you a consistent starting point.
Do not assume that the same temperature works for every type of wax.
4. Allow Enough Time for Curing
Some candles need a curing period before their fragrance performs as intended.
The required time depends on the wax and formulation. Follow the manufacturer’s recommendations, then compare the cold throw and hot throw.
Keep notes on the date each test candle was made so you can track how its fragrance develops.
5. Choose the Right Wick
The wick affects how the candle burns and how much of the wax surface melts.
A poorly matched wick may affect fragrance release, create excessive soot, or prevent the candle from burning properly.
Use wick-sizing guidance for your specific wax and container, then conduct appropriate burn testing.
6. Keep Your Test Batches Consistent
If you change the wax, wick, fragrance load, and container all at once, it becomes difficult to know what caused the result.
Instead, change one variable at a time.
For example, make two test candles using the same wax, container, and wick but different compatible fragrance blends. This makes the comparison more useful.
7. Record Your Results
Create a simple candle-making notebook or spreadsheet.
For each test, record:
- The type and brand of wax.
- The container dimensions.
- The wick type and size.
- The fragrance oil used.
- The fragrance load.
- The temperatures and mixing process recommended by the supplier.
- The curing period.
- Your observations about cold throw and hot throw.
- Your observations during burn testing.
These details can help you repeat successful batches and troubleshoot unsuccessful ones.
Homemade candles can also become part of your Christmas decorations. You can choose festive colors that complement your holiday decor and display your finished candles alongside other seasonal decorations. If you’re planning to decorate your home for Christmas, take a look at these Christmas Mantel Decor Ideas That Make Your Fireplace the Star of the Room.
Frequently Asked Questions About Candle Making
1. Is candle making suitable for beginners?
Yes. Candle making can be a beginner-friendly craft when you start with a straightforward project, use suitable materials, and follow the manufacturer’s instructions.
A basic container candle is a sensible first project because you can focus on learning how to measure the wax, select the wick, add fragrance, and pour the candle correctly.
Start with small batches and test each candle before making more.
If you’re making candles for the Christmas season, consider choosing colors that complement the rest of your holiday decorations. Red, green, gold, cream, and other festive shades can work beautifully with different decorating styles. For more inspiration, explore these Christmas Wreath Home Decor that will make your neighbours ask questions.
2. What is the best wax for homemade scented candles?
There is no single wax that is best for every candle.
Soy wax is a popular choice for container candles, while paraffin, beeswax, coconut wax, and different blends have their own properties.
Your choice should depend on the type of candle you want to make, the fragrance performance you are seeking, and the manufacturer’s recommendations.
3. Why do my homemade candles have very little scent?
Several factors may contribute to weak fragrance.
The fragrance oil may not be compatible with your wax, the candle may need more curing time, or the wick may not be suitable for the container and formulation.
Review the fragrance load, mixing instructions, and wick selection before making changes. Do not simply add more fragrance oil without checking the recommended limits.
4. Can I use essential oils to make scented candles?
Some essential oils may be used in certain candle formulations, but not every essential oil is suitable for every wax or burning application.
Their fragrance performance and safety considerations can differ from those of candle-formulated fragrance oils.
For beginners, candle-safe fragrance oils with clear supplier instructions can be easier to work with.
5. How long should homemade candles cure?
The recommended curing period depends on the wax and formulation.
Some waxes need more time than others for their fragrance performance to develop. Follow the manufacturer’s recommendations and record your results.
Testing a candle too soon may not give you a reliable picture of its eventual fragrance performance.
6. Can I make candles as gifts?
Yes. Handmade candles can make thoughtful gifts for birthdays, Christmas, housewarmings, and other occasions.
Choose a fragrance that suits the recipient, use an appropriate candle container, and pay attention to the presentation.
If you are giving candles to someone, make sure they are properly made and tested rather than treating appearance as the only measure of quality.
7. Can I sell homemade candles?
You can explore candle making as a small business, but selling candles requires more than making attractive products.
You need to understand your material costs, test your products thoroughly, use suitable containers and wicks, and follow the safety, labeling, and business requirements that apply to your location and intended market.
Keep records of your formulations and test results. Do not sell candles until you have established that they perform safely and consistently.
8. How can I make my candles look beautiful without spending too much?
Start with a simple container and focus on the details.
A neat label, a centered wick, a clean finish, and coordinated colors can create an attractive result without requiring expensive decorations.
You can also make matching sets using the same container and different fragrances.
9. Can I put dried flowers inside homemade candles?
It is not recommended to place dried flowers or other combustible decorations in the burnable wax, especially near the wick.
These materials can ignite and create a fire hazard.
Instead, use candle-compatible colorants, suitable containers, or exterior packaging to achieve a decorative look.
10. Which candle-making idea should I try first?
I would begin with a simple vanilla candle or a citrus-inspired candle in a suitable container.
Both projects allow you to learn the basic process without needing to create multiple wax layers or complicated shapes.
Once you understand your wax and wick, you can experiment with fragrance blends and more decorative designs.
Conclusion
Making your own candles gives you room to experiment with fragrances, colors, and designs until you find combinations you enjoy.
You might prefer the warm sweetness of vanilla, the freshness of citrus, the floral character of rose, or the rich aroma of coffee-inspired fragrances. You can also explore layered candles if you want to create something more decorative.
The important thing is to start with suitable materials, measure carefully, and give each candle enough time for curing and testing. A beautiful candle should not only smell pleasant and look attractive; it should also burn safely.
If you are new to candle making, choose one idea from this list and begin with a small test batch. Keep notes about the wax, fragrance, wick, and results so you can improve your next attempt.
You may discover a fragrance combination you love enough to make for your own home, share with friends, or eventually develop into a handmade gift collection.
And if your first candle does not turn out exactly as you imagined, do not let that discourage you. Use what you learn to improve the next batch. With practice, you can develop your own fragrance combinations and create candles that reflect your personal style.
If you enjoy making your own candles, you might also enjoy creating handmade ornaments for your Christmas tree. Making your own decorations gives you the opportunity to choose colors and styles that suit your home. Take a look at these DIY Christmas crafts for adults that look store bought but aren’t