In This Post You Will Learn Crochet Chicken Patterns and Easy Ways To Make Them.
I have always loved little crochet projects that have a lot of personality, and crochet chickens definitely fall into that category. They are small, cute, and you can make them in so many different styles.
You can make a tiny chicken to sit on a shelf, a soft amigurumi chicken for a child, a funny little hen for your kitchen, or even a small chicken that you can turn into a keychain or bag charm.
If you’re still learning to crochet, don’t let the word pattern scare you. Some chicken designs use simple stitches and basic shapes, so they can be a fun project to try once you are comfortable with the basics. Learn about Simple Embroidery gift Ideas that turn stitches into beautiful Keepsakes
In this post, I’m sharing 7 crochet chicken patterns and ideas that are cute, beginner-friendly, and full of personality. I’ll also go over the yarn and supplies you may need, the stitches that commonly appear in chicken patterns, how to choose a pattern, and a few tips that can make your finished chicken look much neater.
What You Need to Make a Crochet Chicken
The exact supplies will depend on the pattern you choose, but most small crochet chicken projects don’t require a huge collection of materials. Here is another Beginner friendly knitting projects for adults anyone can make, you should check for more knitting Ideas.
You will usually need:
- Yarn
- Crochet hook
- Yarn needle
- Stitch marker
- Scissors
- Polyester fiberfill
- Safety eyes or embroidery thread
- A little felt or yarn for details, depending on the pattern
- Row counter, optional
What Yarn Should You Use?
For a small crochet chicken, medium-weight yarn or cotton yarn can be a good starting point.
Cotton yarn is especially nice for amigurumi because it usually gives your stitches a defined appearance, which helps the little details stand out.

You can also use acrylic yarn if that’s what you already have. Just remember that the final texture and size may be different.
If you’re following a specific pattern, check the recommended yarn weight before buying anything. Changing the yarn can change the size of your chicken quite a bit.
What Crochet Hook Size Should You Use?
Your hook size should match the yarn and the pattern instructions.
For amigurumi, crocheters often use a hook that is a little smaller than they would use for a regular crochet project. This helps create tighter stitches so the stuffing doesn’t show through the finished piece.
I Have a guide on Embroidery hoop wall art and 10 beautiful Diy ideas to try. This guide will help understand how to design, assemble, and style beautiful hoop decor effortlessly.
Don’t choose a hook size simply because it looks right. If you’re following a specific pattern, use the hook size recommended by the designer or make a gauge sample if one is provided.
Crochet Stitches You May Need
Before starting your chicken, it helps to understand a few basic stitches.
Many crochet chicken patterns use:
- Chain stitch (ch)
- Single crochet (sc)
- Slip stitch (sl st)
- Increase (inc)
- Decrease (dec)
- Magic ring
If you’re making an amigurumi chicken, the single crochet stitch will probably become one of your main stitches.
What Is a Magic Ring?
A magic ring, also called a magic circle, is a way of starting crochet projects that are worked in the round.
It allows you to pull the center closed so there isn’t a large hole in the middle of your piece.
If the magic ring is new to you, take your time learning it before starting your chicken. Once you get comfortable with it, you’ll find it useful for many other crochet projects too.
1. Classic Little Crochet Chicken
Let’s start with a simple little chicken shape.
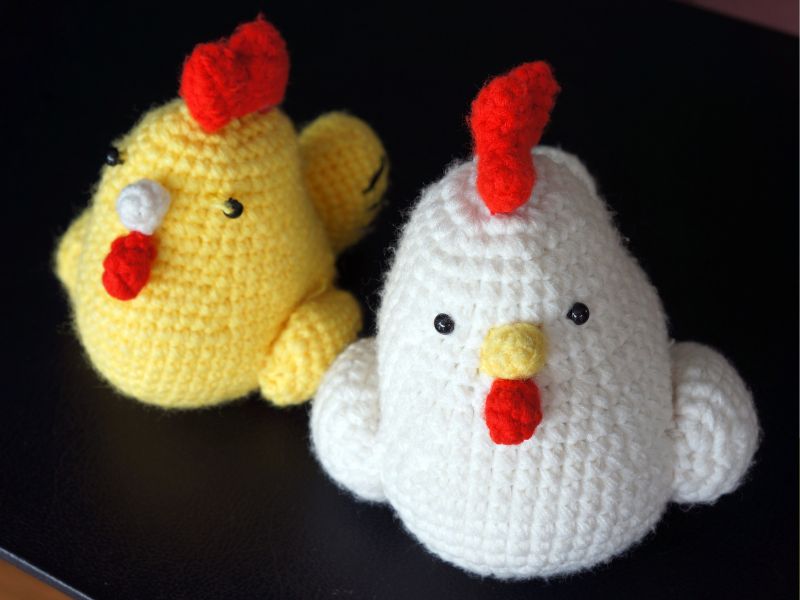
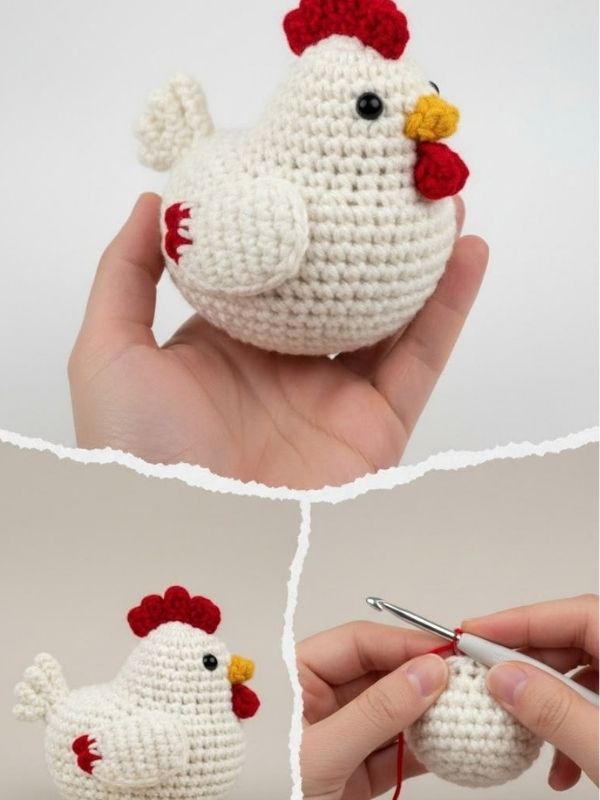
This style usually has a rounded body, a small head, a little beak, wings, and a comb on top.
I really like this type of crochet chicken for beginners because the basic body doesn’t require you to create a complicated shape. You are mainly working in rounds and building the body gradually.
Crochet pattern designs are wonderful for keeping hands active and creative. You can also explore these simple Crafts for seniors for more Easy DIY Ideas,
You can make the body white, cream, yellow, brown, gray, or even a fun pastel color.
For the details, you could use orange yarn for the beak and feet and red yarn for the comb.
How to Make It Cute
The face can completely change the personality of your chicken.
Try placing the eyes slightly closer together for a sweet expression. You can also make the beak small so the eyes remain the main feature.
For a softer handmade look, embroider the eyes instead of using plastic safety eyes.
This is especially useful if you are making the chicken for a very young child because small parts can be a choking hazard.
2. Tiny Crochet Chicken
If you love miniature crafts, a tiny crochet chicken is such a cute project to try.
This chicken can be much smaller than a traditional amigurumi piece, making it perfect for little decorations.
You could place several tiny chickens together and create a small farm scene. Love bird-themed crafts and outdoor decor? Check out our tips on Making the right Bird Milk carton bird feeder crafts to get kids outside and offscreen.
You can also attach a loop to the top and turn one into a decoration for a bag, backpack, gift, or keyring, provided the finished piece is securely constructed.

Why I Like This One
Small crochet projects can be nice when you don’t want to spend several days working on one project.
You can also use leftover yarn from previous projects.
That little amount of yellow yarn sitting in your craft basket might be enough to make a tiny chicken.
Just remember that very small projects can sometimes be more fiddly than larger ones because the stitches are tiny.
3. Crochet Hen With Her Little Chicks
Now we’re getting into one of my favorite ideas.
Instead of making one chicken, you can make a mother hen with a few tiny chicks, Learning how to make a cute DIY Charm at home is also a great idea if you want to attach a charm or keyring to your crochet hen.
The mother hen can have a larger rounded body, while the chicks can be made using much smaller versions of the same basic shape.
You could make the mother hen white or brown and give the chicks different shades of yellow.

Make Each Chick Slightly Different
You don’t have to make every chick exactly the same.
One could have a tiny orange beak.
Another could have a different eye position.
You could even give one a little tuft of yarn on top.
Those small differences can make the finished group feel much more playful.
This would also make a sweet handmade gift for someone who loves farm animals or cute crochet decorations.
4. Crochet Chicken With a Funny Personality
Not every crochet chicken needs to look realistic.
You can exaggerate the features and make something much more playful.
Imagine a round chicken with a large head, tiny wings, a big orange beak, and a bright red comb.
You could even make the eyes slightly larger than normal.
This kind of design works especially well if you enjoy making cute amigurumi characters.
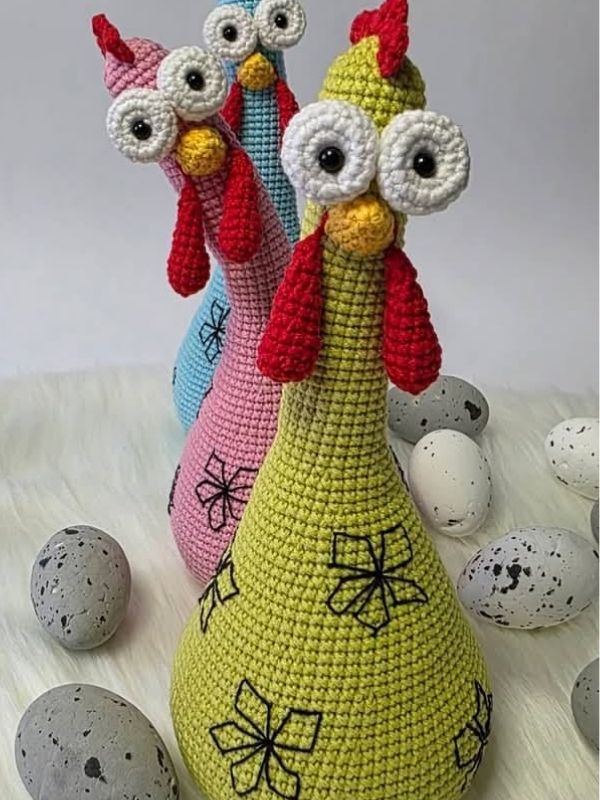
Give Your Chicken a Little Personality
This is where you can have fun.
You could make the chicken look:
- Sleepy
- Surprised
- Happy
- Shy
- Curious
- Slightly confused
The position of the eyes and beak can make a surprisingly big difference.
You can also add tiny accessories such as a bow, scarf, flower, or little hat if your pattern allows for it.
If you want something small and useful, turn your crochet chicken into a little keychain or bag charm. If you’re looking for step-by-step inspiration, you can check out my guide on how to make a cute DIY bag charms at home to see how to easily attach hardware to your finished pieces.
5. Crochet Chicken Keychain or Bag Charm
If you want something small and useful, turn your crochet chicken into a little keychain or bag charm.
Start with a small chicken pattern rather than a large stuffed chicken.
Once the chicken is finished, you can add a secure keychain ring or clasp.
I would make sure the attachment is firmly connected before using it on a bag that gets handled often.
This is also a cute handmade gift idea. Love making mini animals? Check out these 10 Easy zoo animal crafts for preschoolers that spark creativity for more easy handmade ideas
You could make different colors for different people or create a little collection of farm-animal charms.

A Small Detail That Makes a Difference
If you’re making a chicken specifically as a bag charm, try not to make the body too large.
A smaller design will usually hang more comfortably from a zipper or handle.
You can also keep the wings and comb relatively compact so they don’t catch on things easily.
6. Crochet Chicken With a Flower or Bow
Sometimes a simple accessory can completely change a crochet project.
You could add a tiny flower beside your chicken’s wing or place a small bow around its neck.
For a feminine look, try soft pink, lavender, cream, or pastel yellow.
For something more playful, use bright colors.
You don’t need a complicated accessory. Even a tiny crocheted flower can make the finished chicken feel more special.

This Would Make a Sweet Gift
A decorated crochet chicken could work as a small birthday gift, Easter gift, handmade decoration, or little surprise for someone who enjoys handmade items.
You could also place it inside a gift box with other handmade pieces.
If you enjoy making handmade gifts, you may also like my Handmade Crafts for Gifts That Look Special Without Costing a Fortune.
7. Crochet Chicken Family
Why stop at one?
You could make an entire little crochet chicken family.
Create one large hen, a smaller rooster, and a few tiny chicks.
This gives you the chance to play with different sizes and colors while keeping the same general design.
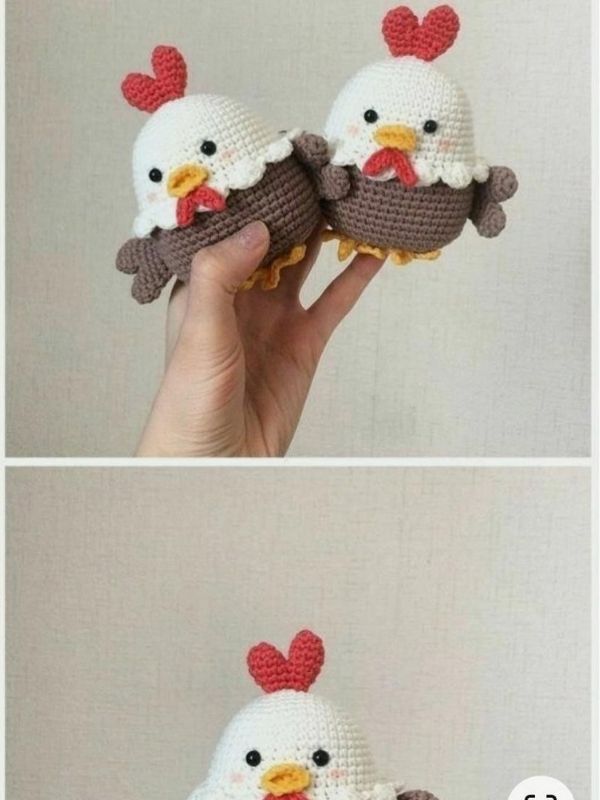
You could make the rooster slightly taller and give him a larger comb or tail.
The hen could have a rounder body, while the chicks could be tiny and fluffy-looking.
A crochet chicken family makes a wonderful handmade gift or spring display, especially when styled alongside cheerful DIY accents like Creative sunflower crafts for kids.
Create a Little Farm Scene
Once you have several chickens, you can make a small decorative scene.
Add a crochet basket, little nest, eggs, or other farm-themed crochet pieces.
You don’t have to make everything complicated. A few simple pieces placed together can make a really cute display.
How to Choose the Right Crochet Chicken Pattern
If you’re a beginner, I recommend looking at the pattern carefully before starting.
Don’t only look at the finished picture.
Check the stitches used and see if you already know most of them.
A pattern may look simple but still use techniques you haven’t learned yet.
If you love combining Crochet pattern work with other floral decorations around your home, check out these creative paper flower crafts for more budget-friendly decor ideas.”
Check the Difficulty
Look for patterns described as:
- Beginner
- Easy
- Beginner-friendly
- Basic amigurumi
- Simple crochet project
If you’re still learning, you may want to avoid a pattern that uses many complicated color changes, unusual stitches, or detailed shaping.
Once you’re more comfortable, you can move on to more detailed chicken designs.
How to Make Your Crochet Chicken Look Neat
The little details can make a big difference.
Keep Your Tension Consistent
Try not to crochet some rounds extremely tightly and others very loosely.
Uneven tension can change the shape of your chicken.
If you notice your stitches becoming much tighter as you work, take a short break and relax your hands.
Count Your Stitches
This is especially important when making amigurumi.
Missing one stitch can change the shape of the body.
Use a stitch marker to keep track of the beginning of each round.
If a pattern says to make 24 stitches, count them.
It might feel slow at first, but it can save you from having to unravel several rounds later.
Don’t Overstuff the Body
You want your chicken to feel nicely filled, but don’t pack it so tightly that the stitches stretch apart.
Add small amounts of stuffing as you go.
Use your fingers or the end of a crochet hook to gently push the stuffing into smaller spaces.
The body should feel firm enough to hold its shape without making the stitches look stretched.
How to Make the Chicken’s Shape Look Better
When you finish stuffing the body, look at it from different angles.
If one side looks flatter than the other, you may be able to move some of the stuffing around.
Don’t immediately add more stuffing.
Sometimes the problem is simply that the filling has moved to one side.
Gently reshape the body with your fingers before deciding if you need more.
How to Attach the Wings
The wings are usually small pieces that are sewn onto the sides of the body.
Before sewing them permanently, place them against the chicken and check their position.
This is one of those moments where taking a few seconds can save you a lot of frustration.
If you attach one wing much higher than the other, your chicken may look slightly lopsided.
Of course, a handmade chicken doesn’t have to be perfectly symmetrical, but it helps to check before securing the pieces.
How to Make the Beak
A little orange beak is one of the details that makes the chicken instantly recognizable.
You can crochet a tiny beak or embroider one using orange yarn.
Keep it small if you want a cute, simple look.
You can also slightly change the shape depending on the personality you want your chicken to have.
How to Add the Comb
The comb is the red piece that sits on top of the chicken’s head.
You can make it using red yarn and sew it securely to the top.
For a simple chicken, a small comb is enough.
If you want a more cartoon-like chicken, you can make the comb slightly larger.
Safety Tips for Crochet Chickens
If you’re making a crochet chicken for a baby or young child, be extra careful with small parts.
Safety eyes, buttons, beads, keychain hardware, and other small pieces can become choking hazards if they come loose.
For young children, embroidered facial features can be a safer option than detachable plastic pieces, but you should still make sure the stitching is secure.
Also check the finished toy regularly for loose parts or damaged stitching.
What If Your Crochet Chicken Doesn’t Look Like the Picture?
Please don’t panic.
This happens.
Your yarn may be a different thickness.
Your hook may be a different size.
Your tension may be different from the pattern designer’s.
Even the amount of stuffing can change the shape.
If the pattern is technically correct but your chicken looks slightly different, that doesn’t mean you failed.
Look at your stitch count first.
If your stitch count matches the instructions, check your yarn, hook, tension, and stuffing before assuming something went wrong.
Can I Use Different Colors?
Absolutely.
Chicken crochet patterns are perfect for experimenting with color.
You could make:
- Yellow chickens
- White chickens
- Brown chickens
- Cream chickens
- Black chickens
- Gray chickens
- Pastel chickens
- Multicolored chickens
You could even make a rainbow chicken family if you want something really playful.
Just remember that changing yarn colors can affect the appearance of the stitches, so choose colors that give you enough contrast for the details you want to add.
How to Make Your Crochet Chicken a Little Bigger
If you want a larger chicken, changing the yarn and hook size can make a difference.
Using thicker yarn with a suitable larger hook will generally create a larger finished piece.
However, don’t simply change the hook size without considering the pattern.
A larger hook can make your stitches looser and create gaps where the stuffing shows through.
If you want a much larger chicken, it is often better to use a pattern designed for the size you want or adjust the pattern carefully.
How to Make Your Crochet Chicken Smaller
The same idea works in reverse.
Smaller yarn and an appropriately smaller hook can create a smaller chicken.
This is especially useful if you want to make a little chicken keychain or bag charm.
Just make sure the finished fabric is still tight enough for the intended project.
Cute Ways to Use Your Crochet Chickens
Once you start making these little chickens, you may end up with more than you expected.
Here are some ways to use them:
As Handmade Gifts
A little crochet chicken can make a sweet handmade gift for someone who loves crochet, farm animals, cute decorations, or handmade items.
As Bag Charms
Small chickens can make adorable additions to handbags, backpacks, and crochet bags.
As Shelf Decor
A few chickens in different sizes can create a cute little display on a shelf.
As Easter Decorations
Chickens and chicks can fit beautifully into an Easter-themed display, especially when paired with crochet eggs, flowers, or baskets.
For a Nursery or Children's Room
A larger soft crochet chicken can make a cute decorative piece for a child’s room, as long as it is made and used safely for the child’s age.
Common Mistakes Beginners Should Avoid
Starting With a Pattern That’s Too Difficult
A complicated pattern can make your first project frustrating.
Start with something simple and build your confidence.
Forgetting to Count
One missed stitch can affect the shape of the entire chicken.
Count your stitches regularly.
Overstuffing
Too much stuffing can stretch your stitches and make your chicken look uneven.
Add it gradually.
Sewing Pieces on Without Checking First
Always position your wings, eyes, beak, and comb before permanently attaching them.
Pulling Your Sewing Thread Too Hard
When attaching small pieces, pull the yarn securely but don’t yank it so hard that the fabric puckers.
My Tips for Making Your First Crochet Chicken
If this is your first time making a crochet chicken, I would keep things simple.
Choose a pattern with basic stitches.
Use a yarn color that makes it easy to see your stitches.
Keep your stitch marker close.
Count your stitches.
Take your time with the stuffing.
And don’t rush the face.
The eyes and beak can completely change the expression of your little chicken, so take a moment to position them before sewing everything into place.
Most importantly, don’t compare your first chicken to someone’s fiftieth.
Your hands are still learning the movements, and that’s okay.
Conclusion
I think crochet chickens are one of those projects that are hard to look at without smiling.
They are small, playful, and you can give each one its own little personality. You can make a tiny chick from leftover yarn, create a whole family of chickens, or turn one into a cute little bag charm.
If you’re new to crochet, start with a simple pattern and don’t put pressure on yourself to make it perfect. Pay attention to your stitch count, keep your tension fairly consistent, and take your time when you’re putting all the little pieces together.
And once you’ve finished your first crochet chicken, don’t be surprised if you immediately start thinking about what color you want to make the next one in.