10 Winter Animal Crafts for Kids That Are Fun and Easy to Make.
Winter is a wonderful time to introduce children to creative activities that keep their hands busy and their imaginations active. When the weather gets cold and outdoor play becomes limited, simple indoor crafts can give children something exciting to look forward to. From adorable polar bears to playful penguins, winter animal crafts are a lovely way to combine creativity, learning, and fun.
Children naturally enjoy making things with their hands, especially when they can turn everyday materials into something they recognise. A paper plate can become a penguin, cotton balls can create a fluffy polar bear, and a paper bag can transform into an Arctic fox. These projects allow children to explore different textures, colours, shapes, and materials while learning about animals that live in cold environments.
The good thing about these crafts is that you do not need expensive supplies or complicated equipment. Many of the materials are probably already in your home or available at a nearby craft store. Paper plates, glue, cotton balls, construction paper, cardboard tubes, washable paint, and child-safe scissors can be used to create several adorable winter animals.
These activities are suitable for different age groups, including preschoolers and elementary-aged children. Younger children may need help cutting shapes and attaching smaller pieces, while older children can complete more of the projects independently and add their own creative details.
If you are looking for fun winter animal crafts for kids to make at home, in the classroom, or during a holiday activity session, here are ten adorable ideas worth trying.
1. Cotton Ball Polar Bear Craft
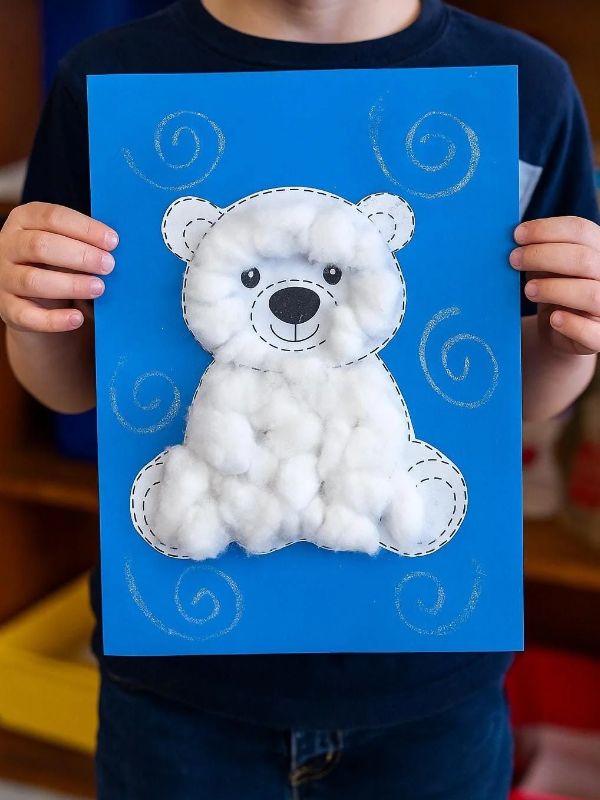
A cotton ball polar bear is one of the easiest winter animal crafts for young children. Its fluffy white appearance makes it a lovely project for introducing children to polar bears and their snowy Arctic environment.
This craft is especially suitable for preschoolers because it involves simple activities such as spreading glue, placing cotton balls, and attaching paper shapes. Children can enjoy watching an ordinary paper cutout gradually turn into a fluffy polar bear.
The finished polar bear can be displayed on a bedroom wall, placed on a classroom winter display board, or added to a collection of handmade winter animal decorations.
Materials Needed
- White construction paper or cardstock
- Cotton balls
- Black construction paper
- Small piece of white paper
- Glue stick or school glue
- Child-safe scissors
- Pencil
- Googly eyes
- Black marker
How to Make It
Step 1: Prepare the polar bear shape.
Start by drawing a large polar bear shape on white cardstock. You can draw a simple round head with two small ears, a wide body, and four short legs. If drawing is difficult, an adult can prepare the outline before the activity begins.
Cut out the shape carefully. Younger children may need an adult to handle this part.
Step 2: Add the cotton balls.
Apply glue to small sections of the polar bear’s body. Give the child a handful of cotton balls and encourage them to press each one gently onto the glued areas.
Continue until the body is covered. The cotton balls will create a soft, fluffy texture that makes the animal look like a real polar bear.
Avoid applying too much glue at once because it can become difficult for children to work with.
Step 3: Create the face.
Cut out a small black oval for the nose. Attach it to the centre of the face, then add two googly eyes above it.
If you do not have googly eyes, use a black marker to draw two small eyes.
Step 4: Add the ears and paws.
Cut two small black or white circles for the inner ears and attach them to the head. You can also add small black paper shapes to represent the paws.
Step 5: Finish the decoration.
Allow the glue to dry completely. Children can add a blue paper background, cotton wool snow, or small paper snowflakes around their polar bear.
Creative Variations
Instead of covering the entire bear with cotton balls, children can use white tissue paper, small pieces of white yarn, or torn white paper. Each material creates a different texture.
You can also turn this activity into a winter scene by placing the polar bear on a sheet of blue construction paper. Add white paper snowflakes, an igloo, and small pieces of cotton wool to represent snow.
Older children can create a family of polar bears by making one large bear and two smaller cubs.
What Children Can Learn
This activity introduces children to polar bears and their natural environment. You can explain that polar bears live in the Arctic and have thick fur and a layer of fat that help them stay warm.
It also develops fine motor skills because children must pick up small cotton balls, spread glue, and position the materials carefully.
Some Other Crafts you can Look at
- 12 Paper Snowflake Crafts for Kids of All Ages
- Creative Christmas Crafts for Adults That Look Store Bought but Aren’t
- Egg Carton Crafts for Kids That Will Make You Think Twice Before Throwing Them Away
- 12 Cardboard Crafts for Preschool That Prove You Dont Need Fancy Supplies
- 15 Valentines Day Crafts for Preschoolers That Are Almost Too Cute to Resist
- 11 Thoughtful New Years Eve Crafts for Family Parties at Home
- 5 Loaves and 2 Fish Crafts for Kids That Make Learning About Jesus Fun
2. Paper Plate Penguin Craft
Penguins are among the most recognisable winter animals, making them a wonderful subject for children’s craft activities. Their black-and-white bodies, small wings, and bright orange feet are easy to recreate using simple household craft materials.
A paper plate provides a convenient base for this project. Children can paint it, attach paper shapes, and decorate it to create a cheerful penguin.
This is a good classroom activity because several children can work on their own penguins using the same basic materials.
Materials Needed
- White paper plates
- Black construction paper
- White construction paper
- Orange construction paper
- Googly eyes
- Glue
- Child-safe scissors
- Black paint or crayons
- Paintbrush
- Pencil
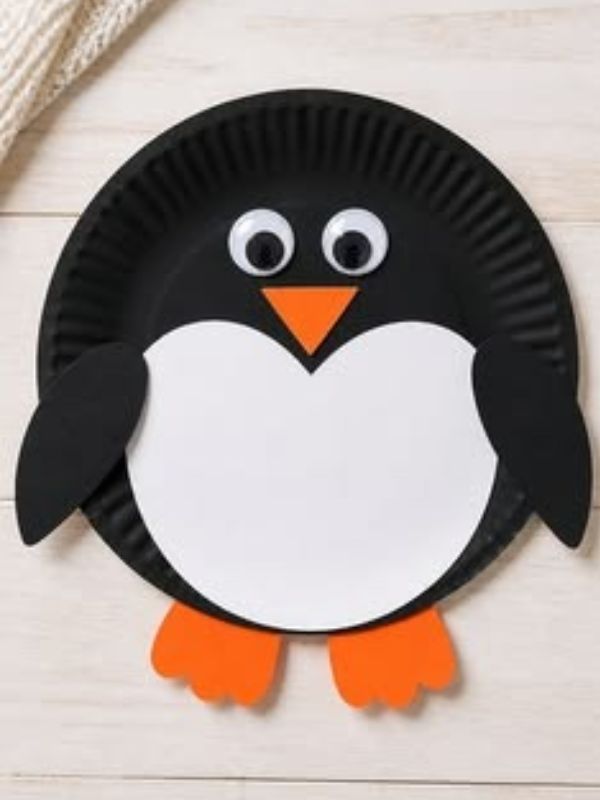
Photo credit
How to Make It
Step 1: Prepare the paper plate.
Place a paper plate on the table with its front side facing upward. If you are using white plates, paint the outer section black and leave a large oval-shaped area in the centre white.
Allow the paint to dry before moving to the next step.
Alternatively, cover the plate with black construction paper and attach a white oval shape to the centre.
Step 2: Make the penguin’s face.
Attach two googly eyes near the top of the white section. Cut a small orange triangle from construction paper and glue it underneath the eyes to create the beak.
Make sure the triangle points downward.
Step 3: Create the wings.
Cut two curved wing shapes from black construction paper. Attach one to each side of the paper plate.
You can angle the wings slightly outward to make the penguin appear as if it is standing with its flippers open.
Step 4: Add the feet.
Cut two orange feet from construction paper. Each foot can have three rounded points to resemble penguin toes.
Glue them underneath the plate.
Step 5: Decorate your penguin.
Children can add a scarf, a small winter hat, or a bow using colourful paper. They can also draw snowflakes around the penguin to complete the winter theme.
Creative Variations
For a more colourful project, let children make penguins wearing paper scarves in their favourite colours. You can also use felt scraps, ribbon, or yarn to create small accessories.
Another option is to make a penguin family. Children can use large plates for adult penguins and smaller plates for baby penguins.
If you are working with older children, encourage them to create a snowy background with an iceberg, ocean water, and falling snow.
What Children Can Learn
While making this craft, children can learn that penguins are birds, even though they cannot fly. Their wings help them swim through water.
You can also explain that different penguin species live in different parts of the world. Not every penguin lives in extremely cold environments.
The project encourages creativity, colour recognition, cutting practice, and the ability to follow instructions.
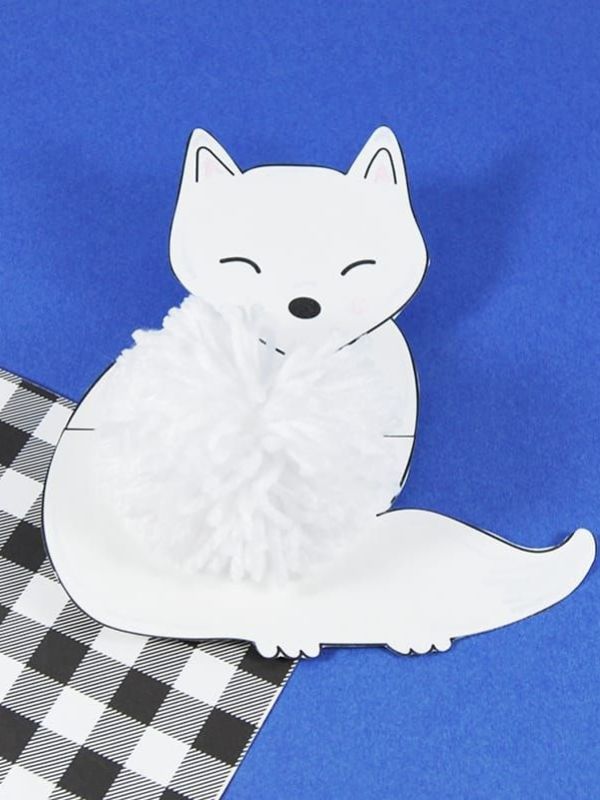
3. Paper Bag Arctic Fox Craft
An Arctic fox craft is a lovely way to introduce children to another animal that survives in cold environments. Arctic foxes are known for their thick fur, small ears, and bushy tails. Their fur often appears white during winter, helping them blend into snowy surroundings.
For this activity, an ordinary paper lunch bag becomes the body of the fox. Children can use construction paper to create its face, ears, and tail.
The finished craft can also be used as a small puppet, making it suitable for imaginative storytelling.
Materials Needed
- White paper lunch bag
- White construction paper
- Black construction paper
- Small piece of grey paper
- Googly eyes
- Glue stick
- Child-safe scissors
- Pencil
- Black marker
How to Make It
Step 1: Prepare the paper bag.
Place the paper bag flat on a table with the folded bottom section facing upward. This folded section will become the fox’s face.
If you prefer, use a white paper bag. If you only have brown paper bags, cover the visible front with white construction paper.
Step 2: Create the ears.
Draw two triangular ear shapes on white construction paper. Cut them out and attach them to the top corners of the folded section.
Cut two smaller grey or black triangles and glue them inside the ears.
Step 3: Make the fox’s face.
Attach two googly eyes to the upper part of the folded section. Cut a small black triangle or oval for the nose and glue it underneath the eyes.
Use a black marker to draw a short line below the nose and add a few small details around the face.
Step 4: Add the cheeks.
Cut two rounded white shapes and attach them underneath the eyes, leaving enough space for the nose. These shapes will help give the fox its characteristic face.
Step 5: Make the bushy tail.
Cut a long, curved tail from white construction paper. Add a small black or grey section at the tip and attach it to the back of the paper bag.
Step 6: Turn it into a puppet.
Once everything is dry, children can place their hands inside the bag and move the folded section to make the fox’s mouth open and close.
Creative Variations
Children can make several Arctic fox puppets with different facial expressions. One fox could look surprised, another could look happy, and another could have its eyes closed.
You can also use the puppets to create a short winter animal story. Encourage children to invent names for their foxes and describe what they might do in a snowy forest.
For older children, provide white, grey, and blue paper so they can create a complete Arctic landscape around their fox.
What Children Can Learn
This craft introduces children to animal adaptations. Explain that Arctic foxes have thick fur and furry paws that help them cope with cold conditions.
Children can also learn that an animal’s fur colour may help it blend into its surroundings.
The puppet-making process encourages storytelling, communication, and imaginative play.
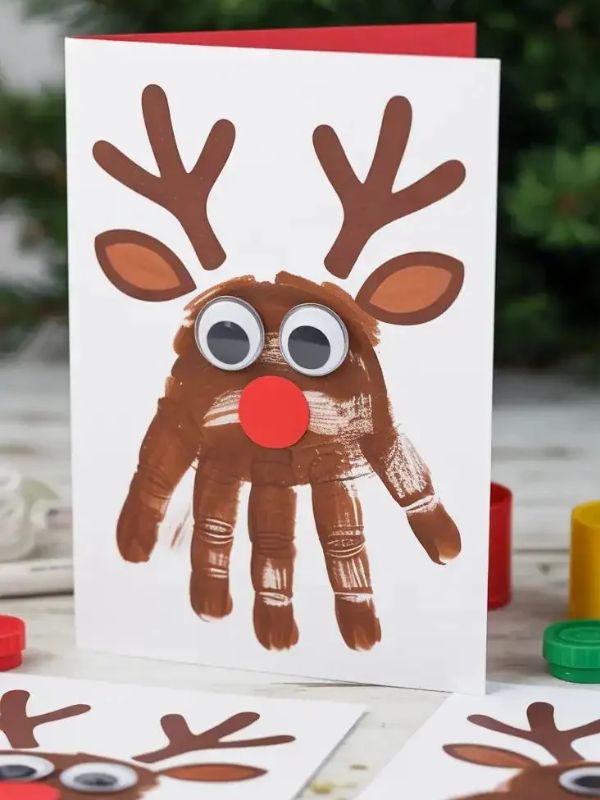
4. Handprint Reindeer Craft
Handprint crafts are always special because they capture the shape of a child’s hand. They can also become keepsakes that parents enjoy saving as children grow older.
A handprint reindeer is a simple winter animal project that uses a child’s hand to create the animal’s head and antlers. The fingers become the antlers, while the palm forms the face.
This activity works particularly well during the winter holiday season, but it can be enjoyed throughout the colder months.
Materials Needed
- Brown construction paper
- Light brown construction paper
- Red construction paper
- Googly eyes
- Glue
- Child-safe scissors
- Pencil
- Black marker
- Crayons
How to Make It
Step 1: Trace the child’s hand.
Place the child’s hand on brown construction paper with the fingers spread apart. Trace around the hand using a pencil.
The thumb and four fingers will form the reindeer’s antlers, while the palm will become the face.
Step 2: Cut out the handprint.
Carefully cut around the outline. Younger children may need help with this step, especially around the spaces between the fingers.
Step 3: Create the reindeer’s face.
Turn the handprint upside down so that the fingers point upward. The palm will now form the reindeer’s face.
Attach two googly eyes near the centre of the palm.
Step 4: Add the nose.
Cut a small red circle and glue it near the bottom of the palm. This will become the reindeer’s nose.
You can use a black paper circle instead if you want a more natural-looking reindeer.
Step 5: Add facial details.
Use a black marker to draw a small mouth. You can also cut two light brown ear shapes and attach them to the sides of the face.
Step 6: Decorate the background.
Glue the finished reindeer onto blue or white cardstock. Add paper snowflakes, stars, or a winter greeting.
Creative Variations
Make a collection of handprint reindeer using different shades of brown paper. Children can decorate each reindeer with a different scarf, bow, or hat.
You can also write the child’s name and the date on the back of the craft. This makes it a lovely keepsake for parents and grandparents.
Another idea is to create a reindeer family using handprints from different family members.
What Children Can Learn
This activity helps children practise tracing and cutting while developing hand-eye coordination.
It also gives them an opportunity to explore shapes and understand how a simple outline can be transformed into something recognisable.
For younger children, it is a good opportunity to discuss reindeer and their role in cold-weather environments.
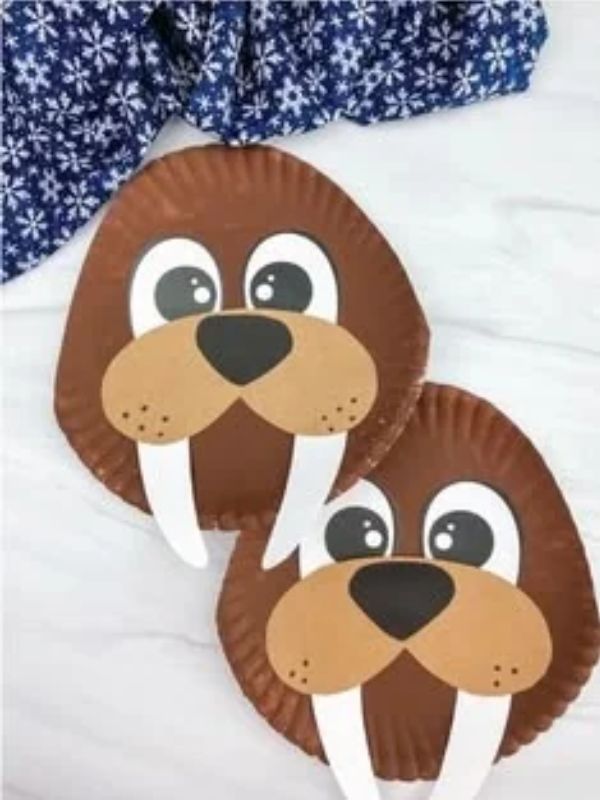
5. Paper Plate Walrus Craft
A paper plate walrus is a fun project for children who enjoy making animals with unusual features. Walruses are known for their large bodies, whiskers, and long tusks.
Their appearance makes them interesting subjects for craft activities. Children can use a paper plate as the face and add paper tusks, whiskers, and googly eyes.
This project is slightly different from the usual penguin and polar bear crafts, so it adds variety to a winter animal collection.
Materials Needed
- Paper plate
- Brown construction paper
- White construction paper
- Black construction paper
- Googly eyes
- Brown crayons or paint
- Glue
- Child-safe scissors
- Black marker
- Pencil
How to Make It
Step 1: Prepare the walrus face.
Use a brown paper plate if you have one. If your plate is white, let children colour it with brown crayons or paint it brown.
Allow any paint to dry completely.
Step 2: Add the eyes.
Glue two googly eyes near the upper middle section of the plate.
You can place them slightly closer together to give the walrus a friendly expression.
Step 3: Create the muzzle.
Cut two large oval shapes from a lighter shade of brown construction paper. Attach them side by side underneath the eyes.
These shapes will form the walrus’s muzzle.
Step 4: Make the tusks.
Cut two long, curved shapes from white construction paper. Glue them underneath the muzzle, pointing downward.
The tusks should be large enough to stand out against the brown face.
Step 5: Add the whiskers.
Cut several thin strips of black or dark brown paper. Attach them to both sides of the muzzle.
You can also draw whiskers with a black marker.
Step 6: Finish the walrus.
Use a black marker to draw a small nose and mouth. Add a few white paper snowflakes around the walrus to complete the winter design.
Creative Variations
Children can make their walruses look different by changing the facial expressions or adding accessories.
For example, a walrus wearing a blue scarf can be placed beside another walrus wearing a red winter hat.
You can also make a simple Arctic display with several paper plate animals, including a polar bear, penguin, and walrus.
For an extra creative activity, let children use brown tissue paper to create a textured walrus face.
What Children Can Learn
Use this craft to explain that walruses are marine mammals that live in Arctic and sub-Arctic regions.
They have long tusks, which they use for several purposes, including helping them move around on ice and displaying themselves to other walruses.
Children can also learn about animal body features and how different animals have adaptations that help them survive.
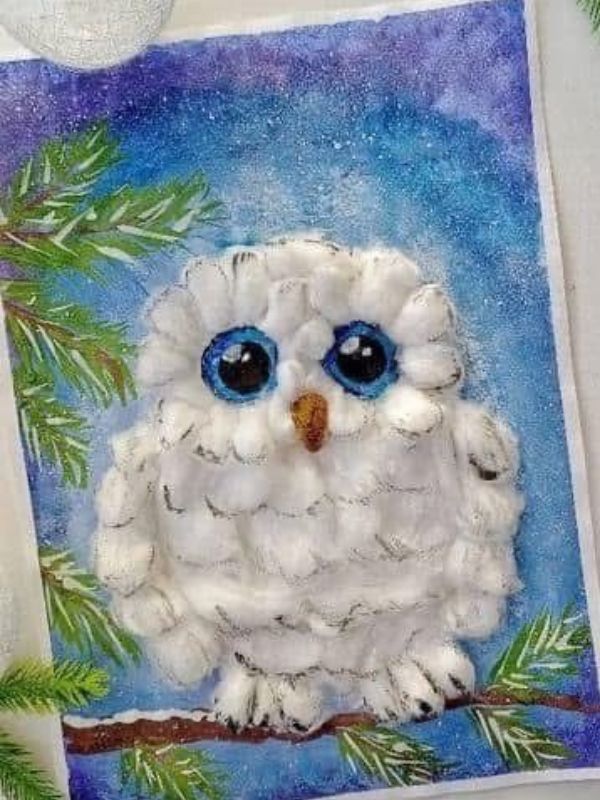
6. Cotton Ball Snowy Owl Craft
Snowy owls are beautiful birds with white feathers and dark markings. Their appearance makes them perfect for a winter-themed craft.
This cotton ball snowy owl project gives children an opportunity to experiment with texture while creating an adorable bird. The cotton balls provide a soft, fluffy appearance, while paper shapes form the eyes, beak, wings, and feet.
It is also a good activity for children who enjoy working with different materials.
Materials Needed
- White cardstock
- Cotton balls
- Black construction paper
- Orange construction paper
- Googly eyes
- Glue
- Child-safe scissors
- Pencil
- Black marker
How to Make It
Step 1: Draw the owl’s body.
Draw a large oval shape on white cardstock. Add two small pointed sections at the top to represent the owl’s head feathers.
Cut out the shape carefully.
Step 2: Add the cotton balls.
Apply glue to the body and attach cotton balls one at a time.
Encourage children to cover most of the body without leaving large spaces between the cotton balls.
If the cotton balls are too large, gently pull them apart to create smaller pieces.
Step 3: Make the eyes.
Cut two black circles from construction paper. Attach them near the top of the owl’s body.
Glue googly eyes inside the circles.
Step 4: Add the beak.
Cut a small orange triangle and attach it underneath the eyes.
The pointed end should face downward.
Step 5: Create the wings.
Cut two curved wing shapes from white or grey paper. Attach them to the sides of the body.
Children can add small black markings to the wings using a marker.
Step 6: Add the feet.
Cut two small orange feet and glue them underneath the owl.
Step 7: Create a snowy background.
Attach the owl to blue cardstock. Add paper snowflakes, a snowy tree, or cotton wool along the bottom to create a winter setting.
Creative Variations
Instead of using cotton balls, children can use white tissue paper, white yarn, or small pieces of felt.
You can also encourage older children to add grey and black markings to represent the patterns found on snowy owls.
Another idea is to create an owl sitting on a paper branch. Cut a brown branch shape from construction paper and attach it to the background before placing the owl on top.
What Children Can Learn
This craft introduces children to snowy owls and their habitats. Explain that snowy owls are found in Arctic regions and have thick feathers that help them stay warm.
Children can also learn that owls are birds of prey and have excellent eyesight and hearing.
The activity encourages careful placement of materials, creativity, and fine motor development.
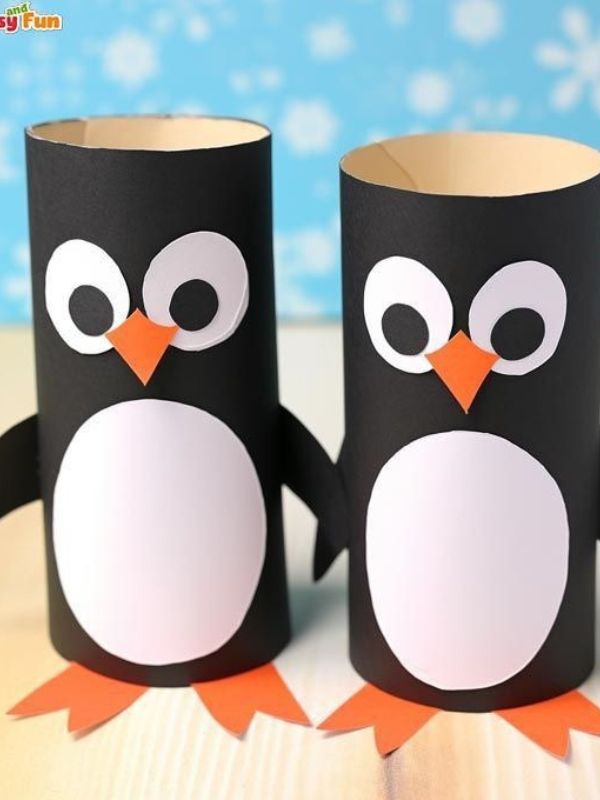
7. Paper Roll Penguin Craft
Before throwing away empty cardboard toilet paper rolls, consider keeping a few for children’s craft activities. These simple cardboard tubes can become the base for several handmade animals.
A paper roll penguin is an easy project that does not require many materials. Its upright shape makes it look like a little penguin standing on the snow.
Children can make one penguin or create an entire group using different decorations.
Materials Needed
- Empty cardboard toilet paper roll
- Black construction paper
- White construction paper
- Orange construction paper
- Googly eyes
- Glue
- Child-safe scissors
- Black marker
- Pencil
How to Make It
Step 1: Cover the cardboard roll.
Cut a piece of black construction paper large enough to wrap around the cardboard tube.
Apply glue to the paper and wrap it around the tube. Press the edges gently so the paper stays in place.
Trim any excess paper.
Step 2: Make the penguin’s belly.
Cut a large oval from white construction paper. Glue it to the front of the cardboard roll.
This will create the penguin’s white belly.
Step 3: Add the eyes.
Attach two googly eyes near the top of the white belly area.
You can also use small circles cut from white and black paper if you do not have googly eyes.
Step 4: Create the beak.
Cut a small orange triangle and glue it underneath the eyes.
Step 5: Make the wings.
Cut two long oval shapes from black construction paper. Attach one to each side of the cardboard tube.
Bend the wings slightly outward so they look more natural.
Step 6: Add the feet.
Cut two orange feet and glue them to the bottom of the tube.
Step 7: Decorate the penguin.
Children can add a paper scarf, bow tie, or small winter hat. They can also draw a snowy background on a separate sheet of paper.
Creative Variations
Make several paper roll penguins in different sizes. You can use shorter cardboard tubes for baby penguins and longer ones for adult penguins.
Children can also create a small penguin family and arrange the animals on a table as a winter decoration.
If you want to turn the activity into a learning game, ask children to give each penguin a name and describe its personality.
What Children Can Learn
This activity helps children understand how recyclable materials can be reused creatively.
It also encourages problem-solving because children must work out how to wrap the paper around the cardboard tube and position the different features.
You can introduce simple facts about penguins, including their feathers, swimming abilities, and how some species live in large groups called colonies.
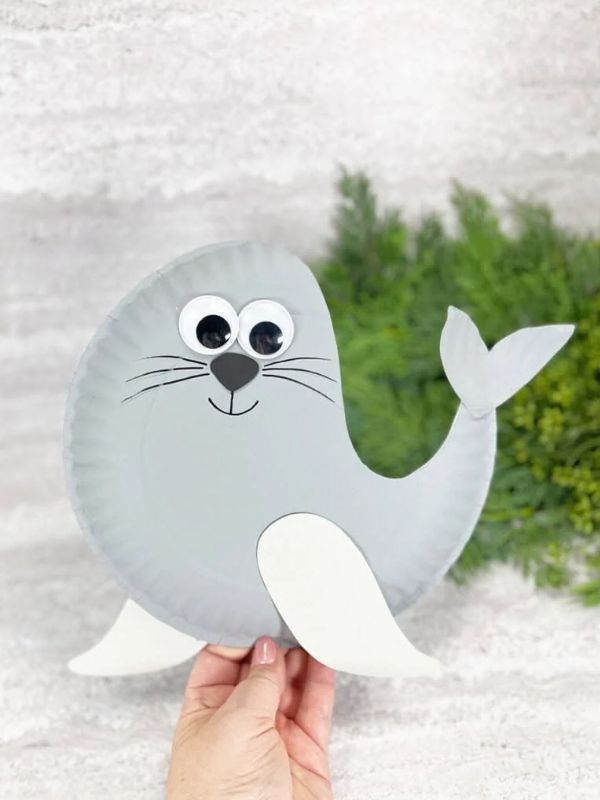
8. Arctic Seal Paper Craft
Seals are another interesting animal to include in a collection of winter crafts. They have rounded bodies, flippers, and whiskers that make them easy to recognise.
An Arctic seal paper craft is a good choice for children who enjoy cutting, gluing, and arranging shapes. It uses simple paper pieces to create a friendly seal resting on an icy surface.
This activity can be completed with basic construction paper and a few decorative supplies.
Materials Needed
- Grey construction paper
- White construction paper
- Black construction paper
- Blue construction paper
- Googly eyes
- Glue
- Child-safe scissors
- Black marker
- Pencil
How to Make It
Step 1: Draw the seal’s body.
Draw a large oval shape on grey construction paper. Make one end slightly narrower to create the seal’s head.
Cut out the shape.
Step 2: Make the flippers.
Draw two small curved shapes on grey paper. These will become the seal’s front flippers.
Cut them out and attach them to the lower sides of the body.
You can also add two small rear flippers at the back.
Step 3: Create the face.
Attach two googly eyes near the front of the body.
Cut a small black oval for the nose and glue it underneath the eyes.
Step 4: Add the whiskers.
Use a black marker to draw three short whisker lines on each side of the nose.
You can also cut thin strips of black paper and glue them onto the face.
Step 5: Add the mouth.
Draw a small curved line underneath the nose. This will give the seal a friendly expression.
Step 6: Make the icy background.
Cut a large irregular shape from white paper to represent an ice floe. Attach it to a sheet of blue construction paper.
Glue the seal onto the ice.
Step 7: Add the finishing touches.
Cut small white circles or snowflakes and place them around the seal. You can also add a second smaller seal to create a mother-and-baby scene.
Creative Variations
Children can make a baby seal by using a smaller oval shape and lighter grey paper.
Another idea is to create a whole Arctic scene with seals resting on ice while snow falls around them.
For older children, introduce different shades of blue and white to make the background more detailed. They can create an ocean, icebergs, and floating pieces of ice.
What Children Can Learn
Explain that seals are mammals and need to come to the surface to breathe air. Many seal species live in cold environments and have layers of fat that help keep them warm.
Children can also learn the difference between seals and other marine animals.
This craft encourages shape recognition, cutting skills, and an understanding of animal habitats.
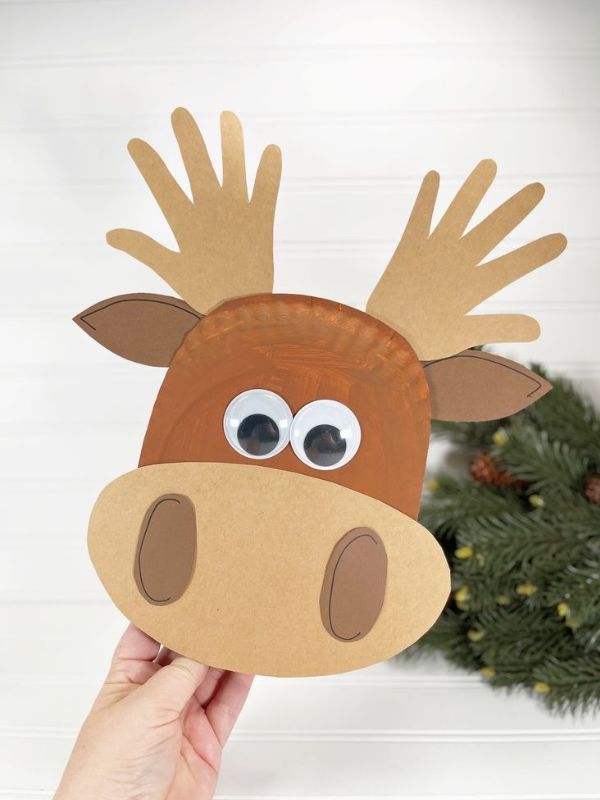
9. Paper Plate Moose Craft
A moose is a large animal with distinctive antlers, making it an interesting subject for a winter craft. Children can use a paper plate to create its face and construction paper to make its ears and antlers.
This activity is a little different from the smaller Arctic animals and provides an opportunity to introduce children to wildlife found in colder forest regions.
The finished moose can be displayed alongside the other winter animals for a colourful classroom or home decoration.
Materials Needed
- Paper plate
- Brown construction paper
- Dark brown construction paper
- Black construction paper
- Googly eyes
- Glue
- Child-safe scissors
- Brown crayons or paint
- Pencil
- Black marker
How to Make It
Step 1: Prepare the paper plate.
Use a brown paper plate if available. Otherwise, colour a white plate with brown crayons or paint.
Allow the paint to dry before continuing.
Step 2: Create the antlers.
Draw two large antler shapes on dark brown construction paper.
Moose antlers are wide and branching, so make sure the shapes are large enough to stand out above the plate.
Cut out the antlers and attach them to the back of the plate.
Step 3: Make the ears.
Cut two oval or leaf-shaped pieces from light brown paper. Attach one on each side of the plate, just underneath the antlers.
Step 4: Add the eyes.
Glue two googly eyes near the upper middle section of the plate.
Step 5: Create the muzzle.
Cut a large oval from a lighter shade of brown paper and attach it to the lower centre of the plate.
Add a small black oval for the nose.
Step 6: Draw the mouth.
Use a black marker to draw a curved line beneath the nose.
You can also add small nostrils using the marker.
Step 7: Decorate the background.
Glue the moose onto blue or white cardstock. Add paper pine trees, snowflakes, or a winter forest scene.
Creative Variations
Children can make moose with different antler shapes and sizes. Encourage them to experiment rather than trying to make every animal look exactly the same.
You can also create a winter woodland display with paper trees, snow-covered hills, and several woodland animals.
For a more textured project, use brown tissue paper or small pieces of torn construction paper to cover the plate.
What Children Can Learn
Moose live in forested areas across parts of North America, Europe, and Asia. They are known for their large bodies, long legs, and impressive antlers.
You can explain that moose are herbivores, which means they eat plants.
This activity also gives children an opportunity to practise cutting larger shapes and arranging different materials to create an animal’s face.
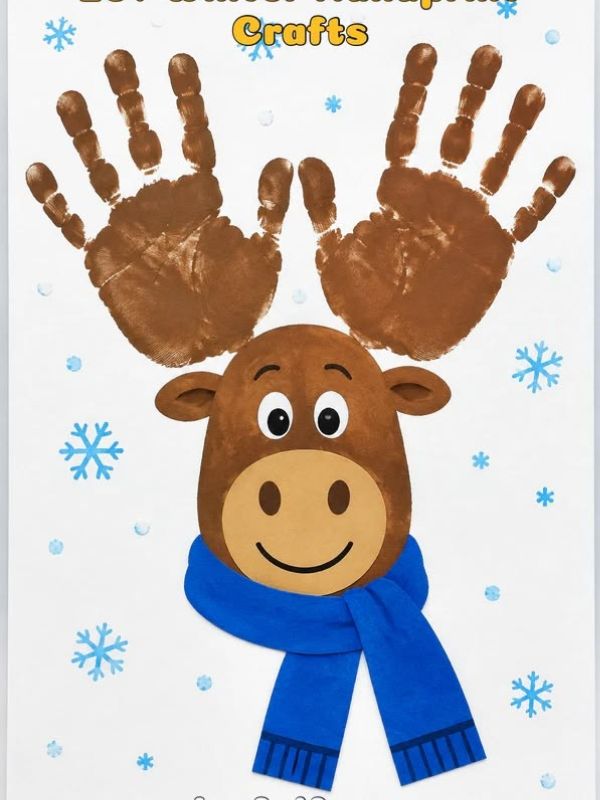
10. Handprint Winter Deer Craft
A handprint winter deer is another lovely project that children can make using simple materials. Like the reindeer craft, it uses a child’s hand as the starting point, but this version can be decorated with natural brown colours and winter details.
It is a suitable activity for preschoolers, kindergarten children, and elementary-aged children. Parents can also keep the finished project as a reminder of how small their child’s hands once were.
Materials Needed
- Brown construction paper
- Light brown construction paper
- White construction paper
- Black construction paper
- Googly eyes
- Glue
- Child-safe scissors
- Pencil
- Black marker
- Crayons
How to Make It
Step 1: Trace the child’s hand.
Place the child’s hand on brown construction paper with the fingers spread apart.
Trace around the hand using a pencil.
The fingers will form the deer’s antlers, while the palm will become the head.
Step 2: Cut out the handprint.
Carefully cut around the outline. An adult can help younger children with the cutting.
Step 3: Prepare the deer’s face.
Turn the handprint upside down so the fingers point upward.
The palm should now look like the deer’s head.
Step 4: Add the eyes.
Attach two googly eyes near the upper middle section of the palm.
If you do not have googly eyes, cut two small white circles and add black dots in the centre.
Step 5: Make the nose.
Cut a small black or dark brown circle and attach it near the bottom of the palm.
Step 6: Add the ears.
Cut two small leaf-shaped pieces from light brown paper. Attach them to the sides of the deer’s face.
Step 7: Decorate the antlers.
Children can add small paper leaves, stars, or snowflakes around the antlers.
You can also glue the finished deer onto blue cardstock and decorate the background with winter trees.
Creative Variations
For a family craft activity, let each person trace their hand to make a different-sized deer.
You can also make a winter deer greeting card by folding a sheet of cardstock in half and attaching the handprint deer to the front.
Older children can add more details, such as a snowy forest, a little scarf, or a group of deer standing together.
What Children Can Learn
This craft helps children explore shapes and develop their tracing and cutting skills.
It also introduces them to deer and their physical features, including antlers, hooves, and fur.
Explain that deer live in different habitats around the world, including forests and woodland areas. Some species are well adapted to cold climates.
More Ways to Make Winter Animal Crafts Fun for Kids
Once children have completed a few winter animal crafts, you can make the experience even more exciting by turning the projects into a larger activity.
Rather than treating every craft as a separate project, use the finished animals to create stories, decorations, learning games, and imaginative play opportunities.
Here are some simple ways to extend the fun.
1. Create a Winter Animal Display
Choose a wall, noticeboard, or empty section of a bedroom where children can display their finished crafts.
Cover the background with blue or white paper to represent a snowy environment. Arrange the polar bear, penguin, Arctic fox, snowy owl, and other animals around the display.
You can also add paper snowflakes, cotton wool, snow-covered trees, and small icebergs.
Give the display a fun title such as Our Winter Animal World or A Trip to the Arctic.
This is particularly useful for teachers who want to decorate a classroom with children’s artwork. Each child can contribute one animal to the display.
2. Make a Winter Animal Storybook
Encourage children to choose their favourite animal from the crafts they have made.
Ask them to create a short story about that animal. It could be about a polar bear searching for food, a penguin making a new friend, or an Arctic fox exploring the snow.
Older children can write their own stories, while younger children can describe what happens and have an adult write it down.
Add drawings or photographs of their finished crafts to the pages. Staple the pages together to create a simple handmade storybook.
This activity combines creativity with early writing, storytelling, and communication skills.
3. Organise a Winter Animal Craft Afternoon
You do not need to complete all ten projects in one day. Instead, choose two or three crafts and organise a special afternoon around them.
Prepare the materials before the children begin. Arrange the paper, glue, cotton balls, scissors, and other supplies in separate containers.
You can also let children choose which animals they would like to make.
For example, one child may prefer the penguin while another may enjoy making the cotton ball polar bear.
Playing gentle background music and allowing children to work at their own pace can make the activity more enjoyable.
4. Add Simple Animal Facts
Craft time is a good opportunity to introduce children to animals and their environments.
After completing each project, share one or two interesting facts about the animal.
For example:
- Polar bears live in the Arctic.
- Penguins are birds that cannot fly.
- Arctic foxes have thick fur.
- Walruses have long tusks.
- Snowy owls have feathers that help them stay warm.
- Seals need to surface to breathe air.
- Moose are herbivores.
Keep the information appropriate for the child’s age. Younger children may enjoy simple facts, while older children can explore more detailed information.
5. Turn the Crafts Into a Pretend Play Activity
Children can use their handmade animals to create their own winter world.
Place the paper roll penguins on a table, arrange the polar bears near a paper iceberg, and position the Arctic foxes beside paper trees.
Encourage children to invent stories about how the animals interact.
They can pretend the animals are looking for food, exploring the snow, or travelling across the ice.
This type of play allows children to use their imagination and practise communication.
Tips for Preparing a Winter Animal Craft Session
A little preparation can make craft time easier for both children and adults. You do not need a large craft room or expensive equipment. A clean table, basic materials, and a little planning are enough to get started.
Prepare the Materials Beforehand
Gather the supplies for each project before inviting children to begin.
Keep similar materials together in small containers. For example, place cotton balls in one bowl, paper shapes in another, and glue sticks in a separate container.
This makes it easier for children to find what they need without searching through a large pile of supplies.
For projects that involve several cutting steps, adults can prepare some of the shapes in advance.
Protect the Working Surface
Craft activities can become messy, especially when children are using paint and glue.
Cover the table with old newspapers, a washable tablecloth, or a reusable craft mat.
You can also provide children with old shirts or craft aprons to protect their clothes.
Keep a damp cloth nearby for cleaning small spills.
Choose Age-Appropriate Projects
Not every project will be suitable for every child.
Preschoolers may enjoy cotton ball polar bears and simple paper plate penguins because they involve basic gluing and decorating.
Older children may be ready for projects that require more detailed cutting, layering, and designing.
Always supervise young children when they use scissors and small craft materials.
Allow Children to Make Their Own Choices
It can be tempting to make every craft look exactly like the example, but children should have room to experiment.
Let them choose their colours, add their own decorations, and create different facial expressions.
One child’s penguin may have a red scarf, while another may prefer a green hat. Both designs can be equally enjoyable.
The goal is to give children an opportunity to create something of their own.
Give the Crafts Enough Time to Dry
Some projects may look finished before the glue or paint has dried completely.
Allow enough drying time before moving the animals or placing them on display.
If children are making several crafts, you can create a separate drying area where completed projects can remain undisturbed.
What Children Gain From Winter Animal Crafts
Winter animal crafts are more than simple decorations. They give children opportunities to practise important skills while learning about animals and the world around them.
Here are some of the benefits these activities can provide.
Fine Motor Skill Development
Many craft activities require children to pick up small materials, squeeze glue bottles, hold pencils, and cut paper shapes.
These movements help children practise controlling the small muscles in their hands and fingers.
Projects involving cotton balls, googly eyes, and small paper decorations are particularly useful for practising careful hand movements.
Creativity and Imagination
Children can use the same basic materials to create very different animals.
One child might make a penguin with a colourful scarf, while another creates a penguin wearing a paper crown.
Allowing children to make these choices encourages them to experiment and express their ideas.
Learning About Animals
Winter animal crafts provide a natural starting point for conversations about wildlife.
Children can learn about animal habitats, body features, food, and how different species survive in cold environments.
You can introduce simple facts during the activity without turning craft time into a formal lesson.
Colour and Shape Recognition
These projects use several basic shapes, including circles, ovals, triangles, and rectangles.
Children can identify the shapes while making the animals.
They can also practise recognising colours and understanding how different colours combine to create an animal’s appearance.
Following Instructions
Step-by-step craft projects encourage children to listen, follow directions, and complete tasks in a particular order.
For example, they may need to cover a cardboard tube before adding the penguin’s face and wings.
This helps them practise patience and understand how individual steps contribute to a finished project.
Confidence and Independence
Completing a craft gives children something they can look at and feel proud of.
Even a simple paper animal can become a meaningful achievement when they have made it themselves.
As children become familiar with different materials and techniques, they may also feel more confident starting new projects independently.
Frequently Asked Questions About Winter Animal Crafts for Kids
1. What are the easiest winter animal crafts for preschoolers?
Some of the easiest winter animal crafts for preschoolers include cotton ball polar bears, paper plate penguins, handprint reindeer, and simple paper roll penguins.
These projects use basic materials and involve activities such as gluing, colouring, and attaching paper shapes. Adults can prepare the more difficult cutting steps in advance.
2. What materials do I need for winter animal crafts?
Most winter animal crafts can be made using everyday supplies such as construction paper, paper plates, cotton balls, cardboard tubes, glue sticks, washable paint, crayons, googly eyes, and child-safe scissors.
You do not need to purchase every item before starting. Many of these materials can be reused across several projects.
3. Are winter animal crafts suitable for toddlers?
Yes, some winter animal crafts can be adapted for toddlers.
Choose simple activities that involve large paper shapes, cotton balls, and adult-assisted gluing. Avoid small loose pieces that could pose a choking risk, and supervise toddlers throughout the activity.
4. How can I make winter animal crafts without spending too much money?
Use materials you already have at home.
Empty cardboard rolls, old paper bags, leftover construction paper, cereal boxes, and paper plates can all become useful craft supplies.
You can also reuse scraps from previous projects instead of purchasing new materials for every activity.
5. What winter animals can children make with paper plates?
Paper plates can be used to create several winter animals, including penguins, walruses, moose, polar bears, and snowy owls.
Their round shape makes them useful as a base for animal faces and bodies.
6. How can I display children’s winter animal crafts?
You can arrange the finished projects on a classroom noticeboard, bedroom wall, shelf, or craft display table.
Use blue and white paper to create a snowy background, then add paper snowflakes, cotton wool, and handmade trees.
You can also attach the animals to a large sheet of cardboard to create a winter animal scene.
7. Can older children enjoy these winter animal crafts?
Absolutely. Older children can make the projects more detailed by adding layered paper, textured materials, decorative backgrounds, and extra animal features.
They can also research the animals before making their crafts and include interesting facts on small display cards.
8. How do I keep children interested during craft time?
Give children some freedom to choose their favourite animals and decorations.
You can also introduce simple challenges, such as creating a penguin family, making an Arctic animal scene, or inventing a story about the animals.
Avoid rushing children to finish. Allowing them to work at their own pace can make the activity more enjoyable.
Conclusion On Winter Animal Crafts for Kids
Winter animal crafts are a wonderful way to keep children entertained while giving them opportunities to learn, experiment, and express their creativity. With simple materials such as paper plates, cotton balls, cardboard tubes, and construction paper, children can create an entire collection of adorable animals.
From the fluffy cotton ball polar bear to the colourful paper plate penguin and the handprint reindeer, each project offers something different. Some are particularly suitable for preschoolers, while others can be adapted for older children who enjoy more detailed activities.
You can make these crafts part of a winter afternoon at home, a classroom art session, or a special family activity. Display the finished animals, turn them into puppets, or use them to create a handmade winter storybook.
Most importantly, give children the freedom to add their own ideas. Their animals may have unusual colours, funny expressions, or colourful accessories, and that is part of what makes handmade crafts special.
Gather a few simple supplies, choose a favourite winter animal, and enjoy creating something lovely together.