12 Paper Snowflake Crafts for Kids of All Ages.
Winter is a wonderful time to bring out the craft supplies and enjoy creative activities with children. When the weather gets cold and outdoor play becomes less convenient, simple indoor projects can keep little hands busy while giving children an opportunity to explore their imagination. One activity worth adding to your winter craft list is making paper snowflakes.
Paper snowflakes are beautiful, inexpensive, and surprisingly versatile. With a few sheets of paper, child-friendly scissors, glue, and some colourful decorations, children can create all kinds of winter-inspired designs. They can make traditional white snowflakes, decorate them with cotton balls, turn them into greeting cards, or join several designs together to create a beautiful hanging garland.
Another lovely thing about paper snowflake crafts is that they can be adapted for different ages. Preschoolers can enjoy decorating prepared snowflake shapes, while elementary-aged children can practise folding and cutting their own designs. Older children can experiment with more detailed patterns, layered decorations, and three-dimensional snowflakes.
These activities also introduce children to useful skills. Folding paper helps develop hand coordination, cutting encourages careful movement, and arranging small decorations gives children an opportunity to practise creativity and decision-making. They can also explore basic shapes, symmetry, patterns, and colours while having fun.
You do not need to purchase an expensive craft kit to get started. Most of the materials can be found around the house or purchased inexpensively from a craft shop.
If you are looking for enjoyable winter activities to try with your children, here are 12 paper snowflake crafts for kids of all ages. Each project includes the materials you need, step-by-step instructions, and creative ways to make the finished decorations even more special.
1. Classic Folded Paper Snowflakes
Classic folded paper snowflakes are a wonderful place to begin because they introduce children to one of the simplest and most enjoyable ways to create snowflake designs.
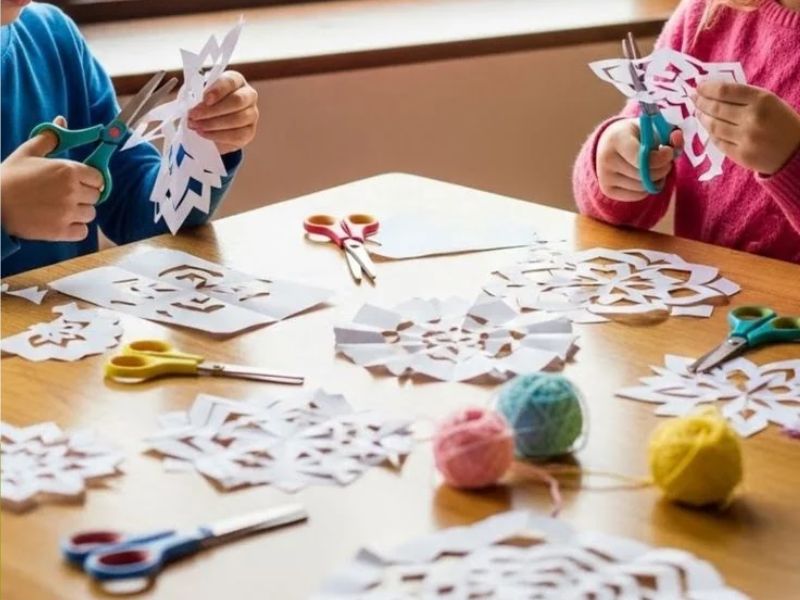
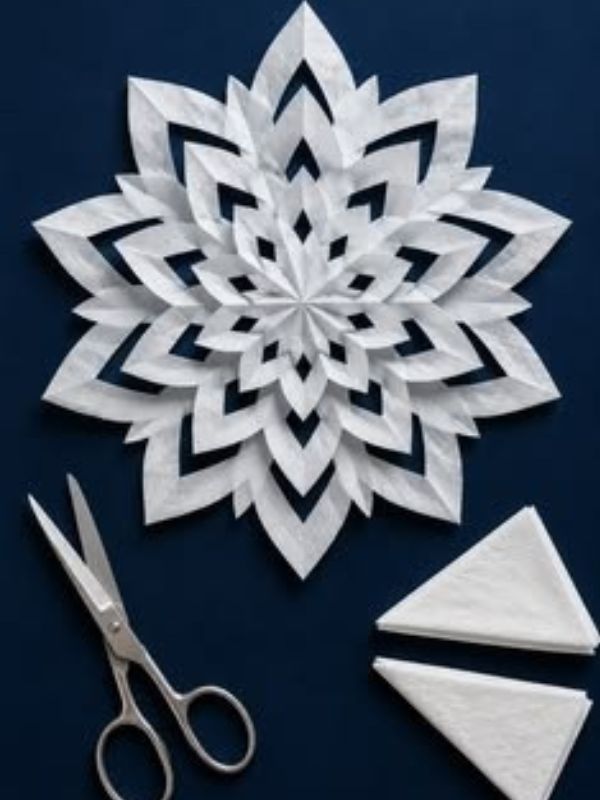
This traditional activity involves folding a square piece of paper several times before cutting small shapes along the folded edges. When the paper is opened, children discover a beautiful pattern created by the cuts they made.
One reason this craft is so enjoyable is that every snowflake can look different. Children can experiment with triangles, small circles, curved lines, and other shapes to see how each cutting pattern changes the finished design.
It is also an excellent activity for teaching children about symmetry. The repeated folds help create matching sections, allowing them to see how one small cut can appear several times across the unfolded paper.
Materials Needed:
- White printer paper
- Child-safe scissors
- Pencil
- Ruler (optional)
- Coloured markers (optional)
Step-by-Step Instructions:
- Begin by cutting a regular sheet of paper into a square. You can make the square any size you prefer, although a medium-sized piece is easier for younger children to handle.
- Fold the square diagonally so that two opposite corners meet, creating a triangle.
- Fold the triangle in half again to make a smaller triangle.
- Continue folding the paper into smaller sections if you want a more detailed snowflake.
- Use a pencil to draw small shapes along the folded edges. These can include triangles, curves, half-circles, and narrow lines.
- Carefully cut along the pencil markings. Remind children not to cut through every folded edge, as some sections need to remain connected.
- Gently unfold the paper to reveal the finished snowflake.
- Place it on a flat surface and smooth out the folds.
Creative Ways to Decorate:
Children can leave their snowflakes plain for a traditional winter appearance or decorate them with small dots using blue and silver markers.
They can also make several snowflakes in different sizes and arrange them on a large sheet of blue construction paper. This creates a lovely winter scene that can be displayed in a bedroom or classroom.
For an interesting variation, encourage each child to make three snowflakes using different cutting patterns. They can compare the finished designs and decide which one they like best.
Best for: Elementary-aged children and older preschoolers with adult assistance.
I have a lovely article on 12 Halloween Paper Crafts for Kids That Are Almost Too Cute to Spook you will love to go through.
2. 3D Paper Snowflake Decorations
If your children enjoy crafts that look detailed and impressive, 3D paper snowflakes are worth adding to your winter activity list.
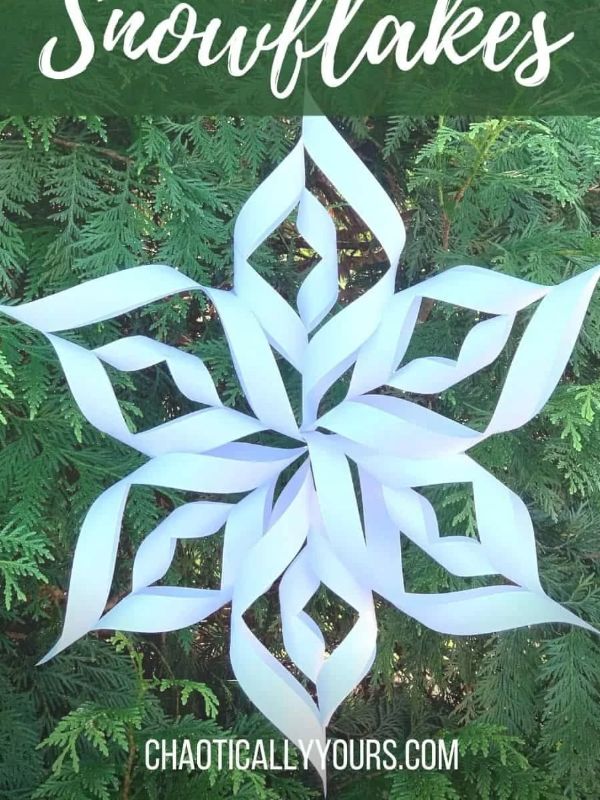
Unlike traditional flat snowflakes, these decorations have several raised sections that create a dimensional appearance. When completed, they look beautiful hanging from ceilings, decorating windows, or forming part of a winter-themed party display.
Although the finished design looks complicated, children can create it by making several matching paper sections and joining them together.
This project is particularly enjoyable for older children who like following instructions and assembling different pieces to produce one large decoration.
Materials Needed:
- Six square sheets of white paper
- Scissors
- Glue stick
- Pencil
- Ruler
- Stapler (adult assistance recommended)
- String or ribbon for hanging
Step-by-Step Instructions:
- Start by cutting six equal squares from white printer paper or lightweight construction paper.
- Take the first square and fold it diagonally to create a triangle.
- Starting from the folded edge, make several parallel cuts towards the opposite side. Stop before reaching the other edge so the paper remains connected.
- Open the paper carefully and place it flat on your working surface.
- Take the two innermost cut sections and bring their ends together to form a small raised shape. Secure them with glue.
- Turn the paper over and bring the next pair of sections together in the opposite direction.
- Continue alternating the direction of the remaining sections until you have created a layered paper shape.
- Repeat the same process with the other five squares.
- Arrange the six finished sections around a central point to form a snowflake.
- Join the sections together using glue or staples, with an adult helping where necessary.
- Allow the decoration to dry before attaching a piece of string for hanging.
Here some Related Articles You May Want to check out.
- Apple Crafts for Preschoolers That Are So Easy, Kids Can Make Them Almost by Themselves
- 10 Dried Flower Crafts and Decor Ideas That Make Your Home Look Beautiful.
- 12 Cardboard Crafts for Preschool That Prove You Dont Need Fancy Supplies
- DIY Squishy Ideas for Kids That Will Keep Little Hands Busy
- 10 Easy Sensory Craft Ideas for Kids with Special Needs That Support Learning
- Crafts for Seniors With Limited Mobility to Do From Bed or a Wheelchair
- Creative Christmas Crafts for Adults That Look Store Bought but Aren’t
- 10 Simple Christmas Crafts for Kids That Are Fun and Simple to Make
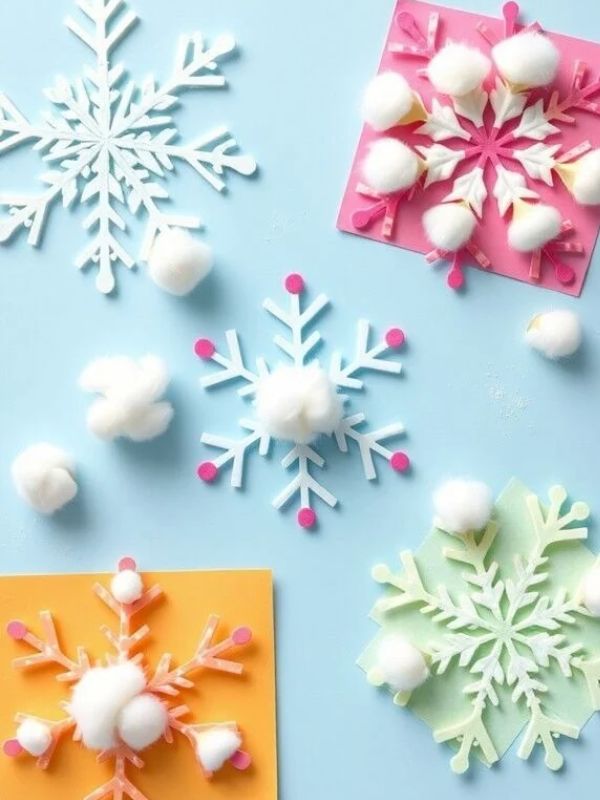
3. Cotton Ball Paper Snowflakes
Cotton balls are wonderful craft materials because they add a soft, fluffy texture to ordinary paper decorations. Children can use them to create snowflakes that resemble freshly fallen snow.
This project is particularly suitable for preschoolers because it involves simple activities such as spreading glue, pulling cotton apart, and placing small pieces onto paper.
It is also a good opportunity to introduce younger children to different textures. They can feel the cotton balls before using them and compare their softness with the smooth surface of the paper.
Materials Needed:
- White construction paper
- Cotton balls
- Glue
- Pencil
- Scissors
- Blue construction paper
- Small pieces of silver paper (optional)
Step-by-Step Instructions:
- Draw a large snowflake shape on a sheet of white construction paper.
- Carefully cut out the snowflake. Younger children can use a prepared shape to make this step easier.
- Place the snowflake on a flat working surface.
- Apply a small amount of glue to one section of the snowflake.
- Pull a cotton ball apart gently to create smaller fluffy pieces.
- Press the cotton pieces onto the glued area.
- Continue adding cotton until the desired sections are covered.
- Decorate the centre with a small piece of silver or blue paper.
- Leave the craft to dry completely.
- Mount the finished snowflake on blue construction paper for a beautiful winter display.
Creative Ways to Decorate:
Instead of covering the entire snowflake with cotton, children can decorate only the tips and centre. This allows the original paper shape to remain visible.
They can also use blue cotton balls or mix white and light blue pieces to create a colourful winter decoration.
For a larger classroom project, prepare several snowflake shapes and allow each child to decorate one. Display all the finished crafts together to create a beautiful winter wall.
Best for: Preschoolers and younger elementary-aged children.
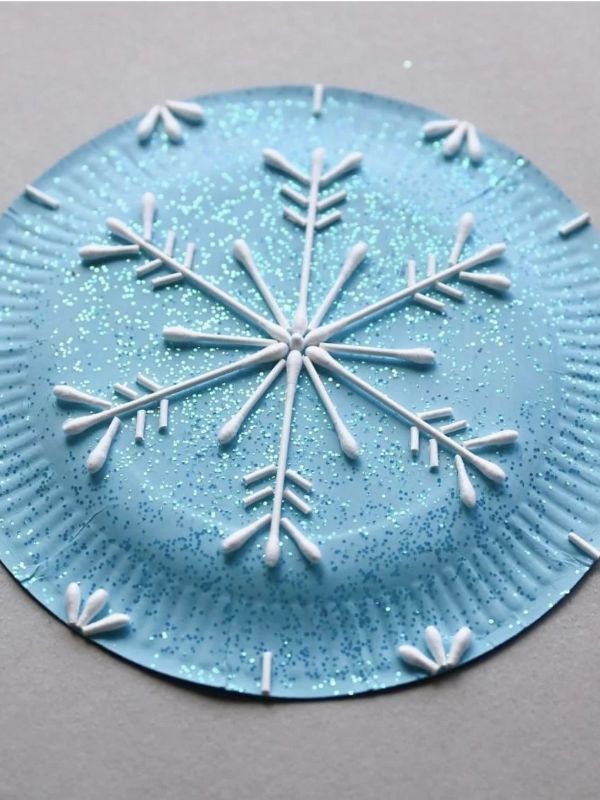
4. Paper Plate Snowflake Craft
Paper plates are among the most useful materials for children’s craft projects. They are inexpensive, easy to find, and large enough to give children plenty of space to create interesting designs.
For this activity, an ordinary white paper plate becomes a beautiful snowflake decoration. Children can cut shapes along the edges, decorate the centre, and add colourful details to complete their projects.
The larger surface also makes this craft suitable for group activities. Every child can create a different design using the same basic materials.
Materials Needed:
- White paper plates
- Child-safe scissors
- Pencil
- Blue markers
- Glue
- Glitter paper
- Sequins or stickers (optional)
Step-by-Step Instructions:
- Give each child a clean white paper plate.
- Use a pencil to draw a simple snowflake pattern on the plate.
- Mark small triangles or curved shapes along the outer edges.
- Carefully cut out the marked sections to create a snowflake-inspired outline.
- Use blue markers to draw smaller patterns around the centre.
- Cut tiny stars, circles, or diamonds from glitter paper.
- Glue the decorative shapes onto different sections of the plate.
- Add a few stickers or sequins if desired.
- Leave the project to dry before displaying it.
Creative Ways to Decorate:
Children can create a traditional white snowflake using blue and silver details. Another option is to paint the paper plate light blue before adding white paper decorations.
For a more detailed project, encourage children to create a collection of paper plate snowflakes with different patterns. They can arrange them from the smallest to the largest on a classroom wall.
Best for: Preschoolers and elementary-aged children, with supervision during cutting.
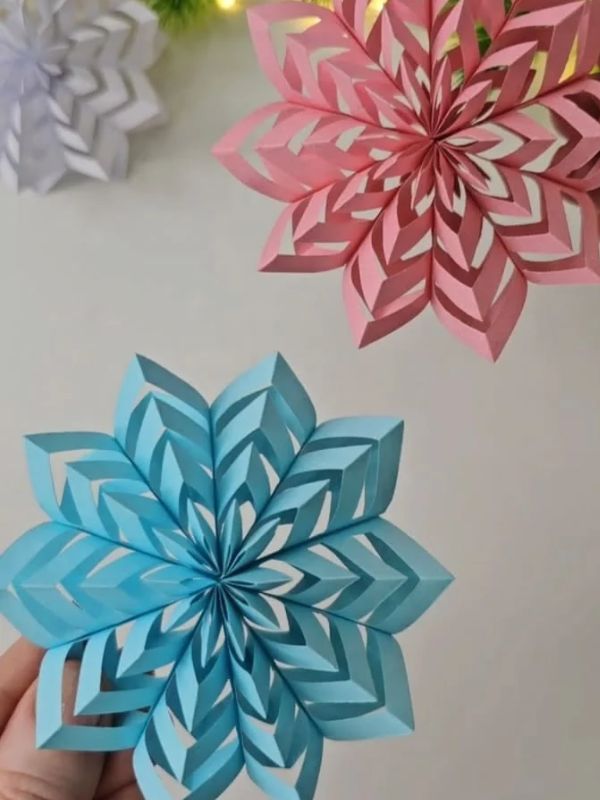
5. Colourful Construction Paper Snowflakes
Snowflakes are usually associated with white, but children’s craft projects can be much more exciting when they experiment with different colours.
Construction paper is available in many shades, making it easy for children to create colourful snowflake decorations. They can choose their favourite colours, combine different shades, and experiment with patterns.
This project follows the same folding and cutting process as a traditional paper snowflake, but the colourful paper gives the finished designs a completely different appearance.
Materials Needed:
- Coloured construction paper
- Scissors
- Pencil
- Glue
- Stickers
- Glitter cardstock (optional)
Step-by-Step Instructions:
- Choose a sheet of construction paper in your preferred colour.
- Cut the paper into a square.
- Fold the square diagonally to create a triangle.
- Fold the triangle again to make a smaller shape.
- Use a pencil to draw small patterns along the folded edges.
- Carefully cut out the shapes.
- Slowly unfold the paper to reveal the snowflake.
- Repeat the process using different colours.
- Arrange the finished snowflakes on a table to compare the patterns.
- Glue them onto a larger sheet of paper if you want to create a colourful winter display.
Creative Ways to Decorate:
Children can combine pink and purple paper to create bright decorations or use different shades of blue for a winter-inspired colour scheme.
Another idea is to glue a small yellow or silver circle in the centre of each snowflake.
They can also create a rainbow snowflake collection by using a different colour for every design.
Best for: Children of all ages.
6. Popsicle Stick and Paper Snowflakes
Popsicle sticks are useful for creating craft structures because they are lightweight and easy to arrange. When combined with small paper decorations, they can become beautiful snowflake ornaments.
This project gives children an opportunity to work with different materials while learning how to arrange objects into a balanced shape.
It is also a lovely option for children who want to make decorations that can be displayed around the house during winter.
Materials Needed:
- Six popsicle sticks
- White or blue construction paper
- Craft glue
- Child-safe scissors
- Markers
- Small buttons or sequins
- Paint (optional)
- String or ribbon

Step-by-Step Instructions:
- Place three popsicle sticks on a flat surface so they cross at the centre and form a six-pointed snowflake shape.
- Ask an adult to help secure the sticks together with craft glue.
- Allow the glue to dry before moving the structure.
- Cut small diamond, triangle, and circle shapes from construction paper.
- Glue the paper shapes onto the ends of the popsicle sticks.
- Add smaller decorations around the centre.
- Use markers to draw little lines and patterns on the sticks.
- Allow the entire project to dry.
- Attach a piece of string or ribbon if you want to hang the snowflake.
Creative Ways to Decorate:
Children can paint the popsicle sticks white, silver, or light blue before adding their paper decorations.
For a colourful design, use different shades of construction paper on each branch.
You can also create a collection of snowflake ornaments and hang them on a small decorative branch placed in a vase.
Best for: Elementary-aged children, with adult assistance when gluing the structure.
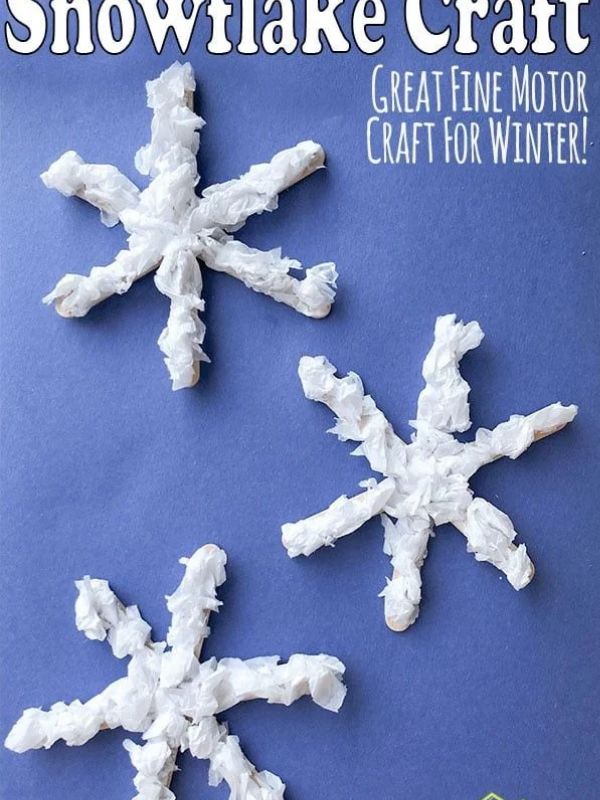
7. Tissue Paper Snowflake Craft
Tissue paper is lightweight, colourful, and easy to work with, making it a lovely material for children’s winter craft projects.
For this activity, children decorate a paper snowflake with small pieces of tissue paper. The finished design can be bright and colourful or use traditional winter shades such as white, blue, and silver.
This project also encourages children to practise placing small pieces carefully and arranging colours to create attractive patterns.
Materials Needed:
- White construction paper
- Coloured tissue paper
- Glue stick or liquid school glue
- Scissors
- Pencil
- Snowflake template (optional)
Step-by-Step Instructions:
- Draw a large snowflake on a sheet of white construction paper.
- Cut out the snowflake shape carefully.
- Choose two or three tissue paper colours.
- Cut the tissue paper into small squares.
- Apply glue to a small section of the snowflake.
- Place the tissue paper pieces onto the glued area.
- Continue adding pieces until the desired sections are covered.
- Mix different colours to create a beautiful pattern.
- Allow the decoration to dry completely.
- Attach a small loop of string if you want to hang it.
Creative Ways to Decorate:
Children can use white and light blue tissue paper to create a traditional winter look.
For a more colourful design, combine pink, purple, and blue pieces. They can also leave some sections uncovered to create contrast.
Another idea is to glue the tissue-covered snowflake onto a dark blue background. This makes the colours stand out beautifully.
Best for: Preschoolers and elementary-aged children.
8. Glitter Paper Snowflakes
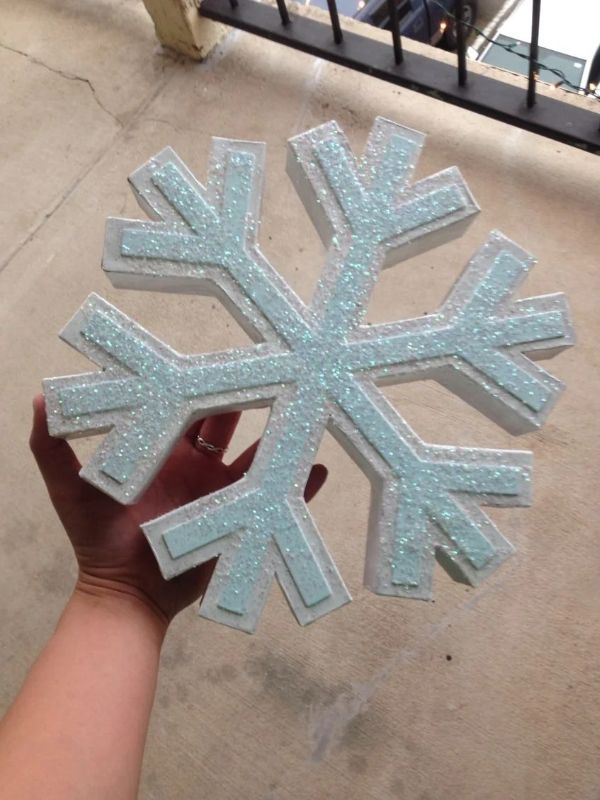
Children who enjoy sparkling decorations will love making glitter paper snowflakes. This craft adds a little shine to ordinary winter artwork and can be used to decorate greeting cards, Christmas trees, bedroom walls, and classroom displays.
Using glitter cardstock is particularly helpful because it creates a sparkling finish without requiring children to handle loose glitter.
You can also use ordinary coloured paper and add glitter glue to selected areas for a more personalised design.
Materials Needed:
- Glitter cardstock
- White construction paper
- Scissors
- Pencil
- Glue
- Glitter glue (optional)
- Snowflake template (optional)
Step-by-Step Instructions:
- Choose a sheet of glitter cardstock in silver, white, or blue.
- Turn the paper over and draw a snowflake shape on the plain side.
- Carefully cut along the outline.
- Add small shapes inside the snowflake if you want a more detailed pattern.
- Cut out the smaller sections carefully.
- Place the snowflake on a sheet of white or dark blue construction paper.
- Glue it in place.
- Add small dots of glitter glue around the design.
- Leave the craft to dry before displaying it.
Creative Ways to Decorate:
Children can make snowflakes using different glitter colours and arrange them into a winter-themed picture.
Another lovely idea is to create a large blue snowflake with a smaller silver one attached to the centre.
If you are using loose glitter, place a sheet of paper underneath the project to collect the excess and make cleaning easier.
Best for: Elementary-aged children, with adult supervision when using loose glitter.
9. Paper Snowflake Window Decorations
Decorating windows with paper snowflakes is a simple way to bring a winter atmosphere into your home or classroom.
Children can make several snowflakes in different sizes and arrange them across a window to create the appearance of falling snow. The decorations look especially beautiful when natural light passes through the window and highlights their shapes.
This is also a lovely group activity because children can each contribute a few snowflakes to one large display.
Materials Needed:
- White printer paper
- Scissors
- Pencil
- Ruler
- Removable window-safe adhesive or double-sided tape
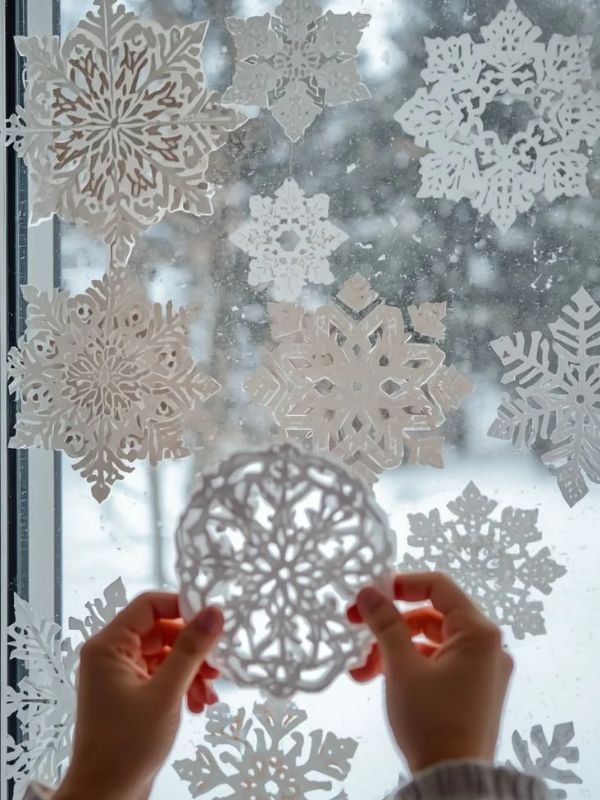
Photo credit
Step-by-Step Instructions:
- Cut several square pieces of white paper.
- Fold each square diagonally to create a triangle.
- Fold the triangle into smaller sections.
- Draw different patterns along the folded edges.
- Cut out the shapes carefully.
- Slowly unfold the paper to reveal the snowflake.
- Repeat the process to create several snowflakes in different sizes.
- Arrange the designs on a table before attaching them to the window.
- Use removable adhesive or suitable double-sided tape to secure each snowflake.
- Step back and adjust the arrangement until you are happy with the display.
Creative Ways to Decorate:
Children can combine large and small snowflakes to make the window display look more natural.
They can also add paper stars, tiny circles, and other winter shapes between the snowflakes.
For a more colourful display, use light blue and white paper together.
Best for: Children of all ages, with adult assistance for attaching decorations to windows.
10. Paper Snowflake Greeting Cards
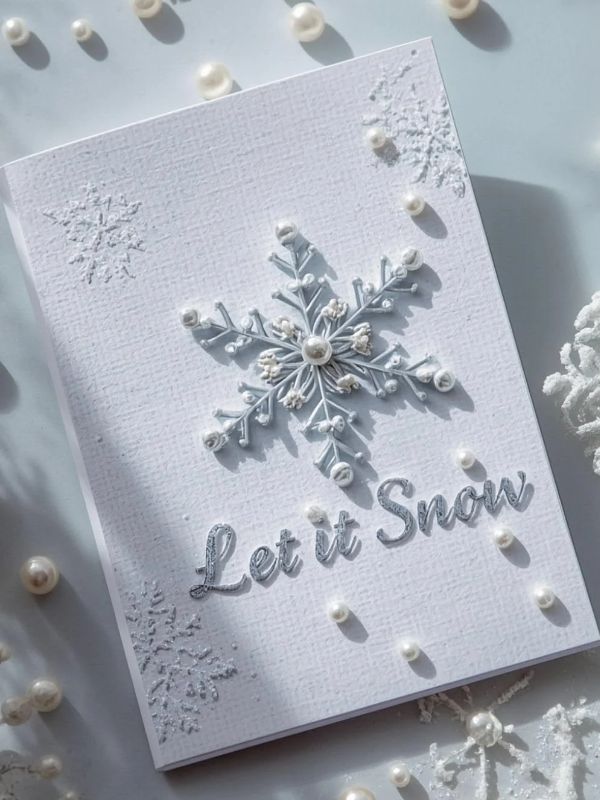
Handmade greeting cards give children an opportunity to turn their craft projects into thoughtful gifts.
A paper snowflake makes a beautiful centrepiece for a winter greeting card. Children can decorate the front with small snowflakes, colourful borders, and handwritten messages.
This is a lovely activity for the Christmas season, classroom exchanges, or a simple afternoon spent making cards for family and friends.
Materials Needed:
- White or coloured cardstock
- White construction paper
- Scissors
- Glue stick
- Markers
- Stickers
- Coloured pencils
- Glitter paper (optional)
Step-by-Step Instructions:
- Take a sheet of cardstock and fold it in half to create a greeting card.
- Choose a small piece of white or blue paper.
- Fold the paper and cut out a simple snowflake design.
- Carefully unfold the snowflake.
- Apply glue to the back and attach it to the front of the card.
- Draw small snowflakes, stars, or dots around the main design.
- Add a decorative border using coloured markers.
- Write a winter greeting inside the card.
- Allow the glue to dry before folding and presenting the card.
Creative Ways to Decorate:
Children can make different cards for different people.
For grandparents, they could write a sweet message and decorate the front with a large snowflake. For friends, they might prefer a colourful design with stickers and cheerful winter greetings.
Some simple messages include:
- Sending You Snowy Smiles!
- Have a Wonderful Winter!
- Wishing You a Beautiful Holiday Season!
- Let It Snow!
- Warm Wishes From Me to You!
Encourage children to write their own messages rather than copying the examples. This makes every card more personal.
Best for: Elementary-aged children and older preschoolers with assistance.
11. Layered Paper Snowflake Wall Art
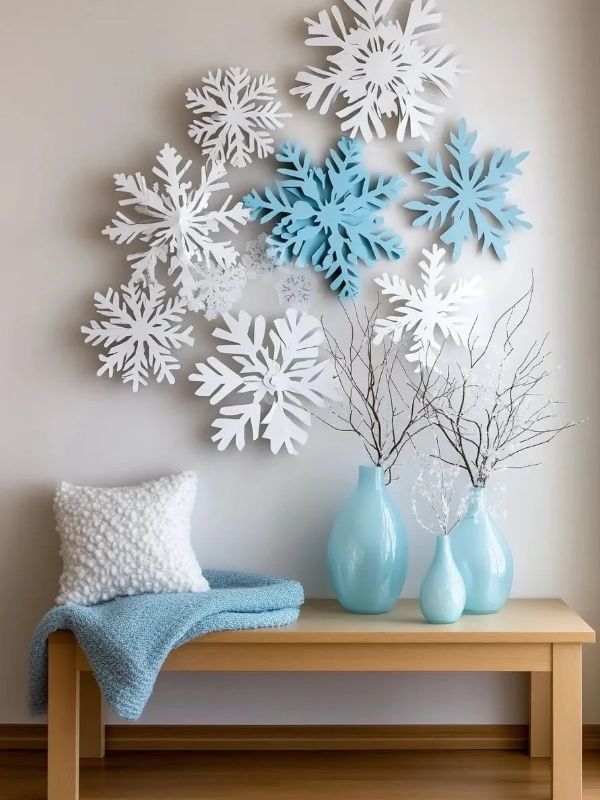
Layered paper snowflakes are a beautiful option for children who want to create something more detailed for their bedroom or classroom.
Instead of making one flat snowflake, this project combines several paper designs of different sizes. The layers create depth and make the finished artwork look more decorative.
Children can use different shades of blue and white or choose their favourite colours to create a personalised design.
Materials Needed:
- White construction paper
- Light blue construction paper
- Dark blue construction paper
- Scissors
- Glue stick
- Pencil
- Cardstock for the background
Step-by-Step Instructions:
- Cut three square pieces of paper in different sizes.
- Take the largest square and fold it diagonally.
- Fold it again to create a smaller triangle.
- Draw a simple snowflake pattern along the folded edges.
- Cut out the design carefully and unfold it.
- Repeat the process with the medium and smallest squares.
- Place the largest snowflake on a sheet of cardstock.
- Add the medium-sized snowflake on top.
- Finish with the smallest snowflake in the centre.
- Apply glue between the layers to secure the design.
- Allow the artwork to dry completely.
Creative Ways to Decorate:
Children can use white paper for the largest snowflake and different shades of blue for the smaller layers.
Another idea is to add a silver paper circle to the centre or decorate the background with tiny stars.
You can also encourage children to make several layered snowflakes and arrange them together on a large poster board.
Best for: Elementary-aged children and older kids who enjoy more detailed projects.
12. Paper Snowflake Garland
A paper snowflake garland is a lovely way to bring several individual crafts together to create one beautiful winter decoration.
Children can make snowflakes in different sizes, colours, and patterns before attaching them to a long piece of string or ribbon. The finished garland can decorate a bedroom, classroom, doorway, or window.
This project is especially suitable for siblings and groups of children because everyone can contribute their own designs.
Materials Needed:
- White printer paper
- Blue construction paper
- Scissors
- Pencil
- String or ribbon
- Glue
- Hole punch (optional)
- Removable tape
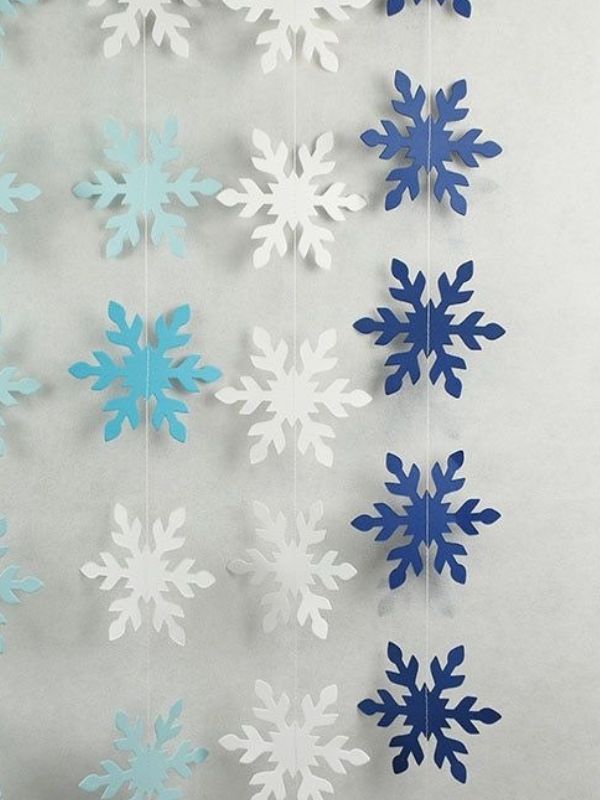
Photo credit
Step-by-Step Instructions:
- Cut several square pieces of white and blue paper.
- Fold each square diagonally to create a triangle.
- Fold the triangle into smaller sections.
- Draw different cutting patterns along the folded edges.
- Carefully cut out the shapes.
- Unfold each piece to reveal the snowflake.
- Make several snowflakes in different sizes.
- Arrange the finished designs in the order you want them to appear on the garland.
- Use a hole punch to make a small hole near the top of each snowflake.
- Thread the string or ribbon through the holes.
- Leave a little space between each snowflake.
- Tie the ends of the string and hang the garland wherever you want to display it.
If you do not have a hole punch, you can attach the snowflakes to the string using small pieces of removable tape.
Creative Ways to Decorate:
Alternate white and blue snowflakes to create a traditional winter colour scheme.
For a more decorative garland, add small paper stars, circles, or silver ornaments between the snowflakes.
Children can also make a long garland using only white paper. It will look lovely against a dark wall or classroom display board.
Best for: Children of all ages, with adult assistance when using the hole punch.
More Ways to Make Paper Snowflake Crafts Enjoyable for Kids
The 12 projects above offer plenty of creative opportunities, but you can make the experience even more enjoyable by introducing small challenges and activities around the crafts.
Children often enjoy having a goal to work towards, especially when they can make decisions about their designs. Here are some additional ideas to make your winter crafting session more interesting.
1. Organise a Snowflake Decorating Competition
A friendly decorating competition can make a regular craft afternoon more exciting.
Give each child a piece of paper and allow them to create their own snowflake. They can use different colours, patterns, and decorations to make their designs unique.
Once everyone has finished, arrange the snowflakes on a table and let the children admire one another’s work.
You can introduce fun categories such as:
- Most colourful snowflake
- Most creative design
- Biggest snowflake
- Smallest snowflake
- Most detailed pattern
- Most unusual snowflake
The goal should be to celebrate creativity rather than make children feel that they must produce the best design.
2. Create a Winter Snowflake Wall
If you have several finished snowflakes, dedicate one section of a wall to displaying them.
Use a large sheet of blue or white paper as the background. Arrange the snowflakes at different heights and sizes to create a beautiful winter display.
Children can also add paper clouds, snowmen, stars, and other winter decorations.
This is particularly useful for classrooms because it gives every child a chance to contribute to a shared project.
3. Make Snowflakes in Different Sizes
Encourage children to experiment with large, medium, and small paper squares.
They will discover that the size of the original paper affects the size of the finished snowflake.
You can turn this into a simple learning activity by asking children to arrange their finished designs from smallest to largest.
It is a fun way to introduce basic measurement and comparison while keeping the activity creative.
4. Combine Snowflakes With Other Winter Crafts
Paper snowflakes can be used as part of larger winter craft projects.
For example, children can create a snowy landscape using blue construction paper, cotton balls, and paper snowflakes. They can add paper houses, trees, snowmen, and other decorations to complete the scene.
5. Turn the Activity Into a Family Craft Afternoon
Crafting does not need to be something children do alone. Parents, older siblings, and other family members can participate too.
Set out different types of paper, scissors, glue, and decorations on a table. Everyone can choose a project and create their own snowflake.
Younger children may enjoy decorating prepared shapes, while older family members can experiment with more detailed folded designs.
At the end of the activity, display everyone’s creations together.
This gives children an opportunity to share their work and enjoy a creative activity with the people around them.
What Children Can Learn From Making Paper Snowflakes
Paper snowflake crafts are enjoyable, but they also provide opportunities for children to practise several useful skills.
You can introduce these activities as part of a winter craft session at home or use them as supplementary projects in a classroom.
Fine Motor Skills
Folding, cutting, gluing, and placing small decorations require children to use their hands and fingers carefully.
Activities such as tissue paper snowflakes and cotton ball decorations allow children to practise controlling small movements.
Younger children can start with larger paper pieces and simple decorations before moving on to more detailed projects.
Creativity and Imagination
There is no single way to decorate a paper snowflake.
Children can choose different colours, create unusual patterns, combine materials, and decide how they want to display their finished work.
Allowing them to make their own choices gives them room to explore their imagination.
Understanding Shapes and Symmetry
Traditional paper snowflakes provide a simple introduction to shapes and symmetry.
When children fold paper and cut patterns along its edges, they can observe how the design changes when the paper is unfolded.
You can ask questions such as:
- What happens when you fold the paper again?
- Which shapes did you cut out?
- Do both sides of your snowflake look similar?
- What happens if you make bigger cuts?
These simple questions can turn a craft project into an enjoyable learning experience.
Following Instructions
Projects with several steps help children practise listening, reading, and following instructions.
For example, making a 3D snowflake requires children to complete several small tasks in the correct order before assembling the final decoration.
Younger children may need assistance, while older kids can follow written instructions more independently.
Colour Recognition
Using different shades of paper and decorations gives younger children an opportunity to identify colours and compare them.
You can ask them to find all the blue pieces, arrange white and silver decorations together, or create a snowflake using only their favourite colours.
Patience and Concentration
Some snowflake designs require careful folding and cutting.
Children learn to take their time, complete one step before moving to the next, and handle their materials carefully.
If a snowflake does not turn out as expected, encourage them to try again or create a different pattern.
Tips for Making Paper Snowflake Crafts Easier for Different Age Groups
One of the reasons paper snowflake crafts are so useful is that you can adapt them to suit children with different abilities.
A project that is suitable for an older child may be difficult for a preschooler. Instead of expecting every child to complete the same steps independently, adjust the activity to make it enjoyable for everyone.
Paper Snowflake Crafts for Toddlers
Toddlers are still developing the coordination needed for detailed cutting and folding activities. They will benefit from simple projects that allow them to explore materials and practise basic movements.
You can prepare large snowflake shapes before the activity begins and allow toddlers to decorate them using washable crayons, large stickers, or cotton balls.
Some suitable activities include:
- Decorating prepared paper snowflakes.
- Gluing large pieces of white tissue paper onto a snowflake outline.
- Placing large cotton balls on a prepared design.
- Making simple snowflake pictures using large paper shapes.
Always supervise toddlers closely and keep small decorations away from them because these may present choking hazards.
Paper Snowflake Crafts for Preschoolers
Preschoolers can participate in slightly more detailed activities, especially when an adult prepares some of the materials beforehand.
They may enjoy folding paper with assistance, decorating snowflakes with stickers, or arranging coloured paper pieces.
Good projects for this age group include:
- Cotton ball paper snowflakes.
- Paper plate snowflakes.
- Tissue paper snowflakes.
- Colourful construction paper snowflakes.
Provide child-safe scissors only when the child is ready to use them, and supervise cutting throughout the activity.
Paper Snowflake Crafts for Elementary-Aged Children
Elementary-aged children can usually handle more steps independently, depending on their individual abilities.
They can practise folding paper, drawing patterns, cutting shapes, and combining different materials.
Suitable projects include:
- Classic folded paper snowflakes.
- Paper snowflake greeting cards.
- Glitter paper snowflakes.
- Paper snowflake garlands.
- Layered paper snowflake wall art.
You can also encourage them to create their own patterns instead of using prepared templates.
Paper Snowflake Crafts for Older Kids
Older children may enjoy projects that require more detailed cutting, planning, and assembling.
They can experiment with 3D paper snowflakes, complicated folding patterns, and layered decorations.
You could also challenge them to design a collection of snowflakes using only one colour or create a large winter display using several techniques.
Allowing older children to design their own projects can make the activity more interesting and give them a chance to explore their individual creativity.
Essential Supplies for Paper Snowflake Crafts
Before starting these projects, it helps to organise the basic supplies in one place.
Most paper snowflake crafts use materials you may already have at home. However, a few additional items can make the projects more colourful and enjoyable.
Here are some useful supplies to consider.
1. White Printer Paper
White printer paper is one of the most important materials for traditional paper snowflakes.
It is lightweight, easy to fold, and simple to cut into different patterns. It is also affordable, so you can make several snowflakes without using expensive craft materials.
2. Coloured Construction Paper
Construction paper is useful when children want to create colourful decorations.
It comes in different shades and can be used for snowflakes, backgrounds, greeting cards, and other winter artwork.
3. Child-Safe Scissors
A suitable pair of scissors makes paper cutting easier for children.
Choose scissors designed for the child’s age and ability, and supervise their use. Adults can handle complicated cuts and preparation for younger children.
4. Glue Sticks
Glue sticks are useful for attaching paper shapes, tissue paper, and other lightweight decorations.
They are generally easier for children to control than large amounts of liquid glue.
5. Cotton Balls
Cotton balls add a fluffy texture to snowflake decorations.
They are especially useful for preschool craft activities because children can pull them apart and arrange them on prepared shapes.
6. Glitter Cardstock
Glitter cardstock gives snowflake decorations a sparkling finish.
It is useful for greeting cards, ornaments, and winter wall displays.
7. Tissue Paper
Tissue paper comes in different colours and can be cut or torn into small pieces for decorating snowflakes.
It is particularly useful for younger children who enjoy arranging and gluing colourful materials.
8. Markers and Crayons
Markers and crayons allow children to add small patterns, lines, dots, and other details to their designs.
Washable options are particularly useful for younger children.
9. String and Ribbon
String and ribbon can be used to turn finished snowflakes into hanging decorations.
They are especially useful for garlands and ornaments.
10. Stickers and Sequins
Small decorative items can make simple paper snowflakes more interesting.
However, choose decorations that are appropriate for the child’s age and supervise their use, particularly with younger children.
Common Mistakes to Avoid When Making Paper Snowflakes
Although paper snowflake crafts are simple, children may encounter a few challenges while making them.
Here are some common problems and ways to avoid them.
1. Using Paper That Is Too Thick
Very thick paper can be difficult for children to fold several times.
For traditional folded snowflakes, regular printer paper is usually a better option. Save heavier cardstock for projects that do not require complicated folding.
2. Cutting Through Every Folded Edge
One common mistake when making folded paper snowflakes is cutting through all the folded sections.
Some parts need to remain connected so that the paper stays together when unfolded.
Show children where to stop cutting before they begin.
3. Making Cuts That Are Too Large
Large cuts can remove too much paper and make the snowflake fragile.
Encourage children to start with smaller shapes and make additional cuts only when necessary.
4. Unfolding the Paper Too Quickly
Paper snowflakes can tear if they are pulled open roughly.
Show children how to unfold their designs slowly, especially when the paper has several folds.
5. Using Too Much Glue
Applying too much glue can make lightweight paper wet and wrinkled.
Encourage children to use small amounts and spread the glue evenly.
6. Trying Complicated Designs Too Early
A child who is just learning how to fold and cut paper may become frustrated with a detailed snowflake pattern.
Start with simple projects and gradually introduce more complicated designs as their confidence grows.
7. Throwing Away Imperfect Snowflakes
Not every paper snowflake will look exactly as expected.
Instead of treating mistakes as failures, encourage children to find creative ways to use their finished designs. An unusual shape can become part of a larger winter collage or decoration.
Frequently Asked Questions About Paper Snowflake Crafts for Kids
1. What age can children start making paper snowflakes?
Children can begin enjoying simple paper snowflake activities during their toddler and preschool years with adult assistance. Younger children can decorate prepared snowflake shapes, while older children can practise folding, drawing patterns, and cutting their own designs.
2. What paper is best for making paper snowflakes?
Regular printer paper is an excellent choice for traditional folded snowflakes because it is lightweight and easy to cut. Construction paper, tissue paper, and glitter cardstock can also be used for different decorative projects.
3. How do you make paper snowflakes with preschoolers?
Start by preparing simple snowflake shapes using white construction paper. Give the children washable glue, cotton balls, stickers, crayons, or small pieces of tissue paper to decorate their designs.
You can introduce folding and cutting gradually as their coordination develops.
4. How can children make paper snowflakes without scissors?
Children who are not ready to use scissors can decorate prepared snowflake shapes instead. They can use stickers, crayons, cotton balls, and glue to create beautiful winter decorations.
Adults can prepare the shapes before the activity begins.
5. How do you make paper snowflakes look different?
Experiment with different paper sizes, folding techniques, cutting patterns, and colours.
Even small changes to the shapes you cut can create completely different designs. Children can also combine several materials to give their snowflakes unique textures.
6. Can you make paper snowflakes with coloured paper?
Yes! Coloured construction paper is excellent for making paper snowflakes. Children can use blue, purple, pink, green, silver, and other colours to create decorations that reflect their personalities.
7. How can you hang paper snowflakes?
You can hang paper snowflakes using string, ribbon, or removable adhesive. For a garland, attach several snowflakes to a long piece of string and hang it across a wall, doorway, or window.
For individual decorations, make a small hole near the top and thread a piece of ribbon through it.
Conclusion On Paper Snowflake Crafts for Kids.
Paper snowflake crafts are a wonderful way to make winter afternoons more creative and enjoyable for children. With a few simple supplies, they can turn ordinary sheets of paper into beautiful decorations for their bedrooms, classrooms, and homes.
From classic folded paper snowflakes to fluffy cotton ball designs, glitter decorations, handmade greeting cards, and colourful garlands, there are plenty of projects to explore.
The best approach is to choose activities that match the children’s ages and abilities. Younger children can enjoy decorating prepared shapes, while older kids can experiment with more detailed designs and create decorations independently.
You can also make the experience more memorable by turning the finished projects into a winter display. Arrange the snowflakes on a wall, decorate the windows, or hang a handmade garland across a doorway.
So, gather your paper, scissors, glue, and favourite decorations, and enjoy making these 12 paper snowflake crafts for kids of all ages. Give the children room to experiment, choose their favourite colours, and create designs of their own. Every snowflake can become a little piece of artwork worth displaying!