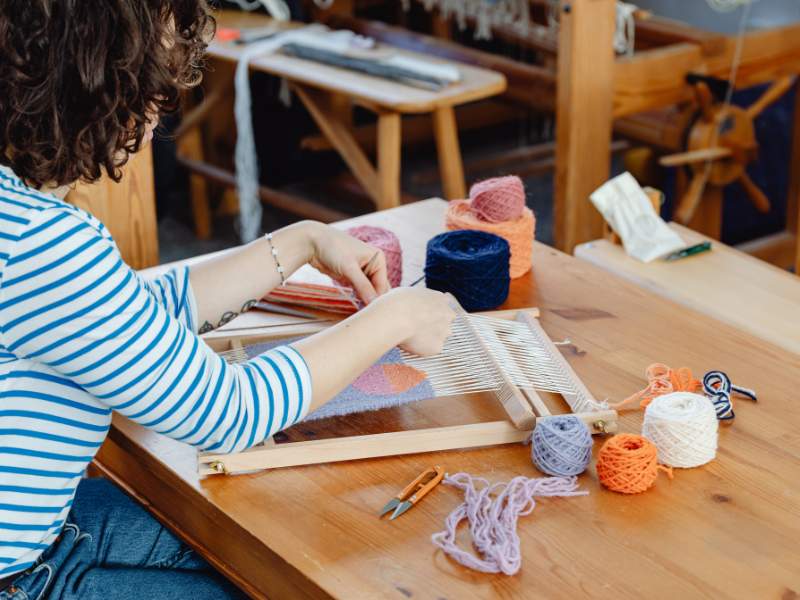
This Article is about Beginner Sewing Projects you can finish in an afternoon.
Have you ever wanted to try sewing but felt unsure about where to begin? Maybe you have a sewing machine sitting in a corner, a collection of beautiful fabrics you have been saving, or a few old clothes you would love to turn into something useful. The good news is that you do not need to be an expert seamstress to start making beautiful things.
There are plenty of beginner sewing projects you can complete in an afternoon without spending a lot of money on materials or learning complicated techniques. From a simple fabric tote bag to pretty scrunchies and useful pillow covers, these projects allow you to practise your sewing skills while creating things you can actually use.
One of the things I love about starting with small sewing projects is that you can see your progress almost immediately. Instead of spending several days working on a complicated dress, you can choose a manageable project, learn a few basic techniques, and finish something you can proudly show off by the end of the day.
If you are looking for simple ways to develop your sewing skills, use leftover fabric, or make thoughtful handmade gifts, you are in the right place.
In this guide, we will explore seven beginner sewing projects you can finish in one afternoon, including the materials you need, the steps involved, and helpful tips for achieving a neat finish.
7 Crochet Chicken Patterns That Will Make You Want to Pick Up Your Hook Is another Project you can start and finish in a day.
What You Need Before Starting Your First Beginner Sewing Projects
Before choosing your first project, it helps to gather a few basic supplies. Having everything within reach makes sewing easier and saves you from interrupting your work to search for missing materials.
You do not need to purchase everything at once. Start with the essentials and add other supplies as you become more comfortable with sewing.
Here are a few useful items to have on hand.
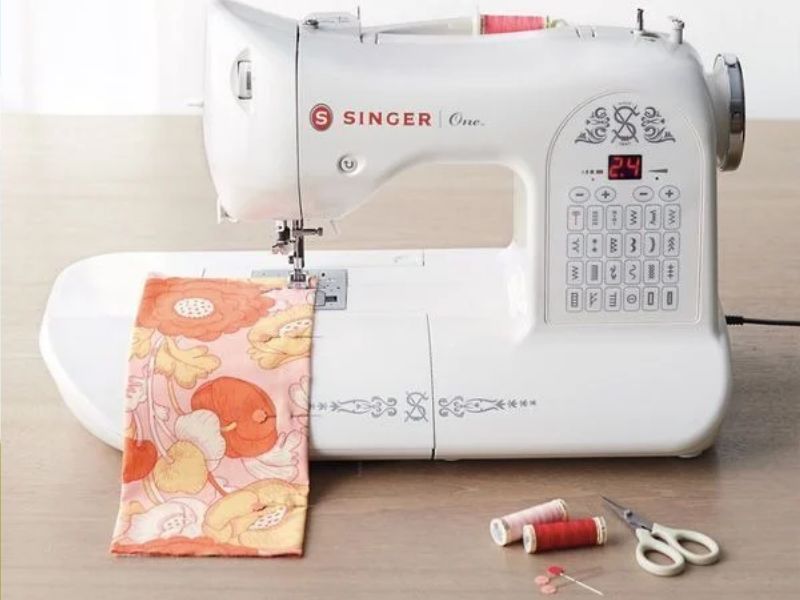
A basic sewing machine: A sewing machine makes it easier to sew straight seams and finish projects quickly. You do not need an advanced model with dozens of decorative stitches. A machine that can sew a straight stitch and a zigzag stitch is enough for most of the projects in this guide.
Fabric scissors: Sharp scissors designed for fabric help you make clean, accurate cuts. Try to keep them separate from your household scissors so they remain sharp.
Measuring tape or ruler: Accurate measurements help your finished projects look neat and fit properly.
Sewing thread: Choose a thread colour that matches your fabric or blends into the design. All-purpose polyester thread is a practical option for many beginner projects.
Straight pins or sewing clips: These hold fabric pieces together while you sew. Clips can be particularly useful when working with thicker fabric.
Hand-sewing needles: Even when you use a sewing machine, you may need a hand-sewing needle to close a small opening or secure a loose thread.
Fabric marking pen or tailor’s chalk: These tools help you mark measurements and cutting lines without guessing.
Seam ripper: Mistakes are a normal part of learning to sew. A seam ripper helps you remove unwanted stitches without damaging the fabric when used carefully.
Iron and ironing board: Pressing your fabric before cutting and your seams during sewing can make a noticeable difference to the finished result.
If you are building your sewing kit from scratch, look for a basic sewing kit containing needles, pins, a measuring tape, a seam ripper, and other small essentials. You can also add a fabric cutting mat and rotary cutter later if you decide to work with quilting cotton or make several projects regularly.
The most important thing is to start with what you have. You can always upgrade your supplies as your skills improve.
You can buy Beginner sewing machine From Amazon
1. Sew a Simple Fabric Scrunchie
A fabric scrunchie is one of the easiest sewing projects for beginners, and it is an excellent way to use small pieces of leftover fabric. It is also useful, attractive, and easy to personalise with different colours and patterns.
You can make scrunchies for yourself, create matching accessories for friends, or put together a small handmade gift set. Floral cotton, satin, gingham, and colourful patterned fabrics all work well, depending on the look you want.
The project introduces you to several useful sewing skills, including sewing a straight seam, turning a fabric tube, inserting elastic, and closing a small opening.
Estimated time: 20–40 minutes.
Materials You Will Need
- A rectangular piece of fabric measuring approximately 4 inches by 20 inches
- A piece of elastic measuring approximately 7–8 inches, adjusted to your preferred fit
- Matching sewing thread
- Fabric scissors
- Straight pins or sewing clips
- A safety pin or elastic threader
- A sewing machine or hand-sewing needle
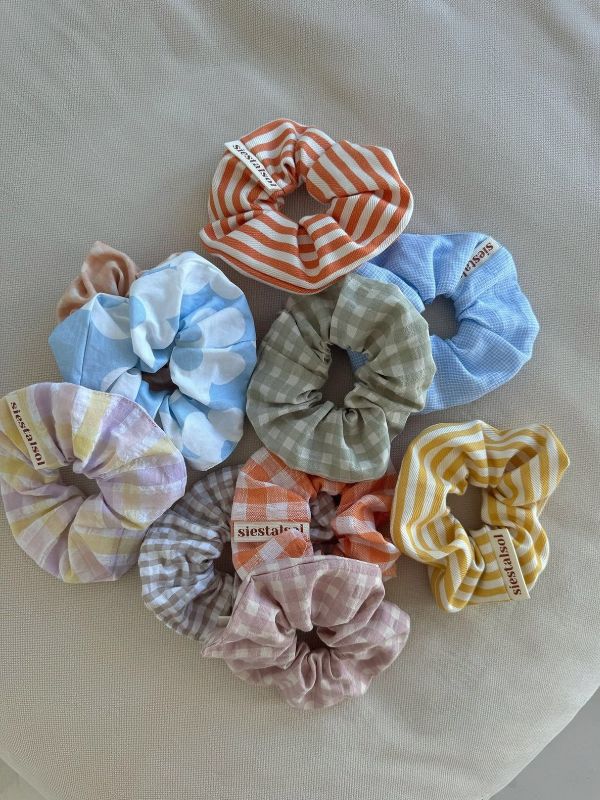
Lightweight cotton is a good starting fabric because it is easy to handle and does not slide around as much as satin.
How to Make a Fabric Scrunchie
Step 1: Cut your fabric.
Cut a rectangle approximately 4 inches wide and 20 inches long. These measurements produce a basic scrunchie, but you can adjust the width for a slimmer or fuller appearance.
Make sure the fabric edges are reasonably straight so the finished scrunchie looks even.
Step 2: Fold the fabric lengthwise.
Place the fabric with the right side facing inward, then fold it in half lengthwise. The two long raw edges should meet.
Pin or clip the edges together to keep them aligned.
Step 3: Sew the long edge.
Sew along the long edge using a straight stitch and a seam allowance of approximately half an inch.
Leave the short ends open. You are creating a fabric tube that will eventually hold the elastic.
If you are sewing by hand, use small, even stitches to help prevent the seam from opening during use.
Step 4: Turn the tube right side out.
Carefully turn the fabric tube right side out. A safety pin attached to one end can help you pull the fabric through without damaging it.
Once turned, gently smooth the tube so the seam sits neatly along one side.
Step 5: Insert the elastic.
Attach a safety pin to one end of the elastic and guide it through the fabric tube.
Hold the opposite end so it does not disappear inside the fabric.
Bring the two elastic ends together and overlap them slightly. Secure them with several stitches, making sure the connection is strong enough to withstand stretching.
Step 6: Close the opening.
Tuck the raw fabric edges inward and place one end of the tube slightly inside the other.
Sew the opening closed with small stitches. You can use a ladder stitch by hand for a less visible finish.
Gently distribute the gathered fabric around the elastic.
Your handmade scrunchie is ready to wear!
Tips for Making Your Scrunchie Look Better
The fabric you choose can completely change the appearance of your finished accessory.
For a simple everyday scrunchie, try cotton in a solid colour or a small floral print. If you prefer a fuller style, use a wider fabric rectangle. For a more delicate appearance, choose a lightweight satin or silky fabric, although these materials may require more careful handling.
Avoid making the elastic excessively tight. A comfortable scrunchie should hold your hair securely without causing unnecessary pulling.
You can also make several scrunchies from one larger piece of fabric. This is particularly useful if you have scraps left over from previous sewing projects.
For an attractive handmade gift, place three matching scrunchies in a small gift box or fabric pouch.
Related idea: If you enjoy creating small handmade accessories, you may also enjoy making Simple DIY Bag Charms to Make at Home: Cute Ideas for Your Handbag or other simple DIY accessories from leftover materials.
2. Make a Reusable Fabric Tote Bag
A reusable fabric tote bag is another excellent sewing project for beginners. It is practical, easy to customise, and useful for carrying groceries, books, craft supplies, or everyday essentials.
Unlike projects that require precise fitting, a basic tote bag has a straightforward shape. You only need to sew a few seams, attach the handles, and finish the raw edges.
You can use plain cotton for a minimalist bag, colourful prints for a cheerful everyday accessory, or sturdy canvas if you want something more durable.
Estimated time: 1–2 hours.
Materials You Will Need
- Approximately half a yard to one yard of suitable fabric, depending on the bag size
- Matching sewing thread
- Fabric scissors
- Measuring tape or ruler
- Straight pins or sewing clips
- Iron and ironing board
- Sewing machine or hand-sewing needle
Medium-weight cotton is a good option for a first tote bag. If you plan to carry heavier items, choose a sturdier fabric and reinforce the seams and handles.
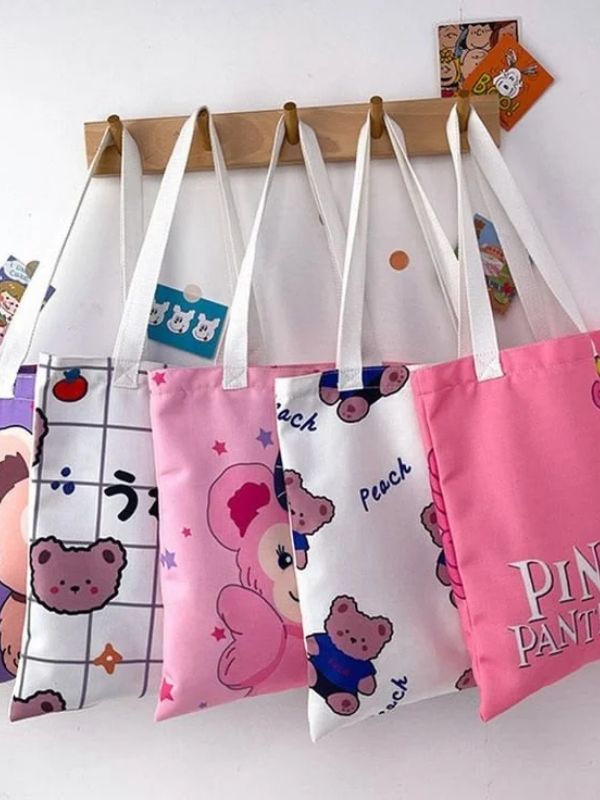
How to Sew a Basic Tote Bag
Step 1: Cut the main bag pieces.
Cut two matching rectangles of fabric. For a small everyday tote, you could start with pieces measuring approximately 15 inches wide and 16 inches tall.
These measurements do not include the seam allowance, so add extra fabric around the edges before cutting if you are using the measurements as finished dimensions.
You can make the bag larger or smaller depending on how you intend to use it.
Step 2: Prepare the handles.
Cut two long strips of fabric, each approximately 4 inches wide and 22 inches long.
Fold each strip lengthwise with the right sides facing inward. Sew along the long edge, then turn the strip right side out.
Press each handle flat with an iron.
Alternatively, fold the long raw edges toward the centre, fold the strip in half lengthwise, and stitch along both long edges. This method creates a flat, reinforced handle without requiring you to turn a narrow fabric tube.
Step 3: Sew the bag body.
Place the two main fabric rectangles together with their right sides facing inward.
Pin the side edges and bottom edge. Sew along both sides and the bottom using a straight stitch and an appropriate seam allowance.
Leave the top edge open.
Backstitch at the beginning and end of each seam to help prevent the stitches from coming undone.
Step 4: Finish the raw edges.
If your fabric frays easily, finish the raw edges with a zigzag stitch or another suitable seam-finishing technique.
You can also use a serger if you have access to one.
Neatly finished seams help your tote bag withstand repeated use and washing.
Step 5: Create the top hem.
Turn the top edge of the bag inward by approximately half an inch and press it flat.
Fold it inward again by another inch, press, and stitch around the top edge.
This creates a clean finish and hides the raw fabric edge.
Step 6: Attach the handles.
Turn the bag right side out and position the handles evenly on the front and back panels.
For a bag that is approximately 15 inches wide, you might place each handle end about 3–4 inches from the side seams.
Check that the handles are not twisted and that their lengths match.
Sew each handle securely to the bag, reinforcing the attachment points with additional stitching. A rectangular stitch pattern with diagonal reinforcement can help distribute the load.
Step 7: Inspect the finished bag.
Trim loose threads and check all the seams.
Turn the bag inside out again if necessary to inspect the bottom corners and handle attachments.
Your tote bag is ready to use!
Ways to Personalise Your Tote Bag
One of the advantages of sewing your own tote bag is that you can choose the size, colour, and details.
For a simple everyday design, use neutral cotton with matching handles. If you enjoy bright accessories, choose colourful prints or combine two coordinating fabrics.
You could also add a small inside pocket for keys, a phone, or other items you want to keep separate from the main compartment.
For a more decorative look, consider adding a fabric bow, a contrasting pocket, or a simple embroidered initial.
If you are planning to make tote bags as gifts, choose fabric that reflects the recipient’s interests. A floral design might suit someone who enjoys gardening, while a geometric print could work well for someone who prefers a modern style.
Keep the first bag simple, though. Once you understand the construction, you can experiment with additional details.
If you are interested in more DIY accessories, How to Make a Cute DIY Keychain at Home can be a lovely addition to a tote bag gift.
Amazon Products You Can Add to This Article
Ready to start crafting? Gathering your materials beforehand helps you dive straight into your project without interruptions. You can Shop these helpful tools and supplies to equip your sewing space.
- Beginner sewing machine
- Basic sewing kit
- Fabric scissors
- Cotton fabric bundles
- All-purpose sewing thread set
- Fabric marking pens or tailor’s chalk
- Sewing clips and straight pins
- Seam ripper
- Fabric interfacing
- Measuring tape and quilting ruler
3. Sew a Simple Pillow Cover
If you want a sewing project that can make a visible difference in your home, try making a simple pillow cover.
Decorative pillows can refresh a sofa, bedroom, reading corner, or favourite chair. Instead of buying a new cushion for every change in season, you can sew removable covers in different colours and patterns.
This project is especially suitable for beginners because you can make a basic envelope-style pillow cover without installing a zipper.
An envelope cover has an overlapping opening at the back, allowing you to insert and remove the pillow easily.
Estimated time: 45–90 minutes.
Materials You Will Need
- Fabric suitable for cushion covers
- An existing cushion or pillow insert
- Matching sewing thread
- Fabric scissors
- Measuring tape
- Straight pins or sewing clips
- Iron and ironing board
- Sewing machine or hand-sewing needle
Cotton, linen blends, and other medium-weight woven fabrics are useful choices for this project.

How to Make an Envelope Pillow Cover
Step 1: Measure your pillow insert.
Measure the width and height of your pillow insert.
For example, if your insert measures 16 inches by 16 inches, use those measurements as a starting point for the front panel.
For a woven fabric, you may need to adjust the dimensions slightly depending on how full you want the cover to look. Avoid making the cover excessively small, as this can strain the seams.
Step 2: Cut the front panel.
Cut one square of fabric to match your intended finished pillow dimensions, adding the seam allowance.
For a 16-inch pillow, a front panel measuring approximately 17 inches by 17 inches allows for a half-inch seam allowance on each side.
Step 3: Cut the back panels.
Cut two rectangular pieces for the back of the cover.
Each piece should be the same width as the front panel, with enough length to create a finished overlap.
For a 16-inch pillow, you could begin with two back panels measuring approximately 17 inches by 12 inches each.
The exact dimensions can vary, but the two panels should overlap by several inches when placed together.
Step 4: Hem the back openings.
Take one back panel and fold one long edge inward by half an inch. Press it with an iron.
Fold it inward again by another half inch, press, and sew along the folded edge.
Repeat this process with the other back panel.
These hems form the opening through which you will insert the pillow.
Step 5: Arrange the pieces.
Place the front panel on a flat surface with the right side facing upward.
Position the two back panels on top with their right sides facing downward. The hemmed edges should overlap near the centre of the pillow.
Align the outer edges carefully and pin or clip them in place.
Step 6: Sew around the edges.
Sew around all four sides using a straight stitch and a consistent seam allowance.
Backstitch at the beginning and end to secure the seams.
If your fabric frays, finish the raw edges before turning the cover right side out.
Step 7: Turn and insert the pillow.
Turn the cover right side out through the overlapping opening.
Use your fingers to gently push out the corners.
Insert the pillow through the back opening and adjust the fabric until the cover sits smoothly.
Your new pillow cover is ready!
How to Make Your Pillow Cover Look Professional
The secret to an attractive pillow cover is accurate measuring and careful pressing.
Pressing the hems before sewing helps you achieve straight, even edges. It also prevents the fabric from shifting while you work.
Choose a fabric that complements your existing decor. For example, a neutral linen-look fabric can suit a simple living room, while a floral print can brighten a bedroom.
You can also make two or three covers in coordinating patterns to create a more intentional look.
For a seasonal refresh, consider colours that work well with the rest of your room rather than choosing a fabric simply because it is popular.
If you are making several covers, cut all the pieces first and then sew them in batches. This can save time and help you keep the measurements consistent.
Your may also enjoy our 10 Home Decor Ideas You Can DIY to Give Your Space a Beautiful New Look articles.
4. Make a Reusable Fabric Gift Bag
A reusable fabric gift bag is a lovely alternative to disposable wrapping paper. It can be used for birthdays, holidays, small celebrations, and thoughtful handmade gifts.
The recipient can reuse the bag for storing accessories, organising small items, or wrapping another present.
This is also a useful project for beginners because the basic design involves only a few straight seams. You can make a small pouch for jewellery or a larger bag for books, clothing, or other presents.
Estimated time: 30–60 minutes.
Materials You Will Need
- A rectangular piece of fabric
- Matching sewing thread
- Fabric scissors
- Measuring tape
- Straight pins or sewing clips
- Ribbon or cord for the drawstring
- Safety pin or cord threader
- Sewing machine or hand-sewing needle
Cotton is a good option because it is easy to sew and comes in a wide range of prints.
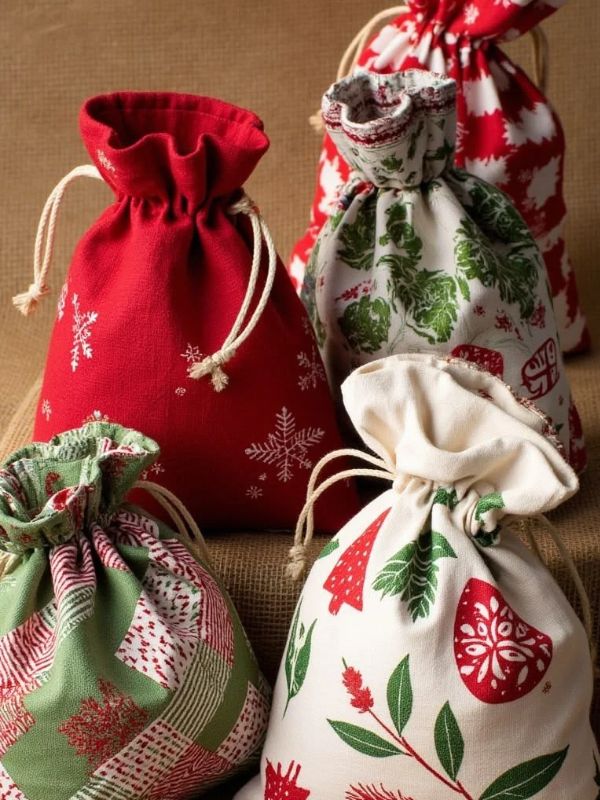
How to Sew a Drawstring Gift Bag
Step 1: Choose the size.
Decide what you want to place inside the bag.
For a small gift bag, you could begin with a piece of fabric measuring approximately 10 inches wide and 16 inches long. The finished size will be smaller after sewing and folding.
If you are making a bag for a particular gift, measure the item first and allow enough room for it to fit comfortably.
Step 2: Prepare the fabric.
Wash and press the fabric if necessary, especially if you plan to use the finished bag for something that may require washing.
Trim uneven edges so the piece is rectangular.
Step 3: Fold the fabric.
Fold the fabric in half with the right sides facing inward, bringing the shorter edges together.
The fold will form the bottom of the bag.
Pin the side edges together, leaving the top open.
Step 4: Sew the side seams.
Sew along both side edges, stopping before the top edge.
Use a consistent seam allowance and secure the beginning and end of each seam with backstitching.
Finish the raw edges to reduce fraying.
Step 5: Create the drawstring casing.
At the top, fold the raw edge inward by approximately half an inch and press.
Fold it inward again to create a channel wide enough for your ribbon or cord to pass through.
Sew around the folded edge, leaving the channel open at the ends if you are creating a simple casing with a separate opening.
For a beginner-friendly design, make sure the channel is wide enough for your chosen ribbon to slide through without becoming stuck.
Step 6: Turn the bag right side out.
Turn the bag right side out and push out the bottom corners gently.
Check that the side seams are neat and that the top casing is even.
Step 7: Insert the ribbon.
Attach a safety pin to one end of the ribbon and guide it through the casing.
If you want the bag to close by pulling the ribbon from both sides, you can create two openings and thread the ribbons in opposite directions.
Tie the ribbon ends securely.
Your reusable gift bag is complete!
Creative Ways to Decorate Your Gift Bag
A plain fabric bag can look beautiful without much decoration, but you can add a few details to make it more personal.
Try a small fabric bow, a contrasting ribbon, a simple embroidered initial, or a decorative button sewn onto the front.
You can also use fabric scraps to create a small patch or pocket.
For birthdays, choose bright colours or playful patterns. For weddings and other formal celebrations, neutral fabric with a satin ribbon can create a more elegant appearance.
If you are making several bags, use different sizes to accommodate different gifts.
A small bag can hold jewellery or hair accessories, while a medium bag can work for handmade gifts and a larger bag can be used for clothing.
These bags are also useful for organising craft supplies, travel accessories, and small items around the home.
Related idea: You could pair a fabric gift bag with a handmade scrunchie or another small sewing project to create a coordinated gift set.
check out this post on Handmade Crafts for Gifts That Look Special Without Costing a Fortune
5. Sew a Simple Fabric Bookmark
If you love reading, a fabric bookmark is a practical sewing project that can be completed quickly.
It is small enough to use fabric scraps, easy to customise, and suitable for handmade gifts. You can make one for your own books or create several for friends and family members who enjoy reading.
Unlike paper bookmarks, a fabric bookmark can be made from durable woven fabric and decorated to match your personal style.
Estimated time: 20–40 minutes.
Materials You Will Need
- Two small pieces of fabric
- Lightweight interfacing, if desired
- Matching sewing thread
- Fabric scissors
- Ruler
- Straight pins or sewing clips
- Iron and ironing board
- Sewing machine or hand-sewing needle
Cotton works well for this project because it is easy to cut and sew.
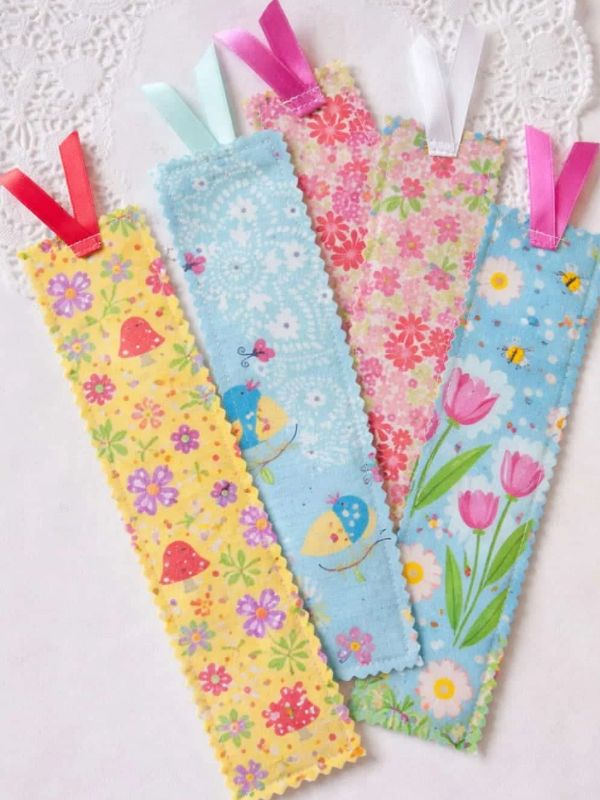
How to Make a Fabric Bookmark
Step 1: Cut the fabric.
Cut two matching rectangles measuring approximately 2.5 inches wide and 7 inches long.
You can adjust the length depending on the size of the books you usually read.
Remember to add a seam allowance if these measurements are intended for the finished bookmark.
Step 2: Add interfacing if needed.
If your fabric is very thin, you can add lightweight interfacing to one or both pieces.
Interfacing helps the bookmark hold its shape and feel more substantial.
Follow the manufacturer’s instructions when applying fusible interfacing.
Step 3: Place the fabric pieces together.
Put the two fabric rectangles together with their right sides facing inward.
Align the edges and pin them in place.
Step 4: Sew around the edges.
Sew around the perimeter using a straight stitch and a small seam allowance.
Leave a small opening along one edge so you can turn the bookmark right side out.
Step 5: Trim the corners.
Carefully trim the excess fabric from the corners without cutting through the stitches.
This reduces bulk and helps the corners look neater when turned.
Step 6: Turn and press.
Turn the bookmark right side out through the opening.
Use a blunt tool to gently shape the corners, then press the bookmark flat.
Fold the raw edges of the opening inward.
Step 7: Close the opening.
Sew the opening closed using a small ladder stitch by hand or a neat line of topstitching around the entire bookmark.
Your fabric bookmark is ready to use!
Ideas for Personalising Your Bookmark
You can use floral fabric, stripes, polka dots, geometric prints, or plain cotton in your favourite colour.
For a gift, choose a print that reflects the recipient’s interests.
You could also add a small ribbon loop at one end, provided it does not make the bookmark too bulky for the book.
Another option is to create a patchwork bookmark using two or three coordinating fabrics.
If you enjoy other paper and fabric crafts, this project can be part of a larger handmade gift collection.
For example, you could make a bookmark, a fabric pouch, and a reusable gift bag for someone who loves reading.
Beginner tip: Avoid adding bulky decorations to the bookmark because they can make a book difficult to close properly.
6. Make a Fabric Storage Basket
A fabric storage basket is a practical sewing project that can help organise small items while adding a decorative touch to your home.
You can use it to store sewing supplies, hair accessories, toiletries, craft materials, or other everyday essentials.
It is also a useful way to practise sewing straight seams and working with slightly thicker materials.
A simple fabric basket can be made with two layers of fabric and optional interfacing to help it stand upright.
Estimated time: 1–2 hours.
Materials You Will Need
- Two pieces of outer fabric
- Two pieces of lining fabric
- Lightweight or medium-weight interfacing
- Matching sewing thread
- Fabric scissors
- Measuring tape
- Straight pins or sewing clips
- Iron and ironing board
- Sewing machine
Cotton is a practical choice for the outer fabric and lining. If you want a sturdier basket, use an appropriate interfacing that adds structure without making the fabric too difficult to sew.
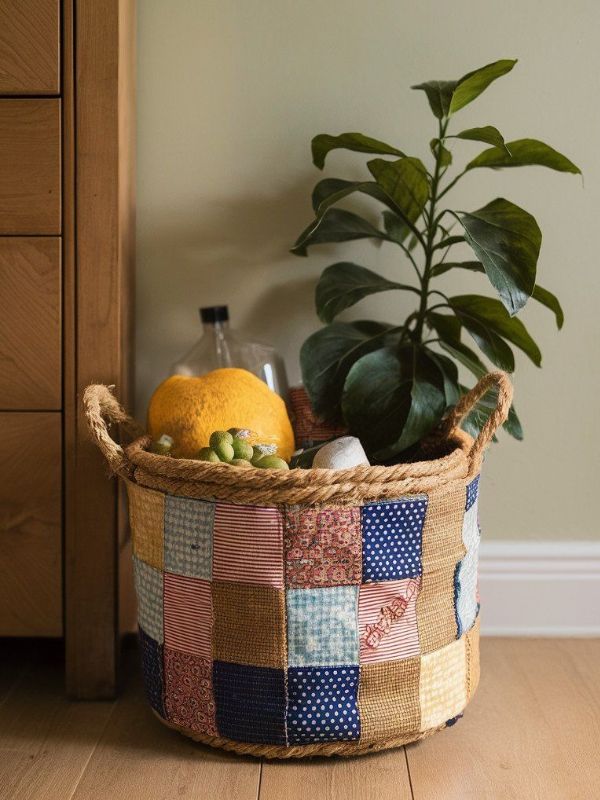
How to Sew a Simple Fabric Basket
Step 1: Choose your basket dimensions.
For a small basket, begin with fabric pieces approximately 12 inches wide and 14 inches tall.
These dimensions can be adjusted depending on the finished size you want.
You will use the fabric to create a rectangular basket with a flat bottom and upright sides.
Step 2: Cut the outer fabric and lining.
Cut two matching outer fabric pieces and two matching lining pieces.
Apply interfacing to the outer fabric or lining according to the manufacturer’s instructions.
The interfacing helps the basket hold its shape.
Step 3: Sew the outer basket.
Place the outer fabric pieces together with their right sides facing inward.
Sew the side seams and bottom seam, leaving the top open.
Do not turn the basket right side out yet.
Step 4: Create the flat bottom.
To give the basket depth, flatten one bottom corner so that the side seam lines up with the bottom seam.
Measure a line across the corner to create the depth you want.
For example, a line measuring approximately 2 inches from the corner can create a modestly sized base, depending on your original dimensions.
Sew along the marked line and trim the excess fabric, leaving enough allowance to prevent the seam from fraying.
Repeat for the other bottom corner.
Step 5: Sew the lining.
Repeat the process with the lining pieces.
Leave a small opening in one of the lining seams or at the bottom so you can turn the basket right side out later.
Step 6: Join the outer basket and lining.
Keep the outer basket inside out and turn the lining right side out.
Place the lining inside the outer basket so their right sides face each other at the top edge.
Align the side seams and pin the top edges together.
Sew around the top edge.
Step 7: Turn the basket right side out.
Pull the outer basket and lining through the opening you left in the lining.
Once the basket is turned right side out, sew the lining opening closed.
Push the lining inside the outer basket and adjust the corners.
Step 8: Finish the top edge.
Press the top edge neatly and sew around it to help the basket hold its shape.
Fold the top edge outward slightly if you prefer a cuffed appearance.
Your fabric storage basket is complete!
Where to Use Your Handmade Storage Basket
One of the best things about this project is that you can make baskets in different sizes for different purposes.
A small basket can hold hair accessories, makeup brushes, or sewing supplies.
A medium-sized basket can help organise toiletries, craft materials, or items on a bedside table.
A larger version can be used for lightweight fabric scraps, children’s art supplies, or other small household items.
You can also make matching baskets using the same fabric collection to create a coordinated look.
For example, a floral basket paired with a matching fabric pouch can make a pretty addition to a bedroom or dressing table.
Choose colours and prints that complement the space where you plan to use the basket.
If you want the basket to stand upright when empty, pay particular attention to the interfacing. A lightweight fabric without enough structure may collapse, while excessively stiff materials can make the seams difficult to sew.
Helpful tip: If you are new to sewing structured projects, start with a small basket before attempting a large one. Smaller pieces are easier to handle under the sewing machine.
This Beginner-Friendly Knitting Projects for Adults Anyone Can Make Is another article you might find useful.
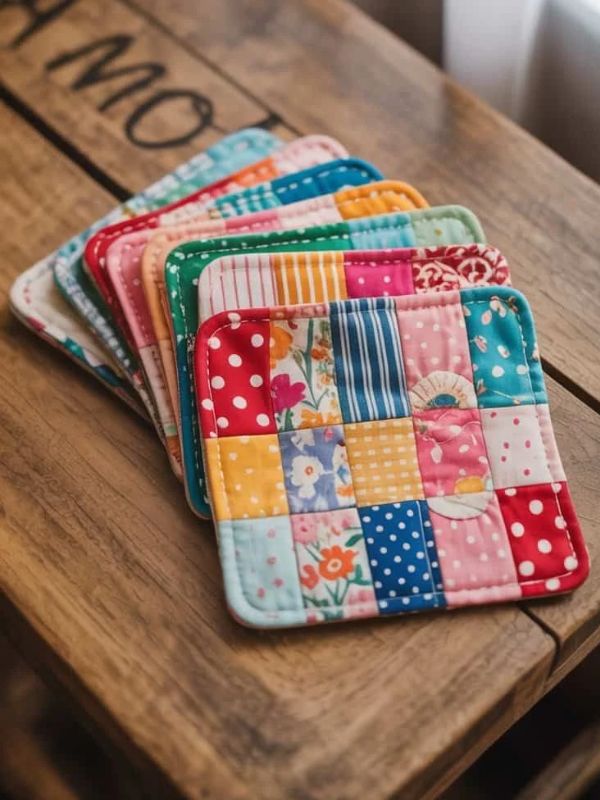
7. Sew a Simple Reusable Fabric Napkin Set
Reusable fabric napkins are another beginner-friendly project that can add a handmade touch to your dining table.
They are simple to make, useful for everyday meals, and easy to customise for different occasions.
You can sew a set for your home, create matching napkins for a dinner party, or give them as a thoughtful handmade gift.
This project is particularly useful for learning how to create neat hems and finish fabric edges.
Estimated time: 45–90 minutes for a small set, depending on the number of napkins and your sewing experience.
Materials You Will Need
- Cotton or linen fabric
- Matching sewing thread
- Fabric scissors or a rotary cutter
- Ruler
- Fabric marking pen or tailor’s chalk
- Iron and ironing board
- Sewing machine or hand-sewing needle
Choose a fabric that can be washed regularly and is suitable for its intended use.
Cotton is a convenient starting option because it is easy to handle and comes in many colours and prints.
How to Make Fabric Napkins
Step 1: Decide on the size.
Choose the finished size you want for your napkins.
For everyday use, you might begin with squares measuring approximately 14 inches by 14 inches or 16 inches by 16 inches.
Add enough fabric for the hems before cutting.
Step 2: Cut the fabric squares.
Measure and mark your fabric carefully.
Cut the squares as accurately as possible so the finished napkins have even edges.
If you are making a set, cutting all the squares together can help keep their sizes consistent.
Step 3: Press the edges.
Fold each raw edge inward by approximately half an inch and press.
Fold the edge inward again by another half inch to enclose the raw edge.
Pressing each fold before sewing makes the hems easier to manage.
Step 4: Secure the corners.
Pay attention to the corners as you fold the hems.
You can create simple folded corners or use a mitred corner technique for a more polished finish.
If you are a complete beginner, simple folded corners are perfectly acceptable. Take your time to keep the fabric flat and avoid creating unnecessary bulk.
Step 5: Sew the hems.
Sew around the four sides of the napkin, keeping your stitches an even distance from the inner folded edge.
Backstitch at the beginning and end to secure the thread.
If you are sewing by hand, use small, even stitches to achieve a neat finish.
Step 6: Press the finished napkin.
Trim loose threads and press the napkin flat.
Repeat the process for the remaining pieces.
Your reusable fabric napkins are ready for use!
Ways to Style Your Handmade Napkins
The fabric you choose can help create different looks for your dining table.
Plain white or beige napkins can suit a simple, understated setting. Floral prints can create a cheerful appearance, while stripes and checks can give your table a more relaxed feel.
You can also make napkins in seasonal colours for family gatherings and celebrations.
For a coordinated table setting, pair your handmade napkins with a matching table runner or fabric placemats.
If you are making them as gifts, fold the napkins neatly and tie them together with a ribbon.
You could also include a small handmade fabric gift bag to create a complete gift set.
A useful sewing tip: Wash your fabric before cutting if it is likely to shrink. Prewashing helps prevent the finished napkins from becoming uneven after their first wash.
How to Choose the Best Beginner Sewing Project for Your Skill Level
With seven projects to choose from, you may be wondering which one you should try first.
The answer depends on the materials you have available, how much time you have, and which sewing skills you want to practise.
You do not need to complete every project in one day. Choose one that feels manageable and work at a pace that allows you to learn as you go.
Here is a quick comparison to help you decide.
| Sewing project | Estimated time | Main skill you will practise | Ideal for |
|---|---|---|---|
| Fabric scrunchie | 20–40 minutes | Sewing tubes and inserting elastic | Using fabric scraps |
| Fabric tote bag | 1–2 hours | Straight seams and attaching handles | Making a useful everyday item |
| Envelope pillow cover | 45–90 minutes | Hemming and assembling panels | Refreshing home decor |
| Fabric gift bag | 30–60 minutes | Sewing side seams and creating a casing | Handmade gifts |
| Fabric bookmark | 20–40 minutes | Turning fabric and topstitching | Small gifts and quick projects |
| Fabric storage basket | 1–2 hours | Constructing a shaped item | Home organisation |
| Fabric napkins | 45–90 minutes | Measuring and hemming | Dining accessories |
These times are estimates rather than guarantees. Your first attempt may take longer, especially if you are still learning to operate a sewing machine.
That is completely normal.
If You Have Never Used a Sewing Machine Before
Start with a fabric bookmark or a simple scrunchie.
Both projects use small pieces of fabric and allow you to practise basic sewing techniques without needing to manage large pieces of material.
Before beginning, spend a few minutes practising straight stitches on a spare piece of fabric.
Learn how to guide the fabric gently beneath the presser foot without pulling it. Also practise starting and stopping your stitches neatly.
Once you feel comfortable, move on to the main project.
If You Want Something Useful for Your Home
Try the pillow cover, storage basket, or fabric napkins.
These projects can help you develop skills that you will use in future home decor projects.
For example, learning to sew an envelope pillow cover can prepare you for making larger cushion covers, while learning to hem fabric napkins can help you create table runners and simple curtains.
Choose a fabric that complements your home so you will be excited to use the finished item.
If You Want to Make Handmade Gifts
The scrunchie, gift bag, bookmark, and tote bag are good options.
They can be personalised with different colours, patterns, and small decorative details.
You can also combine two or three projects to create a coordinated gift set.
For example, a fabric pouch or gift bag paired with a matching scrunchie can make a thoughtful present for a friend.
If You Want to Use Leftover Fabric
Start with scrunchies, bookmarks, or small gift bags.
These projects generally require less fabric than a tote bag or pillow cover.
Before cutting anything, sort your scraps by size and fabric type. You may find that a few small pieces can be combined to create an attractive patchwork design.
Using fabric scraps can also help you practise sewing without feeling pressured to get every detail perfect.
Common Sewing Mistakes Beginners Should Avoid
Learning to sew becomes easier when you understand a few common mistakes and how to prevent them.
You do not need to produce perfect work on your first attempt. The goal is to build confidence, understand the techniques, and improve with practice.
1. Cutting Fabric Without Measuring
One of the easiest ways to make a sewing project more difficult is to cut fabric without measuring it first.
Even a small difference in dimensions can affect the finished shape of a tote bag, pillow cover, or storage basket.
Before cutting, measure your fabric carefully and mark the cutting lines with tailor’s chalk or a fabric marking pen.
Double-check your measurements before making the first cut.
If possible, cut on a flat surface with enough room to spread out your fabric.
2. Forgetting the Seam Allowance
A seam allowance is the space between the raw edge of the fabric and the line of stitching.
If you cut a piece to the exact finished measurement without allowing extra fabric for the seams, the final item may turn out smaller than expected.
Always check whether the measurements in a tutorial refer to the cut fabric size or the finished size.
When a tutorial gives finished dimensions, remember to add the appropriate seam allowance before cutting.
3. Using the Wrong Needle or Thread
Different fabrics may require different needles.
A universal needle works for many common woven fabrics, but delicate, stretchy, or thick materials may need a more suitable needle type.
Using an unsuitable needle can cause skipped stitches, damaged fabric, or other sewing problems.
Likewise, check that your thread is appropriate for the project and that your machine is threaded correctly.
If you are unsure, test the combination on a small scrap of the same fabric before sewing the main item.
4. Pulling the Fabric While Sewing
It can be tempting to pull the fabric through the machine to make it move faster.
However, pulling may distort the fabric and create uneven stitches.
Instead, guide the fabric gently while allowing the machine’s feed dogs to move it forward.
Keep your hands positioned safely away from the needle, and avoid rushing through the seam.
A steady pace usually produces better results than trying to finish as quickly as possible.
5. Skipping Pressing
Pressing your fabric before cutting and your seams during construction can make a noticeable difference to the finished project.
Unpressed folds can shift while you sew, leaving uneven hems and bulky corners.
Use an iron at a temperature appropriate for your fabric.
Press rather than dragging the iron across delicate material, and test the heat on an inconspicuous scrap when necessary.
6. Forgetting to Secure Your Stitches
If the beginning and end of a seam are not secured, the stitching may come undone during use.
On a sewing machine, a short backstitch at each end of the seam can help hold the stitches in place.
For hand sewing, secure the thread carefully with a suitable knot or finishing technique.
Pay particular attention to areas that will experience tension, such as tote bag handles and the elastic connection inside a scrunchie.
7. Choosing a Difficult Fabric for Your First Project
Some fabrics are harder to work with than others.
Slippery satin, stretchy jersey, delicate chiffon, and very thick materials can require techniques that beginners have not yet learned.
For your first few projects, consider medium-weight cotton or another stable woven fabric.
Once you are comfortable measuring, cutting, and sewing straight seams, you can gradually experiment with more challenging materials.
8. Expecting Every Project to Look Perfect
Your first pillow cover may have slightly uneven corners. Your first tote bag might have a seam that is not completely straight.
These small imperfections do not mean you have failed.
Every project teaches you something useful, and the skills you develop now will make future projects easier.
Keep your early projects so you can compare them with your later work. You may be surprised by how much your sewing improves after a few attempts.
How to Make Your Sewing Projects Look Neater
You do not need advanced sewing skills to produce attractive handmade items. A few simple habits can help your projects look more polished.
Choose coordinating fabrics. If you are combining different fabrics, look for colours and patterns that work well together. Two coordinating prints can look more intentional than several unrelated designs.
Use matching thread. Matching thread blends into the fabric and makes minor stitching irregularities less noticeable. Contrasting thread can also look attractive when you want the stitching to become part of the design.
Keep your measurements consistent. Use a ruler or measuring tape instead of estimating distances by eye.
Press as you work. Pressing after important steps helps the seams lie flat and makes it easier to assemble the remaining pieces.
Trim loose threads. Before considering a project complete, inspect it for loose threads, unfinished seams, and uneven edges.
Finish the raw edges. Fabrics that fray easily benefit from suitable seam finishes. A zigzag stitch, serger, or enclosed seam can help prevent the edges from unraveling.
Take your time with the final details. A neat hem, secure handle, or well-finished corner can make a simple project look considerably better.
You can also experiment with decorative details once you feel comfortable with the basic construction. Small pockets, ribbons, fabric bows, and simple embroidery can personalise your projects without requiring advanced techniques.
The important thing is to build your skills gradually instead of attempting every technique at once.
How to Organise a One-Afternoon Sewing Session
If you want to finish a sewing project in one afternoon, a little preparation can make the experience easier.
You do not need to rush. Instead, organise your time so you can concentrate on the project without repeatedly stopping to find supplies or correct avoidable mistakes.
Choose One Project Before You Begin
Start by deciding exactly what you want to make.
Trying to complete a scrunchie, tote bag, pillow cover, and fabric basket in one afternoon may leave you feeling rushed.
Choose one project that matches your current skill level and the amount of time available.
If you finish early, you can always start another small project.
Prepare Your Materials in Advance
Gather the fabric, thread, scissors, measuring tools, and other supplies you need.
Check that your sewing machine is threaded correctly and that the needle is suitable for your fabric.
If you are using an unfamiliar fabric, practise on a scrap before starting the main project.
Having your materials ready helps you spend more time sewing and less time searching for supplies.
Cut All the Fabric Pieces First
Read through the project instructions and cut the required pieces before assembling anything.
Label the pieces if they look similar or if you are making several items at once.
This is especially useful for tote bags, pillow covers, and fabric storage baskets, where accurate measurements matter.
Sew in a Logical Order
Follow the steps in sequence rather than skipping ahead.
For example, press the fabric before sewing, finish the seams where necessary, and attach the handles before completing the final inspection of a tote bag.
Working in order helps you avoid having to unpick stitches because you forgot an earlier step.
Leave Time for Finishing
Do not use all your available time on the main seams.
Set aside a few minutes to trim loose threads, close openings, press the finished item, and check that the seams are secure.
These final details can make a noticeable difference to the result.
If the project takes longer than expected, that is fine. Learning a new skill is more important than finishing within an exact number of minutes.
Useful Sewing Supplies Worth Having at Home
As you become more interested in sewing, you may want to build a small collection of supplies that make future projects easier.
You do not need to purchase everything immediately. Start with the tools you need for your chosen project and add other items when you find yourself using them regularly.
Here are some useful supplies to consider.
A Basic Sewing Machine
A reliable beginner sewing machine can help you complete projects faster and make your stitches more consistent.
Look for a machine that handles straight stitching, zigzag stitching, and basic seam finishing.
Before purchasing one, consider the fabrics you expect to sew, how often you will use the machine, and whether replacement needles and accessories are readily available.
Fabric Scissors
Good fabric scissors make cutting easier and help you achieve clean edges.
Choose a comfortable pair that fits your hand and is suitable for the types of fabric you use.
Keep them sharp and avoid using them to cut paper, cardboard, or other materials that may dull the blades.
Measuring Tape and Ruler
A flexible measuring tape is useful for measuring curved surfaces and checking the dimensions of bags, cushions, and other projects.
A straight ruler is helpful when marking fabric pieces, creating hems, and measuring small items.
Having both available makes it easier to work accurately.
Sewing Clips and Pins
Pins and clips hold fabric layers together before sewing.
Pins can be useful for lightweight woven fabrics, while clips may be more convenient for thicker materials or areas where pins could leave marks.
Always remove pins or clips before they reach the needle.
Seam Ripper
A seam ripper is particularly useful when learning to sew.
It allows you to remove stitches carefully when a seam goes wrong or when you need to make an adjustment.
Work slowly and keep the sharp point away from the fabric so you do not accidentally create a hole.
Fabric Marking Tools
Tailor’s chalk and fabric marking pens help you mark cutting lines, seam allowances, and other measurements.
Choose a marking tool that is suitable for your fabric and test it first to ensure the marks can be removed as intended.
An Iron
An iron is useful for preparing fabric, pressing hems, and flattening seams.
You do not need an expensive model to begin sewing, but you should use a temperature appropriate for your fabric.
A pressing surface that allows you to work comfortably is helpful too.
A shopping tip: If you are building your sewing kit on a budget, compare the cost of individual tools with that of a basic sewing kit. A kit can be convenient, but check the quality and usefulness of the included items before buying.
Frequently Asked Questions About Beginner Sewing Projects
What Is the Easiest Sewing Project for a Complete Beginner?
A fabric bookmark or simple scrunchie is a good starting point for a complete beginner.
Both projects use relatively small pieces of fabric and introduce basic sewing techniques without requiring complicated construction.
A bookmark helps you practise straight seams and turning fabric, while a scrunchie introduces you to sewing a tube and inserting elastic.
If you are learning to use a sewing machine, practise on scrap fabric before starting your project.
Can I Finish a Beginner Sewing Projects in One Afternoon?
Yes, many small sewing projects can be completed in one afternoon, especially if you already have the necessary materials.
Simple projects such as scrunchies, bookmarks, and gift bags may take less than an hour once you understand the steps.
Larger projects, such as tote bags and storage baskets, may take one to two hours or longer.
Your experience, the type of fabric, and the complexity of the design all affect how long a project takes.
Can I Sew These Projects Without a Sewing Machine?
Yes. Several of these projects can be sewn by hand.
Scrunchies, fabric bookmarks, small gift bags, and simple napkins are possible to make with a hand-sewing needle and thread.
However, hand sewing generally takes longer than using a machine, especially for larger projects.
Use small, even stitches and secure your seams properly. If you plan to make sewing a regular hobby, you may eventually find a sewing machine helpful.
What Fabric Is Best for Beginner Sewing Projects?
Medium-weight cotton is one of the easiest fabrics to begin with because it is relatively stable and straightforward to cut and sew.
It works well for tote bags, pillow covers, gift bags, bookmarks, and many other simple projects.
Linen blends can also be useful, although some fabrics wrinkle more easily than others.
For your first projects, avoid slippery or highly stretchy fabrics until you feel comfortable handling and stitching more stable materials.
What Can I Sew With Leftover Fabric?
There are plenty of useful things you can make with leftover fabric.
Small scraps can be turned into scrunchies, bookmarks, fabric keychains, or decorative patches.
Larger pieces can become small pouches, gift bags, cushion covers, or sections of a patchwork project.
Before throwing away fabric scraps, sort them by size and type. This makes it easier to identify suitable materials for future projects.
Do I Need Sewing Experience to Make a Tote Bag?
No. A simple tote bag is a suitable project for someone who understands the basics of sewing or is willing to practise them.
The main skills involved are measuring, cutting, sewing straight seams, finishing the top edge, and attaching handles securely.
Choose a stable fabric and follow the steps carefully.
If this is your first time using a sewing machine, practise straight stitching on spare fabric before beginning the bag.
How Can I Make My Handmade Sewing Projects Look Professional?
Focus on accurate measurements, straight seams, neat hems, and well-finished edges.
Pressing your fabric during construction can also improve the appearance of the finished item.
Choose fabrics that suit the project and avoid adding too many decorative details before you have mastered the basic techniques.
Most importantly, practise regularly. Your sewing will become more consistent as you gain experience.
Are Beginner Sewing Projects Expensive to Make?
Not necessarily.
Many beginner projects use small amounts of fabric and basic sewing supplies.
Scrunchies, bookmarks, and small gift bags can often be made from leftover fabric, which helps reduce material costs.
If you are starting from scratch, your initial expenses may be higher because you need to purchase tools. However, many of those tools can be used for numerous future projects.
Compare prices, use materials you already have when appropriate, and buy supplies based on the projects you genuinely want to make.
Can I Sell the Beginner Sewing Projects I Make?
Yes, you can consider selling handmade sewing projects once you are comfortable producing items with consistent quality.
Scrunchies, tote bags, fabric pouches, gift bags, and home accessories are possible products to explore.
Before selling, calculate your fabric, thread, packaging, labour, and other expenses. Research your intended customers and compare similar products to understand the market.
Start with a few samples and gather feedback before making a large quantity.
Remember that selling handmade items requires more than sewing skills. Pricing, product presentation, customer service, and marketing also influence your results.
Conclusion On Beginner Sewing Projects
Learning to sew does not require you to master every technique before making something useful. Starting with small, manageable projects allows you to develop your skills while creating items you can enjoy using or sharing with others.
From a simple fabric scrunchie to a reusable tote bag, pillow cover, or storage basket, these seven beginner sewing projects offer plenty of ways to practise your skills in an afternoon.
You can start with the project that interests you most, gather a few basic supplies, and work through the instructions at your own pace.
Remember that your first attempt does not need to be perfect. Each project gives you an opportunity to improve your measuring, cutting, stitching, and finishing techniques.
As your confidence grows, you can experiment with new fabrics, introduce decorative details, and take on more challenging designs.
You may even discover that sewing becomes a favourite creative hobby or a skill you can use to make thoughtful handmade gifts.
Which of these beginner sewing projects would you like to try first: the fabric scrunchie, tote bag, pillow cover, gift bag, bookmark, storage basket, or fabric napkins? Choose one, prepare your materials, and enjoy creating something with your own hands.