Valentine’s Day Crafts for Adults is a lovely opportunity to add a little color, creativity, and personality to your home. While store-bought decorations can be beautiful, making your own gives you the freedom to choose the colors, textures, and designs that suit your space. You can turn an ordinary glass jar into a glowing lantern, create a delicate heart wreath for your front door, or make paper flowers that stay beautiful long after February 14.
The wonderful thing about Valentine’s Day crafts for adults is that you don’t need to be an experienced artist to create something worth displaying. A few basic supplies, a little patience, and a clear idea of what you want to make can help you produce decorations that look thoughtfully designed.
You also don’t need to fill every corner of your home with bright red hearts. Soft blush pink, cream, burgundy, muted green, warm wood, and touches of gold can create a more sophisticated Valentine’s Day look. If you prefer colorful decorations, you can use traditional reds and pinks in a way that feels balanced rather than overwhelming.
Another reason I love handmade decorations is that you can adapt them to your budget. You might already have glass jars, leftover ribbons, cardboard, paper, fabric scraps, or an old picture frame that can become part of your next project. Instead of buying an entirely new collection of decorations, you can work with what you have and purchase only the supplies you need.
In this guide, you will see seven easy Valentine’s Day crafts for adults that combine creativity with practical decorating ideas. Each project includes a list of materials, step-by-step instructions, helpful design advice, and suggestions for displaying the finished piece in your home.
I have an article on 15 Valentines Day Crafts for Preschoolers That Are Almost Too Cute to Resist
Why Make Your Own Valentine’s Day Decorations?
Before getting into the tutorials, it’s worth understanding why handmade decorations can be such a useful addition to your seasonal decorating routine.
1. You Can Choose Decorations That Match Your Home
Ready-made Valentine’s Day decorations often follow the same familiar patterns: bright red hearts, pink signs, glitter, and large romantic messages. Those designs can be fun, but they may not suit every home.
When you make your own decorations, you control the appearance of the finished product.
For example, someone with a neutral living room might prefer a cream-colored heart wreath with a burgundy ribbon. Someone with colorful furniture might enjoy a bright pink paper flower arrangement. If your home has a rustic style, natural twine, unfinished wood, and dried flowers may be better choices.
This freedom makes DIY projects particularly useful when you want your seasonal decorations to complement the furniture and accessories you already own.
2. Handmade Crafts Can Be Budget-Friendly
You don’t need an expensive crafting machine or a large collection of specialist tools to make attractive decorations.
Cardboard can become a heart-shaped wall decoration. An empty glass jar can become a lantern. Leftover fabric can be transformed into a wreath, and ordinary cardstock can become an arrangement of paper flowers.
The key is to look at your existing supplies before buying anything.
Make a short list of what you already have, identify the missing materials, and purchase only what you need. This approach helps prevent unnecessary spending on supplies that might remain unused after Valentine’s Day.
If you’re looking to give your phone a seasonal update too, you can check out my guide on Valentine’s Day wallpaper aesthetics for some fun inspiration.
3. You Can Reuse Many of Your Decorations
A handmade decoration doesn’t have to be limited to one day of the year.
A neutral wreath can be updated with different ribbons for spring, autumn, or Christmas. A decorative jar can hold artificial flowers throughout the year. A simple picture frame can display seasonal artwork that you change whenever you want.
When planning a craft, consider whether you can make it adaptable.
Choosing durable materials and timeless colors can help you get more use out of the finished piece.
4. Crafting Gives You an Opportunity to Slow Down
Creative activities can provide a welcome break from everyday responsibilities. Cutting paper, arranging flowers, painting a wooden ornament, or wrapping yarn around a cardboard shape gives you something practical to focus on.
You don’t need to finish seven projects in one afternoon. Choose one that appeals to you, prepare the materials, and work at a comfortable pace.
If you’re tired, a simple paper flower or decorative jar may be a better choice than a detailed wreath that requires several hours of work.
Ready to style every corner of your house for the holiday, take a look at these lovely Valentine’s Day home decorations to set the perfect mood.
1. DIY Valentine’s Day Heart Wreath
A heart wreath is one of the most recognizable Valentine’s Day decorations, but the materials and colors you choose can make it look completely different from the usual store-bought designs.
For a sophisticated appearance, consider using a heart-shaped base covered with fabric, yarn, faux flowers, or paper leaves. A combination of burgundy, blush pink, cream, and natural textures can create a beautiful result without requiring too many decorative elements.
This wreath works well on an interior door, above a console table, or as part of a seasonal display on a living room wall.
Estimated time: 45–90 minutes
Difficulty: Beginner to intermediate
Best for: Front doors, interior walls, entryways, and handmade gifts
Materials You will Need for this Valentine’s Crafts for Adults
- A heart-shaped wreath form or sturdy cardboard
- Ribbon, yarn, fabric strips, or artificial flowers
- Scissors
- A pencil
- Craft glue or a hot glue gun
- Optional decorative leaves
- A ribbon for hanging
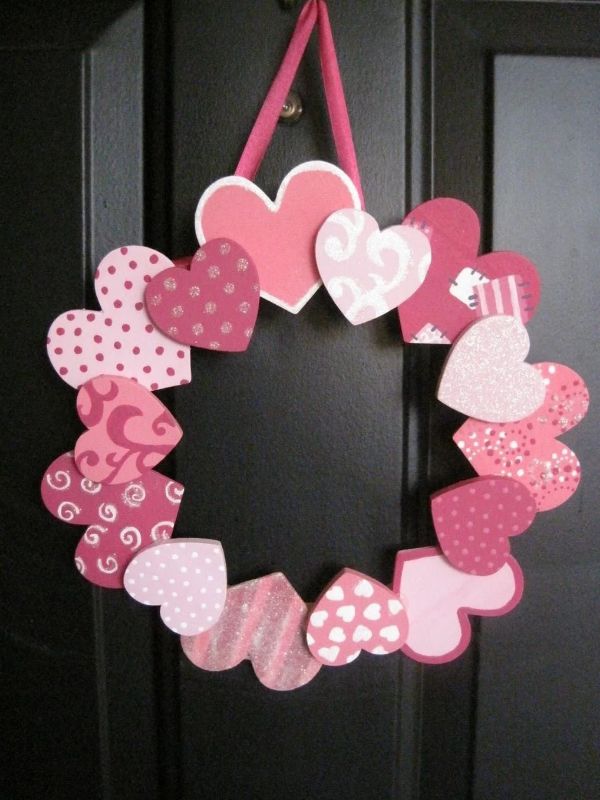
Helpful supplies: A heart-shaped wreath form, floral wire, and artificial flowers can make this project easier.
These are Amazon search links for finding suitable supplies; prices and availability may vary.
How to Make a Valentine’s Day Heart Wreath
Step 1: Choose your wreath base.
Start with a heart-shaped wreath form. If you don’t want to purchase one, draw a large heart on cardboard and carefully cut it out.
For a sturdier cardboard base, cut two matching heart shapes and glue them together. This gives the wreath more structure and reduces the chance of it bending while you decorate it.
If you’re making a large wreath, use thick cardboard rather than a thin cereal box.
Step 2: Decide on your color palette.
Before attaching anything, choose two or three main colors.
Cream and burgundy create a rich, elegant appearance. Blush pink and white produce a softer look, while red and natural brown give the wreath a rustic feel.
Limiting your colors helps the design look coordinated. You can still introduce another color through a small ribbon or a few leaves.
Step 3: Cover the base.
If you’re using yarn, attach the end to the back of the wreath and begin wrapping it around the form. Keep the strands close together so the cardboard doesn’t show through.
For fabric, cut your material into strips and wrap them around the base, overlapping the edges slightly.
If you prefer flowers, you can cover the base with fabric or paper first, then attach your flowers in small groups.
Work slowly around the shape and check the front regularly to make sure the coverage looks even.
Step 4: Add your decorative details.
Arrange your artificial flowers, paper leaves, or small fabric hearts before gluing them into place.
Try placing the largest flowers first, then filling the spaces with smaller pieces. This creates a more natural arrangement than placing every flower at equal distances.
You don’t have to cover the entire wreath with decorations. Leaving part of the base visible can give the finished piece a more modern appearance.
Step 5: Attach the hanging ribbon.
Cut a length of ribbon and secure it to the back of the wreath.
Before hanging the decoration, check that the ribbon is firmly attached and that the wreath sits evenly. If one side is heavier because of the flowers, adjust the hanging point to help it remain straight.
Allow all adhesive to dry according to the product instructions before displaying the wreath.
How to Make Your Heart Wreath Look More Expensive
The secret to an attractive wreath is not the number of decorations you use. It’s how well the materials work together.
Choose flowers in complementary shades rather than combining every color available. Use ribbon with enough texture to stand out against the wreath, and trim any loose fabric ends.
You can also add a small bow to one side instead of placing it at the top. This creates an asymmetrical design that looks more natural.
If you prefer minimalist home decor, make a wreath with a neutral fabric base and only a few burgundy flowers. For a traditional Valentine’s Day appearance, cover the entire heart with red or pink flowers.
Where to Display Your DIY Heart Wreath
Hang the finished wreath on an interior door, above a fireplace, or on a wall near your entryway.
You can also place it flat on a table and arrange battery-operated candles around it for a seasonal centerpiece. If you choose this option, keep the wreath and any fabric decorations away from open flames.
Crafting tip: Store the wreath in a sturdy box after Valentine’s Day. Keeping it away from moisture, direct sunlight, and pressure from other decorations will help preserve its shape and color.
If you want to bring that same aesthetic to your tech, take a look at these Valentine’s Day wallpaper Ideas ideas to beautify your phone
2. Beautiful Valentine’s Day Mason Jar Lanterns
Valentine’s Day mason jar lantern inspiration and tutorial
If you have an empty glass jar at home, you already have the starting point for a beautiful Valentine’s Day decoration.
Mason jar lanterns are especially attractive because they combine glass, color, and light. During the day, the decorated glass adds interest to a shelf or table. In the evening, a battery-operated light creates a warm glow that makes the decoration stand out.
This project is also an excellent way to reuse clean glass jars instead of throwing them away.
Estimated time: 30–45 minutes, plus drying time
Difficulty: Beginner
Best for: Coffee tables, dining tables, bedside tables, and handmade gifts
Materials You will Need
- One or more clean glass jars
- Tissue paper in red, pink, cream, or burgundy
- White craft glue or a suitable decoupage medium
- A paintbrush
- Scissors
- A pencil
- Optional black dimensional paint for outlines
- Battery-operated LED tea lights
You can find mason jars for crafting, and battery-operated+LED+tea lights online.
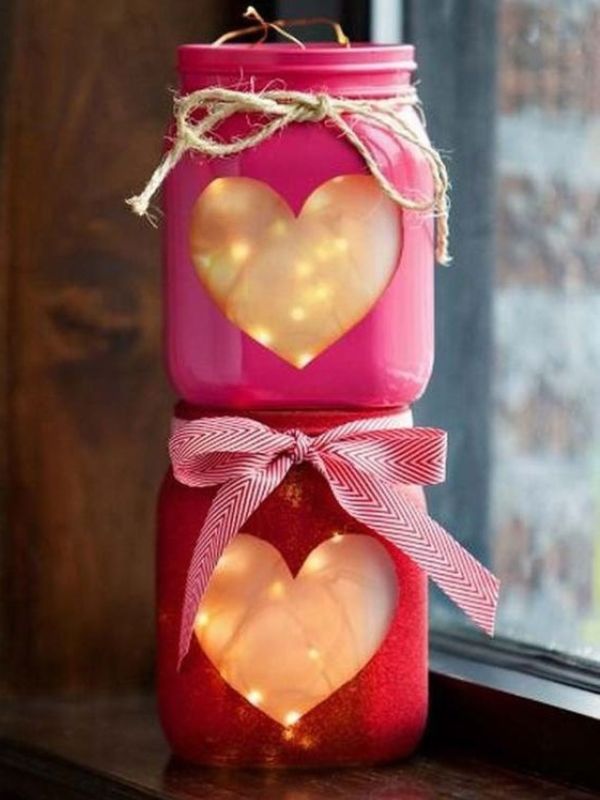
How to Make a Valentine’s Day Mason Jar Lantern
Step 1: Clean and dry the jar.
Remove any labels and wash the jar thoroughly. Make sure it is completely dry before applying glue.
Adhesive usually works better on a clean surface without grease, dust, or moisture.
If the jar has stubborn label residue, use an appropriate cleaning method and rinse it well before beginning.
Step 2: Cut your tissue paper.
Cut the tissue paper into small squares or irregular pieces.
You can use one color for a simple design or combine two or three shades. Pale pink, deep red, and cream work well together because they provide contrast without making the jar look too busy.
If you want a heart design, draw several small hearts on tissue paper and cut them out separately.
Thin tissue paper is useful for this project because light can pass through it more easily than through thick paper.
Step 3: Apply the tissue paper.
Brush a thin layer of decoupage medium onto a small section of the outside of the jar.
Place a piece of tissue paper over the glue and gently smooth it with your brush. Continue adding pieces until the surface is covered.
Overlap the edges slightly to avoid large gaps.
Be gentle when smoothing the paper. Tissue paper tears easily when it becomes wet, so use light brush strokes rather than pressing hard.
Step 4: Add a heart design.
If you want a stained-glass-inspired appearance, place the tissue paper hearts in different positions around the jar.
You can outline the hearts with black dimensional paint if you want a more defined look. However, the outlines are optional, and the jar can look beautiful without them.
Allow the decorative layers to dry before handling the jar extensively.
Step 5: Add the light.
Place a battery-operated LED tea light inside the jar.
Switch it on and observe how the light passes through the tissue paper. If one area looks darker than the others, you can make another jar with thinner paper coverage or a different arrangement.
For a coordinated display, create three jars in different sizes and arrange them together.
The Craft Science: Why Does the Jar Glow?
The effect comes from the way light interacts with the glass and translucent tissue paper.
Clear glass allows much of the light to pass through it. Tissue paper scatters and filters some of that light, giving the decoration a softer appearance.
Different tissue paper colors change the color of the light that reaches your eyes. Red and pink paper can create a warm rosy glow, while cream paper produces a softer, lighter effect.
The thickness of the paper and the amount of overlapping also influence the result. Several thick layers can block more light than a single thin layer.
This is why it helps to test a small area before covering the entire jar.
How to Style Your Lanterns at Home
Place one lantern on a bedside table, or arrange three jars on a wooden tray with a few artificial rose petals.
For a dining table, you can combine the jars with a small flower arrangement and neutral table linens. The contrast between glass, fabric, and flowers creates visual interest without requiring many additional decorations.
You can also wrap a ribbon around the neck of the jar, but avoid covering too much of the glass if you want the light to remain visible.
Safety note: Use battery-operated lights rather than real candles. Never place a flame inside a decorated jar containing tissue paper, glue, ribbon, or other flammable materials.
Here is an article on How to Make DIY Glass Jar Lanterns for Your Garden: An Easy Step by Step Guide To get more inspiration.
3. DIY Valentine’s Day Paper Flowers
Paper flowers are a wonderful choice when you want floral decorations that last longer than fresh bouquets.
They can be used in vases, attached to gift boxes, arranged on a wall, or combined into a handmade centerpiece. You can make them from ordinary colored paper, cardstock, crepe paper, or leftover craft paper.
The most useful thing about this project is that you can adjust the size and shape of the flowers to suit your decorating needs.
Large paper roses can become a statement decoration, while smaller flowers work well in a tabletop arrangement.
Estimated time: 30–60 minutes
Difficulty: Beginner to intermediate
Best for: Vases, wall decorations, gift wrapping, and centerpieces
Materials You’ll Need
- Colored cardstock, crepe paper, or craft paper
- Scissors
- Pencil
- Glue stick or craft glue
- A ruler
- Wooden skewers or floral wire for stems, if needed
- Green paper for leaves
- Optional floral tape
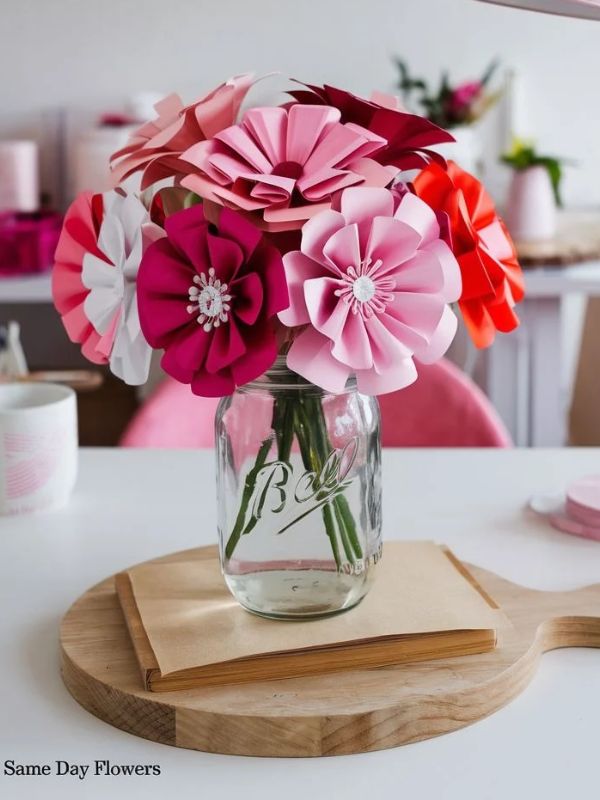
Photo credit
How to Make Paper Flowers
Step 1: Choose your flower style.
You can create roses, simple layered blossoms, or rounded flowers with several petals.
For a beginner-friendly design, start with a flower made from separate petals. This gives you more control over the shape and makes it easier to correct mistakes.
Choose paper colors that match your intended display. Blush pink, burgundy, cream, and dusty rose are attractive options for Valentine’s Day.
Step 2: Draw and cut the petals.
Draw a few petal shapes on your paper.
For a layered flower, cut several large petals for the bottom layer and smaller petals for the center. You don’t need every petal to be identical, but keeping them approximately the same size within each layer will help the flower look balanced.
If you plan to make several flowers, create a paper template first. You can trace around the template rather than drawing every petal individually.
This saves time and makes it easier to produce a coordinated arrangement.
Step 3: Shape the petals.
Gently curve the edges of each petal around a pencil or a similar smooth object.
The amount of shaping depends on the paper. Thin paper bends easily, while thicker cardstock may require a little more pressure.
Avoid pressing so firmly that the paper creases sharply unless you want a folded effect.
For a more natural appearance, slightly curl some petals inward and others outward.
Step 4: Build the flower from the center outward.
Roll a small piece of paper into a tight center and secure it with glue.
Attach the smaller petals around the center, overlapping them slightly. Continue adding the larger petals around the outside.
Check the flower from different angles as you work. If all the petals point in exactly the same direction, the flower may look flat. Slight differences in their positions can create a fuller appearance.
Allow the glue to set before adding the next layer if the petals keep slipping.
Step 5: Add leaves and a stem.
Cut a few leaves from green paper and attach them to the back of the flower.
If you want a flower for a vase, attach a suitable wooden skewer or floral wire to the back. Secure it with glue and, if needed, a small piece of paper or floral tape.
Keep the stem lightweight enough to support the flower without bending.
Step 6: Repeat the process.
Make several flowers in different sizes.
A group of three to seven flowers can make an attractive display, depending on the size of the vase and the fullness of the flowers.
Varying their height helps the arrangement look more natural.
How to Make Paper Flowers Look Realistic
Real flowers rarely have perfectly identical petals. Small differences in shape, angle, and size help create a more natural appearance.
Try using two shades of the same color. For example, a burgundy center surrounded by blush petals can create depth without needing complicated techniques.
You can also use slightly different petal shapes for each flower. One might have narrow petals, while another has wider, rounded petals.
The paper itself makes a difference. Crepe paper stretches and bends more easily than ordinary cardstock, which makes it useful for creating soft curves. Cardstock, on the other hand, provides more structure for flowers that need to hold their shape.
If you are using thin paper, avoid applying too much glue because it can cause wrinkles or make the petals soggy.
Ways to Use Your Paper Flowers
Arrange your flowers in a glass vase for a Valentine’s Day centerpiece. You can add paper leaves to fill gaps between the blooms.
Another option is to attach a few flowers to a picture frame or use them to decorate a handmade gift box.
Smaller paper flowers can also be attached to greeting cards, gift tags, or scrapbook pages.
If you’re decorating a small room, one carefully arranged bouquet may be enough. You don’t need to place paper flowers on every surface to make them noticeable.
Crafting tip: Keep your finished flowers away from water, damp surfaces, and direct sunlight. Store them in a box where the petals won’t be crushed.
If f you love working with lasting florals, you might also enjoy exploring these How to Make Beautiful DIY Paper Flowers: A Simple Step-by-Step Tutorial to bring a charming, rustic touch to your space
4. Handmade Valentine’s Day Love Letter Jar
A love letter jar is a meaningful Valentine’s Day craft because it combines decoration with personal messages.
Instead of buying an ordinary gift container, you can decorate a glass jar and fill it with handwritten notes. These notes might include favorite memories, reasons you appreciate someone, encouraging messages, or activities you would like to enjoy together.
The finished jar can serve as a thoughtful gift for a partner, a close friend, a family member, or someone who needs encouragement.
It is also one of the easiest crafts to personalize because the contents matter more than expensive materials.
Estimated time: 30–60 minutes, depending on the number of notes
Difficulty: Beginner
Best for: Handmade gifts, anniversaries, Valentine’s Day, and appreciation gifts
Materials You will Need
- A clean glass jar with a lid
- Colored paper or cardstock
- Scissors
- Pens or fine-tip markers
- Ribbon or twine
- A small label or gift tag
- Optional stickers or decorative paper
- Optional shredded paper for the bottom of the jar
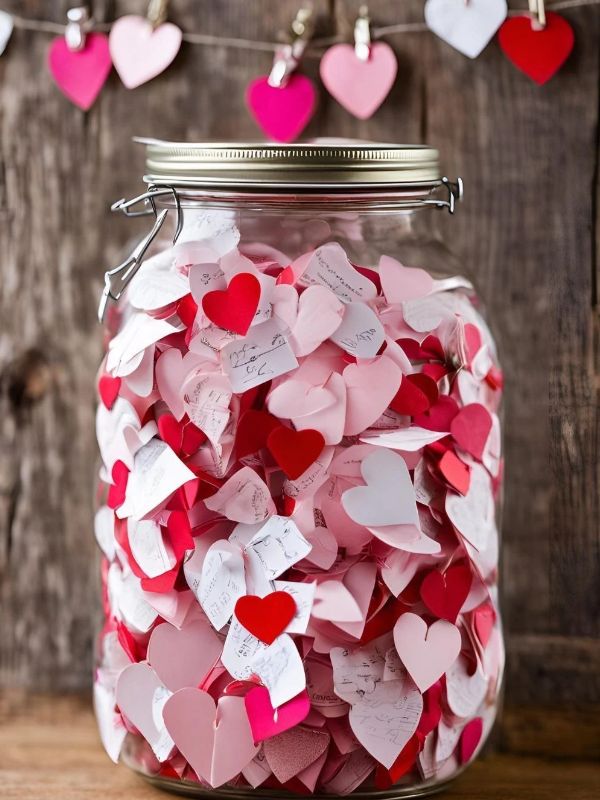
You can find colored paper for writing notes.
How to Make a Valentine’s Day Love Letter Jar
Step 1: Clean your jar.
Wash the jar and remove any labels. Dry it completely before adding the decorations.
A transparent jar works especially well because the folded notes become part of the display.
If you prefer a more colorful look, you can use a tinted jar or decorate the outside with a few paper hearts.
Step 2: Prepare your paper strips.
Cut your paper into strips of approximately equal size.
You can use one color throughout or choose several shades to make the jar more colorful.
For a coordinated appearance, try cream paper with burgundy and blush accents. You could also use different colors to represent different types of messages.
For example, one color could represent favorite memories, while another could contain encouraging messages.
Step 3: Write personal notes.
This is the most important part of the project.
Instead of filling the jar with repeated general messages, write notes that reflect the recipient’s personality, experiences, and interests.
You might write about a moment when the person helped you, something you admire about them, a funny memory, or a small act of kindness you appreciate.
If you’re making the jar for a friend, your notes could include shared memories, words of encouragement, or ideas for activities you could enjoy together.
If you’re making it for yourself, fill it with reminders of your achievements, things you’re grateful for, or encouraging words to read on difficult days.
You can prepare 15, 30, or 52 notes. Choose a number that feels manageable rather than turning the project into a stressful task.
Step 4: Fold the notes.
Fold each note into a small rectangle or roll it loosely.
Avoid rolling the paper too tightly, because the recipient may find it difficult to open.
Place the notes in the jar as you finish them.
Step 5: Decorate the jar.
Tie ribbon around the neck of the jar and attach a small gift tag.
You could write something simple on the tag, such as “Open Whenever You Need a Smile” or “Little Reminders of How Much You Matter.”
If you want to decorate the glass itself, add a few small heart stickers or a simple label.
Keep the design relatively simple so the notes remain visible.
Step 6: Finish the gift.
Arrange the notes neatly and close the lid.
If you are giving the jar as a present, place it inside a small gift bag or box with a handwritten card.
You could also include a few individually wrapped treats or another small gift, provided they fit safely inside the packaging.
What Should You Write Inside a Love Letter Jar?
If you are struggling to think of messages, divide them into categories.
Favorite memories: Write about experiences you shared, conversations you still remember, or moments that made you laugh.
Reasons for appreciation: Mention specific qualities you admire, such as kindness, patience, generosity, or determination.
Encouragement: Include reminders that the person is capable, valued, and deserving of care.
Future plans: Write down activities you would enjoy doing together, such as cooking a meal, visiting a new place, or watching a favorite movie.
Everyday happiness: Add simple messages that might brighten an ordinary day.
The more personal your notes are, the more meaningful the jar is likely to become.
Why This Craft Makes a Meaningful Gift
Many store-bought gifts are designed to be enjoyed immediately. A love letter jar offers something different because the recipient can return to the messages over time.
The jar also allows you to express feelings in a way that may be easier to communicate through writing.
You don’t need expensive stationery or elaborate decorations. Thoughtful words, neatly prepared notes, and a clean presentation can make a simple jar feel special.
Crafting tip: If you want the jar to be opened throughout the year, include a small instruction card explaining how to use it. For example, the recipient could open one note every Sunday or whenever they need encouragement.
If you want to explore more ways to surprise your loved ones with creative presents, you can also check out this guide on Handmade Crafts for Gifts That Look Special Without Costing a Fortune
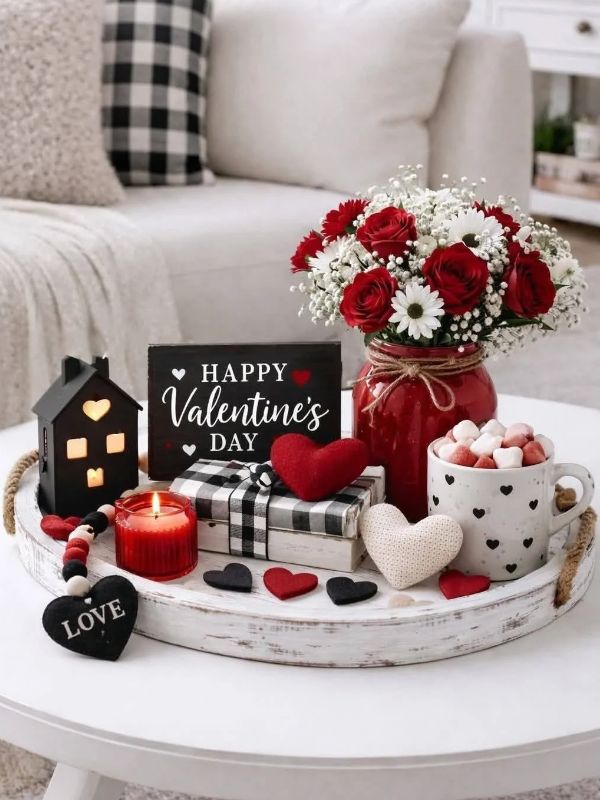
5. DIY Valentine’s Day Decorative Tray
A decorative tray is a practical craft because it can help organize small accessories while making a coffee table, console, or bedside table look more polished.
For Valentine’s Day, you can transform a plain wooden tray or an inexpensive secondhand tray with paint, paper, decorative handles, or a simple heart design.
Unlike some seasonal decorations, a tray can remain useful throughout the year. After Valentine’s Day, remove any temporary decorations and use it to hold everyday items.
Estimated time: 45–90 minutes, plus drying time
Difficulty: Beginner
Best for: Coffee tables, entryways, bedside tables, and gift displays
Materials You will Need
- A plain wooden tray or suitable existing tray
- Fine-grit sandpaper, if the surface requires preparation
- Acrylic paint suitable for the tray’s material
- Paintbrush or small foam roller
- Painter’s tape
- Pencil
- Optional heart stencil
- Suitable clear protective finish
- Optional decorative paper or handles
You can look for unfinished+wooden+trays, acrylic+paint+sets, and heart+stencils.
Choose products that are suitable for the material of your tray and follow their instructions.
How to Make a Valentine’s Day Decorative Tray
Step 1: Choose a tray.
A simple rectangular or round tray works well.
Wooden trays are especially useful because they can be sanded and painted, but you can also decorate a suitable metal or plastic tray using products designed for that surface.
Before starting, check that the tray is structurally sound and that its surface is suitable for the finish you intend to use.
Step 2: Prepare the surface.
If you’re using an unfinished wooden tray, remove dust and smooth any rough areas with fine-grit sandpaper.
If the tray is already painted or finished, check the manufacturer’s guidance before sanding or applying another coating.
Wipe away the dust and allow the surface to dry.
Good surface preparation helps paint adhere more evenly and reduces the chance of an uneven finish.
Step 3: Apply the base color.
Choose a color that complements your home.
Cream, white, muted pink, and burgundy can all work well for Valentine’s Day.
Apply a thin coat of paint using a brush or foam roller. Let it dry according to the paint manufacturer’s instructions before deciding whether another coat is necessary.
Several thin coats usually produce a more even result than one thick coat.
Step 4: Add a simple design.
Use painter’s tape to create straight lines or a stencil to add small hearts.
You could paint one large heart in the center or create a repeating pattern along the edges.
If you prefer a minimalist look, leave the main surface plain and decorate only the corners.
Allow each color to dry before applying another one. This helps prevent smudging and reduces the risk of lifting the underlying paint.
Step 5: Protect the finish.
Once the paint has dried fully, apply a suitable clear protective finish if the product is recommended for your tray’s material.
Follow the instructions regarding drying time, ventilation, and curing.
Do not assume that paint is safe for direct food contact simply because it has dried. If you plan to serve food on the tray, use a tray and finish specifically suitable for that purpose.
Step 6: Style the finished tray.
Place the tray on a coffee table or console and add a few carefully chosen objects.
For example, you could include a small vase of paper flowers, a decorative jar, and a battery-operated candle.
Leave enough empty space to keep the display balanced and ensure the tray remains practical.
How to Style a Decorative Tray Without Making It Look Cluttered
A tray can easily become crowded if you add too many objects.
Start with one taller item, such as a flower arrangement. Add a smaller object beside it, then introduce a third item only if the display needs it.
Varying the heights of the objects creates a more interesting arrangement. A tall vase, a medium-height jar, and a low decorative dish work together because they don’t compete at the same level.
You can also use different textures to add interest. Glass, wood, fabric, and paper create contrast even when the colors are similar.
For a small coffee table, use a smaller tray and limit the number of objects. For a larger console, you have more space to create a wider arrangement.
How to Reuse the Tray After Valentine’s Day
One advantage of this project is that it doesn’t have to be stored away after February 14.
Remove the heart-shaped decorations and use the tray to organize remote controls, hold a small vase, or display everyday accessories.
If you chose a neutral base color, the tray can remain on your coffee table throughout the year.
For a more obviously seasonal design, keep the heart decorations small enough that you can cover or replace them later.
Crafting tip: Keep the tray away from standing water and clean it with a method suitable for its finish. Excessive moisture can damage some paints and wooden surfaces.
If you want to carry that natural, welcoming styling over to your entertainment spaces, you might also enjoy checking out these ideas for How to Style a Bar Cart If You Don’t Drink: 10 Beautiful Ideas and Fun natural table settings to tie your home decor together.
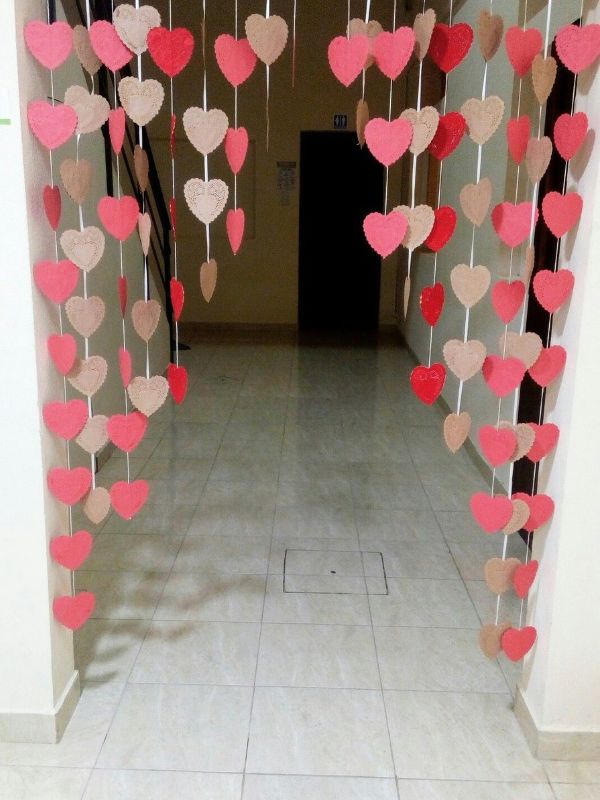
6. DIY Valentine’s Day Heart Garland
A heart garland is an easy way to decorate a wall, fireplace mantel, window, or party table without taking up much space.
It can be made from cardstock, fabric, felt, or even carefully selected pages from old magazines. You can also reuse leftover paper from previous craft projects.
The design is simple, but the choice of materials makes a big difference to the finished appearance.
For a refined look, consider using alternating shades of cream, burgundy, and blush pink. For a more playful display, choose brighter colors and patterned paper.
Estimated time: 20–40 minutes
Difficulty: Beginner
Best for: Mantels, windows, bedroom walls, party backdrops, and table displays
Materials You will Need for Valentine’s Day Crafts for Adults
- Cardstock, craft paper, or felt
- Pencil
- Scissors
- String, twine, or ribbon
- Glue or small clips
- Ruler
- Optional heart template
- Optional hole punch
Helpful supplies include cardstock paper, decorative twine, and craft scissors.
How to Make a Valentine’s Day Heart Garland
Step 1: Choose your paper.
Select paper that is thick enough to hold its shape but easy to cut.
Cardstock is a good option because it provides structure. Thinner paper is easier to fold, while felt creates a softer, fabric-like appearance.
If you’re using leftover paper, check that the colors and patterns work together before cutting.
Step 2: Create a heart template.
Draw a heart on a piece of scrap paper.
Fold the paper in half and draw one side of the heart along the fold. Cut it out and unfold the paper to reveal a symmetrical shape.
You can use this template to trace as many hearts as you need.
If you want the garland to look more natural, create hearts in two or three sizes rather than making every piece identical.
Step 3: Cut out the hearts.
Trace the template onto your selected paper and cut out the shapes.
Prepare enough hearts to fill the length of your garland.
Before attaching them, arrange them on a table so you can see how the colors look together. This makes it easier to correct any awkward color combinations before the pieces are attached.
Step 4: Attach the hearts to the string.
Lay the string on a flat surface.
Attach the hearts using small amounts of glue or clips, leaving equal spaces between them.
If you’re using glue, check that the adhesive is suitable for your paper and string.
You can attach the hearts along their top edges so they hang naturally. Alternatively, fold small tabs over the string and secure them at the back.
For a fuller garland, use double-layered hearts with two colors of paper.
Step 5: Add dimension.
To create a three-dimensional effect, cut two matching hearts, fold them slightly down the center, and attach them together along one side.
You can experiment with several layers, but avoid making the hearts so heavy that the string sags.
Another option is to alternate flat hearts with small fabric bows or paper circles.
Step 6: Hang your garland.
Measure the space where you want to display the finished decoration.
Secure the garland with suitable hooks or removable hanging strips that are appropriate for the wall surface and the weight of the decoration.
Allow the garland to hang naturally rather than pulling it completely straight. A gentle curve often looks more attractive above a mantel or window.
How to Make a Heart Garland Look More Sophisticated
The key is to consider the relationship between color, spacing, and texture.
If the hearts are too close together, the garland may look crowded. If they are too far apart, the design may feel incomplete.
Start with equal spacing, then adjust the arrangement to suit the size of your hearts and the length of your string.
For a modern look, use plain paper in two complementary colors. For a rustic appearance, combine kraft paper with natural twine.
You could also create a monochromatic garland using several shades of pink. The subtle differences in color provide interest without making the decoration feel overly busy.
Where to Use a DIY Heart Garland
Hang the garland above a fireplace, across a bedroom wall, or around the edge of a party table.
For a romantic dinner, it can serve as a backdrop behind the dining table. For a small apartment, hang it above a console or window rather than filling the room with additional decorations.
If you plan to use it outdoors, choose suitable materials and protect the paper from wind and moisture.
Crafting tip: Store paper garlands flat or loosely coiled in a box after use. Avoid folding the hearts sharply, as this can leave permanent creases.
If you are looking to refresh other spaces around your home beyond Valentine’s Day, you might also love browsing through these 12 DIY Bible Verse Home Decor Ideas That Bring Scripture to Life to bring a creative touch to every room.
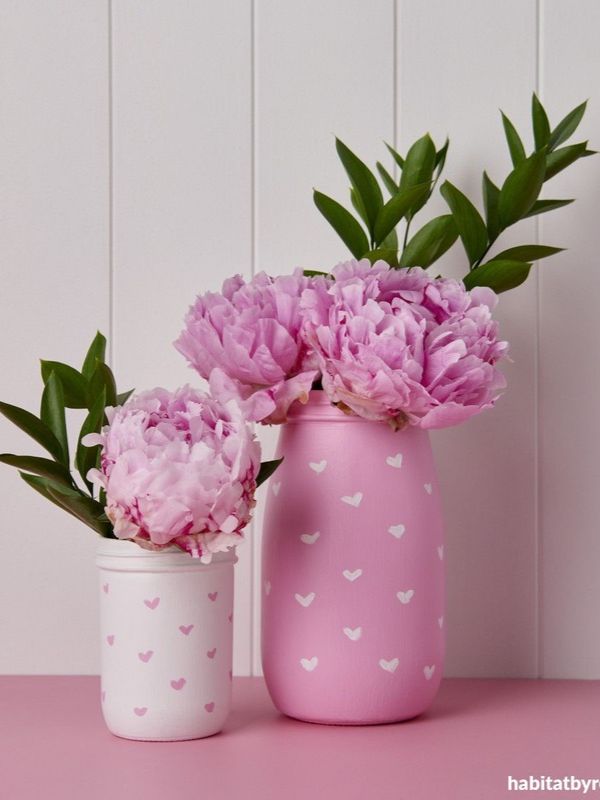
7. DIY Valentine’s Day Painted Flower Vase
A painted vase is a beautiful Valentine’s Day craft because it combines a practical household object with a personal decorative design.
You can use a plain glass vase, a suitable secondhand vase, or a clean glass container that has the right shape for flowers.
For this project, you’ll decorate the outside of the container with a simple design. You might choose small hearts, abstract shapes, delicate flowers, or a color-blocked pattern.
The result can hold artificial flowers, paper flowers, or a suitable arrangement of fresh flowers, depending on the materials and finish you choose.
Estimated time: 30–60 minutes, plus drying time
Difficulty: Beginner
Best for: Coffee tables, dining tables, bedside tables, and handmade gifts
Materials You will Need
- A plain glass vase or suitable glass container
- Glass paint or another paint specifically suitable for the surface
- Paintbrushes
- Rubbing alcohol or another suitable surface cleaner
- Cotton pads or a lint-free cloth
- Painter’s tape
- Optional heart stencil
- Optional decorative ribbon
- Artificial or paper flowers
How to Make a Valentine’s Day Painted Vase
Step 1: Select the vase.
Choose a vase with a shape that suits the flowers you plan to display.
A narrow-necked vase works well for a few paper flowers or individual stems. A wider opening is more suitable for a fuller arrangement.
Before decorating, check that the vase is stable and free from cracks.
Step 2: Clean the outside.
Wash the vase and remove any dirt or grease.
If the paint manufacturer’s instructions recommend using rubbing alcohol or another surface cleaner, follow those directions and allow the glass to dry completely.
Avoid touching the cleaned area excessively before painting, as fingerprints can interfere with adhesion.
Step 3: Plan your design.
Decide where you want the painted details to appear.
You could create a row of small hearts around the lower half of the vase or paint a few larger shapes on one side.
If you prefer a more modern look, use painter’s tape to create straight lines or geometric sections.
Try arranging the design on paper first. This helps you see how the colors work together before you begin painting.
Step 4: Apply the paint.
Use paint that is suitable for glass and follow the manufacturer’s instructions.
Apply thin layers rather than one heavy coat. This helps reduce visible brush marks and uneven patches.
If you’re using several colors, allow each section to dry as directed before painting adjacent areas.
For a simple design, use one main color and one accent color. For example, blush pink hearts on a clear vase can look attractive without requiring a complicated pattern.
Step 5: Allow the vase to cure.
Drying and curing are not always the same thing.
Paint may feel dry to the touch before it has fully hardened or reached its recommended durability. Follow the manufacturer’s instructions for drying time, curing time, ventilation, and any heat-setting requirements.
Don’t place the vase in an oven unless the paint specifically requires and permits that process and the vase is suitable for it.
Step 6: Arrange your flowers.
Once the paint has fully cured, add your flowers.
Paper flowers are a good choice if you want the entire arrangement to be reusable. Artificial flowers are another practical option.
If you want to use fresh flowers, check whether the vase’s painted finish is suitable for repeated contact with water. Keep water away from painted areas unless the product instructions specifically allow it.
How to Choose Colors for Your Painted Vase
Color choice influences whether the vase looks traditional, modern, rustic, or romantic.
Blush pink and cream create a soft appearance. Burgundy and white provide stronger contrast. Gold accents can add a decorative touch, while muted green pairs well with floral designs.
You can also use a neutral base and add small red hearts. This gives you a decoration that is clearly associated with Valentine’s Day without making the entire vase bright red.
If your room already contains several colors, choose one that appears in your existing decor. Repeating a color from your cushions, curtains, artwork, or rug can help the new decoration fit into the room.
How to Display Your Finished Vase
Place the vase on a coffee table, dining table, bedside table, or console.
If the vase is small, group it with one or two complementary objects rather than surrounding it with many unrelated decorations.
For a Valentine’s Day centerpiece, arrange the vase on a tray with a few paper hearts or a small decorative jar.
After the holiday, you can move it to another room or use it as part of your regular home decor.
Crafting tip: If you’re making several vases, decorate them in a coordinated style rather than making every one identical. A group of vases with similar colors but slightly different patterns can look more interesting than a perfectly matching set.
If you enjoy painting glassware, you might also love exploring these creative terracotta pot painting ideas to add a rustic, earthy touch to your indoor plants and home decor.
How to Make Your Valentine’s Day Crafts Look Beautiful Without Overspending
Now that you’ve explored the seven projects, let’s look at a few practical design principles that can help you create decorations that look intentional.
You don’t need expensive supplies to make a craft look good. The most important things are thoughtful color choices, careful preparation, and a clear idea of where the finished item will be displayed.
1. Choose a Color Palette Before You Begin
One of the easiest ways to improve the appearance of your DIY decorations is to select your colors before starting.
Instead of buying random supplies and trying to combine them later, choose a small palette.
Here are three combinations worth considering.
| Decorating style | Suggested colors | Suitable crafts |
|---|---|---|
| Soft and romantic | Blush pink, cream, white | Paper flowers, heart garlands, painted vases |
| Traditional Valentine’s Day | Red, pink, white | Heart wreaths, mason jar lanterns, paper decorations |
| Rustic and natural | Burgundy, kraft brown, natural wood | Wreaths, decorative trays, paper flowers |
| Modern and minimal | Cream, burgundy, muted green | Decorative trays, vases, neutral wreaths |
You don’t have to follow these combinations exactly. Use them as starting points and adjust them to match your home.
2. Prepare Your Materials Before Starting
Gather everything you need before applying glue or paint.
This sounds simple, but it can make a big difference. Searching for scissors while your glue begins to dry can interrupt your progress and lead to uneven results.
Read the instructions for your materials before using them. Some paints require several coats, while certain adhesives need time to set before another layer can be added.
A little preparation helps you avoid rushing through the finishing stages.
3. Work With the Materials You Already Have
Before purchasing craft supplies, look around your home.
You may already have glass jars, old picture frames, leftover wrapping paper, fabric scraps, ribbon, or cardboard that can be reused.
For example, a clean glass jar can become a lantern, while cardboard can provide a base for a wreath or heart garland.
Reusing materials can reduce waste and help you experiment without spending money on every new idea.
However, check the condition of anything you reuse. Avoid cracked glass, unstable containers, or materials that are unsuitable for the intended project.
4. Pay Attention to the Finishing Details
Small details can influence how polished the finished craft looks.
Trim loose threads, remove dried glue that is visible on the front, and allow paint to dry completely before handling the decoration.
If you’re using ribbon, cut the ends neatly. If you’re arranging paper flowers, adjust the petals so that they don’t all point in exactly the same direction.
These finishing steps don’t require special artistic skills, but they can improve the final appearance considerably.
I have a post on 10 Home Decor Ideas You Can DIY to Give Your Space a Beautiful New Look
Common Mistakes to Avoid When Making Valentine’s Day Crafts for Adults
Even simple DIY projects can become frustrating when the materials are unsuitable or the instructions are rushed. A few precautions can help you avoid common problems.
Using Too Much Glue
Excess glue can seep out around paper shapes, leave shiny patches, or make thin paper wrinkle.
Apply a small amount first and add more only when necessary. Use the adhesive according to the manufacturer’s instructions.
Choosing Materials That Don’t Work Together
Not every paint adheres to every surface, and not every glue works well with fabric, glass, or plastic.
Check that the materials are compatible before starting.
For example, use a paint designed for glass when decorating a glass vase. If you are painting a wooden tray, choose a product suitable for that surface and the intended use.
Rushing the Drying Process
A project may look finished before the paint or adhesive has fully dried.
Handling it too early can cause smudges, loose decorations, or fingerprints.
Allow enough time for each layer to dry and follow the product instructions regarding full curing.
Adding Too Many Decorations
It can be tempting to keep adding hearts, ribbons, flowers, and glitter until every space is filled.
However, an overcrowded design can make it difficult to appreciate the individual details.
Step back occasionally and look at the craft from a distance. If it already looks balanced, you may not need to add anything else.
Forgetting Where the Craft Will Be Used
A decoration intended for a sheltered shelf may not be suitable for a damp bathroom or an exposed outdoor area.
Consider the environment before choosing your materials.
Paper decorations can warp in moisture, some adhesives weaken in heat, and certain paints may fade in direct sunlight.
Choose materials that suit the location where you plan to display the finished piece.
This Simple DIY Bag Charms to Make at Home: Cute Ideas for Your Handbag Is another lovely craft you can add to your valentines crafts for gift.
How to Display Your DIY Valentine’s Day Decorations
Making a beautiful craft is only part of the process. Where and how you display it can influence how much attention it receives.
Here are a few ways to incorporate your handmade decorations into different areas of your home.
Valentine’s Day Coffee Table Decor
A decorative tray is a useful starting point for a coffee table display.
Place your painted tray in the center of the table, then add a small vase of paper flowers and a decorated jar.
Keep the arrangement low enough that it doesn’t interfere with conversation or the everyday use of the table.
If your coffee table is small, choose just two items. If you have a larger table, you can introduce another decorative object, provided the arrangement still feels balanced.
Valentine’s Day Bedroom Decor
For a bedroom, focus on a few small details rather than a complete seasonal makeover.
A small paper flower arrangement on a bedside table, a heart garland above a dressing table, or a decorative jar on a shelf can provide a Valentine’s Day touch.
Soft colors tend to work particularly well in bedrooms because they can complement existing bedding and curtains.
You can also choose decorations that remain suitable after February 14, such as neutral paper flowers or a painted vase.
Here is a beautiful,35 Home Interior design ideas you can use in decorating your room.
Valentine’s Day Dining Table Decor
Your dining table is a natural place for handmade decorations, especially if you’re planning a special meal.
Arrange paper flowers in the center of the table and place your decorated lanterns nearby.
Make sure the display leaves enough room for plates, serving dishes, and glasses.
For safety, use battery-operated lights around paper, ribbon, and fabric decorations. Keep flammable materials away from open flames and hot surfaces.
Valentine’s Day Entryway Decor
A heart wreath can make a simple entryway feel more festive.
Hang it on an interior door or position it above a small console table.
If you have space on the console, add a small vase or decorative tray. Avoid placing too many objects together, especially if the entryway is narrow.
A well-positioned wreath can create a noticeable seasonal display without requiring much additional decoration.
For more ways to style this area of your home, check out these inspiring entryway wall decor ideas to elevate your doorway styling.
Frequently Asked Questions About Valentine’s Day Crafts for Adults
1. What Are the Easiest Valentine’s Day Crafts for Adults?
Some of the easiest options include paper heart garlands, decorative mason jars, handmade love letter jars, and paper flowers. These projects use basic supplies and don’t require advanced crafting skills.
If you’re a beginner, start with a project that involves cutting, arranging, and gluing rather than one that requires detailed painting or complicated construction.
2. What Materials Do I Need for DIY Valentine’s Day Crafts for Adults?
The materials depend on the project, but many adult crafts use supplies such as cardstock, scissors, glue, ribbon, glass jars, paint, fabric scraps, and artificial flowers.
Before buying anything, check what you already have at home. You may be able to complete a project with only a few additional materials.
3. How Can I Make Valentine’s Day Crafts for Adults Decorations Look Expensive?
Choose a limited color palette, use materials with complementary textures, and pay attention to the finishing details.
For example, a simple cream wreath with a burgundy ribbon can look more coordinated than a wreath covered with many unrelated colors and decorations.
Clean edges, carefully applied paint, and balanced arrangements also help create a polished result.
4. Can I Make Valentine’s Day Crafts for Adults on a Budget?
Yes. Reusing cardboard, glass jars, leftover paper, ribbon, and fabric scraps can reduce the cost of many DIY projects.
You can also make decorations that serve more than one purpose. A decorative tray can organize everyday objects, while a painted vase can be used throughout the year.
5. What Are Some Valentine’s Day Crafts Adults Can Make as Gifts?
A love letter jar, handmade paper flowers, a decorated vase, and a small heart wreath are all thoughtful options.
You can personalize each project with the recipient’s favorite colors, a handwritten message, or a design connected to a shared memory.
The most suitable gift depends on the recipient’s preferences and how much time you want to spend making it.
6. How Long Do Valentine’s Day Crafts Take to Make?
Simple projects such as a heart garland may take around 20–40 minutes. A decorative tray or detailed wreath may take an hour or longer, especially when you include drying time.
These estimates vary depending on the materials, the size of the project, and your experience.
Always allow enough time for paint and glue to dry before displaying the finished decoration.
7. Can I Reuse My Valentine’s Day Decorations Next Year?
Many handmade decorations can be reused if you make them from durable materials and store them properly.
Keep paper decorations dry, protect wreaths from being crushed, and store glass items where they won’t break.
You can also choose designs that are easy to update with new ribbons, flowers, or seasonal accessories.
8. What Colors Look Best for Valentine’s Day Home Decor?
Red, pink, and white are traditional Valentine’s Day colors. However, cream, burgundy, dusty rose, muted green, and gold can also work beautifully.
Choose colors that complement your existing home decor rather than trying to use every traditional Valentine’s Day shade at once.
9. Can I Make Valentine’s Day Crafts for Adults Without Special Tools?
Yes. Many projects require only basic supplies such as scissors, paper, glue, ribbon, and a paintbrush.
A craft knife, hot glue gun, or specialist tool may be helpful for certain projects, but it isn’t necessary for every decoration.
Choose a project that matches the supplies you already have and follow appropriate safety instructions when using tools or adhesives.
10. What Is a Good Valentine’s Day Craft for Adults, for Someone Who Isn’t Artistic?
A decorated love letter jar is a particularly good choice because it relies more on thoughtful messages than artistic ability.
A simple heart garland is another option. You can use a paper template to create matching shapes, then arrange them along a piece of string.
Both projects allow you to create something personal without needing advanced drawing or painting skills.
Conclusion on Valentine’s Day Crafts for Adults
Creating your own Valentine’s Day decorations is a practical way to bring a little creativity into your home without spending a fortune on seasonal accessories.
From a heart-shaped wreath to a glowing mason jar lantern, each of these seven projects gives you an opportunity to make something that reflects your personal style. You can choose soft, romantic colors, reuse materials you already own, or experiment with designs that complement your existing furniture and accessories.
You don’t need to complete every project to make your home feel special. Start with the craft that interests you most, gather the materials you need, and take your time with each step.
If you enjoy paper crafts, begin with the heart garland or paper flowers. If you prefer practical decorations, try the painted tray or vase. And if you want to create a meaningful handmade gift, the love letter jar is an excellent place to start.
The most successful DIY decorations are often the ones that suit your home, serve a purpose, and bring you satisfaction long after you’ve finished making them.
Choose one idea, make it your own, and enjoy the process of creating something beautiful for Valentine’s Day.
Related Articles For Valentines Day You May Also Like
- Plus Size Valentines Day Outfits
- Valentines Day Nail Ideas
- Hairstyles for valentines day
- Valentines Day Accessories
- Valentines Day Photoshoot Ideas For Women
- Valentines Day Work Outfit
- 10 Glitter Ombre Nails To Try For Valentines day
- Valentines Day Dinner Outfit Ideas
- valentines day outfit ideas
- What to Wear on Valentine’s Day
- Couples Valentines Day Photoshoot Ideas