Clay Ideas You Won’t Believe Are So Easy to Make
Have you ever looked at a cute clay craft and thought it would be too difficult to make at home? The good news is that you do not need to be an experienced artist to create beautiful clay crafts. With a little creativity, some basic supplies, and a few simple techniques, you can make surprisingly lovely pieces right at home.
These simple clay ideas are perfect for beginners because they do not require complicated tools or advanced sculpting skills. Whether you are looking for a relaxing weekend project, something decorative for your home, or a handmade gift idea, there is something here you can try.
From cute little dishes and magnets to decorative ornaments and miniature creations, these projects show just how versatile clay Ideas can be. So gather your supplies and let’s get crafting. Learn how to make Easy Costumes jewelry crafts at the comfort of your own home with materials that you already have at home.
Why Are Clay Ideas So Popular?
Clay crafts have become increasingly popular because they are simple, creative, and surprisingly versatile. You can turn a small amount of clay into everything from cute home decorations and jewelry to personalized gifts and useful everyday items.
Another reason people love clay ideas is that they are beginner friendly. You do not need to be a professional artist or own expensive equipment to get started. With basic clay and a few simple tools, you can experiment with different shapes, textures, colors, and designs.
Clay Ideas crafting is also a great way to slow down and enjoy a hands on creative activity. Rolling, shaping, pressing, and decorating clay can be relaxing, while the finished pieces give you something personal and handmade to display or use. Go through my guide to learn how make DIY bag charms at home for beginners
Most importantly, clay allows you to make something that feels completely your own. Even when following the same DIY tutorial, you can change the colors, patterns, shapes, and details to create a unique result. That combination of creativity, simplicity, and personalization is what makes clay ideas so appealing to both beginners and experienced crafters.
What You Need for These Simple Clay Ideas
Before starting, gather the basic supplies you may need. You do not necessarily need everything on this list because the materials will depend on the project you choose.
- Air dry clay or polymer clay
- Rolling pin or smooth glass bottle
- Craft knife
- Toothpick or wooden skewer
- Acrylic paint
- Paintbrushes
- Parchment paper
- Small bowl or cup
- Clay sculpting tools
- Fine sandpaper
- Clear varnish or clay sealer
- Super glue or strong craft glue
- Ribbon or twine
- Small beads or decorative pieces
If you are a beginner, air dry clay is a great option for many of these projects because it does not require an oven. Always follow the manufacturer’s instructions for whichever clay you choose. I Have a free Printable on How To make DIY Journal at home.
1. DIY Clay Trinket Dish
Create a beautiful DIY clay trinket dish that gives you a simple and stylish place to keep your rings, earrings, keys, or other small items. This beginner friendly project is easy to customize with different colors, textures, and patterns. It also makes a thoughtful handmade gift for a friend, family member, or loved one.
You can place your finished clay dish on a bedside table, vanity, dresser, or desk. Add your initials, a simple floral design, or a natural texture to make it uniquely yours.
Materials
- Air dry clay
- Rolling pin
- Small bowl
- Craft knife
- Acrylic paint
- Paintbrush
- Clay sealer, optional
- Parchment paper

How to Make It
Step 1: Prepare the clay
Take a piece of air dry clay and knead it gently with your hands until it becomes soft and easy to work with.
Step 2: Roll out the clay
Place the clay on parchment paper and roll it out evenly until it is about ¼ inch thick.
Step 3: Cut the shape
Place a small bowl upside down on the clay and carefully cut around it to create a neat circular shape.
Step 4: Shape the dish
Place the clay circle inside the bowl and gently press it down so the clay takes the shape of the bowl.
Step 5: Smooth the edges
Use your fingers to gently smooth the edges and remove any cracks or rough areas.
Step 6: Let it dry
Remove the clay from the bowl and place it on a flat surface. Allow it to dry completely according to the instructions on your clay package.
Step 7: Paint your dish
Once completely dry, use acrylic paint to add your favorite colors and designs.
Step 8: Finish the piece
Allow the paint to dry completely and apply a suitable clay sealer if desired.
Your handmade trinket dish is now ready to use. Keep your favorite jewelry inside or give it to someone as a simple handmade gift.
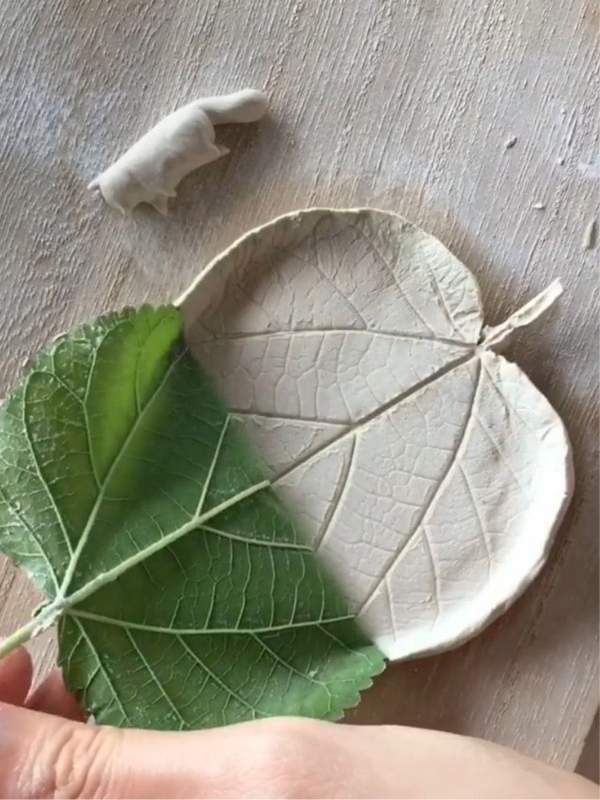
2. DIY Clay Leaf Dish
Create a beautiful DIY clay leaf dish inspired by nature. This project allows you to capture the natural shape and texture of a real leaf and turn it into a decorative piece for your home.
You can use different types of leaves to create different shapes and textures. Display your finished dish on a coffee table, shelf, dresser, or entryway table, or use it to hold small jewelry and other little items.
Materials
- Air dry clay
- Fresh leaf with visible veins
- Rolling pin
- Craft knife
- Acrylic paint
- Paintbrush
- Clay sealer, optional
- Parchment paper
How to Make It
Step 1: Choose your leaf
Choose a clean leaf with visible veins and an interesting shape.
Step 2: Roll out the clay
Place your clay on parchment paper and roll it evenly until it is about ¼ inch thick.
Step 3: Press the leaf into the clay
Place the leaf on top of the clay with the veined side facing down. Gently roll over it to transfer the natural texture.
Step 4: Remove the leaf
Carefully lift the leaf away from the clay without damaging the texture.
Step 5: Cut the shape
Use a craft knife to carefully cut around the outline of the leaf.
Step 6: Shape the dish
Place the clay leaf inside a small bowl and gently press it down to create a shallow dish.
Step 7: Let it dry and paint
Allow the clay to dry completely, then paint it with autumn colors, natural greens, or any colors you love.
Step 8: Seal the finished dish
Once the paint is completely dry, apply a suitable clay sealer if desired.
Your clay leaf dish is now ready to display. Make several using different leaves for a beautiful collection of nature inspired crafts.
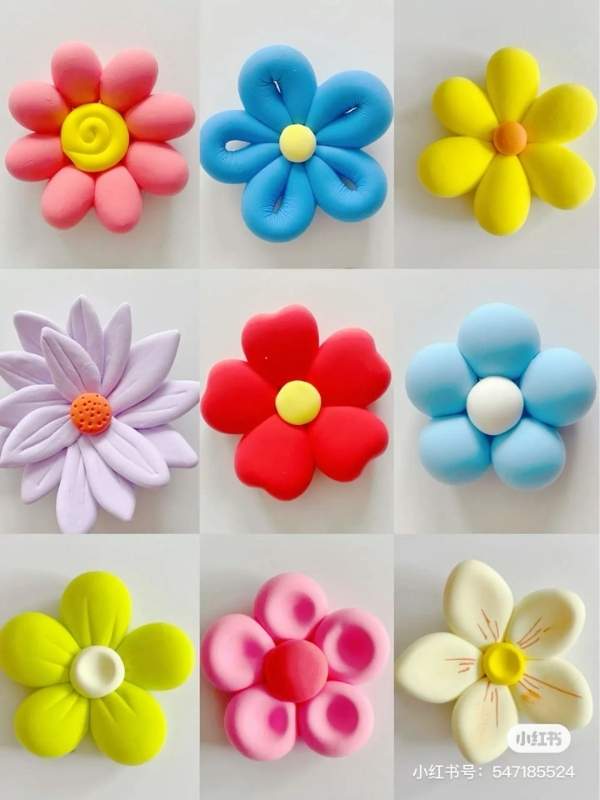
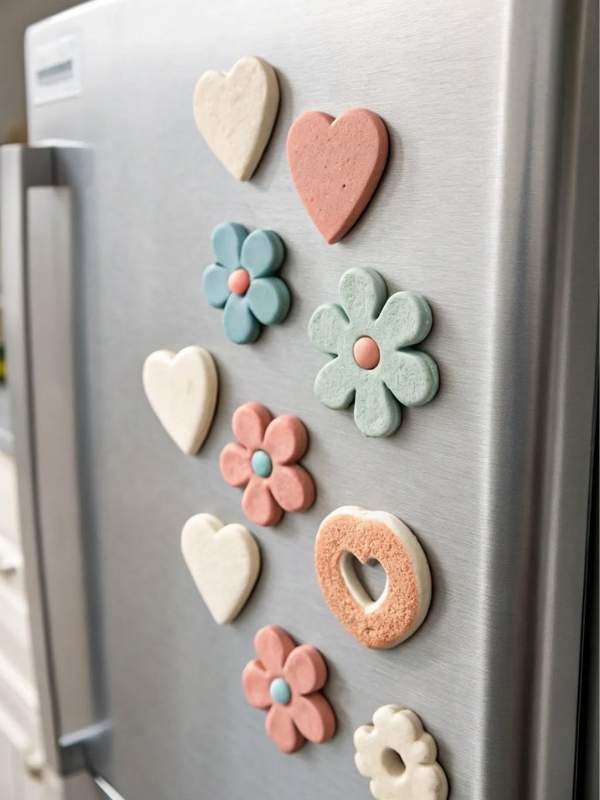
3. DIY Clay Flower Magnets
Create colorful DIY clay flower magnets that can add a cheerful handmade touch to your refrigerator or magnetic board. These little flowers are simple to make and can be customized with different colors and designs.
They are also a lovely handmade gift idea. Make several flowers in different colors and arrange them into a small set for a friend, teacher, or family member.
Materials
- Air dry clay
- Small flower cookie cutter
- Rolling pin
- Toothpick
- Acrylic paint
- Paintbrush
- Small magnets
- Strong craft glue
How to Make It
Step 1: Prepare the clay
Knead a small piece of clay until it becomes soft and workable.
Step 2: Roll out the clay
Roll the clay flat until it is evenly thick.
Step 3: Cut out the flowers
Use a small flower shaped cutter to cut several flowers from the clay.
Step 4: Add details
Use a toothpick to create lines on the petals or add a small clay circle to the center of each flower.
Step 5: Let the clay dry
Place the flowers on a flat surface and allow them to dry completely according to the manufacturer’s instructions.
Step 6: Paint the flowers
Use acrylic paint to give each flower a bright and cheerful color.
Step 7: Attach the magnets
Once the paint is completely dry, glue a small magnet to the back of each flower.
Step 8: Let the glue set
Allow the glue to cure completely before placing the magnets on a magnetic surface.
Your flower magnets are ready to use. Make different flowers and colors to create a cheerful little garden on your refrigerator.
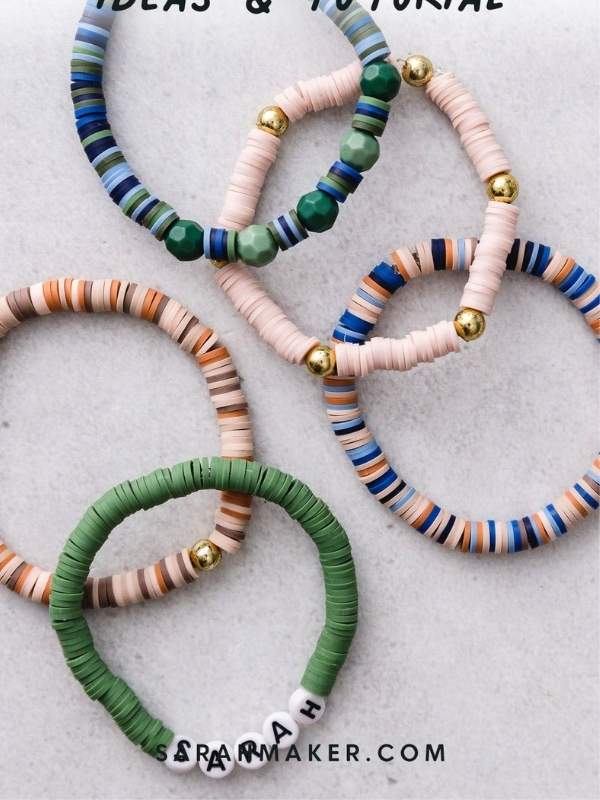
4. DIY Clay Bead Bracelet
Create a colorful DIY clay bead bracelet that you can customize to match your personal style. Making your own beads allows you to experiment with different colors, shapes, patterns, and sizes.
This is also a fun project for making personalized handmade gifts. Create a bracelet using someone’s favorite colors or add letter beads to spell a name or meaningful word.
Materials
- Polymer clay
- Toothpick or wooden skewer
- Craft knife
- Elastic bracelet cord
- Acrylic paint, optional
How to Make It
Step 1: Choose your colors
Select two or more polymer clay colors that you want to use for your bracelet.
Step 2: Shape the beads
Roll small pieces of clay between your palms to create round beads. You can also make hearts, ovals, cubes, or other shapes.
Step 3: Make the holes
Use a toothpick or wooden skewer to carefully create a hole through the center of each bead.
Step 4: Add patterns
Combine different colors or add simple patterns to make your beads more interesting.
Step 5: Bake the beads
Place the beads on a suitable baking surface and bake the polymer clay according to the manufacturer’s instructions.
Step 6: Let them cool
Allow the beads to cool completely before handling them.
Step 7: Thread the bracelet
Arrange your beads in your preferred order and thread them onto elastic bracelet cord.
Step 8: Secure the bracelet
Tie the ends of the elastic cord securely and trim away the excess.
Your handmade clay bracelet is ready to wear or give as a personalized gift.
5. DIY Clay Mushroom Decorations
Create adorable DIY clay mushroom decorations that can bring a whimsical touch to your shelves, tables, or miniature garden displays. These tiny mushrooms are easy to shape and can be made in different sizes and colors.
You can make a whole collection of mushrooms and arrange them together to create a charming little woodland inspired display.
Materials
- Air dry clay
- Acrylic paint
- Paintbrushes
- Toothpick or clay tool
- Clay sealer, optional

How to Make It
Step 1: Prepare the clay
Knead a small amount of clay until it becomes soft and easy to shape.
Step 2: Make the stem
Roll a small piece of clay into a short cylinder. Make one end slightly wider to create the base.
Step 3: Shape the mushroom cap
Take another piece of clay and shape it into a small rounded cap.
Step 4: Join the pieces
Place the mushroom cap on top of the stem and gently press the two pieces together.
Step 5: Add details
Use a toothpick or clay tool to add lines underneath the cap or small dots on top.
Step 6: Let it dry
Allow your mushroom to dry completely according to the clay manufacturer’s instructions.
Step 7: Paint the mushroom
Paint the stem and cap in your favorite colors. Try red and white for a classic mushroom look or use earthy colors for a natural appearance.
Step 8: Seal your decoration
Once the paint has dried completely, apply a suitable sealer if desired.
Your little clay mushroom is ready to display. Make several in different sizes to create your own miniature woodland scene.
6. DIY Clay Ring Cone
Create a simple DIY clay ring cone that gives your favorite rings a stylish place to rest. This small project is both decorative and useful, making it perfect for a vanity, bedside table, or dresser.
You can keep the design simple or decorate the cone with flowers, dots, stripes, initials, or other patterns to match your jewelry and home decor.
Materials
- Air dry clay
- Acrylic paint
- Paintbrush
- Toothpick or clay sculpting tool
- Fine sandpaper, optional
- Clay sealer, optional

How to Make It
Step 1: Prepare the clay
Take a small piece of air dry clay and knead it gently until it becomes soft and workable.
Step 2: Shape the cone
Roll the clay into a smooth ball, then gradually shape it into a cone with a wider bottom and narrower top.
Step 3: Flatten the base
Gently press the bottom against your work surface so that the cone can stand upright.
Step 4: Smooth the surface
Use your fingers to smooth away cracks and rough areas.
Step 5: Add decorative details
Use a toothpick or clay tool to add dots, flowers, lines, initials, or another simple pattern.
Step 6: Let it dry
Place the ring cone on a safe, flat surface and allow it to dry completely.
Step 7: Paint the cone
Once dry, paint it with acrylic paint in a color that complements your room or jewelry collection.
Step 8: Finish the piece
Allow the paint to dry completely and apply a suitable clay sealer if desired.
Your clay ring cone is ready to use. Simply slide your rings over the top and keep your favorite pieces organized in one beautiful handmade spot.
7. DIY Clay Heart Ornament
Create a sweet DIY clay heart ornament that adds a personal and handmade touch to your home. This simple project is more than just a decoration because you can personalize it with a name, initial, special date, or meaningful message. It also makes a lovely handmade gift for someone you care about.
You can hang your clay heart on a Christmas tree, bedroom wall, decorative branch, door handle, or even attach it to a gift as a handmade tag.
Materials
- Air dry clay
- Rolling pin
- Heart shaped cookie cutter
- Toothpick or wooden skewer
- Acrylic paint
- Paintbrush
- Ribbon or twine
- Clay sealer, optional
- Craft knife, optional

How to Make It
Step 1: Prepare the clay
Take a piece of air dry clay and knead it gently with your hands until it becomes soft and easy to work with.
Step 2: Roll out the clay
Place the clay on parchment paper and roll it out evenly until it is about ¼ inch thick. Try to keep the thickness consistent so the ornament dries evenly.
Step 3: Cut out the heart
Place your heart shaped cutter on the clay and press down firmly. Carefully remove the excess clay around the heart.
Step 4: Add a personal design
Use a toothpick or clay tool to create small dots, lines, flowers, initials, or a short word on the surface. You can also press a small leaf or textured material into the soft clay to create a natural pattern.
Step 5: Make a hanging hole
Use a toothpick or wooden skewer to carefully make a small hole near the top of the heart. Make sure the hole is large enough for your ribbon or twine.
Step 6: Let it dry
Place the heart on a flat surface and allow it to dry completely according to the instructions on your clay package.
Step 7: Paint your ornament
Once completely dry, use acrylic paint to decorate your heart. Try soft neutral shades for a minimalist look or brighter colors for a playful design.
Step 8: Add the ribbon
After the paint has dried, thread a piece of ribbon or twine through the hole and tie it securely.
Your handmade heart ornament is now ready to display. Make several in different sizes and colors, or personalize each one with the names or initials of family members to create a meaningful collection.
8. DIY Clay Candle Holder
Give your home a warm and handmade touch with a DIY clay candle holder. This simple project can become a beautiful decorative piece for your bedroom, living room, dining table, or entryway.
You can keep the design minimal or personalize it with flowers, leaves, dots, textures, or other patterns. It can also make a thoughtful handmade gift for someone who enjoys cozy home decor.
Materials
- Air dry clay
- Rolling pin
- Small candle or suitable candle insert
- Craft knife
- Toothpick or clay tool
- Acrylic paint
- Paintbrush
- Clay sealer, optional

How to Make It
Step 1: Prepare the clay
Knead a piece of clay with your hands until it becomes soft and easy to shape.
Step 2: Create the base
Roll the clay into a thick, even circle that is sturdy enough to support the candle.
Step 3: Shape the holder
Gently press the edges upward to create a shallow holder and smooth the surface with your fingers.
Step 4: Create the candle opening
Carefully create an opening in the center that is appropriately sized for your chosen candle or insert.
Step 5: Add your design
Use a toothpick or clay tool to add small patterns, textures, or shapes to the surface.
Step 6: Let it dry
Allow the clay to dry completely according to the manufacturer’s instructions.
Step 7: Paint the holder
Once completely dry, paint it in a color that complements your home decor.
Step 8: Finish your project
Allow the paint to dry completely and apply a suitable sealer if appropriate for your clay.
For the safest option, use an LED tealight with a handmade air dry clay holder. If using a real candle, only do so if the clay product and holder are specifically suitable for heat and open flame, and never leave a burning candle unattended.
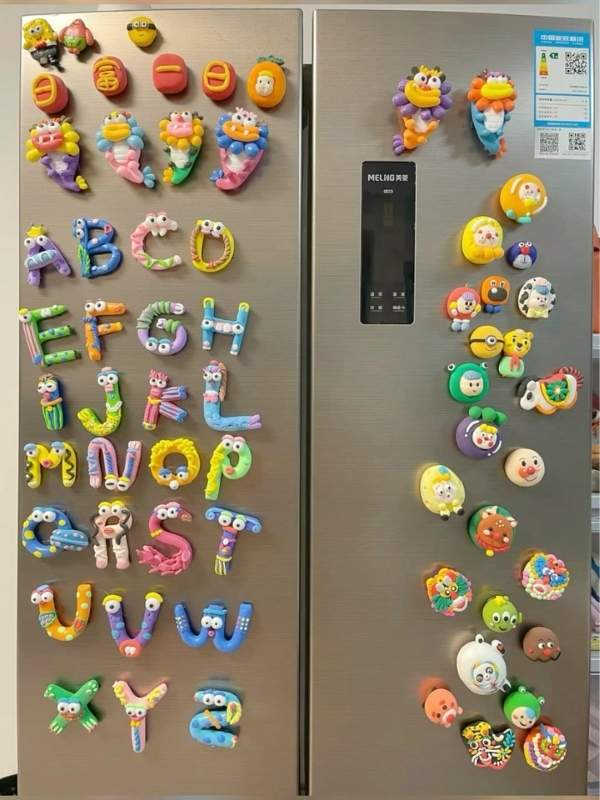
9. DIY Clay Fridge Magnets
Create personalized DIY clay fridge magnets using simple shapes, letters, or miniature objects. This is a great project when you want something quick and customizable.
You can make hearts, flowers, stars, fruits, animals, initials, or seasonal designs. They are also useful for holding notes, shopping lists, photographs, and children’s artwork on your refrigerator.
Materials
- Air dry clay or polymer clay
- Rolling pin
- Small cookie cutters, optional
- Toothpick or clay sculpting tool
- Acrylic paint
- Paintbrush
- Small craft magnets
- Strong craft glue
- Clay sealer, optional
- Craft knife, optional
How to Make It
Step 1: Prepare the clay
Take a small piece of clay and knead it gently with your hands until it becomes soft and easy to shape.
Step 2: Choose your designs
Decide what you want your magnets to look like. You can make hearts, stars, flowers, circles, clouds, leaves, letters, or miniature objects.
Step 3: Shape the clay
Roll the clay flat on parchment paper and use a cookie cutter to create your chosen shapes. You can also shape them by hand.
Step 4: Add details
Use a toothpick or clay tool to create small details such as dots, lines, facial features, or simple patterns.
Step 5: Let the clay dry or bake it
Allow air dry clay to dry completely according to the manufacturer’s instructions. If using polymer clay, bake it according to the package directions.
Step 6: Paint your designs
Once the clay has hardened, use acrylic paint to add your favorite colors and decorative details.
Step 7: Attach the magnets
After the paint has dried completely, apply strong craft glue to the back of each piece and attach a small magnet.
Step 8: Let everything set
Allow the glue to cure completely before placing your finished magnets on the refrigerator.
Your handmade clay magnets are now ready to use. Make a whole collection with different shapes, colors, and themes to give your refrigerator a fun personalized look.
How to Make These Clay Ideas Your Own
One of the best things about working with clay is how easy it is to personalize your projects. You do not have to copy a tutorial exactly. Use the basic idea as a starting point, then change the colors, shapes, patterns, and details to create something that matches your personality.
Try combining different colors of clay to create marbled designs, or add simple patterns such as dots, stripes, flowers, or tiny hearts. You can also press leaves, lace, stamps, or textured materials into soft clay to create interesting surfaces.
For gifts, consider adding initials, names, meaningful dates, or favorite colors. A simple clay ornament or trinket dish can become much more special when it has a personal touch.
You can also experiment with different sizes. Make miniature versions of your favorite designs for cute decorations, or create larger pieces when you want something that stands out.
Most importantly, do not be afraid to experiment. Some of the most interesting clay ideas can come from simply playing with the material and seeing what you can create.
How to Display Your Handmade Clay Ideas Crafts
Once you have finished making your clay projects, displaying them is a great way to enjoy your creativity instead of keeping your handmade pieces tucked away. Even simple clay crafts can become beautiful decorations when they are arranged thoughtfully.
Place clay trinket dishes, ring cones, and small sculptures on a bedside table, dresser, vanity, or bookshelf. Grouping several pieces together can create a small handmade display without making the space feel cluttered.
For clay ornaments and hanging decorations, attach ribbon or twine and hang them on a wall hook, decorative branch, pegboard, or seasonal display. You can change the pieces throughout the year to match different seasons and celebrations.
Clay magnets are perfect for refrigerators, magnetic boards, or metal memo boards. Arrange several designs together to create a colorful little collection.
If you make clay jewelry, such as bracelets or clay bead necklaces, display them on a jewelry stand, small tray, or decorative hook. This keeps your handmade pieces visible while making them easy to access.
You can also use a shadow box or glass display case for especially delicate or meaningful clay creations. This is a lovely option for miniature sculptures, keepsakes, and decorative pieces you want to protect from dust.
The key is to display your clay crafts somewhere you can actually see and appreciate them. After all, one of the best parts of DIY crafting is being able to look around your home and see things you made with your own hands.
Frequently Asked Questions About Clay Ideas
What is the easiest clay project for beginners?
A small clay trinket dish, magnet, or simple ornament is a great project for beginners. These crafts require basic shaping and do not involve complicated sculpting techniques.
What type of clay is best for beginners?
Air dry clay is a convenient choice for beginners because it hardens naturally without an oven. Polymer clay is another option, especially for detailed projects, but it needs to be baked according to the manufacturer’s instructions.
Can I make clay crafts at home without special tools?
Yes. You can start with simple household items such as a rolling pin, toothpick, smooth glass bottle, or butter knife. As you become more comfortable with clay, you can invest in proper sculpting tools.
Can I paint air dry clay?
Yes. Allow the clay to dry completely before painting it. Acrylic paint is commonly used for decorating air dry clay because it provides good coverage and is available in many colors.
How long does air dry clay take to dry?
Drying time depends on the thickness of the project, the type of clay, temperature, and humidity. Many projects take around 24 to 72 hours to dry completely, but always follow the drying instructions provided with your clay.
Are these clay ideas suitable for kids?
Some simple clay projects can be suitable for children with adult supervision. Choose age appropriate materials and avoid small pieces that could present a choking hazard for young children.
How can I make my clay crafts look more professional?
Take your time when shaping and smoothing the clay, keep the thickness even, allow the project to dry completely, and apply paint carefully. Adding a suitable sealer can also give some finished projects a cleaner appearance and added protection.
Final Thoughts On Clay Ideas
These 9 simple clay ideas prove that you do not need complicated techniques or expensive supplies to make beautiful handmade crafts. With some clay, a few basic tools, and a little imagination, you can create useful decorations, jewelry, ornaments, and cute little pieces for your home.
The Good part is that each project can be customized to match your personal style. Change the colors, experiment with shapes, add different textures, or combine several ideas to create something completely your own.
If you are completely new to clay crafting or simply looking for an easy DIY project to enjoy this weekend, these clay ideas are a great place to start. Pick your favorite one, gather your supplies, and see what you can create with your own hands.