DIY Glass Jar Lanterns for Your Garden: An Easy Step by Step Guide.
We have all done it. You stand in front of the recycling bin, holding an empty pasta sauce jar or a beautiful glass pickle jar, feeling a tiny pang of guilt for throwing it away. It has great shape, heavy glass, and a ton of potential but you just don’t know what to do with it. Meanwhile, you scroll through outdoor design feeds and find yourself drooling over those magical, ambient backyard setups that look like a scene from an upscale garden party.

The bad news? Buying high end outdoor lighting can cost a small fortune, and solar lights from the store often look cheap and uninspiring. The good news? You are sitting on a goldmine of raw materials right in your kitchen pantry. Transforming ordinary glass jars into stunning, weather resistant garden lanterns is one of the easiest, most rewarding weekend projects you can tackle.
It gives a second life to everyday waste and injects an instant, cozy glow into your patio, porch, or garden paths. This step by step guide breaks down the exact budget-friendly materials, wiring secrets, and creative styling ideas you need to illuminate your outdoor space safely and beautifully. Check out this 7 easy crafts and arts for kids to do when they’re bored at home
Materials You Will Need
One of the best things about this DIY project is that you don’t need many supplies to create beautiful garden lanterns. You may already have most of these items at home, making it an affordable weekend craft.
Here’s what you’ll need:
- Clean glass jars (mason jars, jam jars, or any clear glass jars)
- LED tea lights or battery-operated candles (recommended for safety outdoors)
- Jute twine or natural rope
- Scissors
- Hot glue gun and glue sticks (optional)
- Decorative pebbles, sand, or small stones
- Dried flowers, pressed leaves, or faux greenery (optional)
- Acrylic paint or glass paint (optional)
- Paintbrushes or sponge brushes (if painting)
- Wire or sturdy craft wire (optional, for hanging lanterns)
- Small pliers (if using wire handles)
- Ribbon, lace, or burlap (optional for extra decoration)
Before You Start
Wash and dry each glass jar thoroughly to remove labels, glue residue, and fingerprints. A clean surface helps paint, glue, and decorative materials stick better while giving your finished lantern a polished look.
If you’re planning to use your lanterns outdoors, choose weather-resistant decorations and battery-operated LED candles. They provide a beautiful glow without the open flame, making them a safer option for gardens, patios, balconies, and walkways.
Step 1: Choose and Prepare Your Glass Jars
The first step is choosing the right glass jars. Almost any clear glass jar can be transformed into a beautiful garden lantern, so there’s no need to buy expensive supplies. Mason jars are a popular choice because they’re sturdy and timeless, but jam jars, pickle jars, pasta sauce jars, and other recycled glass containers work just as well. Using jars you already have is also a great way to reduce waste while creating something beautiful for your outdoor space.
Before decorating, wash each jar thoroughly with warm, soapy water to remove dust, food residue, and labels. If sticky glue remains after peeling off the label, rub it with a little cooking oil or adhesive remover, then wash the jar again until the glass feels completely smooth. A clean surface helps paint, glue, and other decorative materials stick properly while giving your finished lantern a polished appearance.

Once the jars are dry, inspect them carefully. Avoid using any jars with cracks, chips, or damaged rims, especially if you plan to hang them. Strong, undamaged glass will last much longer outdoors and is less likely to break during use.
Now is also the perfect time to decide on the style of your lanterns. You might prefer a simple, natural look with clear glass and twine, or you may want to paint the jars, add pressed flowers, wrap them with lace, or decorate them with seasonal accents. Choosing a theme before you begin helps every lantern look coordinated, especially if you’re making several for a garden path, patio, or outdoor dining area.
With your jars cleaned, prepared, and ready to decorate, you can move on to the creative part of the project.
Step 2: Decorate the Glass Jars
Now comes the fun part decorating your glass jars. This is where you can get creative and give each lantern its own unique look. You can keep the design simple and elegant or add decorative details that match your garden, patio, or the season.
If you love a clean, natural style, wrap jute twine around the neck of the jar several times and tie it into a neat bow. This simple touch adds texture and gives the lantern a rustic look that blends beautifully with outdoor spaces.
For a more decorative finish, consider adding one or two of these ideas:
- Paint the outside of the jar with glass paint or acrylic paint.
- Wrap lace, burlap, or ribbon around the middle of the jar.
- Glue on pressed flowers or leaves for a nature-inspired design.
- Add small wooden beads or charms to the twine.
- Use stencils to paint simple patterns or botanical designs.
- Create a frosted effect with frosted glass spray or matte glass paint.
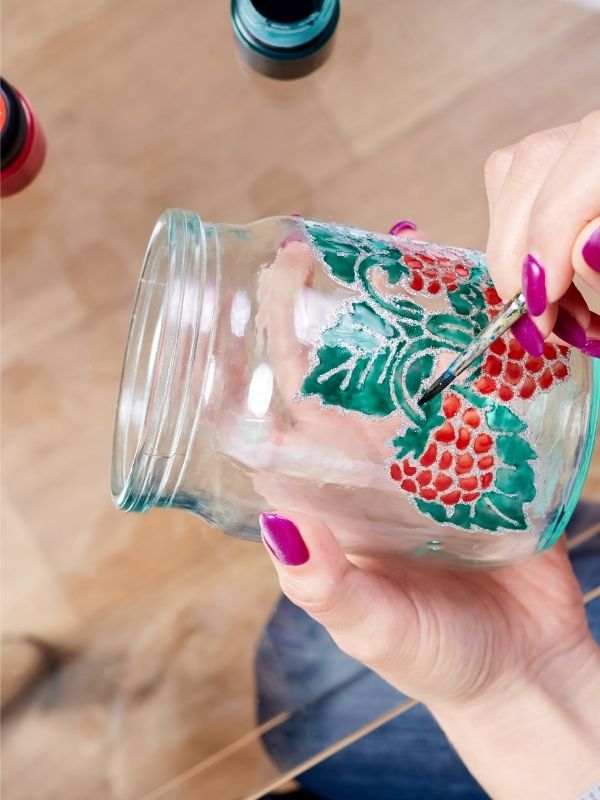
If you’re painting the jars, apply thin, even coats instead of one thick layer. Allow each coat to dry completely before adding another to achieve a smooth, professional-looking finish. Depending on the type of paint you use, you may need two or three coats for full coverage.
You can also mix different textures for a more interesting design. For example, pair painted glass with natural twine, or combine lace with small wooden beads. Using a few complementary materials creates a beautiful handcrafted look without making the lantern feel too busy.
If you’re making several lanterns, keep them connected by repeating the same color palette or decorative materials. They don’t have to be identical, but using similar colors and finishes will create a cohesive display once they’re placed around your garden.
After decorating, let everything dry completely before moving to the next step. This helps prevent smudges and ensures every detail stays securely in place. Once your jars are finished, you’re ready to turn them into functional lanterns.
Step 3: Add a Handle (Optional)
If you’d like to hang your lanterns from tree branches, shepherd’s hooks, pergolas, or fence posts, adding a wire handle is a simple way to make them both decorative and functional. You can also skip this step if you plan to place the lanterns on a table, garden steps, or along a walkway.
Start by cutting a piece of sturdy craft wire that’s long enough to wrap around the neck of the jar with extra length for the handle. Place the wire just below the rim where the jar naturally narrows, then twist the ends together until it fits snugly. The wire should be secure without pressing too tightly against the glass.
Next, use the remaining wire to form a handle by bending it into a smooth arch above the jar. Secure each end by twisting it tightly around the wire ring. If needed, use small pliers to tighten the twists and shape the handle neatly.
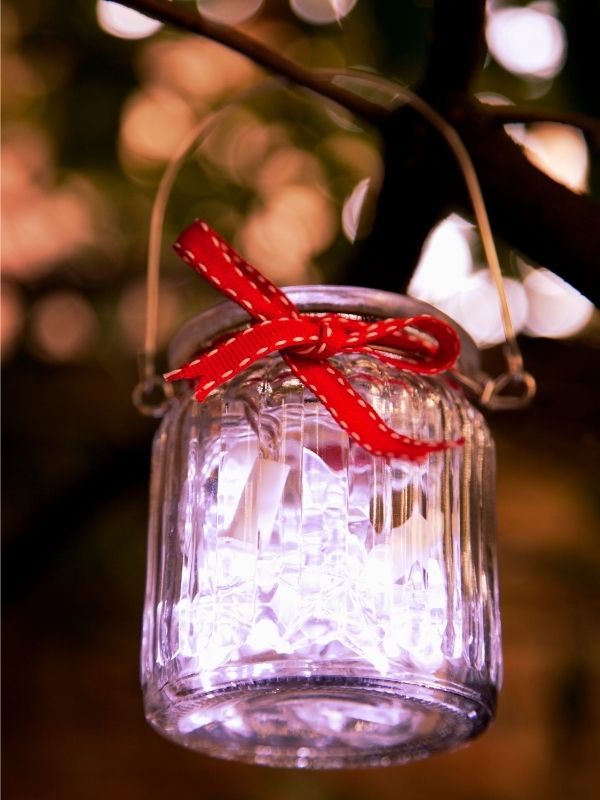
Once the handle is attached, gently lift the empty jar to make sure it feels balanced. If one side sits lower than the other, adjust the wire until the lantern hangs evenly. Taking a few extra minutes to check the balance will help prevent the lantern from tilting once a candle is inside.
For a more decorative finish, wrap a little jute twine around parts of the wire handle or tie a small bow where the handle meets the jar. Wooden beads, faux greenery, or a sprig of dried lavender can also add a charming finishing touch without making the lantern feel overcrowded.
If you’re creating several hanging lanterns, try hanging them at different heights. This simple arrangement adds visual interest and creates a beautiful layered effect when the lanterns are lit in the evening.
With the handle in place, your lantern is almost complete. The next step is adding the candle and decorative fillers that will give it a warm, inviting glow.
Step 4: Add the Candle and Decorative Fillers
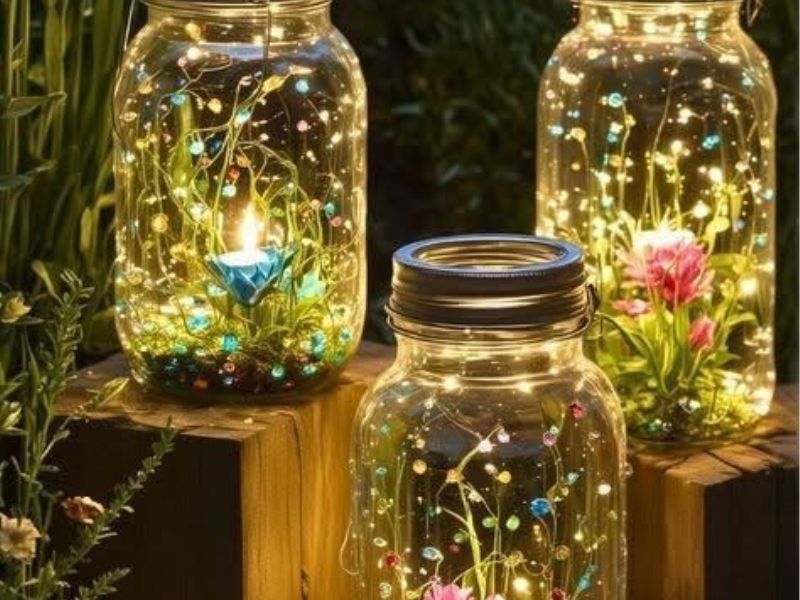
Now it’s time to turn your decorated jar into a glowing lantern. The combination of a soft light and natural fillers gives your lantern a finished look while helping the candle sit securely inside the jar.
Start by adding a thin layer of decorative filler to the bottom of the jar. Depending on the style you’re going for, you can use:
- Small pebbles
- White stones
- Decorative gravel
- Sand
- Glass gems
- Pinecones
- Dried moss
- Seashells (for a coastal-inspired look)
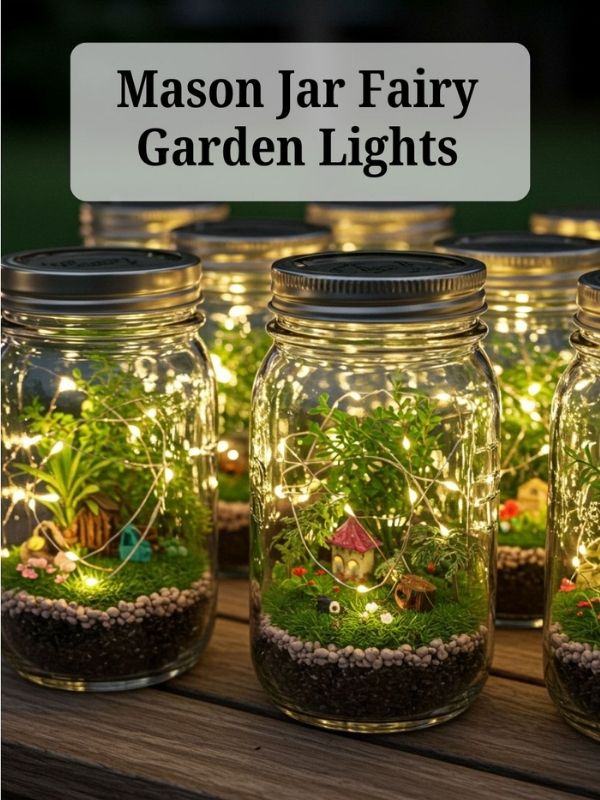
Spread the filler evenly across the bottom so the candle has a stable surface to rest on. If you’re using larger stones, arrange them so the candle sits flat and won’t wobble.
Next, place an LED tea light in the center of the jar. Battery-operated candles are the safest option for outdoor lanterns because they aren’t affected by wind and don’t produce an open flame. Many LED tea lights even have a realistic flickering effect that creates the warm glow of a real candle.
If your lantern will be displayed in a sheltered area and you choose to use a real tea light, never leave it unattended. Keep it away from dry leaves, plants, fabric, or anything else that could catch fire, and place the lantern on a stable, heat-resistant surface.
Before moving on, switch on the candle to see how the light shines through the glass. This is a great time to make small adjustments if needed. You might decide to add a few more pebbles, reposition the candle, or remove any decorations that block too much of the light.
The goal is to let the warm glow remain the focal point. A few carefully chosen decorative elements will enhance the lantern’s beauty without taking attention away from the light itself.
Once you’re happy with the look, your lantern is ready to brighten your outdoor space. The final step is choosing the best spots in your garden to display your handmade creations for maximum impact. Check out this Terracotta pot painting ideas
Step 5: Display Your Glass Jar Lanterns Around the Garden
Your DIY glass jar lanterns are complete, and now it’s time to bring your garden to life. Where you place them can make just as much of a difference as how you decorate them. A few thoughtfully placed lanterns can create a warm, inviting atmosphere that’s perfect for relaxing evenings or entertaining guests.
Line a garden pathway with lanterns to create a softly lit walkway. Spacing them a few feet apart helps guide the eye while adding a welcoming glow after sunset.

If you have a patio or deck, group two or three lanterns of different heights on a side table or outdoor dining table. Mixing large and small jars creates a layered display that feels balanced and visually interesting.
Hanging lanterns also make a beautiful addition to outdoor spaces. Suspend them from tree branches, pergolas, shepherd’s hooks, or fence posts using the wire handles you created earlier. Hanging them at different heights adds depth and creates a magical effect when the lights begin to glow in the evening.
You can also use your lanterns to highlight specific areas of your garden, such as:
- Flower beds
- Garden steps
- Around a fountain or birdbath
- Near a bench or seating area
- Along a porch or entryway
- Around an outdoor fire pit
- Beside potted plants or planters
If you’re decorating for a special occasion, place several lanterns together as a centerpiece for an outdoor dinner, garden party, or backyard celebration. Pair them with fresh flowers, greenery, or a simple table runner to create a beautiful setting.
To keep your lanterns looking their best, wipe the glass regularly to remove dust, dirt, and water spots. If they’re stored outdoors, bring them inside during heavy rain or extreme weather to help preserve the decorations and extend their lifespan.
With just a few glass jars and a little creativity, you’ve created handmade lanterns that add warmth, charm, and personality to your outdoor space. They’re simple to make, easy to customize, and beautiful enough to enjoy throughout the seasons.
Common Mistakes to Avoid
DIY glass jar lanterns are simple to make, but paying attention to a few small details can make a big difference in how they look and how long they last. Avoiding these common mistakes will help you create lanterns that are both beautiful and durable.
Using Dirty or Wet Jars
Always clean and dry your glass jars before decorating. Dust, grease, or leftover label adhesive can prevent paint and glue from sticking properly, resulting in a less polished finish.
Overdecorating the Lantern
It can be tempting to add lots of ribbons, beads, flowers, and other embellishments, but too many decorations can hide the beauty of the glass and reduce the amount of light that shines through. Choose a few complementary elements and keep the design balanced.
Choosing the Wrong Adhesive
Not all glues work well on glass, especially for outdoor projects. If you’re attaching decorations, use a strong adhesive or hot glue designed for crafts to help everything stay in place.
Skipping Drying Time
If you’re painting the jars or gluing decorations, allow each layer to dry completely before moving to the next step. Rushing the process can lead to smudges, peeling paint, or decorations coming loose.
Using Unsafe Candles
Battery-operated LED tea lights are the safest choice, especially if your lanterns will be placed near plants, wooden furniture, or hanging decorations. If you decide to use real candles, never leave them unattended and always keep them away from flammable materials.
Ignoring Outdoor Weather
Rain, strong winds, and direct sunlight can affect some decorative materials over time. If your lanterns aren’t made with weather-resistant supplies, bring them indoors during severe weather to help them last longer.
Forgetting to Test the Display
Before arranging all of your lanterns around the garden, place one outside after dark to see how it looks. You may want to adjust the spacing, move it to a brighter location, or add more lanterns to create the warm, inviting glow you’re looking for.
Avoiding these simple mistakes will help your handmade lanterns look more polished and allow you to enjoy them season after season.
Garden Styling Ideas for Your DIY Glass Jar Lanterns
Once your lanterns are finished, you can use them in many different ways to enhance your outdoor space. A thoughtful arrangement can make your garden feel more inviting, whether you’re relaxing outside with a book or hosting friends and family.
Create a Glowing Garden Path
Place lanterns along both sides of a garden path or walkway to create a welcoming entrance. Space them evenly so the light flows naturally from one lantern to the next. This simple arrangement works beautifully for evening gatherings and outdoor celebrations.
Style an Outdoor Dining Table
Use two or three lanterns as the centerpiece for your patio or garden table. Pair them with fresh flowers, woven placemats, and neutral tableware for a simple yet elegant setting that feels warm and inviting.
Brighten a Cozy Seating Area
Place lanterns around a bench, porch swing, or outdoor lounge chairs to create a relaxing corner where you can unwind after sunset. Mixing different jar sizes adds dimension without making the area feel cluttered.
Hang Lanterns for Added Height
If your lanterns have wire handles, hang them from tree branches, pergolas, garden hooks, or fence posts. Hanging lanterns at different heights creates a layered display and draws the eye through the garden.
Highlight Your Favorite Plants
Use lanterns to draw attention to flower beds, potted plants, or decorative shrubs. The gentle glow adds depth to your garden and makes these areas stand out in the evening.
Decorate for Special Occasions
DIY glass jar lanterns are perfect for outdoor events such as birthdays, garden parties, weddings, barbecues, or family dinners. You can customize the colors and decorations to match the theme of the occasion and reuse them for future celebrations.
Mix with Other Outdoor Decor
Your lanterns pair beautifully with other natural garden elements, including wooden planters, wicker furniture, stone pathways, and lush greenery. Keeping the materials and colors consistent helps create a cohesive outdoor space that feels both stylish and welcoming.
With a little creativity, these handmade lanterns can become one of the most charming features in your garden, adding warmth and character throughout the year.
DIY Tips for Beautiful Glass Jar Lanterns
Keep these simple tips in mind to make your lanterns look even more polished and last longer:
- Use glass jars of different sizes to create a more interesting display.
- Choose warm white LED tea lights for a soft, natural glow.
- Stick to two or three decorative materials for a clean, balanced design.
- Wrap twine tightly around the jar and secure the ends with a small drop of hot glue.
- Test your lanterns at night before deciding on their final placement.
- Repeat the same colors and materials if you’re making multiple lanterns for a cohesive look.
- Use weather-resistant decorations if your lanterns will stay outdoors.
- Store your lanterns indoors during heavy rain or harsh weather to help protect them.
- Refresh the decorations with the seasons instead of making new lanterns each time.
- Recycle glass jars from your kitchen to save money and reduce waste.