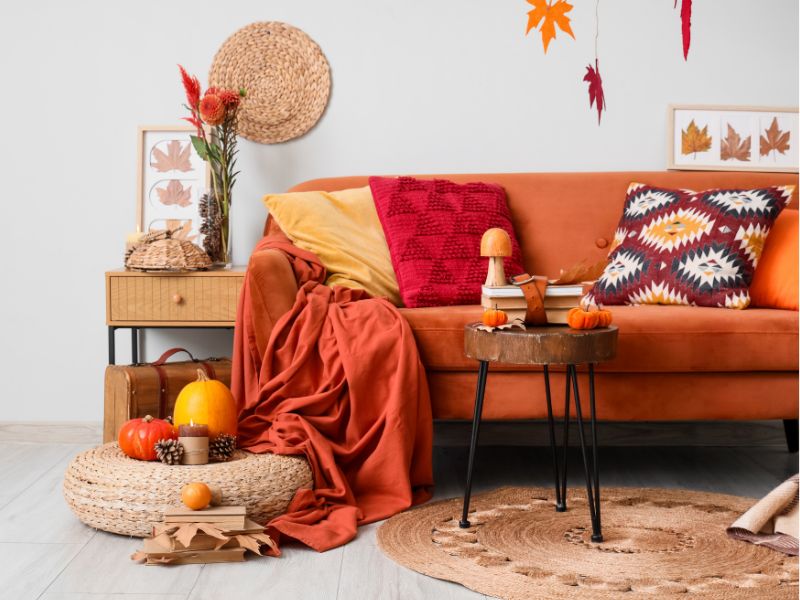

Thanksgiving is a beautiful opportunity to show appreciation for the people who make our lives meaningful. It is a time for gathering with family and friends, enjoying good food, sharing memories, and remembering the little things we are grateful for.
While many people prepare special meals and decorate their homes for the occasion, exchanging thoughtful gifts can also be a lovely way to celebrate.
One of the beautiful things I love about a handmade present is that they can communicate appreciation in a way that a store-bought item cannot. The time, care, and creativity that go into making something by hand can make the recipient feel genuinely special.
You could prepare a small basket filled with homemade treats, create a personalized photo frame, make a scented candle, or put together a collection of handmade decorations. Even a simple handwritten gratitude card can become a treasured keepsake when it comes from the heart.
Handmade gifts are also wonderful because you can customize them to suit the person receiving them. A friend who enjoys decorating might appreciate a handmade fall wreath, while a family member who loves practical gifts might prefer a decorated jar filled with homemade cookies.
If you are looking for something meaningful to give this Thanksgiving, you are in the right place.
In this guide, we will Look at well detailed 10 handmade Thanksgiving gifts that feel thoughtful and special, including easy DIY projects, materials you can find without much difficulty, and step-by-step instructions to help you create each gift.
Check out these 7 Best Retirement Gift Ideas For Dad Who Says He Doesn’t Want Anything
1. DIY Thanksgiving Gift Basket
A handmade Thanksgiving gift basket is a lovely way to combine several small presents into one thoughtful package.
Instead of purchasing a ready-made basket, you can choose the items yourself and arrange them according to the recipient’s interests. This makes the gift feel more personal and gives you the freedom to work with your budget.
For example, you could create a basket filled with homemade cookies, a small candle, a handwritten gratitude card, and a few autumn decorations.
If the recipient enjoys cooking, you might include a wooden spoon, a tea towel, and a small selection of baking ingredients. For someone who enjoys relaxing at home, consider including a handmade candle, a decorative item, and a favorite snack.
The beauty of this project is that there is no single correct way to assemble it.

Materials You Will Need
- A small basket, wooden crate, or sturdy gift box
- Shredded paper or tissue paper
- Ribbon or twine
- Homemade treats or other small gifts
- A handwritten gift tag
- Autumn-themed decorations
- Clear wrapping paper, if desired
How to Make a Thanksgiving Gift Basket
Step 1: Choose a theme for your basket.
Before gathering your supplies, decide what kind of gift you want to create.
A baking basket might contain cookie cutters, a wooden spoon, and homemade cookies. A relaxation basket could include a handmade candle, a small notebook, and a favorite treat.
Choosing a theme helps you select items that work well together instead of filling the basket with unrelated objects.
Step 2: Select your container.
Look around your home for a suitable basket or box.
A simple wicker basket creates a traditional appearance, while a wooden crate can give the gift a rustic feel. If you prefer something inexpensive, a sturdy cardboard gift box covered with decorative paper can work just as well.
Choose a container that comfortably holds all your items without looking overcrowded.
Step 3: Arrange the items.
Place tissue paper or shredded paper at the bottom of the container to create a soft base.
Position the tallest items toward the back and the smaller items near the front. This arrangement allows the recipient to see everything inside.
If you are including homemade food, package it properly and keep it separate from candles, soaps, or other scented products.
Step 4: Add handmade details.
Tie a ribbon around the basket or attach a small tag with a Thanksgiving message.
You could write something simple, such as “Thankful for you” or “A little gift to show how much you are appreciated.”
A small handmade paper leaf or an autumn-colored bow can also make the basket look more festive.
Step 5: Finish the presentation.
Check that the items are secure and that the basket is easy to carry.
If you want to wrap it, use clear wrapping paper and tie the top with ribbon. You can also leave it unwrapped if the arrangement already looks attractive.
Who Would Love This Gift?
A Thanksgiving gift basket is suitable for a host, a close friend, a relative, a neighbor, or anyone you want to appreciate.
It is especially useful when you are unsure what single item to give because you can combine several affordable things into one thoughtful present.
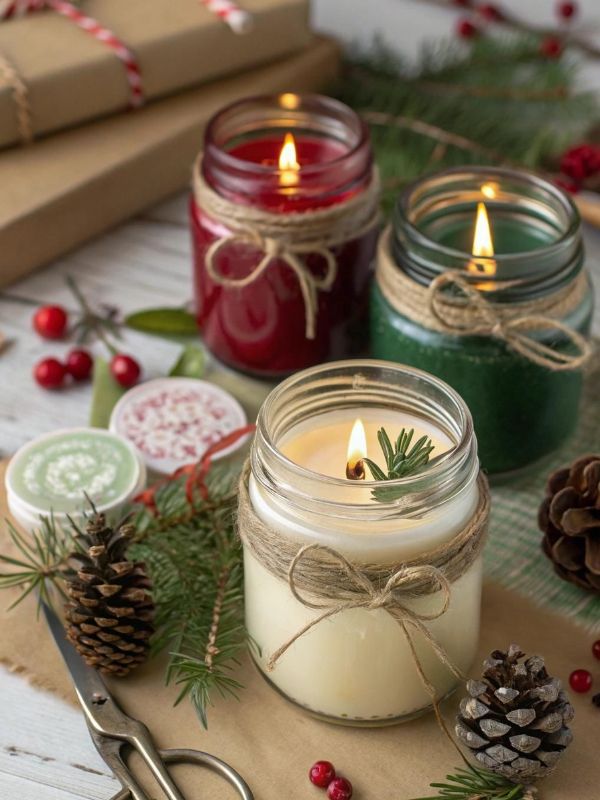
2. Handmade Scented Candles
Handmade candles make thoughtful Thanksgiving gifts because they can be enjoyed long after the holiday has passed.
A candle can add a decorative touch to a living room, bedroom, or dining area. You can also choose a container and label that suit the recipient’s home.
For Thanksgiving, warm seasonal fragrances such as vanilla, cinnamon, apple, or pumpkin-inspired scents are popular choices.
You can make your own candles using a candle-making kit or purchase a suitable candle base and the necessary supplies separately.
If you are new to candle making, using a beginner-friendly kit can make it easier to gather the right materials.
Materials You Will Need
- Candle wax suitable for container candles
- Candle wicks
- Heat-safe candle containers
- A suitable wax-melting vessel
- A thermometer
- Wick holders
- Candle-safe fragrance, if desired
- Labels or decorative tags
- Appropriate heat-resistant equipment
How to Make Handmade Candles
Step 1: Choose your containers.
Select clean, dry containers specifically suitable for candle making.
Heat-resistant glass candle jars or purpose-made candle containers are good options. Avoid containers that may crack or break when exposed to heat.
Small jars can work well for gifts, provided they are designed to withstand candle-making and burning temperatures.
Step 2: Prepare the wicks.
Position the wick in the center of each container using a suitable wick sticker or holder.
Keep the wick upright and centered so the finished candle can burn as intended.
Choose a wick appropriate for the wax type and the diameter of your container.
Step 3: Melt the wax carefully.
Follow the manufacturer’s instructions for melting your chosen wax.
Use an appropriate double-boiler arrangement or equipment recommended by the wax manufacturer. Do not heat wax directly over an uncontrolled flame or leave it unattended.
A thermometer helps you monitor the temperature.
Step 4: Add fragrance if desired.
If you want scented candles, use fragrance specifically formulated for candle making.
Follow the fragrance manufacturer’s recommended usage rate and the wax supplier’s temperature instructions.
Do not use ordinary perfume or random essential oils unless they are specifically suitable for your candle formulation.
Step 5: Pour the wax.
Carefully pour the prepared wax into the containers, following the manufacturer’s guidance for pouring temperature and handling.
Keep the containers on a stable, heat-resistant surface.
Allow the candles to cool undisturbed.
Step 6: Finish the candles.
Once the wax has cooled and set, trim the wick according to the candle-making instructions.
Add a label with the scent name or a short Thanksgiving message.
For example, you could write “Warm Wishes” or “A Little Autumn Glow.”
Allow the candle to cure for the period recommended for your particular wax and fragrance before gifting it.
How to Package Your Candle Gift
Place the candle in a small gift box with tissue paper.
Tie a ribbon around the box and attach a handmade tag.
You can also pair the candle with a handwritten card or a small decorative item.
If you are giving several candles, consider using matching containers and labels to create a coordinated gift set.
Important safety note: Candle making involves hot wax and potentially flammable materials. Follow the wax manufacturer’s instructions, use appropriate equipment, and keep hot wax away from children and pets. Before gifting a candle, make sure it is properly made and labeled, with appropriate burning and safety instructions.
Amazon product ideas:
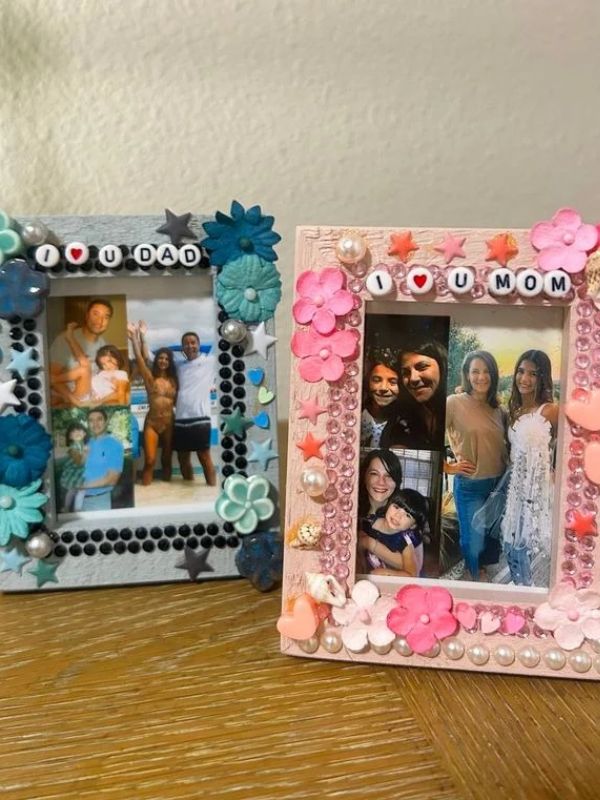
3. DIY Personalized Photo Frame
A personalized photo frame is a meaningful Thanksgiving gift because it celebrates a memory shared with someone special.
You can use a photograph from a family gathering, a birthday celebration, a vacation, or another moment that the recipient remembers fondly.
Rather than giving an ordinary frame, decorate it by hand and include a short message that explains why the photograph matters.
This is a particularly lovely gift for parents, grandparents, siblings, close friends, or anyone who enjoys keeping photographs around the home.
Materials You Will Need
- A plain photo frame
- A printed photograph
- Acrylic paint suitable for the frame’s material
- Paintbrushes
- Craft glue, where appropriate
- Decorative paper or stickers
- Small embellishments
- A handwritten message or gift tag
How to Make a Personalized Photo Frame
Step 1: Choose the photograph.
Select a photograph that has a special meaning for the recipient.
It might be a picture of the two of you together or a photograph of the family enjoying a happy occasion.
Choose an image that is clear enough to look good when printed in the frame’s size.
Step 2: Select a simple frame.
A plain wooden frame is particularly easy to personalize, although other frame materials may also work with suitable paints and adhesives.
Before decorating it, remove the glass and photograph if possible.
Step 3: Paint the frame.
Choose a color that complements the photograph and the recipient’s home.
Cream, brown, muted orange, and sage green can suit an autumn-inspired gift.
Apply the paint according to the product instructions and allow it to dry fully before adding more layers or decorations.
Step 4: Add personal details.
Write a short phrase on a small paper tag or attach a decorative label to the frame.
You could use messages such as “Family Memories,” “Grateful for You,” or “A Moment to Remember.”
If you want to add small decorative details, consider paper leaves, a simple painted border, or a small design in one corner.
Avoid adding bulky decorations that prevent the frame from standing properly.
Step 5: Insert the photograph.
Once the frame is completely dry, place the photograph inside and secure the backing.
Check that the frame stands securely and that the glass is clean.
Step 6: Wrap the gift.
Place the frame in a suitable gift box or wrap it in protective paper.
Attach a handwritten note explaining why you chose that particular photograph.
How to Make the Gift More Meaningful
The photograph itself can make the gift special, but a personal message can add another layer of thoughtfulness.
You might write about a happy memory you share, something you appreciate about the recipient, or a moment when they helped you.
You do not need a long message. A few sincere sentences are enough.
JaneEssence tip: If you are decorating a frame for someone who prefers simple home decor, keep the design minimal. A neutral frame with a meaningful photograph can be more useful than one covered with many embellishments.
Check out this 15 Christmas Gift Ideas for Mom That Say “I Love You” Without Saying a Word
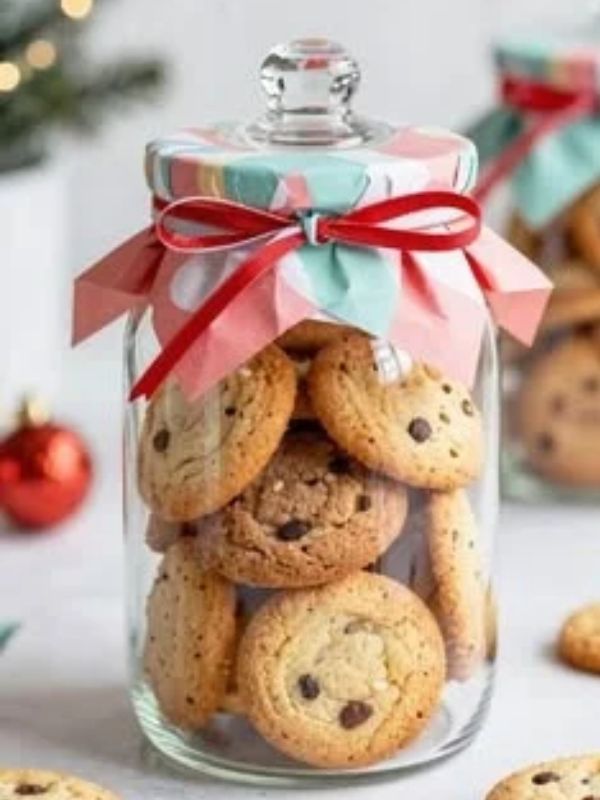
4. Homemade Cookies in a Decorated Jar
Homemade cookies are a lovely Thanksgiving gift for anyone who enjoys sweet treats.
Instead of presenting them in an ordinary container, you can arrange the cookies in a decorated jar and add a handmade label.
This gives a familiar gift a more personal appearance while keeping the project relatively simple.
You can bake the recipient’s favorite cookies or prepare a seasonal batch with ingredients such as cinnamon, oats, chocolate chips, or dried cranberries.
If you prefer not to bake, a jar containing the dry ingredients for a cookie recipe is another option.
Materials You Will Need
- Ingredients for your chosen cookie recipe
- A clean food-safe jar or suitable food container
- Baking tray and other necessary baking equipment
- Baking paper, if needed
- Ribbon or twine
- Cardstock
- Marker
- Optional fabric or decorative paper for the lid
How to Make a Cookie Jar Gift
Step 1: Choose a cookie recipe.
Select a recipe you know how to prepare or one that has clear instructions.
Chocolate chip cookies, oatmeal cookies, and simple butter cookies are all suitable options.
Consider whether the recipient has any food allergies or dietary restrictions before deciding which recipe to use.
Step 2: Bake the cookies.
Prepare the dough according to your recipe.
Bake the cookies until they are done, following the recipe’s temperature and timing instructions.
Allow them to cool completely before placing them in the container. Warm cookies can create condensation, which may affect their texture and freshness.
Step 3: Prepare the jar.
Use a clean, completely dry, food-safe container.
Make sure it is large enough to hold the cookies without crushing them.
You can also use a suitable bakery box if that is more practical.
Step 4: Arrange the cookies.
Place the cooled cookies inside the jar.
If necessary, separate layers with food-safe parchment paper.
Avoid packing the cookies too tightly, especially if they are delicate.
Step 5: Decorate the container.
Tie a ribbon or piece of twine around the jar.
Cut a small tag from cardstock and write a message such as “Baked with Love” or “A Sweet Thanksgiving Treat.”
You can also decorate the lid with autumn-colored paper, provided the decoration does not interfere with the container’s closure.
Step 6: Add a personal note.
Attach a small card with the cookie flavor and, if helpful, the main ingredients.
If you are giving homemade food to someone who may have allergies, clearly identify common allergens and avoid making claims that the food is allergen-free unless you can verify that.
Alternative: A Cookie Mix in a Jar
You can also layer the dry ingredients for a cookie recipe in a jar.
For example, you might add flour, sugar, oats, and chocolate chips in measured layers, provided the ingredients and quantities suit the chosen recipe.
Attach a recipe card explaining which additional ingredients are needed and how to bake the cookies.
This option is especially useful when you want to give someone a fun baking activity rather than ready-made treats.
Food safety tip: Store homemade cookies according to the recipe’s storage guidance. Choose a gift that can remain safe during transport and tell the recipient how to store it. Perishable fillings or toppings may require refrigeration.
Amazon product ideas to Shop: Food-safe glass jars cookie gift boxes,
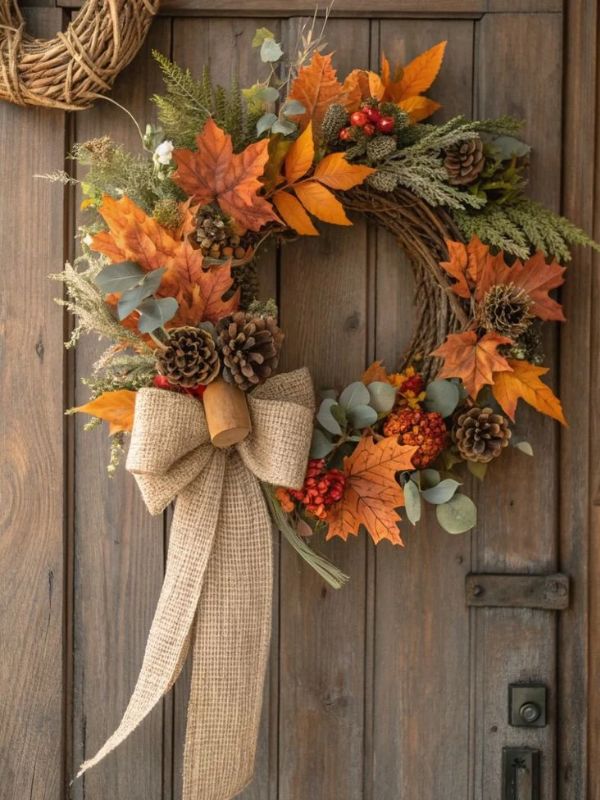
5. Handmade Fall Wreath
A handmade fall wreath is a beautiful gift for someone who enjoys decorating their home for autumn.
It can be displayed on a front door, above a mantel, or on an interior wall, depending on the design.
You can create a wreath using artificial autumn leaves, small decorative pumpkins, ribbon, dried flowers, or other seasonal materials.
Artificial materials are particularly useful because they can last for several seasons when stored properly.
The key is to choose a design that suits the recipient’s decorating style.
Materials You Will Need
- A suitable wreath base
- Artificial autumn leaves
- Ribbon
- Decorative berries or small pumpkins
- Craft wire or suitable adhesive
- Scissors or wire cutters, as needed
- Optional dried flowers
- A hanging loop
How to Make a Fall Wreath
Step 1: Choose your wreath base.
You can use a grapevine wreath, a wire frame, or another base designed for decorative wreath making.
Choose a size that suits the space where you expect the recipient to display it.
A smaller wreath can work well for an apartment door or interior wall, while a larger design can make a statement on a spacious front door.
Step 2: Select your decorations.
Choose a small group of colors that work well together.
For a traditional autumn wreath, consider orange, red, yellow, and brown.
For a softer appearance, combine cream, muted green, and warm beige.
Gather enough leaves and embellishments to cover the areas you want to decorate.
Step 3: Arrange the leaves.
Before attaching anything, arrange the leaves around the wreath base.
Try layering different shapes and colors to create depth.
You can cover the entire base or leave some of it visible for a more natural appearance.
Step 4: Secure the decorations.
Attach the leaves using suitable craft wire, floral wire, or adhesive recommended for your materials.
If you are using wire, tuck the ends away carefully so they do not scratch the recipient’s door or injure anyone handling the wreath.
Add small pumpkins or other embellishments where they help balance the design.
Step 5: Add a ribbon.
Tie a bow and secure it to the top or bottom of the wreath.
A plain burlap ribbon can create a rustic look, while a velvet ribbon can make the wreath feel more elegant.
Step 6: Add a hanging loop.
Make sure the wreath has a secure hanging point appropriate for its weight.
Check that the decorations are firmly attached and that no sharp wire ends are exposed.
How to Present the Wreath as a Gift
A wreath can be difficult to wrap in ordinary gift paper.
Instead, place it in a suitable wreath box or attach a simple gift tag and present it with a handwritten card.
If you are delivering it personally, protect the decorations during transport so the leaves and embellishments do not become crushed.
Helpful tip: If the recipient lives in a windy area or plans to display the wreath outdoors, choose materials suitable for outdoor use. Some artificial foliage and ribbons may fade or deteriorate when exposed to weather.
This is also a wonderful project for anyone who enjoys seasonal home decor and wants to create something that can be reused each year.
Check out my Post on 9 DIY Thanksgiving Place Cards to Make Your Dinner Table Look Beautiful
Here are some Amazon Affiliate Products to Consider for these Handmade Thanksgiving Gifts
- Beginner candle-making kits
- Suitable candle jars and wicks
- Plain photo frames
- Gift baskets and decorative gift boxes
- Food-safe glass jars
- Fabric coaster sewing supplies
- Pressed flower craft supplies
- Blank gratitude journals
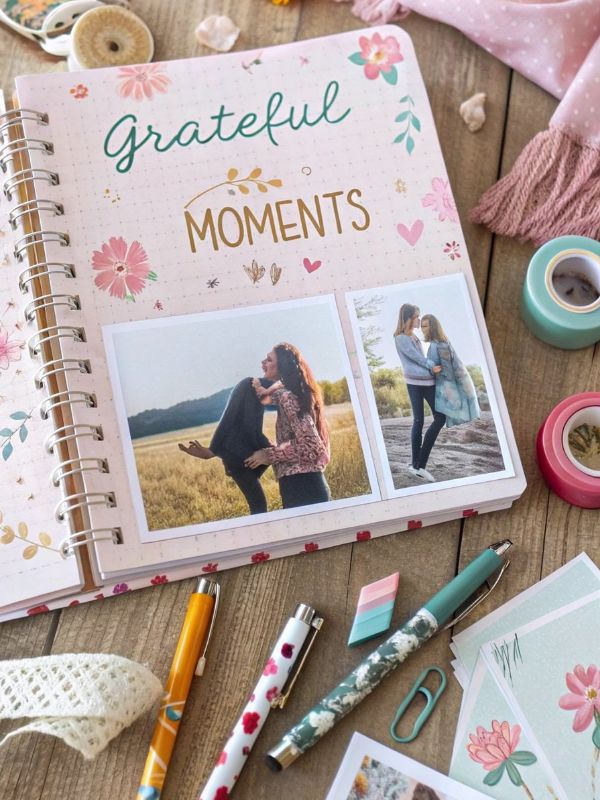
6. DIY Handmade Gratitude Journal
A gratitude journal is a thoughtful Thanksgiving gift because it encourages the recipient to reflect on the good things in their life.
It can be a lovely present for a friend, family member, teacher, or someone who enjoys writing.
You do not need advanced bookbinding skills to make one. A plain notebook can be transformed with a handmade cover, a personal message, and a few simple writing prompts.
The finished journal can be used throughout the year rather than only during Thanksgiving.
Materials You Will Need
- A plain notebook
- Decorative cardstock or scrapbook paper
- Scissors
- Craft glue or double-sided tape suitable for paper
- Markers or pens
- Ribbon
- Stickers or paper embellishments
- A handwritten note
How to Make a Gratitude Journal
Step 1: Choose a notebook.
Select a notebook with enough pages for regular writing.
A small notebook is easy to carry, while a larger one offers more room for longer reflections.
You can use a lined notebook, a blank journal, or a notebook with dotted pages.
Step 2: Design the cover.
Cut decorative paper to fit the front cover.
Choose colors that reflect the recipient’s taste. Neutral shades, autumn colors, or floral patterns can all work well.
Attach the paper carefully, smoothing out any wrinkles as you go.
If you prefer not to cover the original notebook, decorate it with a small paper label instead.
Step 3: Add a title.
Write a title on the cover, such as “A Little Gratitude Journal” or “Things I’m Thankful For.”
You can hand-letter the title or print it on paper and attach it to the cover.
Add a small leaf, flower, or other decorative detail if you wish.
Step 4: Include writing prompts.
Write a few prompts on the first page to help the recipient get started.
For example:
- What made me smile today?
- Who am I grateful to have in my life?
- What is one good thing that happened this week?
- What is something I appreciate about my home?
- What is one memory I want to remember?
These prompts are optional. Leave plenty of blank pages so the recipient can use the journal in their own way.
Step 5: Add a personal message.
Write a short note on the inside cover.
You could explain why you chose the journal or share something you appreciate about the recipient.
A personal message makes the gift feel more meaningful than a notebook alone.
Step 6: Finish with a ribbon or bookmark.
If the notebook design allows it, attach a ribbon bookmark.
Choose a ribbon that complements the cover and trim it neatly.
Make sure the ribbon does not interfere with the notebook’s binding.
How to Package the Journal
Wrap the journal in simple paper and tie it with twine or ribbon.
You could also pair it with a nice pen and a small handwritten card.
If you want to create a larger gift, place the journal, pen, and card in a small gift box.
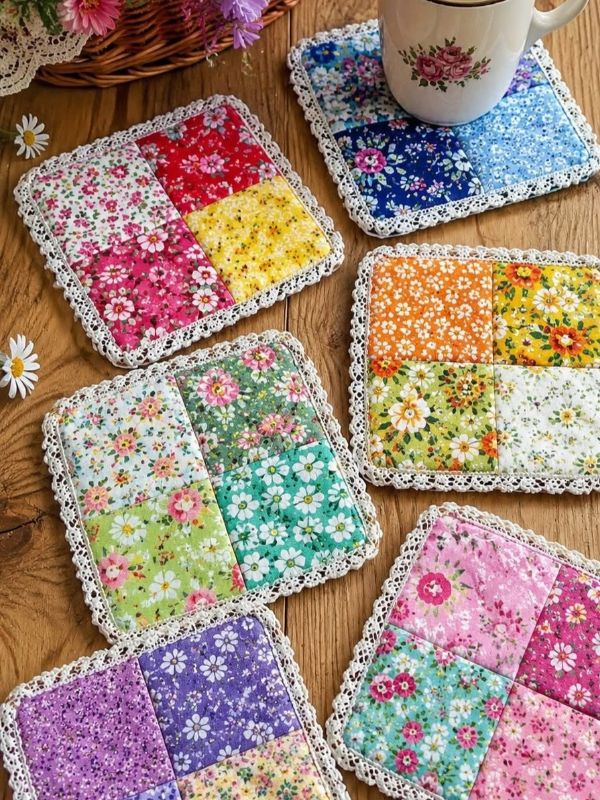
7. Handmade Fabric Coasters
Fabric coasters are practical handmade gifts for people who enjoy decorating their homes or entertaining guests.
They help protect table surfaces from drink rings and can add a decorative touch to a coffee table, dining table, or desk.
You can make them using cotton fabric in autumn-inspired prints, plain neutral colors, or patterns that suit the recipient’s home.
This project is particularly suitable if you already have basic sewing supplies and want to use up fabric scraps.
Materials You Will Need
- Cotton fabric
- Absorbent batting or suitable interfacing
- Scissors or a rotary cutter
- Ruler
- Sewing pins or clips
- Matching thread
- Sewing machine or hand-sewing needle
- Iron, if suitable for the fabric
How to Make Fabric Coasters
Step 1: Choose your fabric.
Select cotton fabric that can absorb small amounts of moisture and is suitable for the intended use.
For a Thanksgiving gift, you could choose autumn leaves, pumpkins, simple plaid patterns, or solid colors.
Using two complementary fabrics can make the coasters look more interesting.
Step 2: Cut the fabric.
Cut two matching fabric squares for each coaster.
A finished coaster of approximately 4 inches square is a common size, so you will need to allow extra fabric around the edges for seam allowances.
Cut a matching piece of suitable batting or interfacing according to your chosen construction method.
Step 3: Layer the pieces.
Place the two fabric squares with their right sides facing each other.
Position the batting as directed by the pattern or material instructions.
Secure the layers with pins or clips.
Step 4: Sew around the edges.
Sew around the square, leaving a small opening so you can turn the coaster right side out.
If you are new to sewing, use a consistent seam allowance and take your time around the corners.
Step 5: Turn and finish the coaster.
Carefully turn the coaster right side out through the opening.
Gently push out the corners and press the coaster with an iron if the fabric allows.
Fold the raw edges of the opening inward and sew it closed.
Step 6: Add decorative stitching.
You can sew a line around the edge of the coaster to help it lie flat and give it a finished appearance.
Repeat the process to make a matching set of four or six coasters.
How to Package Fabric Coasters
Stack the finished coasters and tie them together with ribbon or twine.
Add a small tag with a message such as “For Your Cozy Coffee Moments” or “Made Especially for You.”
You could also package them in a simple gift box.
Helpful tip: Choose fabrics that can be washed and dried according to their care instructions. If you use batting or interfacing, make sure it is suitable for the finished coaster and the expected laundering method.
This is a practical handmade gift because the recipient can use it regularly instead of storing it away after Thanksgiving.
You Can Learn more Tip For sewing using this my article 7 Beginner Sewing Projects You Can Finish in One Afternoon
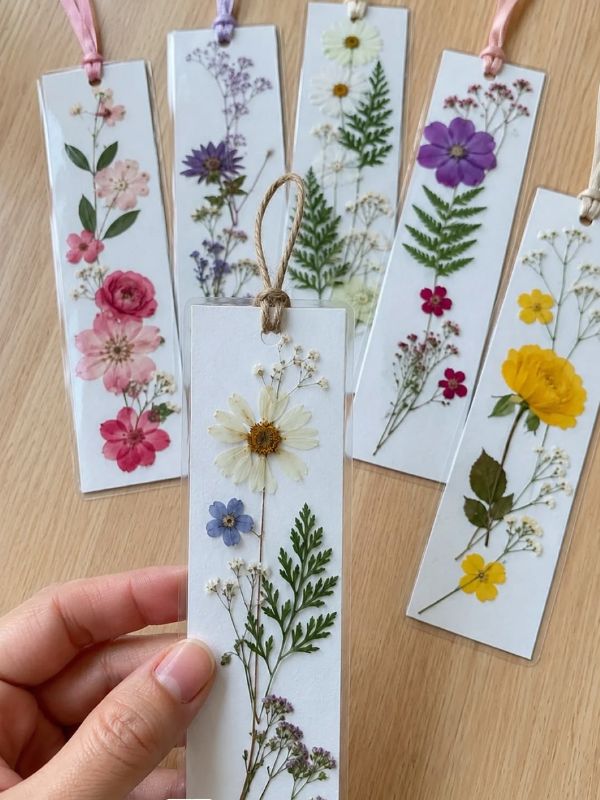
8. DIY Pressed Flower Bookmarks
For someone who loves reading, a handmade pressed flower bookmark can be a simple but thoughtful Thanksgiving gift.
Pressed flowers preserve the delicate appearance of real flowers and can turn an ordinary piece of cardstock into a small work of art.
You can make one bookmark or create a matching set using different flowers and colors.
This project is also suitable for people who enjoy botanical crafts and handmade stationery.
Materials You Will Need
- Thick cardstock
- Pressed flowers
- Clear adhesive suitable for paper and dried botanicals
- Scissors
- Ruler
- Hole punch
- Ribbon or thin cord
- Optional laminating sheets
How to Make Pressed Flower Bookmarks
Step 1: Prepare the flowers.
Choose fully dried pressed flowers that are flat and free from moisture.
Small flowers and delicate leaves are often easier to arrange on bookmarks than large blooms.
If you are pressing flowers yourself, allow enough time for them to dry completely before using them.
Step 2: Cut the cardstock.
Cut the cardstock into long rectangles.
A bookmark measuring approximately 2 by 6 inches is a useful starting point, but you can adjust the size to suit your preference.
Round the corners if you want a softer finish.
Step 3: Arrange the flowers.
Place the pressed flowers on the cardstock before attaching them.
Try a simple arrangement with one flower and a leaf, or create a small cluster near the bottom.
Leave some blank space so the design does not become overcrowded.
Step 4: Attach the flowers.
Use a small amount of suitable adhesive to secure the flowers.
Follow the adhesive instructions and avoid applying so much glue that it damages the delicate petals.
Allow the bookmark to dry completely.
Step 5: Protect the design.
You can leave the bookmark uncovered for a natural finish, or protect it with suitable laminating material.
If you laminate it, make sure the flowers are completely dry and arranged flat before sealing.
Step 6: Add a ribbon.
Punch a small hole near the top of the bookmark.
Thread a short ribbon through the hole and tie it securely.
Trim the ends neatly.
How to Present the Bookmark
Place the bookmark inside a card with a handwritten Thanksgiving message.
You could also pair it with a book, a journal, or a small packet of stationery.
For someone who enjoys reading, this small gift can become a useful reminder of your thoughtfulness.
Helpful tip: Keep the flower arrangement relatively flat so the bookmark fits comfortably between book pages.
If you want to make several bookmarks, prepare the cardstock pieces first and then decorate each one individually.
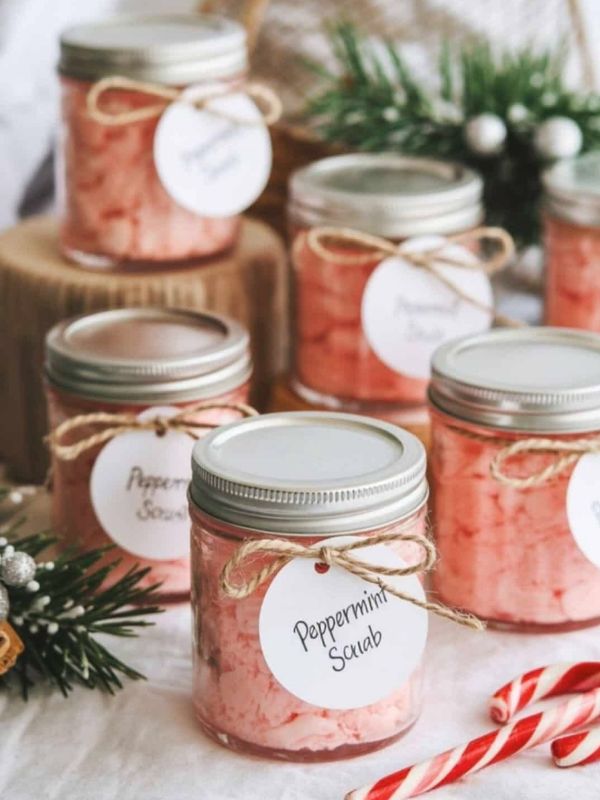
9. Homemade Sugar Scrub in a Decorative Jar
A homemade sugar scrub can be a thoughtful gift for someone who enjoys personal-care products.
You can prepare a simple sugar-based scrub with a suitable carrier oil and package it in a clean, dry container.
For a Thanksgiving-inspired presentation, decorate the jar with an autumn-colored label, ribbon, or small handmade tag.
Because this gift is intended for use on the skin, ingredient selection and hygiene are important.
Materials You Will Need
- Granulated sugar
- A suitable cosmetic-grade carrier oil
- A clean, dry container with a secure lid
- A clean mixing bowl
- A clean spoon or spatula
- A label
- Ribbon or twine
- Optional cosmetic-grade fragrance, if suitable
How to Make a Simple Sugar Scrub
Step 1: Prepare your workspace.
Wash your hands and clean your work surface and utensils.
Make sure the container is thoroughly clean and completely dry before use.
Water entering the scrub can encourage microbial growth, so keep moisture out of the mixture and use appropriate hygiene practices.
Step 2: Choose suitable ingredients.
Use plain granulated sugar and a carrier oil suitable for cosmetic use, such as a cosmetic-grade sunflower oil.
Avoid adding ingredients that may be irritating or unsuitable for the skin.
If you decide to include a fragrance, use a product intended for cosmetic use and follow its recommended usage limits.
Step 3: Combine the ingredients.
Place the sugar in a clean mixing bowl.
Add the oil gradually and stir until the mixture reaches a texture you like.
The scrub should be moist enough to hold together slightly but not excessively oily.
Step 4: Transfer the scrub.
Spoon the mixture into the prepared container.
Wipe the outside of the jar if necessary and close the lid securely.
Step 5: Decorate the jar.
Create a simple label with the product name.
You might write “Homemade Sugar Scrub” or “A Little Self-Care Gift.”
Add the date it was prepared and basic usage instructions.
Step 6: Package the gift.
Tie a ribbon around the jar and attach a handwritten card.
You can also place it in a small gift box with a soft washcloth, provided the additional items are clean and dry.
Important Considerations for Homemade Body Scrubs
Homemade personal-care products can spoil or become contaminated if they are prepared or stored improperly.
Do not add fresh fruit, milk, or other perishable ingredients to a scrub intended to be stored.
Avoid introducing water into the container, and do not assume that a homemade scrub has a long shelf life without appropriate formulation and testing.
Label the ingredients clearly, including any fragrance, and advise the recipient to discontinue use if irritation occurs.
Sugar scrubs may be too abrasive for sensitive or damaged skin and should not be used on broken or irritated skin.
If you are unsure about making a cosmetic product safely, consider gifting a commercially manufactured scrub instead and personalizing the packaging.
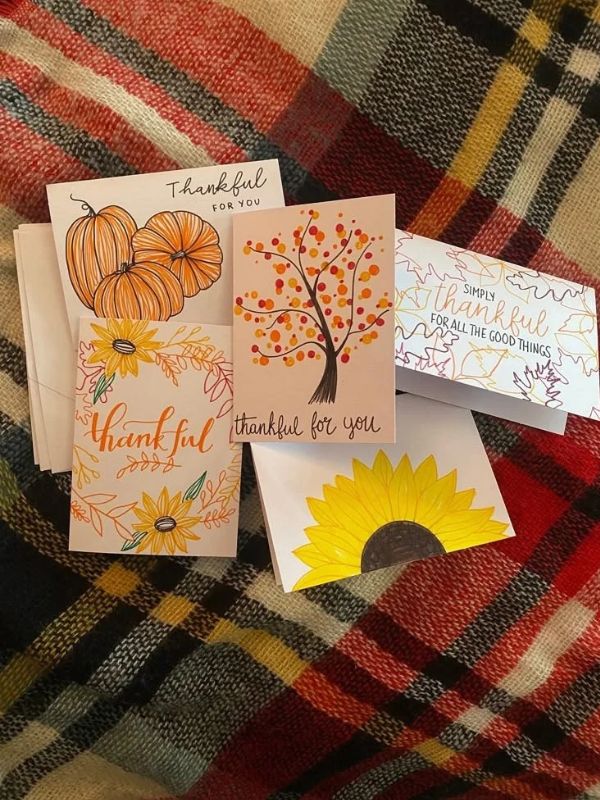
10. Handmade Thanksgiving Greeting Card and Gift Set
Sometimes, the most meaningful gifts are the simplest ones.
A handmade Thanksgiving greeting card can express appreciation in a personal way, especially when you write a message that reflects your relationship with the recipient.
To make the gift feel more complete, you can pair the card with a small handmade item, such as a bookmark, a paper flower, a decorated candle, or a few homemade cookies.
This is an excellent option if you are working with a limited budget or want to give something thoughtful to several people.
Materials You Will Need
- Blank cardstock
- Decorative paper
- Scissors
- Glue stick
- Markers or pens
- Autumn-themed stickers or stamps
- Ribbon, if desired
- A small handmade gift to accompany the card
How to Make a Handmade Thanksgiving Card
Step 1: Fold the cardstock.
Choose a piece of cardstock and fold it in half to create a greeting card.
You can use white, cream, kraft, or autumn-colored paper.
Make sure the card is large enough to hold your message comfortably.
Step 2: Create the front design.
Decorate the front with a simple illustration or paper arrangement.
You could make a paper pumpkin, attach a few paper leaves, or draw a small bouquet of autumn flowers.
If you enjoy lettering, write “Happy Thanksgiving” across the front.
Step 3: Add a personal message.
Inside the card, write a few sentences about what you appreciate about the recipient.
For example:
“I’m grateful to have you in my life. Thank you for the kindness, encouragement, and happy memories you have shared with me. I hope this Thanksgiving brings you many reasons to smile.”
Adjust the message to suit the person receiving the card.
A sincere, personal note often means more than a long, generic greeting.
Step 4: Prepare a small gift.
Choose a handmade item that complements the card.
A pressed flower bookmark is suitable for a reader, while homemade cookies may be appreciated by someone who enjoys sweet treats.
You can also include a small decorated jar, a handmade ornament, or a few paper flowers.
Step 5: Package everything together.
Place the card and gift in a suitable envelope or gift box.
Tie the package with ribbon or twine and attach a small tag.
If the gift contains food, make sure the packaging is appropriate for food and that the contents are protected during transport.
Who Would Appreciate This Gift?
A handmade card and small gift set can be suitable for friends, relatives, teachers, neighbors, hosts, and colleagues.
It is particularly useful when you want to show appreciation without spending much money.
You can prepare several cards in one crafting session and personalize the message inside each one.
Helpful tip: Avoid using exactly the same message for everyone if you want the gifts to feel personal. Mentioning a shared memory, a quality you admire, or something the person has done for you can make the card more meaningful.
How to Choose the Right Handmade Thanksgiving Gift
With so many lovely projects to choose from, it helps to consider the recipient before deciding what to make.
A thoughtful gift is not necessarily the most complicated one. It is the one that suits the person receiving it.
Here are a few things to consider.
Think About the Recipient’s Interests
Consider what the person enjoys doing in their free time.
Someone who loves decorating may appreciate a handmade wreath, while a person who enjoys reading may prefer a pressed flower bookmark.
A friend who loves baking might enjoy homemade cookies or a baking-themed gift basket.
Choosing something connected to the recipient’s interests makes the gift feel more personal.
Consider How Much Time You Have
Some handmade gifts can be completed in an afternoon, while others require additional preparation.
A personalized card, decorated gift jar, or simple photo frame can be relatively quick to make.
A wreath, handmade candle, or sewn coaster set may require more supplies and time.
If you are preparing several gifts, choose projects that you can make in batches.
For example, you could prepare all the greeting cards together and then personalize each one.
Set a Budget Before Shopping
Handmade gifts can be affordable, but the cost of supplies can increase when you purchase everything from scratch.
Before shopping, check what you already have.
You may have leftover ribbon, paper, fabric, jars, or decorative materials from previous projects.
Reuse these supplies whenever appropriate and purchase only what you need to complete the gift.
Make the Gift Useful When Possible
Decorative gifts are lovely, but practical handmade presents can be especially appreciated.
Fabric coasters, bookmarks, journals, and gift baskets can all serve a purpose beyond the holiday.
Consider whether the recipient would enjoy using or displaying the item in their home.
Add a Personal Message
Even a simple gift can become more meaningful when accompanied by a handwritten note.
Use the card to explain why you chose the gift or to express something you appreciate about the recipient.
You do not need to write a long message. A few sincere sentences can make the present feel special.
Frequently Asked Questions About Handmade Thanksgiving Gifts
1. What are some easy handmade Thanksgiving gifts?
Some easy handmade Thanksgiving gifts include decorated gift baskets, personalized photo frames, homemade cookies in jars, gratitude journals, pressed flower bookmarks, and handmade greeting cards.
These projects can be adapted to suit different budgets and crafting abilities.
2. What can I make for someone who is hosting Thanksgiving dinner?
A handmade gift basket, homemade cookies, a fall wreath, a decorative candle, or a personalized greeting card can be thoughtful gifts for a Thanksgiving host.
Consider the person’s interests and home decor style when choosing what to make.
If you are bringing homemade food, package it properly and check whether the host has any dietary restrictions.
3. How can I make a Thanksgiving gift look expensive without spending much?
Presentation can make a simple gift look polished.
Choose a coordinated color palette, use clean packaging, add a neat ribbon, and attach a handwritten tag.
For example, homemade cookies placed in a suitable jar with a simple label can look attractive without requiring expensive materials.
4. What handmade Thanksgiving gifts can I make with children?
Children can help decorate greeting cards, personalize gift baskets, paint suitable photo frames, and assemble paper bookmarks.
Choose age-appropriate activities and supervise children when using scissors, hot wax, small embellishments, or other potentially hazardous materials.
5. When should I start making Thanksgiving gifts?
Starting one or two weeks before Thanksgiving gives you time to gather supplies and complete your projects without rushing.
If you are making candles, allow the appropriate curing time. For dried flower crafts, make sure the flowers are fully dry before using them.
Food gifts should be prepared according to safe storage and freshness requirements.
6. Can handmade Thanksgiving gifts be inexpensive?
Yes. Many handmade gifts can be created with materials you already have at home.
Greeting cards, paper crafts, decorated jars, and personalized photo frames can be affordable options.
The cost will depend on the materials you choose and whether you already own the necessary tools.
7. What should I write on a Thanksgiving gift tag?
You can write a simple message such as:
- Thankful for you.
- Made with love.
- A little gift to show my appreciation.
- Grateful to have you in my life.
- Wishing you a beautiful Thanksgiving.
- Thank you for being part of my story.
You can also write the recipient’s name and include a short personal message.
Conclusion on Handmade Thanksgiving Gifts
Thanksgiving is a wonderful time to celebrate the people who bring happiness, support, and meaning into our lives.
Although gifts are not the main reason for the celebration, a thoughtful handmade present can be a lovely way to express appreciation.
These 10 handmade Thanksgiving gifts offer a variety of options, from DIY gift baskets and personalized photo frames to homemade cookies, gratitude journals, and pressed flower bookmarks.
Some projects are ideal for beginners, while others allow you to explore your creativity and develop new crafting skills.
You can choose a gift based on the recipient’s interests, your available time, and the materials you already have at home.
Remember that you do not need to create something elaborate to make someone feel appreciated. A simple gift, prepared with care and accompanied by a sincere message, can be just as meaningful.
If you are planning your Thanksgiving gifts early, save your favorite ideas and gather the supplies you need. You can also adapt these projects for birthdays, Christmas, housewarming celebrations, and other special occasions.
Which of these handmade Thanksgiving gifts would you love to make for someone special? Share your favorite idea and save this guide for your holiday crafting plans.
Fall is almost here, Go through this article on Cheap Fall Home Decor Ideas for Your Living Room