10 Easy costume jewelry crafts you can make at home.
Have you ever looked at cute jewelry online and thought, I wish I could make something like that myself at home? Maybe something simple, pretty, and unique that still feels personal and stylish without spending too much money.
Costume jewelry crafts are such a fun and creative way to express your style while making accessories that actually match your vibe. From delicate earrings to beaded bracelets and simple statement pieces, there’s something so satisfying about turning basic materials into beautiful jewelry you can wear every day.
What makes it even better is how beginner friendly it is. You don’t need fancy tools or professional experience just a little creativity, some basic supplies, and the willingness to try. Whether you’re doing it as a hobby, a relaxing weekend activity, or even thinking about starting a small business, DIY jewelry opens up a whole world of possibilities.
If you’ve been wanting to try something creative and aesthetic, these easy costume jewelry crafts you can make at home are the perfect place to start.
Materials you will need
Before you start making your beaded bracelet, make sure you have everything ready. This will make the process smooth and stress-free.
- Elastic string or stretch cord
- Assorted beads (choose any colors, shapes, or styles you like)
- Scissors
- Jewelry glue (optional, for securing knots)
- Small tray or bowl (to keep beads organized and prevent rolling)
- Tape or a clip (optional, to hold one end of the string in place while beading)
1. Beaded Bracelet with Elastic String
A beaded bracelet is one of the easiest costume jewelry crafts you can start with, especially if you’re a beginner. It’s simple, fun, and doesn’t require any complicated tools, just beads, elastic string, and a little bit of creativity.
You can choose any style you like soft pastel beads for a feminine look, gold accents for something classy, or colorful beads for a playful summer vibe. The beauty of this craft is that you can fully customize it to match your personal style or even your outfits.
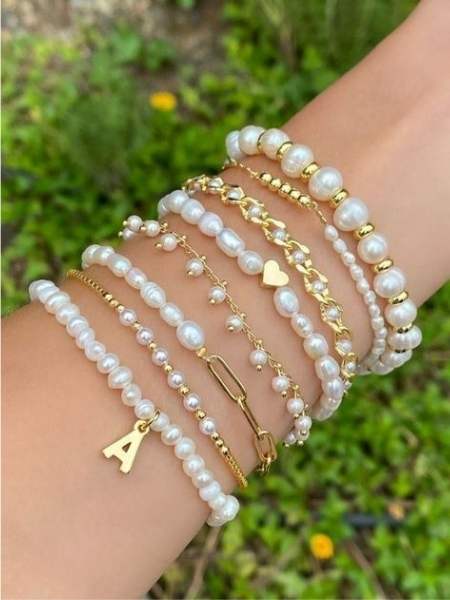
To make it, just cut a piece of elastic string, thread your beads in your preferred pattern, and tie a secure knot when you’re done. It’s quick, relaxing, and gives you a pretty handmade piece you can wear or gift to someone special.
This is the perfect first step into DIY jewelry because it’s easy, affordable, and instantly satisfying once you see your finished bracelet.
2. Handmade Clay Earrings (Super Easy Beginner Guide)
What You Need:
- Polymer clay (any colors you like)
- Toothpick or small knife
- Baking tray + oven
- Earring hooks
- Small jump rings (tiny metal rings)
- Pliers (or something to open/close the rings)
Steps:
1. Soften the clay
- Take a small piece of clay and roll it in your hands until it becomes soft and easy to shape.
2. Shape your design
- Make simple shapes like circles, hearts, teardrops, or small abstract pieces.
- Keep it simple if you’re a beginner it still looks stylish.
3. Add details (optional but cute)
- Use a toothpick to add tiny holes, lines, or texture.
- You can also mix two colors together for a marble effect.
4. Make a hole for hanging
- Before baking, gently poke a small hole at the top where the earring hook will go later.
5. Bake it
- Place your pieces on a tray and bake following your clay instructions (usually low heat for 10–30 minutes).
- Let them cool completely.
6. Assemble your earrings
- Open a jump ring using pliers.
- Attach the clay piece and then hook it onto the earring hook.
- Close the jump ring tightly.
3. Wire-Wrapped Rings (Simple Aesthetic DIY Guide)
What You Need:
- Thin jewelry wire (flexible but strong)
- Round object (like a marker or pen) for sizing
- Pliers (very helpful but optional)
- Small beads (optional for decoration)

Steps:
1. Measure your ring size
- Wrap the wire around your finger or a marker that matches your finger size.
- Leave extra wire on both ends so you can work with it.
2. Form the base
- Twist the wire around once or twice to create a simple ring band.
- Make sure it feels snug but not too tight.
3. Start shaping the design
- Take the loose ends of the wire and twist them into small patterns.
- You can do spirals, loops, or simple curves.
4. Add a bead (optional)
- Slide a bead onto the wire before finishing your design.
- Twist the wire around it to hold it in place securely.
5. Secure the ends
- Tuck in any sharp ends so it doesn’t scratch your finger.
- Use pliers (or press tightly) to flatten and secure everything.
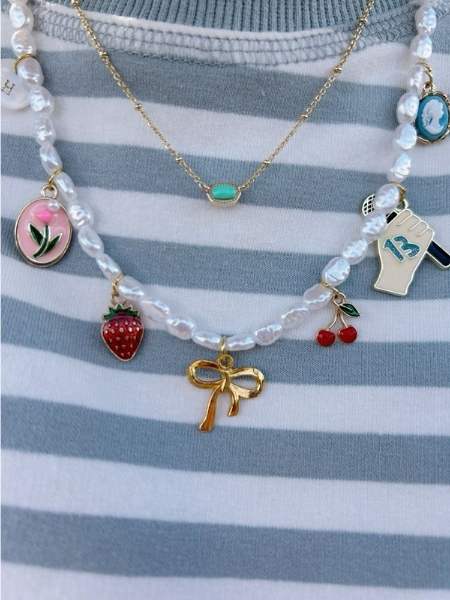
4. DIY Charm Necklaces (Personal & Stylish Guide)
What You Need:
- A necklace chain (any length you prefer)
- Small charms (hearts, stars, letters, shells, etc.)
- Jump rings (tiny connecting rings)
- Pliers (or something to open/close rings)
Steps:
1. Choose your chain
- Pick a simple chain that matches your style (gold, silver, or rose gold look).
- Lay it flat so you can plan your design.
2. Pick your charms
- Select charms that mean something to you or just look pretty together.
- Try not to overthink it simple combinations often look best.
3. Plan the layout
- Place your charms on the chain first without attaching them.
- Adjust spacing until it looks balanced and nice.
4. Attach the charms
- Open a jump ring using pliers.
- Hook it through a charm, then attach it to the chain.
- Close it tightly so it doesn’t slip off.
5. Repeat for all charms
- Add as many or as few as you like.
- Keep checking the spacing as you go.
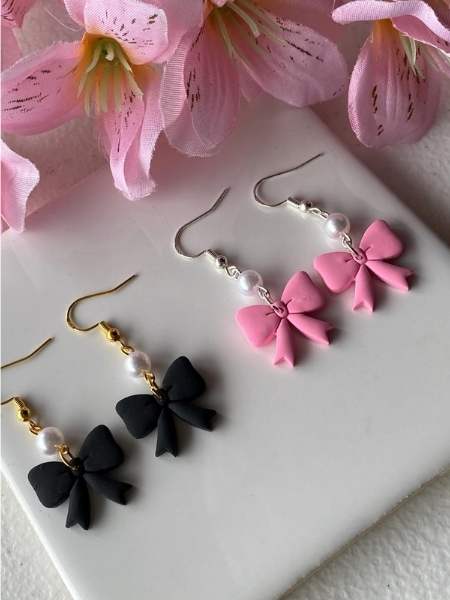
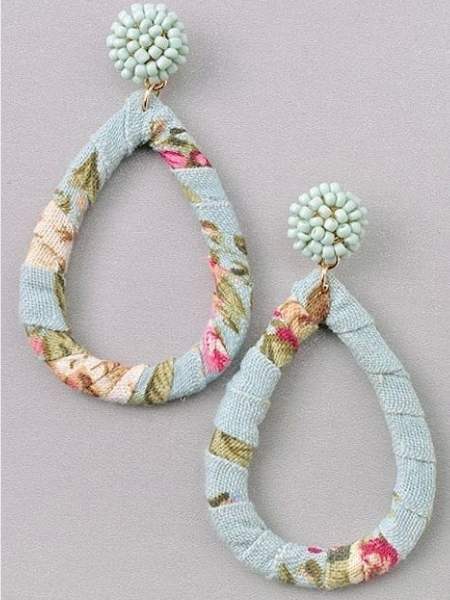
5. DIY Statement Earrings (Recycled Materials Guide)
What You Need:
- Old cardboard, plastic pieces, fabric scraps, or old jewelry parts
- Scissors
- Glue (strong glue or hot glue if available)
- Paint, markers, glitter, or nail polish (for decoration)
- Earring hooks
- Jump rings or small wire (for attaching)
Steps:
1. Choose your base
- Pick a material you can easily cut and shape.
- Cardboard is easiest for beginners, but plastic or fabric also works.
2. Cut your design
- Draw your shape first (circles, leaves, abstract shapes, hearts, etc.).
- Cut carefully and make sure both earrings are similar in size.
3. Decorate your pieces
- Paint your design or add patterns using markers.
- You can also add glitter, fabric layers, or small beads for extra detail.
- Let everything dry completely before moving on.
4. Strengthen the base (optional but helpful)
- If using cardboard or fabric, add a light layer of glue on top to make it firm.
5. Attach the earring hook
- Use a small hole punch or pin to create a tiny hole at the top.
- Insert a jump ring or wire through the hole.
- Attach the earring hook and close it tightly.
6. Final check
- Make sure both earrings are balanced and secure before wearing.
6. Button Earrings (Cute & Budget-Friendly Guide)
What You Need:
- Colorful buttons (different sizes if possible)
- Earring studs or hooks
- Strong glue (or hot glue)
- Jump rings (optional for hanging style)
- Pliers (optional)
Steps:
1. Pick your buttons
- Choose buttons that look cute together or match your outfit style.
- You can use shiny, vintage, or colorful ones.
2. Decide your style
- Either use one button per earring (simple look)
- Or stack 2–3 buttons for a layered design.
3. Attach the base
- Apply strong glue to the back of the button.
- Stick it directly onto the earring stud or hook base.
4. Let it dry
- Leave it for at least 15–30 minutes so it holds firmly.
5. Double-check
- Make sure everything is secure before wearing.
7. Fabric Wrapped Bangles (Soft & Stylish Guide)
What You Need:
- Plain bangles or bracelets
- Fabric strips or old cloth
- Glue
- Scissors
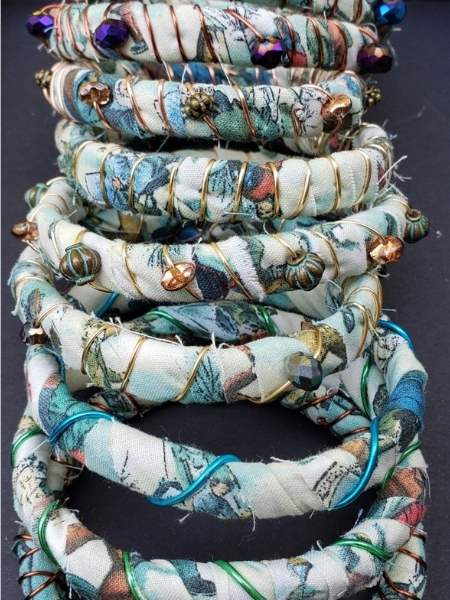
Steps:
1. Prepare your fabric
- Cut long thin strips from fabric or old clothes.
- Choose colors that match your style.
2. Add glue to the bangle
- Start a small section at a time so it doesn’t dry too fast.
3. Wrap the fabric
- Carefully wrap the fabric tightly around the bangle.
- Keep smoothing it as you go so it looks neat.
4. Secure the ends
- When you reach the end, glue it down properly.
- Tuck the edge in for a clean finish.
8. Paper Bead Jewelry (Eco-Friendly Guide)
What You Need:
- Old magazines or colored paper
- Glue
- Toothpick or pencil
- String or thread
- Scissors
Steps:
1. Cut paper strips
- Cut long triangular strips (wide at one end, narrow at the other).
2. Roll the beads
- Wrap the strip tightly around a toothpick starting from the wide end.
- Add glue as you roll to keep it firm.
3. Seal the bead
- Add a final layer of glue on the outside.
- Let it dry completely so it hardens.
4. String them
- Once dry, thread the beads onto string or elastic.
- Create bracelets or necklaces in your preferred pattern.
9. Shell Necklace (Beachy Aesthetic Guide)
What You Need:
- Small shells (real or craft shells)
- Thin string, cord, or chain
- Drill pin or small nail (for making holes, if needed)
- Jump rings (optional)
- Glue (optional for reinforcement)
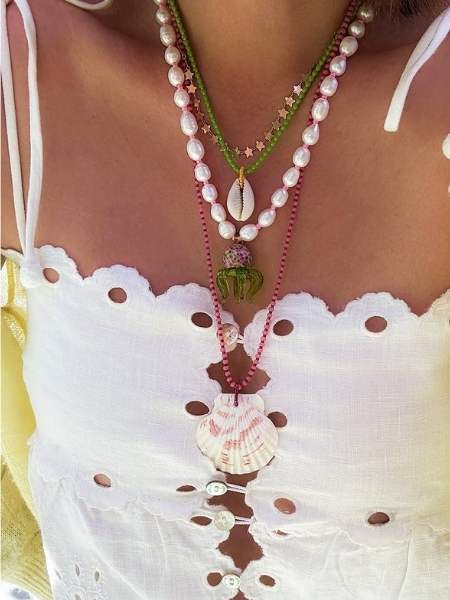
Steps:
1. Prepare your shells
- If your shells don’t already have holes, carefully make a small hole at the top using a pin or thin nail.
- Work slowly so the shell doesn’t crack.
2. Choose your design
- Decide if you want one main shell (simple pendant style)
- Or multiple shells for a layered beachy look.
3. Attach the shells
- Thread the string through the hole.
- If using jump rings, attach the shell first, then connect it to a chain or cord.
4. Adjust the length
- Tie or fasten the necklace so it sits where you want on your neck.
5. Secure it
- Add a small drop of glue near knots or holes if needed for extra strength.
10. Safety Pin Bracelet (Trendy DIY Guide)
What You Need:
- Safety pins (small size works best)
- Beads (seed beads or small colorful beads)
- Elastic string or strong thread
- Scissors
Steps:
1. Fill the safety pins
- Open each safety pin and slide beads onto it.
- Mix colors or create patterns for a stylish design.
2. Close them tightly
- Make sure each pin is fully secured so beads don’t fall out.
3. Connect the pins
- Thread elastic or string through the top loop of each safety pin.
4. Form the bracelet
- Continue linking until it fits your wrist comfortably.
5. Tie securely
- Knot the ends tightly and trim extra string.
11. Chain Layer Necklace (Simple Stack Style Guide)
What You Need:
- 2–4 different chains (varying lengths)
- Jump rings
- Necklace clasp (optional)
- Pliers
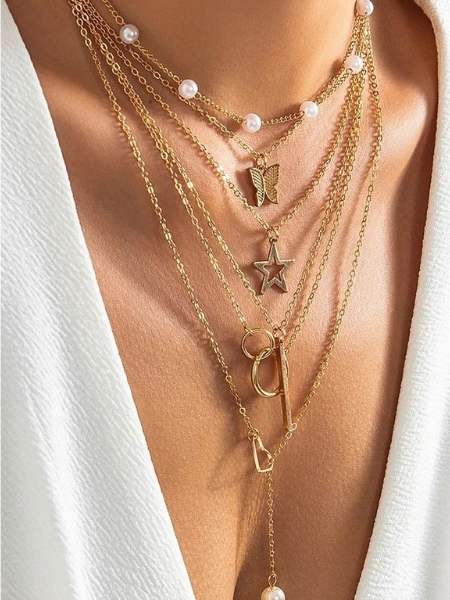
Steps:
1. Pick your chains
- Choose different lengths so they layer nicely (short, medium, long).
2. Arrange them
- Lay them flat and check how they sit together.
3. Connect if needed
- Use jump rings to attach chains together at the clasp end if you want them fixed.
4. Add clasp (optional)
- Attach a single clasp so all chains close together easily.
5. Adjust layers
- Make sure each chain sits nicely without tangling.
Conclusion on Easy Costume Jewelry Crafts You Can Make At Home.
Making costume jewelry at home is honestly one of the easiest ways to get creative without spending too much money. With simple items like beads, wire, buttons, shells, and even recycled materials, you can create pieces that feel stylish, personal, and unique to you.
What makes DIY jewelry so special is that nothing ever comes out exactly the same. Every piece has its own little character, and that’s what makes it beautiful. You don’t need perfection here just a bit of patience and imagination.
The more you practice, the more your designs improve, and before long you’ll have your own collection of handmade accessories that actually look like something from a boutique.
It’s not just about making jewelry it’s about enjoying the process and turning everyday materials into something you can wear proudly.